LC close button

605+ Cannabis Strains over 20 Breeders worldwide.

How to SCROG – The Screen of Green Growing Marijuana Method

Over the years, the main goal of most cannabis growers is to get better yields and this is the screen of green growing marijuana method or “SCROG”. There are actually many ways to ensure that you’ll get good yields. You can use improved fertilizer mixes, use soil mixes exclusive for cannabis plants and use high-intensity lighting.

Aside from these, smart and experienced growers also “train” their cannabis plants to grow more yields. Training is growing plants in a different way from its usual growth pattern. It involves low and high stress techniques.

Low stress techniques will put very little stress on cannabis plants while high stress methods will place cannabis plants in a lot of stress. When incorrectly done, high stress techniques can cause poor growth and even poor yields. So if you are new to training your plants, low stress techniques or LST is a better alternative.

What is SCROG?

The Screen Of Green growing  marijuana method or SCROG is a low stress cannabis growing technique that makes use of small grow spaces like a grow cabinet or grow tent. A screen is used to train cannabis plants to grow horizontally during the growing phase so that all the plants in the growing area will get equal amounts of light.

Simply speaking, SCROG is when a screen is placed over your plants just when your precious babies are in their early growth phase. The plants will grow taller and will surely move through the screen. Some leaves and stems will try to pass the screen but you need to prevent this by tucking the plant parts back.

When your plants enter the flowering phase, the plants may already be left alone because these won’t continue to grow vertically. Cannabis plants concentrate on developing buds at this phase so it will cease growing. At this time, you must switch the lighting to stimulate the flowering phase.

From a full 24 hour lighting or 18 hour light and 6-hour darkness (which is the most common schedule followed by growers) your plants will now be exposed to a balanced 12 hour light and 12-hour darkness schedule. A 12/12 schedule is what stimulates the flowering phase.  

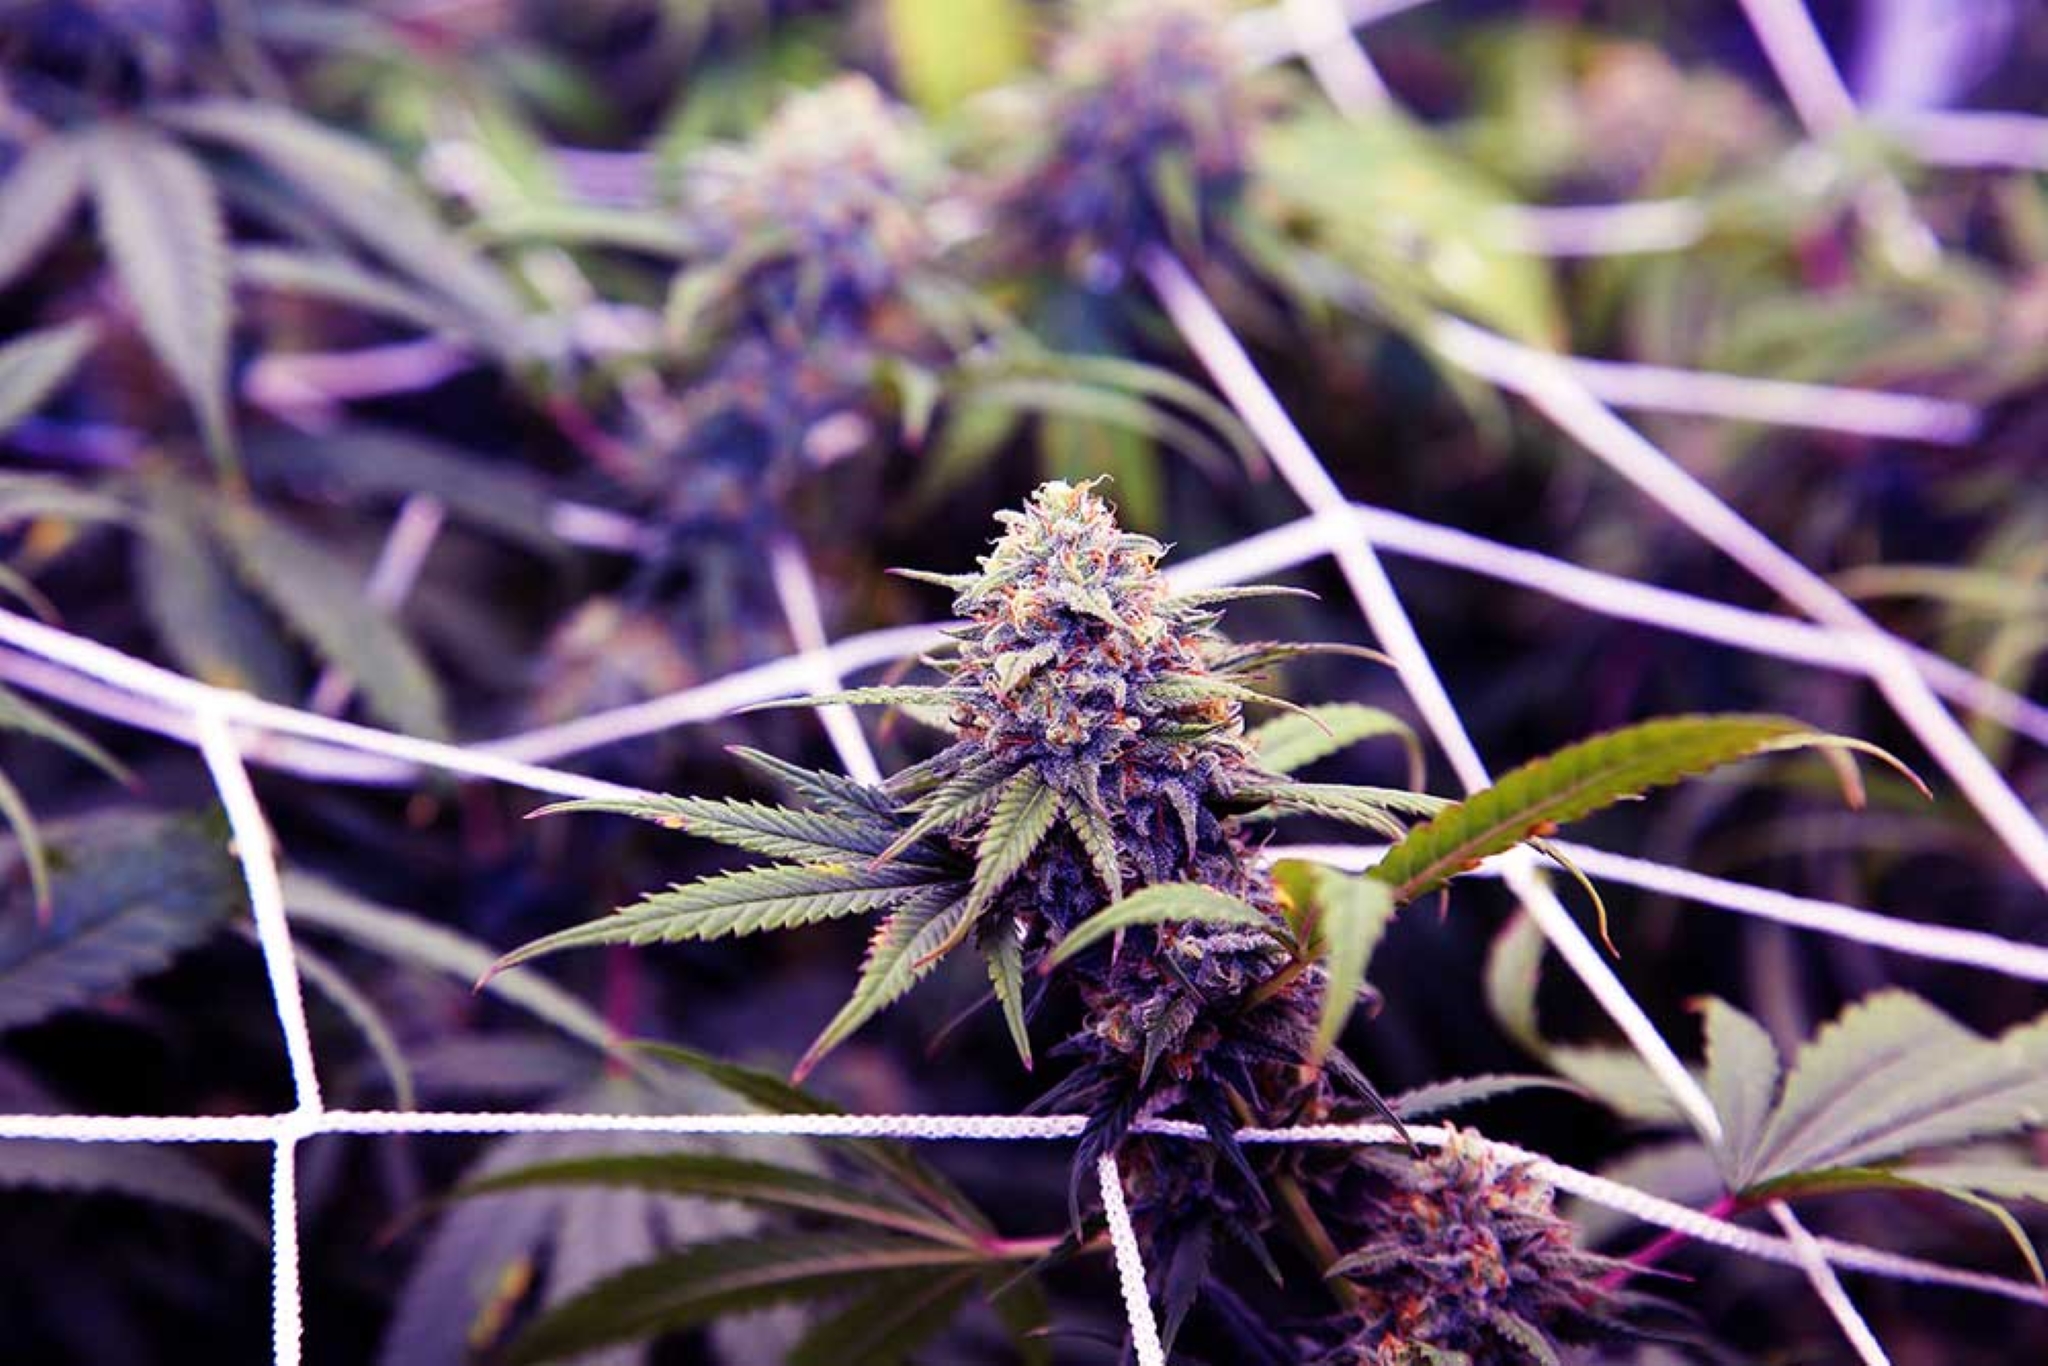
Compared to regular growing or without subjecting your plants to training, SCROGed plants will not develop a dominant cola.  The Christmas tree shape of the cannabis plant is replaced with a flat top. A number of plants under the screen will look like an even blanket of green, hence the name of the method.  

SCROGging ensures that all the flower sites will be supplied with equal lighting so the growth hormones will be evenly distributed over all the plants under the screen. The result: buds of equal sizes which will give you more yields than any other technique.

How Many Plants Can be Grown Using SCROG?

Compared to other training strategies, you won’t be able You can’t grow a large number of plants under SCROG. The reason for this is you don’t want your plants to grow in an overcrowded growing space. Because SCROGging will create a blanket of even buds during the flowering space, you need to consider growing only a few plants.

With only a few plants inside your growing tent or cabinet, you will be able to easily maintain your growing area. The buds that will soon grow through the screen will not compete with the amount of light these get as well.

But if you want to grow more plants or you want to increase your yields by growing more plants under the SCROG, use a larger indoor growing space instead.

What You Need to Use the SCROG

Even novice cannabis growers can use screen of green growing marijuana method “SCROG” technique to improve yields. And the best part of this method is that you don’t need any sophisticated materials and tools to do it.
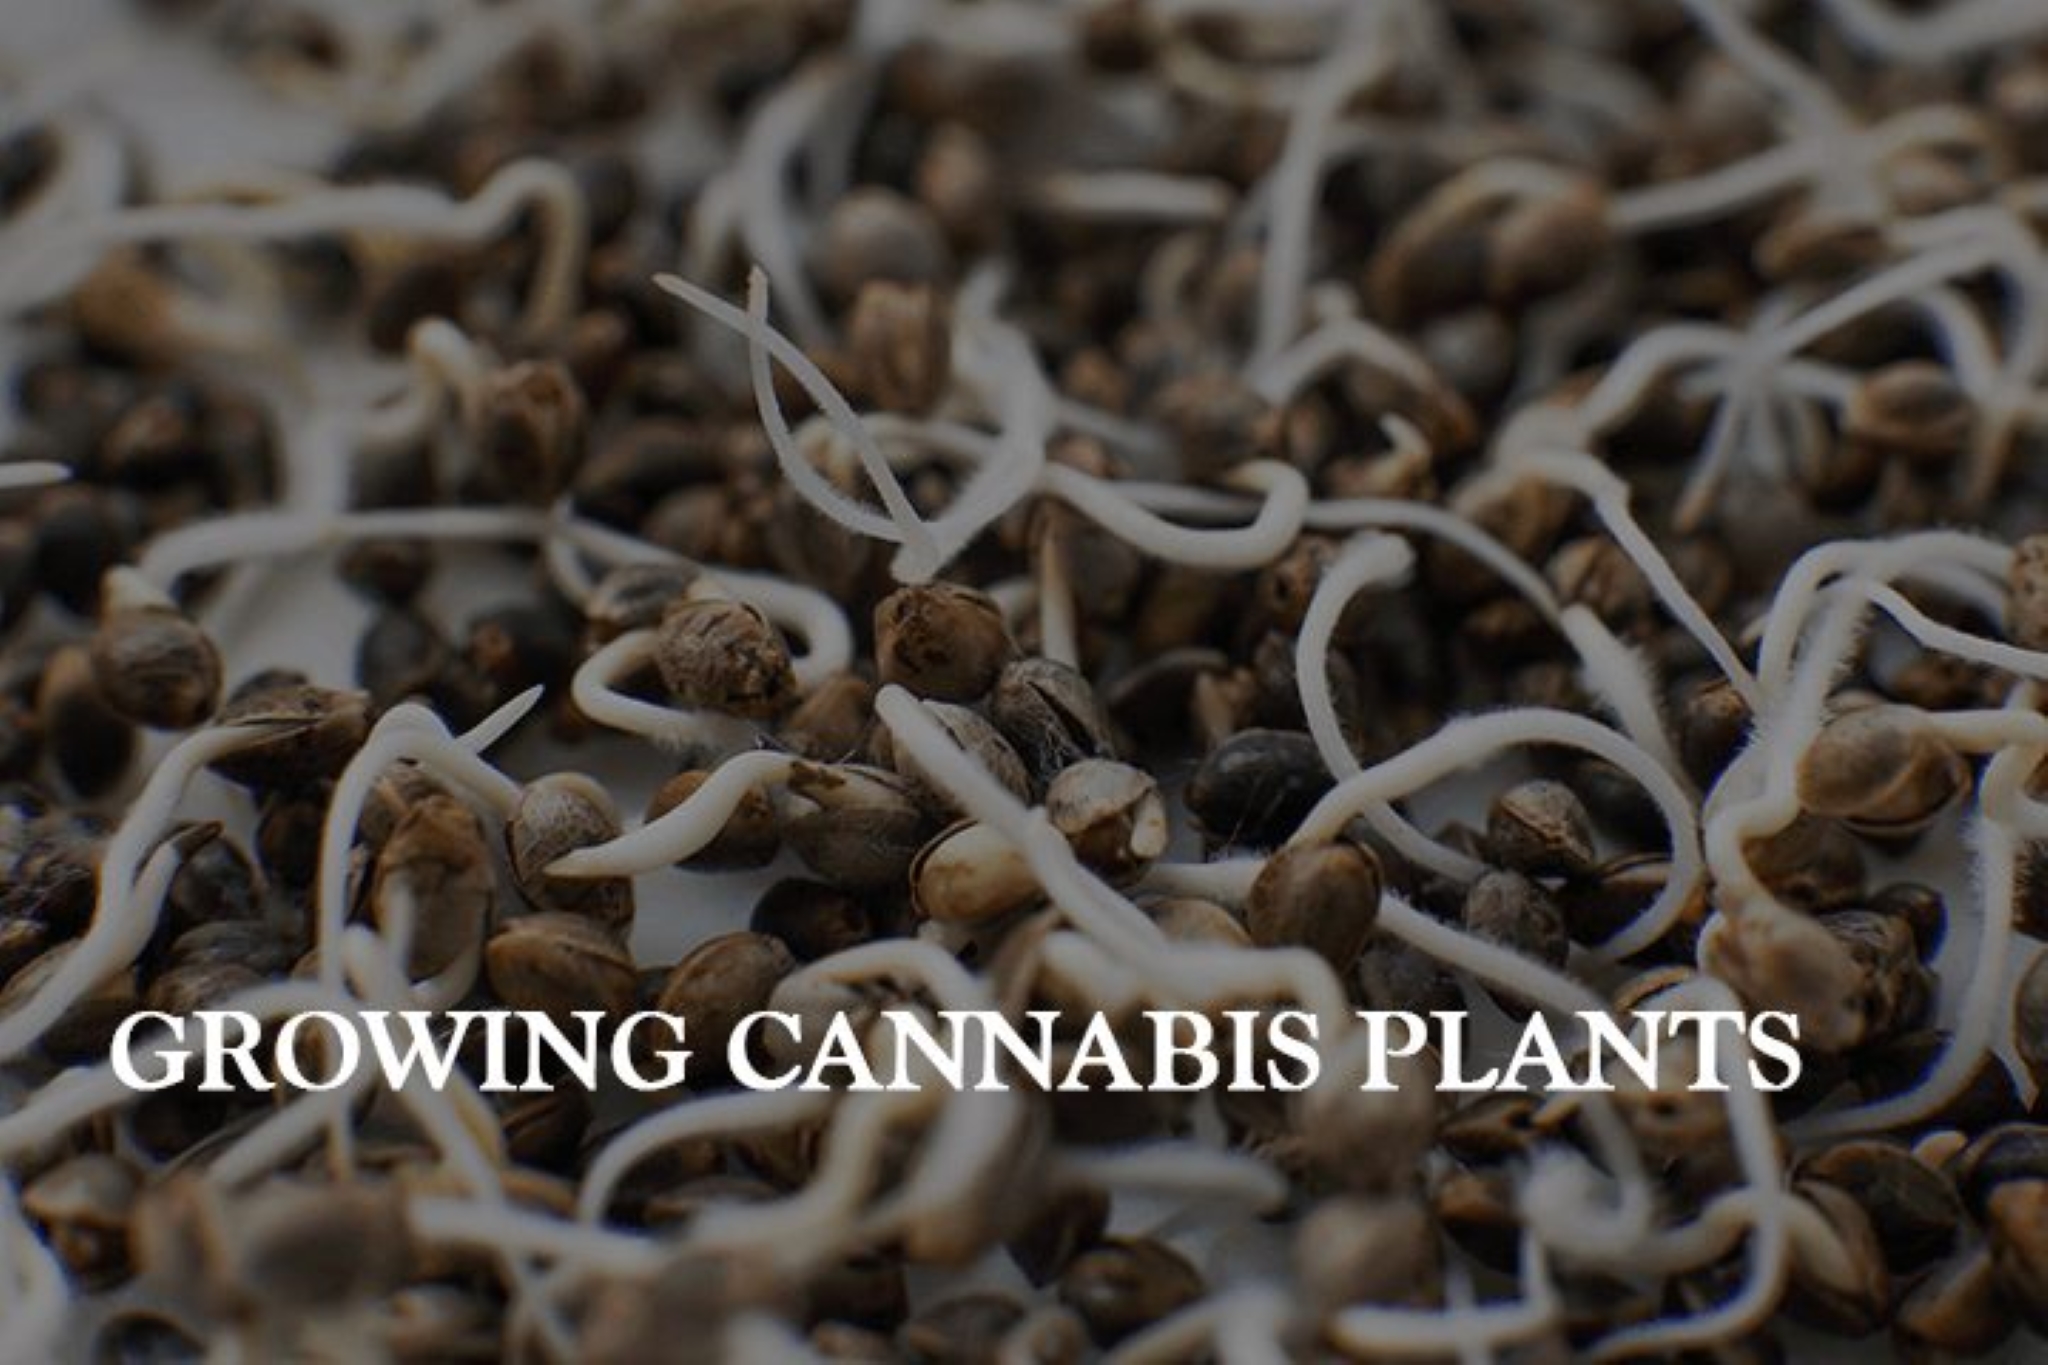
Cannabis Plants

The most important part of planning for your SCROG garden is the type of strain that you will grow. Remember that cannabis plants can be tall or short and can grow wide or petite. There are some strains that will suit indoor growing while some prefer the outdoors.

You must research on the strain that will grow well under SCROG. To help you out, we have a list of the best strains at the end of this tutorial.

12-liter Pots

It is recommended that you use 12-liter pots to be your plant’s final container.  An important thing to consider is to prevent stress on plants especially on young plants. Transplanting plants from a small growing container to a larger one is very stressful and can even cause poor growth and reduced yields. To prevent this, cultivate your plants starting from a large container. This 12-liter pots will definitely make good large final containers for your young plants.

Screen with 5–10cm Spacing

There are a variety of screens available from hardware stores and craft stores but why buy when you can make your own? The most common material used to make SCROG screens is twine because this is soft and will not injure the delicate branches of your young plants.

You may also use young, thin bamboo stalks. Simply weave the stalks together to make a screen. Use short pieces of thread or twine to hold the stalks in place.

Garden Ties or String

You need garden ties or string to install the screen on top of your plants. Don’t tie these permanently because you might need to adjust the height of the screen. You might also replace the screen in case it becomes damaged.

Instructions for SCROGging

1. Install Your Ready-made screen

Most growers who use SCROGging rely on ready-made, easy to install screens. You will be able to purchase these from hardware stores and craft stores. Carefully measure the area that you will place the screen on and cut this with pliers.

Place the screen about 20 to 25 inches above the pot and not above the plant tips. If you are making your own screen, take note of this height. Use wire or twine to install the screen on top of your plants.   

Install the screen on top of the plants. You will cultivate your plants without controlling their overall growth of the plants. With this technique, your plants will be growing wider to allow lighting to be distributed along the branches and the leaves. Bushy plants will also have improved yields when grown under SCROG.

2. Arrange Your Plants Under the Screen

Now that your screen is ready, you will now be able to arrange your potted plants underneath it. Your plants need adequate space in between pots. Allot at least 30 cm x 30 cm minimum screen space.

This space will prevent overcrowding because this can affect the overall development of the buds. Buds will only compete for light causing one bud to be larger and more dominant. You must also never overlook spaces between plants because doing so can severely affect the way cannabis plants grow taller or wider.

3. Guide Your Plants Under the Screen

As your plants grow taller, these will try to grow through the screen. Your role in training your plants is to gently tuck the new leaves, stems, and branches under the screen. Your plants will continuously do this but each time this happens, take time to tuck the plants back until the plants are used to lateral growth.

4. Remove the Top Cola

During the growing phase, your plants will continuously grow but come flowering phase, these will stop growing and will concentrate on creating buds instead. Once you find a single cola growing on the topmost part of the plant, chop it off. Use a sharp blade to remove the cola.

5. Keep the Branches in Place

Naturally, your plants will resist this training as it grows taller and wider. Aside from just tucking the branches to hold these in place, you may use twist ties, twine or wire to keep these in place.

Tie the branches on the screen but be careful not to press the branches too hard or damaging the plants. Remember, you will only tuck or tie the branches and leaves and not cut them off completely. Your plants will still need its leaves to manufacture food which will help grow larger and denser buds.

6. Continue Training

Your goal is to train your plants until they have completely covered the screen. You won’t have to wait too long because this can happen in just a few weeks’ time depending on the strain you are growing. Keep growing and training until about 70% of the screen has been covered.

When your plants have successfully covered 70% of the screen flip the switch and control the lighting inside the growing area. Place your plants under a 12 hour light and 12-hour dark schedule to induce flowering.

7. Monitor Your Plants’ Growth

Continue placing your plants in a 12/12 lighting schedule. Soon, you will notice buds forming at the top. Use a timer to accurately flip the light switch to adhere to this strict light schedule.

As your plants grow more flowers, these will fill all the spaces between the squares of the screen. At this point, there could still be unwanted leaves and stems escaping through the stems and these should be carefully tucked back.

8. Maintain Good Circulation at the Top and Bottom of Your Growing Area

While you focused so much on what happens at the top of the screen, don’t neglect what happens at the bottom. As the screen thickens, the bottom section of the SCROG garden will have less and less light and hence, it will be more humid along this part.

Use a small PC fan to deliver a small breeze which will help strengthen your plants’ stems and branches.

This fan will also keep the soil dry and help prevent mold and mildew growth especially root rot. It’s therefore important to time your watering and to water only when the soil is dry and not when it is wet or moist to prevent mold growth.

9. Harvest Your Buds When These are Ready

It will soon come a time when your buds are ready for harvest.  You can tell that these through checking out the pistils or threads that stick out from the buds as well as the color of the trichomes or the resin buds.  Harvest time is different from one strain to another but usually, this is checked using these factors.

When you are ready to harvest cut the buds using a clean and sharp pair of scissors or a new blade. Unlike harvesting without the screen, you can easily take the plant and cut the buds or you can cut the entire plant from the branches and dry it. With the screen, you need to spend time cutting the buds from the screen. Do this gently to avoid crushing the buds.

If you want to harvest the stems and leaves as well, use pliers or a sharp pair of scissors to remove the screen as well as any support you installed on your plants. Once these are removed, you may now take the rest of the plant for drying.

A Few Tips to Improve SCROGging

Maintain Good Air Flow

Whether you are growing your plants in a growing room or in limited, tight places like a grow tent or cabinet, airflow is very important. Proper airflow will help maintain the wet-dry cycle where efficient gas exchange happens. Constant evaporation and condensation happen along the surface of the leaves along the stomata. When you use the SCROG, you create a flat mat to enhance airflow.

Providing good air circulation on top as well as the bottom of the canopy is very important. So aside from using an intake and outtake PC fans, growers use another small fan to blow a soft breeze under the canopy. The small breeze improves air circulation under the plants, dries up the soil to prevent mold and mildew growth and helps make the stems and branches stronger.

Choose the Ideal Cannabis Strain

Cannabis plants are very resilient simply because these will grow in any environment and adapt to changes in temperatures as well. But some species of cannabis will simply grow taller and stretch more and hence, are not good for growing indoors and SCROGging.

Some cannabis strains won’t work well with scrogging. Some plants may barely stretch while some stretch a lot. A clue is to determine the flowering stretch of the plant to identify if the strain is good for scrogging or not. The stretch of a cannabis strain is usually indicated in the strain’s growing information. You can find these online from various dedicated cannabis growing sites.

The best cannabis strains that will work best with SCROGging

Here are top 5 strains that are known to work well with SOG or SCROG.

1. Northern Lights

Northern Lights is a very potent classic strain that may have genetically parented numerous strains coming from all around the world. The fact that this strain is very powerful and has stable genetics which is why it is widely used by breeders.

This classic strain has a spicy aroma and taste that is quite strong for novice users. It also has subtle earthy tones which can be felt even after you have taken a few exhales.

The reason why Northern Lights is so potent is because of its very powerful landrace parents from Afghanistan and Thailand. You will surely admire Northern Lights’ overpowering euphoric effect which is perfect for anyone suffering from depression due to its very relaxing natural effects.

This can be useful in ending insomnia also due to its superb relaxing effects. You don’t have to rely on sleep remedies and synthetic drugs meant for insomnia. It is also popular for its effective analgesic effects making it effective for headaches, muscle pains, muscle strains, and migraines.

Northern Lights will give you more yields and has quick flowering times. It a good candidate for indoor growing and cultivation and with the SCROG method, you will have more yields compared to other training methods.

2. Haze Berry

Haze Berry is a strain that will give you bountiful yields using the SCROG method. It is an indica that has very powerful analgesic effects. It can replace your synthetic pain relievers and won’t give you dangerous side effects or dependence as well. Haze Berry’s lineage actually traces back in the 1970s when breeders from California combined Thai, Afghan, and Purple strains. Purple strains are known for their higher anthocyanins levels. These strains also produce more antioxidants which cause the buds to have a hallmark blue color.

If you want your Haze Berry plants to develop that trademark blue color, you must expose these in slightly cooler conditions. Even the taste and aroma of this strain is reminiscent of the deliciously sweet taste of berries. Train your Haze Berry plants early using the SCROG method and you will have more yields. Remember that this strain will grow fast so don’t waste a minute to start installing your SCROG screen in your growing area.

3. White Widow

Another iconic strain known for its ability to create amazing strains is White Widow. This strain is very famous for its strong body buzz and uplifting high. People who have consumed White Widow say that the high is similar to a slight pressure that starts on your face and spreads throughout the body. Along with this sensation is the feeling of an uplifting sense of joy which will be able to help calm stress and anxiety.

White Widow is not for first-time users because the effects are sometimes overpowering. Your mouth will begin to water from the intense earthy taste with subtle hints of citrus. This delicious aroma and taste will stay in your system as the strain starts to settle.

White Widow can reduce anxiety and depression. It will replace your regular synthetic medications and won’t have any dangerous effects. It can also be used against pain especially in curbing headaches, muscle pains, and chronic pains because of its powerful natural analgesic effects.

This strain is a favorite among coffeeshops of Amsterdam. But a word of caution, most White Widow variants sold from coffeeshops can be too strong. If you are lucky enough to check this one out, be sure to consume this strain moderately. Savor every smoke because it’s not every day you get to taste authentic White Widow strains.  

White Widow will respond well to SCROGging. This strain is already high yielding and when used under the SCROG, you will be able to get more yields than ever before.  

4. Critical

Critical is a popular and potent strain that is known for its potent high and short growing time. This is an indica-dominant hybrid strain with a soothing, relaxing high which will stay in your system longer, allowing you to enjoy its recreational and medicinal effects for an extended time as well.

Critical was made by combining an Afghan and Skunk strains which are two potent parents that are also high-yielding. This strain will give you large yields with a strong skunk aroma with hints of blueberry and chocolate.

This indica-dominant strain will grow well and is easy to cultivate for as long as the growing conditions are met. Critical needs warm and not too humid climates to grow healthy and yield good buds. It will grow well indoors or inside a grow tent with the SCROG method.

5. Bubblegum XL

Bubblegum XL is another strain that will grow well using the SCROG. This strain is for people with a sweet tooth because it tastes and smells like delicious candy with berries, and floral aromas. This sweet scent creates a pleasant and relaxing experience. This is a balanced hybrid strain and has inherited from its parents the ability to adapt to different growing conditions.

When used as a medicinal strain, Bubblegum XL is for relaxation and uplifting mood. It can enhance your creativity and focus in moderate amounts. Another thing that’s great about Bubblegum is that it won’t grow so tall therefore it will fit inside your growing space tent or cabinet. This is easy to manage and cultivate as long as you maintain an environment that is no damp and humid.

Growing Cannabis Plants with Seeds

Now, the option of growing a cannabis plant with seeds is apparently more trouble-free, assured strategy for the newly growers. This is the most complacent and the most doable approach to creating access to the cannabis plants. You can also choose Cannabis Seeds based on your desired size, flavor, flowering times, and effects. If you think that it is terrorizing to grow plants that came from seeds, then perhaps you can rest yourself now because it actually suggests less trouble compared to growing plants using culticlones.

There are several seed banks available which propose products that are proven and tested. Seeds coming from seed banks are most likely efficient. Since you can maneuver the variety of your choice, it will be easier for you to determine the best cannabis strain for you. For sure you do not want to waste your time and money by purchasing products that are low in quality.

It is also good to understand that there are three various types of seeds for cannabis plants, namely:

  1. Autoflower Seeds– These seeds are cultivated by mixing ruderalis with either Indica or Sativa. These seeds instantly start flowering with few numbers of weeks of fertilization without having to change the cycle of the light. Autoflower seeds are mostly suggested to beginners who have limitations on height and time.
  2. Feminized Seeds – These seeds are cultivated by mixing two female cannabis plants. One of them was strained to produce male pollen sacks. Since the feminized seeds do not have male chromosomes, they are likely always female. The feminized seeds are commonly recognized as more cost-efficient because anyone can anticipate for all the seeds to become female.
  3. Regular Seeds – These seeds are cultivated by mixing the male and female cannabis in order to generate offspring. Characteristically, these seeds will consist of male and female cannabis plants. This illustrates that approximately one-half of the total seeds you fertilized will have to be culled in order to distinguish the male plants from the female plants.

Another thing that can justify the significance of seeds over clone is that it is commonly what is common to the cannabis plant. Marijuana is known to be an annual plant, which means that its life can only extend up to one year. Marijuana is not equipped with the capability of being active for a longer period of time and it does not flower for a longer period. Thus, clones taken from mature mother plants may be getting old already and might yield minimal buds compared to seeds.

Cannabis plants that are grown from seeds will possess a cordial structure of root. People who do not have any knowledge of gardening, the main part of the full root system of a plant are the taproot. The taproot penetrates deeply in the surrounding soil and ingests a huge quantity of nutrients. A clone plant is not capable of flouring a tap root, therefore, it can never be as solid and hearty as the plants grown from seeds.

Advantages of Seeds:

  1. Pathogens – With seeds, you can have a clean beginning.  You are assured that there is no inheritance of risks such as diseases and pests.
  2. Endurance – Seeds produce more enduring plants since seeds have a taproot.
  3. Acquisition – Seeds are easier to get and easier to produce all by yourself. The seeds can be shipped in any part of the world and can be delivered right in your door.

Disadvantages of Seeds:

  1. Variable – Seeds are completely dissimilar. It simply means that if you purchase one bag of seeds, the unique gene expression will be present between the cannabis plants. Although this is a fun type of variety, it can also signify that there is no chance that you can ever grow similar plant again except if you use clones.
  2. Sexing – When growing with the regular seeds, it will be required that you figure out the sex of every plant and eradicate the male plants. The step of figuring out the sex can be tough. This will normally require a microscope and some practice to effectively determine the sex.
  3. Viable – Well, not all seeds are already mature or hearty enough to fertilize. Normally, hearty and fully enhanced seeds are color brown as contrary to yellow or white.
  4. Time – Growing with seeds will normally take longer as compared to clones, except if you use autoflowering seeds. The extensive period of the growing seeds is due to the procedure of figuring out the sex. Big thanks to the modern technology; this procedure can now be finished during the first two weeks of fertilization with a tissue specimen.

Yes, there was a point of time when clones were famous and well acknowledged. However, growers had concerns on the odd characteristics of their plants have brought them back to the technique of seed growing.

By understanding the differences between seeds and clones in growing a cannabis plant, it will be easier for you now to come up with a decision of which side you will go. At least, you now have a better picture of what these methods are after comprehending the best and also the worst facts of each growing strategy. Whether you plan to plant indoor or outdoor, either seeds or clones can be used in growing the cannabis plants. You can also solicit advice and tips from your fellow growers if you want to be certain with your choice.

Growing cannabis plant either through seeds or clones can serve well depending on you really need. You must be certain of what kind of result you are looking for. Seeds and clones both have their good and not so good aspects and all you have to do is to weigh and evaluate these things. At the end of the day, it will still go back to the personal preferences and taste of the growers. Needless to say, one should really be wise and be careful when deciding which method to apply as it will completely affect the absoluteness of the growth of the plant.

Potting Soil or Gardening Soil: Which is Best for Indoor Marijuana Growing?

You might have learned the basics of Indoor Marijuana Growing together with its relevance, importance, and scope of the said practice in modern society where we live today. Indeed, this gardening movement is an important technique in these high times where most of the governments in our world.

However, as we go along this practice, you might have this dilemma in choosing the right soil for your Cannabis Seeds. Will you ever go for Potting Soil? Or with the Gardening ones? Which is Best for Indoor Marijuana Growing?

Highlighting the Soil

Soil is one of the universal elements in our world. It is the source of nutrition, home, and water purification for all of its living inhabitants. It is made up of different organic matters, minerals, liquids, gases, and various organisms. When mixed, they are effectively capable of supporting life.

For the plants, soils are the primary source of life. It is in these vast mixtures scattered in different parts of the world, from their humble seeds that germinated in time. These mixtures supported their needed minerals and managed to help them exist in the past billions of years.

Gardening Soil

Gardening Soilis the typical soil that you have seen in the farms or mountainsides which are full of minerals and nutrients that are good for your plants. It is the conventional topsoil where the trees in the forest are planted on. This type of soil is suitable for outdoor planting with natural conditioners such as those mixtures from the compost pit.

Potted Soil

On the other hand, potting soil is the mixture of organic compounds which are packed in a pot, meant to be used for plants for indoor settings. These plants have to grow far and relatively controlled exposure from the sunlight and other atmospheric conditions which may affect their growth when placed outside. Because this soil is not exposed outside, it has to be more concentrated to provide good nutrition for the hidden plants.

Factors to Consider for your Successful Indoor Marijuana Growing

• Types of Soil

a. Loam
The best and most used type of soil for the plants around the world, loam soils is the balanced mixture of clay, sand, and silt which helps the seed to germinate easier due to the said balance of the three important soils but are extreme.
b. Clay
The heaviest among the six types, this soil is relatively high in nutrients due to its liquid properties but is unideal for the plants that must grow in the rainy season or endure the scorching heat during the dry season. This soil is fragile and sensitive when it comes to the climate.
c. Sand
This is the most acidic in all of the soils, considering its low, dry, and light properties that makes an ordinary jungle plant may not grow on this type of soil. However, some plants can be easily planted in a desert and nobody will ever tell you on when to come back on that remote area, just to check your growing plant, in case if it grows.
d. Silt
This soil is light and convenient to use. It holds moistures better than the sandy soil. It is made up of medium-sized particles and because of this, the silt soil can easily get compacted upon usage.
e. Peat
One of the most common types of soils being used for garden purposes, peats are one of the most moisturized and rich in organic matter. This type of soil is good for ornamentals and other small plants that need to be separated with the other plants growing with loam.
f. Chalk
The most alkaline content in the rest of the soils, this type of soil is good for the plants who do not need acidic conditions for growth and are shallow, low in fertility but in other variants- it can hold greater nutrition than the clay soils and higher water capacity.

• Properties of Soil for Successful Marijuana Growth

a. Physical Texture
Your soil must be of natural formation to make it accommodating to the seeds needed to plant over them and create natural pockets and minimal rooms for ventilation and abundant nutrient supplies from the depths of this soil. At the end of the day, it’s your soil that must be primarily responsible for the successful growth of your plants.
a. Porosity
Your soil must be good enough to create spaces for water and gas deposits. This soil composition can help the roots of your plants to better absorb the liquids, minerals, and in rare cases, gases which can contribute to the growth of the plants.
b. Consistency
Your soil must be good enough to have a uniform texture and formation to avoid any deprived right for a plant to grow. If your soil has different types and was mixed, such as the loam and sandy, then chances are that the nutrition that your plant may gain in that soil will go lower and this will significantly affect the quality of your Marijuana Plant.
c. Temperature
Just like our rooms, your soil temperature matters, especially when you live in places where extreme weather conditions may happen from daily to monthly. As we all know, one cannot be able to survive so much coldness and immense heat because these temperatures can make our body systems malfunction and eventually stop. What more if the plants will face the same situation, considering their thinner body systems, more fragile parts, and smaller capacities which are susceptible to sudden change of atmospheric heat.
d. Color
Another thing to consider is your soil’s color which affects the buyers’ minds immediately. Your ideal soil must be in loam and if another strain mixes, it may result in weaker strains.
One may not consider buying light brown soils than buying the darker colors. Also, one must know that traditionally, the ideal soils must be a part of the vast topsoil in the world- which is usually dark brown.
e. Resistivity
Is your soil good enough to retract the current electric condition that can destroy your plant especially when it is dry? If your soil continues to be a good conductor of electricity despite being dry, it means that your soil is too metallic and may not be good for your plants’ growth, putting the minerals that can be absorbed by your plant be electrically charged, polarized and may not penetrate the internal systems of your plant.

• Nutrients and Minerals

a. Nitrate
This is the form of Nitrogen that your plants need. This is the mineral which gives your plants the vibrant colors they grow in the future- from green, red, violet or other ecological colors through the chlorophyll production. Nitrate also helps your plant to develop strong and enduring foliage.
b. Phosphorus
This mineral is the main factor that helps your plants develop good roots and flowers. It helps your plants endure the changing environmental concerns, such as drought and winter.
c. Potassium
It contributes to your plants’ early growth and development, as well as its water retention until it matures further for a few more weeks. It also helps them to fight diseases and harmful insect intervention.
d. Magnesium
Like the Nitrate, Magnesium is also responsible for the color development of your plants, especially your leaves.
e. Sulfur
It helps your plants to fight many diseases that it may acquire through the air or water. Sometimes, it may acquire through human intervention. It also assists your plant to develop other important minerals like Amino Acids, Vitamins, Proteins, and Enzymes.
f. Calcium
This mineral is the one responsible for the growth and development of cell walls of our strains. If well-developed, the cell walls of your plants will effectively combat the diseases it has to suppress and is necessary for the biological metabolism and nitrate uptake of your plant.

Conclusion

Depending on the strain, type of cultivation and your desired nature, your plants will still grow even if it is intended for Indoor Marijuana Growing or Outdoor displays.

Your Gardening Soil is good for the strains which need to be exposed by direct sunlight to produce good and high-quality foods, enriching their THC and CBD contents and are great for long-term use.

However, Potted Soil boasts another nature of Indoor Marijuana with its Ruderalis and other Indica Plants as the primary targets of the said indoor practice. This soil is good for keeping the plants healthy despite the absence of sunlight in their lives. After all, these are still plants- they have lives and choose to act well despite the setbacks being imposed by their owners or farmers.

In the end, you must choose on whether you will plant  marijuana growing or plant Outdoors before continuing to check your supplier’s attention due to some problems with your purchased soil. Enjoy gardening!

How to Grow Marijuana from Seed

Growing Cannabis Seeds are entirely attributed to the quality of the seeds. There is no chance for the plants to grow better than the seeds to which they grow from. Back then, seeds shops were nowhere to find. Hence seeds were preserved from unique buds – however, this was entirely a shot in the dark with plenty of tests with possibilities of errors. Fortunately, people now understand more about marijuana seed growing.

The growing of Cannabis Seeds is not a hard method to follow. In fact, even the growers who have just first started the venture of marijuana planting can easily try it. Nonetheless, the method is an expedition of phases. Cannabis Seeds are best to be grown with seeds because of the fact that their life cycle is short. With that being pointed out, you must be able to monitor daily your marijuana plants for moisture, diseases, pests, light, and nutrient inadequacy. If you are not confident with yourself in working with commitment and in dedicating enough time, then maybe you can blow the idea of planting Cannabis Seeds.

Similar to all types of gardening, growing marijuana is an ability that can be improved after a certain period of time. The process comprises steps that are easily learned but it requires a gleefully stoned life span to become adept. There is not enough justification for one to feel browbeaten by growing Cannabis Seeds. The method is actually simple but can either be cheap or costly depending on your preferences.

Gathering details and understanding the basics of growing Cannabis Seeds is a perfect state to begin at. Coming with a primed decision in the earlier period will boost your harvests. Here are the common basic steps on how to grow marijuana from seeds:

1. Choose Your Kind of Cannabis Seeds

The selection of seeds can be astounding. Ruderalis, sativa, and indica are some varieties which are accessible in just a click. You have gained personal knowledge based on your personal experiences. You may assess what kind of strains have suited well in your gutter before. Think about what kind of strain have worked well for you as a treatment to a certain ailment. These are basic things you can always go through when deciding for your own Cannabis Seeds.

After consolidating your personal preferences, you now contemplate on your growing lifestyles. Are you planning to grow your Cannabis Seeds in a small limited space where indicas or autoflowering strains can grow best? Or would you opt to grow your seeds in your huge backyard where your Cannabis Seeds can freely grow either in big pots or directly planted in the soil?

2. Basics of Marijuana

For you to achieve the best growth of your Cannabis Seeds while it gives you the dewy buds, your Cannabis Seeds would demand the basic things.

1. Air

To ensure the firmness and the appropriate exchange of gases, your marijuana seed needs an open fresh air. Well, there will be no issue if you grow your seeds outdoor since your plants will be denuded to air. However, indoor plants will require an intake of fresh air, old air exhaust, as well as a fan necessary for the movement of the air. Nonetheless, environments bolster molds, pests, and poor growth. The accumulations of gases will feat the growth of the plant.

2. Light

To ensure hearty vegetation of the Cannabis Seeds, there should be over twelve hours equivalent light for each twenty-four hour period. Growing the seeds indoor will let you control the light with the use of timers. On the other hand, in the planting of seeds outdoors, the germination should be deferred until the time when plants can finally be defined to the daylight of more than twelve hours and get direct sunlight of eight hours at a minimum each day.

3. Nutrients

Similar to other existing living creatures, marijuana plants also need fuel for them to grow. An ideal fragile mixture of soil that is abundant with minerals, vitamins, composts, and living organisms can provide your marijuana plant with sufficient food intended for the entire life cycle. You can further enhance the quality of your soil by watering it with a compost tea or other organic mixtures such as feather meals or molasses.

4. Water

Like the other living creatures, marijuana required water so that they can grow, flourish and deliver its biological purposes. If you are residing in a place where rainfall is a regular visitor, then the outdoor seeds can get all it requires. Huge marijuana plants are notably parched. If you intend to produce big plants, then you will definitely have to complement water in between the rainfalls. In indoors, the water turns to be the instrument that delivers nutrients. Uninterrupted water is made use to regularly lavish the soilless systems and the hydroponics.

5. Humidity

Growers do not have any command over humidity if plants are grown outdoors. Growers are literally under the grace of the climate. The positive thing is that the alternatives in humidity, as well as the healthy biological capacities, have to adjust to a modifying grow atmosphere and this makes your marijuana plant uniquely enduring. For indoor plant growing, the control for humidity is very necessary from the seeds to flowers. The leaves aspirate atmospheric moisture as one of their daily functions. A balanced humidity creates for hearty pests and mold-free surroundings.

6. Temperature

Marijuana plant is very tough and it can endure either in heat or cold temperature. But just like any other living things, the plant can also get stressed if they are exposed to extreme temperature. The marijuana plant can go through the survival stage with temperatures too high for over a long period of time. The acceptable temperature that would support a durable growth of marijuana is twenty-seven degrees centigrade. This ideal condition is easier achieved when indoor by securing fans, heating and cooling mats, and air conditioning units. The lights will definitely produce heat which requires being vented. For outdoors, the grower will have to choose their time. You must be aware of your specific climate. You can use a sun cycle to achieve the right timing.

7. Growing Medium

The organic growers shall make use certain types of soil each time inside or out. Nevertheless, the soil is not the only consideration. Balanced mediums which are completely dependent on nutrients consist of rock wool, perlite, or coconut coir.

3. Lights for Growing Indoor Cannabis Seeds

With the authorization of marijuana, choices of lights have been exploding absolutely. The deciding factor will be the budget.

Grow cupboards – Entirely tailored for marijuana and available to go refined grow cupboards created by individuals who have plenty of experience. If you have so many extra dollars, you can also use carbon filters, fans, lights, timers, another clone, and flower chambers. You can get these items and use them through plug and play.

Lights that are suited for each budget – You can use a primitive but proven to work effectively Compact Fluorescent Light (CFL) or a small Light Emitting Diode (LED) set up in just three hundred dollars, by average.

4. Germination and Marijuana Seedlings

The starting point of your marijuana growing is the germination of your chosen Cannabis Seeds. Every feasible seed has the complete information required to grow your chosen marijuana strain. The germination of seeds will only require the perfect conditions, and then the life cycle will start.  Remember that there is no way for the seeds to germinate unless the three common requirements are achieved – ideal location, water, right temperature with right warmth. Growing marijuana is a kind of organic procedure that does not impose strict rules. There are several methods known for germinating marijuana:

1. In Water

Just soak the seeds in water that is abundant in enzyme until you notice the taproot occur then place them in the medium. The seeds will rapidly drive and crack the surface after a week.

2. Straight Right in the Medium

Put the seeds right in the medium. This is to prevent any possible transplant injury. Almost all the time, it is more doable to germinate through a small pot of your preferred medium then put on larger pots or in the garden.

3. Germination Stations

Giving considerable manipulation over the environment of germination, the germination stations give temperature control, humidity, and can expedite the times of germination.

4. Paper Towel

The seeds are out on a paper towel that is moist and placed in a dark place with warm temperature. This is commonly enclosed with an improved plate or plastic to keep the humidity and the moisture. After waiting for a few days to one week, the seeds are expected to already germinate.

5. Jiffies, Rock Wool and Plugs Stations

Doable to keep as you can potentially have up to fifty seeds germinating right in a very limited space. The moment the seeds have already rooted, they can now be transferred to their ultimate location without having to damage the roots.

5. The Vegetation Stage of Marijuana

The instance the green leaves converge the light, the process of photosynthesis becomes enthusiastic. The plants begin to metabolize and the vegetative stage has started.

Indoors: The daylights are set to eighteen hours a day, while night lights should be six hours.  This does not require coordination with the substantial daylight hours. You have the option to schedule it to hours that would perfectly work for you. The use of electrical devices during off-peak times can help you save a significant amount of money.

The marijuana plants are delightful to be put in organic soil or if they are being nourished with nutrients which are created intended for the stage of vegetation. Plenty of fan-forced light winds hold temperature under full command and build up the young plants. Extraneous controls can be incorporated such as casting carbon dioxide in the surrounding. You can participate in training that is not stressful to boost the rate of plant growth and enhance the flowers potentiality of indoor marijuana.

6. Blooming Stage of Hearty Marijuana

The phase of blooming, flowering, and budding refers to a similar growth phase of marijuana. The next coming months is something to look forward since the aromas begin to manifest. Exciting floral setups also start to appear which are specific to your kind of strain. The phase of blooming has unique periods which are natural to all kinds of marijuana plants and start the moment vegetation is over.

7. Quality of Buds by Undergoing Harvest, Drying, and Curing

In the last periods, the nutrients are taken for granted and the plants will be cleared out with cleansed water. This ensures a classic nutrient flavor and accumulated salt piquancy.

1. Harvesting

Some would simply wet the trim by eliminating all the leaves as the plant is still firmly standing then crack the plant down beyond. Hang the branches until they get dry or simply lay the individual buds right on a drying rack. Others will choose to eliminate only the big sugar leaves than do the harvest and hang the entire plant. No specific rules were implemented except that you are required to do careful handling.

2. Drying and Curing Marijuana

Dry the buds in a dark place with cool temperature with minimal humidity. Preferably, this procedure would really take time and shall consume at least two weeks.

Monitor things regularly for tendencies of mounds and over drying: If dried, the thin branches will quickly break. The thick branches will still be minimally malleable.

3. Storage of Cured Buds

Open the top portion of the jar once daily during the first two weeks. This produces accumulated humidity which can moulder the buds. The moment the flowers get dried to the touch, belch the jar once every week.

You can do curing for as long as you desire. You can keep your basis by determining your choice of smoothness. The longer item you will do the curing, the smoother result you will get.

Taking the pleasure of growing your own Cannabis Seeds is not hard. Simply give the needed attention and enough patience so that you can gain the stinky advantages regardless if they were taken from the smallest spaces of your place.

Are You 18 Or Over?

Yes

Or

No By clicking yes, you certify that you are over 18. By using this website, you agree to our legal disclaimer.
× Chat Us with Whatsapp