500 NEW MARIJUANA SEEDS RELEASED

Nutrient Burn Marijuana Symptoms


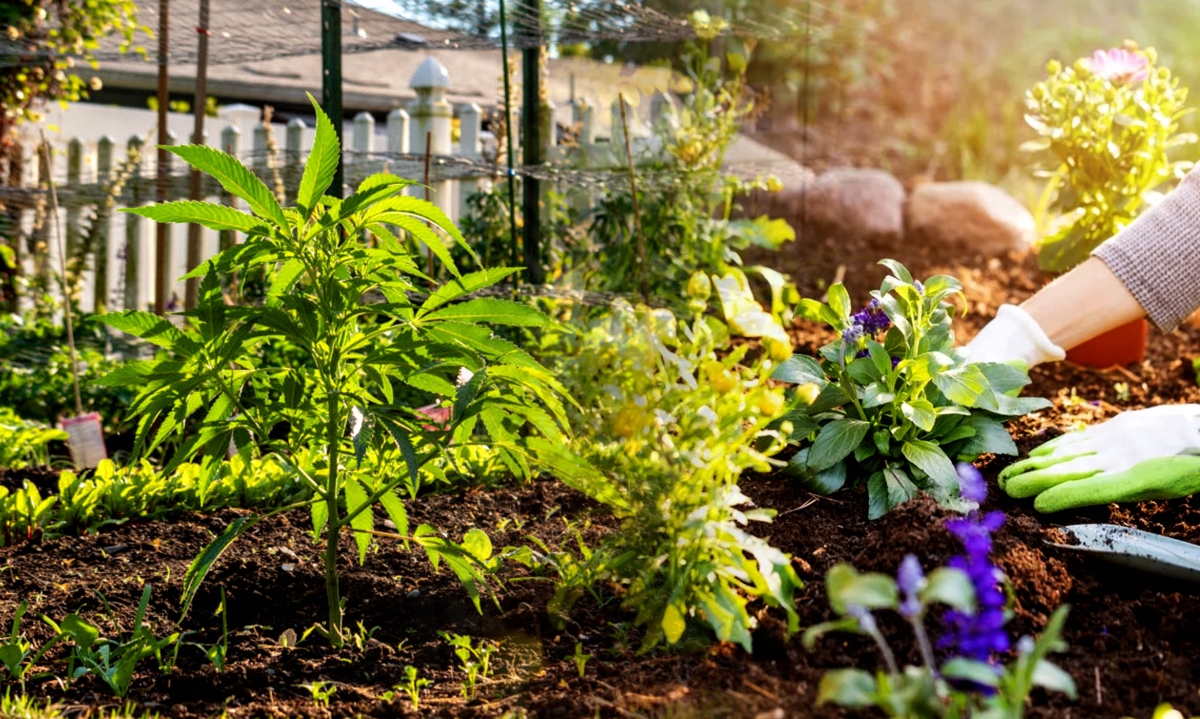
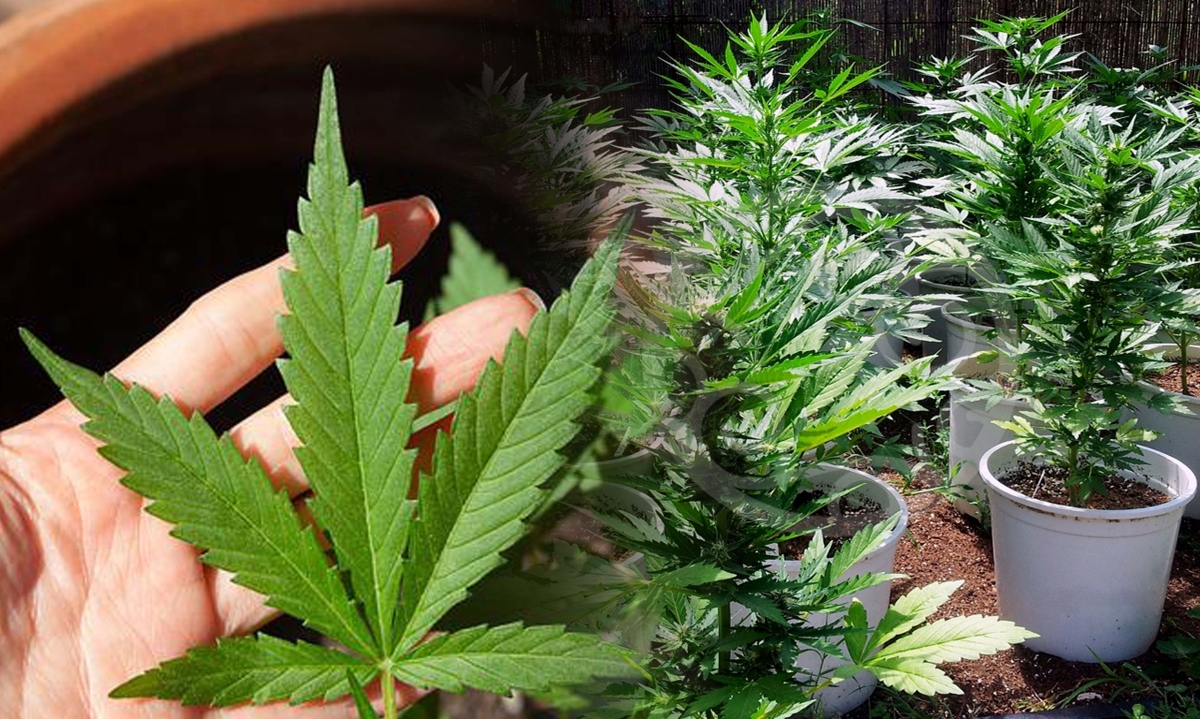
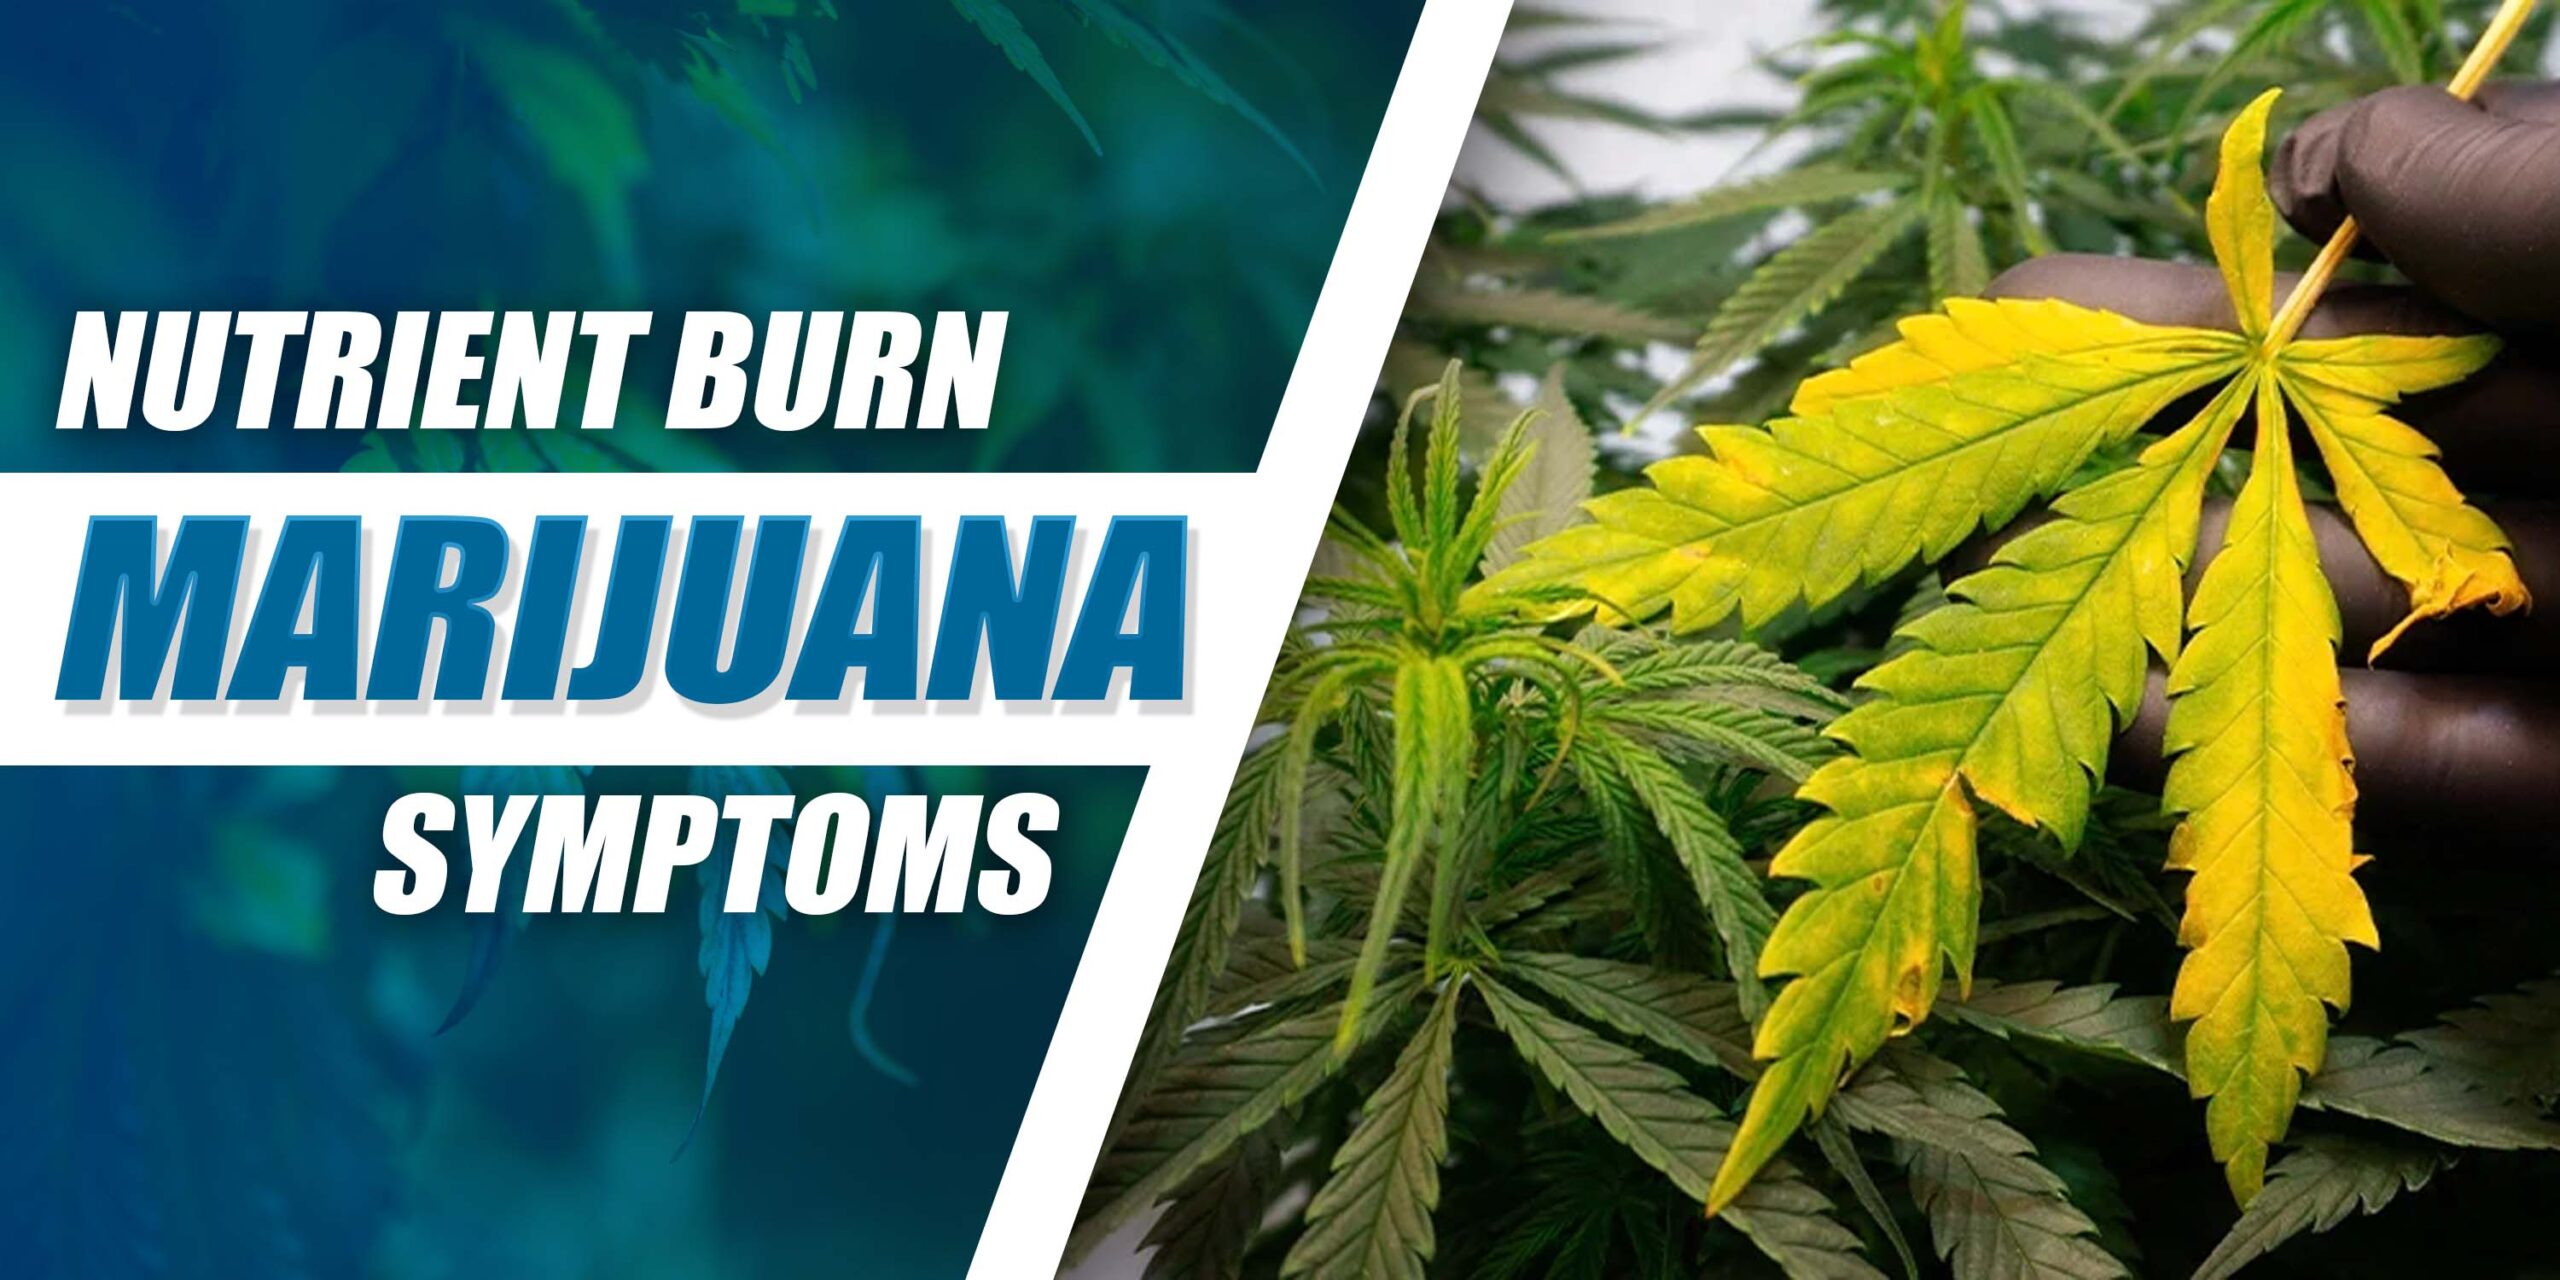
Nutrient burn marijuana is a common problem for cannabis growers. It can harm the plants and reduce how much they produce. This happens when plants get too much fertilizer, and the nutrients build up in their leaves. Too many nutrients can make the leaves change color and fall apart. They might turn yellow or brown at the ends, curl up, or droop. In serious cases, leaves can even die and fall off.

Causes of Nutrient Burn Plants

nutrient burn marijuana

Understanding what causes nutrient burn is important to prevent and manage it well. The main reason for this problem is giving plants too much nitrogen. Nitrogen is very important for plants to grow well. When cannabis plants are growing leaves during the vegetative stage, they need a lot of nitrogen. But if they get too much, it messes up the balance of nutrients in the plant. This makes it hard for the plant to take in other important nutrients, and that’s what causes nutrient burn. Also, using too much phosphorus and potassium, which are important for flowering and keeping the plant healthy, can lead to nutrient burn if not used carefully.

Identifying Nutrient Burn

nutrient burn marijuana

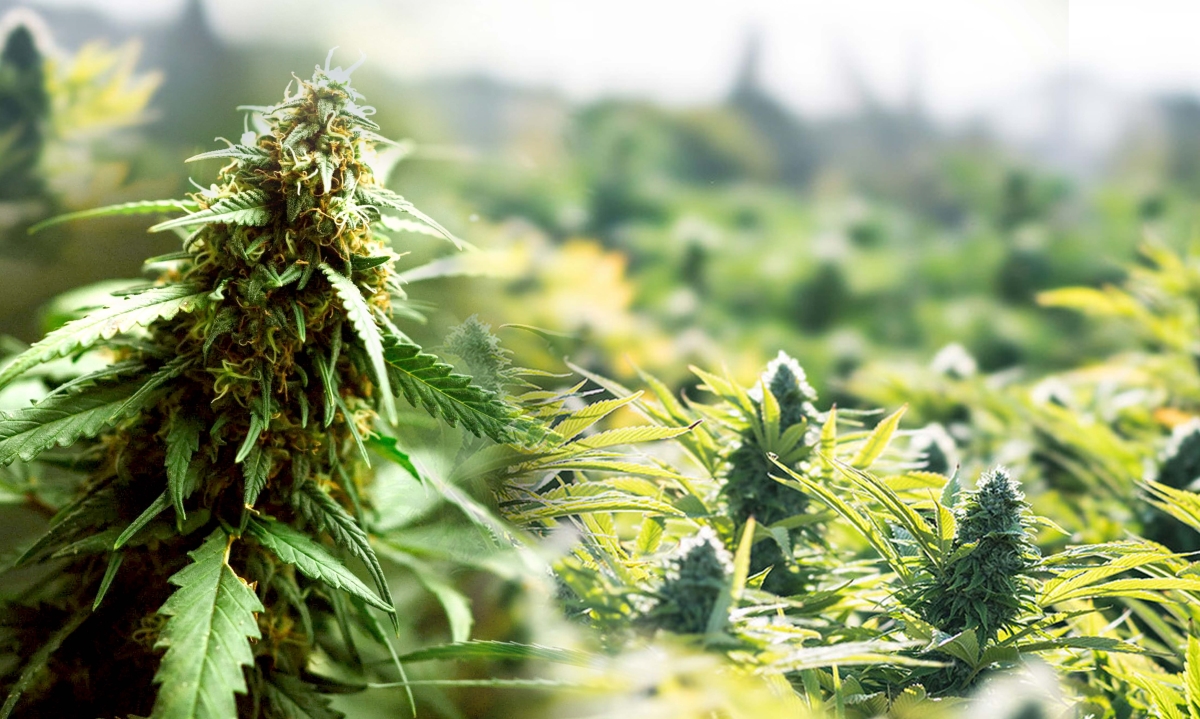
Accurately spotting the signs of nutrient burn is super important so you can fix the problem fast. Keep a close eye on your plants for any signs that something’s wrong, like the tips of the leaves turning yellow or brown, or the leaves curling or twisting. If you see these things happening, it means the nutrients in your plant are out of balance, and you need to do something about it right away to stop more damage.

Preventive Measures

Preventing nutrient burn requires a comprehensive approach that addresses various aspects of plant nutrition and management:

1. Proper Nutrient Dosage

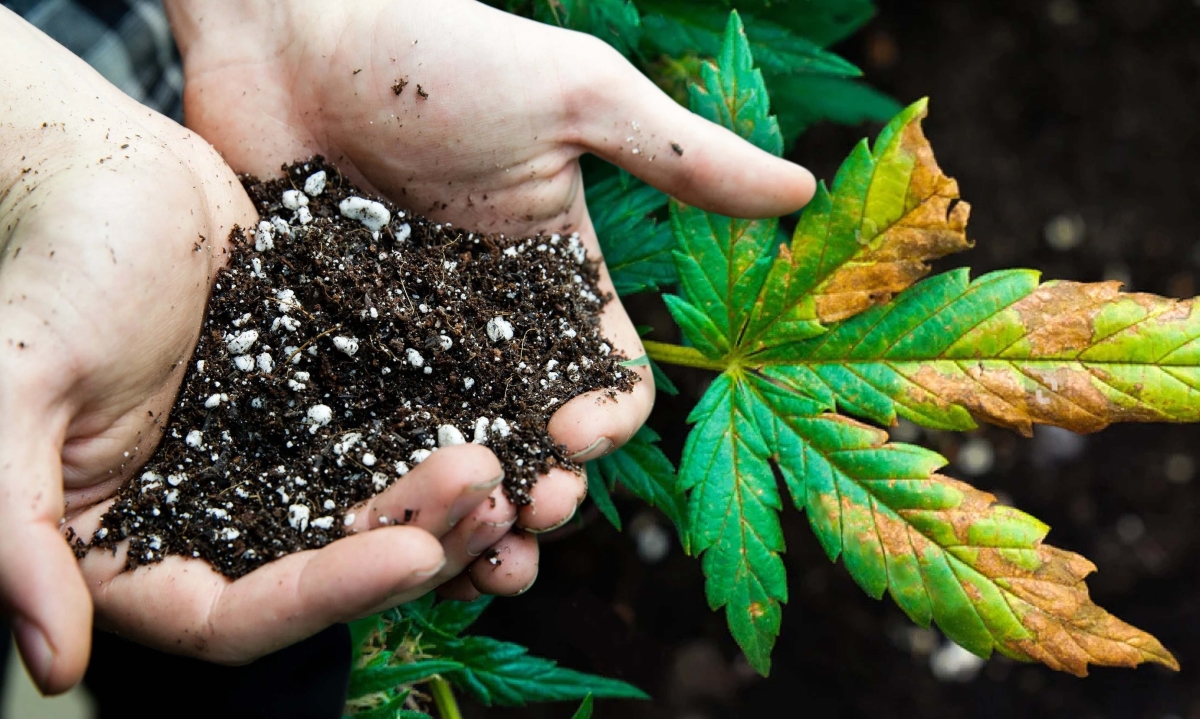
Following the recommended amounts of nutrients is important to make sure you don’t give your plants too much and cause a nutrient burn. Each type of cannabis and each stage of its growth need different amounts of nutrients, so you have to be careful about how much fertilizer you give them. By following the instructions from the fertilizer maker and keeping an eye on how your plants are doing, you can adjust how much nutrients you give them to match exactly what they need.

2. pH Monitoring

Keeping the right pH levels in the soil or water where your cannabis plants grow is super important. This helps them soak up all the nutrients they need and makes sure they don’t get too much or too little of anything. Cannabis plants do best when the pH is a bit acidic, ideally between 6.0 and 7.0. Checking the pH regularly lets you know if it’s not right and helps you fix it by adjusting the pH or flushing out extra nutrients if necessary.

3. Adequate Watering Practices

Getting the watering just right is really important to keep your plants healthy and avoid nutrient burn. If you water them too much, it can make the soil too wet, and that stops the roots from taking in nutrients properly. But if you don’t water them enough, they might not get all the nutrients they need, and they could get stressed out. It’s best to stick to a regular watering schedule that matches how much water your plants need, so they stay hydrated but not drowned in water.

4. Vigilance for Symptoms

It’s really important to keep an eye on your plants regularly and look out for any signs that they might be getting too much or too little of certain nutrients. Check your cannabis plants often for any changes in how their leaves look, like if they change color or texture, or if they’re growing differently than usual. If you spot any signs of nutrient burn early on, you can do something about it quickly, like adjusting the nutrients you give them or fixing any problems to help them get back to normal and stop more damage.

5. Quality Nutrient Products

It’s also important to get good-quality nutrients for your plants to make sure they get all the nutrients they need and to avoid nutrient burn. Good fertilizers have the right mix of nutrients that cannabis plants need, so they can take them up easily and evenly. If you choose well-known brands and avoid cheap or low-quality products, you can protect your plants from nutrient problems and help them grow strong and healthy.

Addressing Nutrient Burn

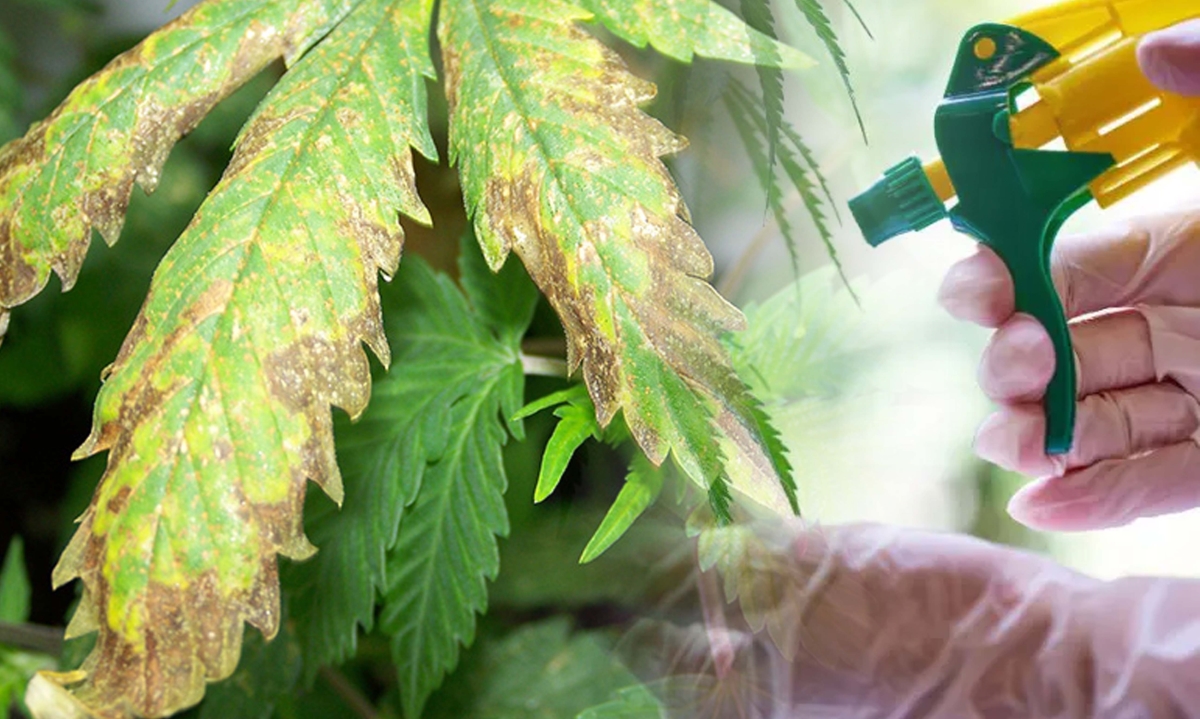
When nutrient burn happens, it’s important to act quickly to help the plants recover. Flushing the growing medium with water that has the right pH can wash away extra nutrients and bring things back into balance for the plant. But if the nutrient burn is really bad, you might need to do more to help the plants. This could mean changing how you fertilize them, giving them extra nutrients, or letting them rest for a bit before you start their regular growing routine again.

Conclusion

Dealing with nutrient burn is a big deal for cannabis growers, but if you stay on top of things and follow the best ways to take care of your plants, you can keep it under control. Making sure you give the right amount of nutrients, checking the pH levels, watering the right way, watching out for signs of trouble, and using good-quality nutrients are all important steps to protect your plants from nutrient burn and help them grow well. The key is to stop problems before they get too bad and to look after your plants carefully to keep them healthy for a long time.

FAQs

Q: Can nutrient burn affect the overall health of cannabis plants?
A: Yes, nutrient burn can adversely impact the health of cannabis plants by inhibiting nutrient absorption, leading to stunted growth, reduced yield, and increased susceptibility to pests and diseases.

Q: How can I test the pH levels of my soil or hydroponic solution?
A: You can test pH levels using a pH testing kit or meter, readily available at gardening stores. Simply collect a small sample of soil or hydroponic solution, follow the kit’s instructions for testing, and adjust pH levels as needed to maintain optimal conditions.

Q: Is nutrient burn reversible, or will it permanently damage my plants?
A: In many cases, nutrient burn is reversible with prompt intervention. Flushing the growing medium with plain water to remove excess nutrients can help alleviate symptoms and facilitate plant recovery. However, severe cases of nutrient burn may cause irreversible damage, particularly if left untreated for an extended period.

Q: Can nutrient burn occur even if I follow recommended nutrient dosages?
A: Yes, nutrient burn can still occur if nutrient dosages are followed strictly. Factors such as variations in plant genetics, environmental conditions, and nutrient uptake rates can influence how plants respond to fertilization. It’s essential to monitor plants closely for signs of nutrient burn and adjust nutrient levels accordingly.

Q: Are there organic methods to prevent nutrient burn in cannabis plants?
A: Yes, several organic methods can help prevent nutrient burn in cannabis plants. These include using compost and organic fertilizers, maintaining healthy soil microbial activity, practicing crop rotation, and incorporating natural amendments like kelp meal and bone meal to enrich the soil with essential nutrients gradually.

Cannabis History: When Was 420 Invented?


The term “420” has a fascinating story in the world of cannabis. Its origins have puzzled people for years. Many believe it came from secret police codes or obscure cultural nods, but the truth is different. So where and when was 420 invented? The real story of 420 starts in 1970s California, within its lively subculture. This tale has sparked curiosity among enthusiasts for decades.
Contrary to what many think, 420 didn’t emerge from mysterious codes or references. Instead, it sprouted from the vibrant atmosphere of 1970s California. This nugget of cannabis history has intrigued people for ages.

The Waldos – Pioneers of 420

when was 420 invented

The story starts with five students from San Rafael, California, calling themselves “the Waldos.” In 1971, they heard about a treasure map leading to hidden cannabis, supposedly left by a Coast Guard member. Every day at 4:20 p.m., after school, they met at the Louis Pasteur statue to search for the treasure. Despite their efforts, they never found it. However, their routine of meeting at 4:20 became a cultural phenomenon, giving birth to “420.”

The tale begins with a group of high school students from San Rafael, California, who named themselves “the Waldos.” In the autumn of 1971, they set out on a journey fueled by curiosity and the desire for adventure. They had stumbled upon a treasure map said to lead to a secret stash of cannabis abandoned by a Coast Guard member. At 4:20 p.m. every day, after school, the Waldos gathered at the Louis Pasteur statue to pursue the elusive treasure. Despite their persistent efforts, the treasure remained out of reach. Nevertheless, their daily ritual at 4:20 p.m. eventually gave rise to the cultural phenomenon known as “420.”

The Grateful Dead Connection

when was 420 invented

The journey of 420 from a local story to a worldwide sensation took an unexpected twist thanks to the influence of the iconic band, the Grateful Dead. The Waldos, connected to the Dead’s inner circle, played a crucial role in spreading the term within the counterculture community.

In 1990, during a Grateful Dead concert in Oakland, California, journalist Steven Bloom encountered 420 firsthand. A flyer distributed among Deadheads encouraged people to gather at 4:20 on April 20th, honoring the Waldos and solidifying the link between 420 and cannabis culture.

The path of 420 from a local tale to a global phenomenon took an interesting turn because of the Grateful Dead’s influence. The Waldos, who had connections to the band, helped popularize the term within the counterculture scene.

In 1990, at a Grateful Dead concert in Oakland, California, journalist Steven Bloom came across 420. A flyer passed around among Deadheads urged fans to assemble at 4:20 on April 20th, acknowledging the Waldos and cementing the connection between 420 and the cannabis community.

The Spread of 420 – From Subculture to Mainstream

when was 420 invented

Sparked by the push for cannabis legalization and increased media attention, the idea of 420 moved beyond its roots in the counterculture, reaching a wider audience. High Times magazine played a key role in spreading the story of the Waldos, helping to spread 420 worldwide and firmly establishing it as a significant cultural symbol.

The adoption of 420 as an unofficial holiday further cemented its position in popular culture, with gatherings and festivities held globally every April 20th. Despite efforts by certain institutions, like the University of Colorado and the University of California, Santa Cruz, to discourage its celebration, 420 persisted as a symbol of support for cannabis and unity within communities.

Legacy and Continued Influence

Even years after their adventures, the Waldos still hold onto a special place in cannabis culture, preserving a legacy that’s deeply woven into its fabric. Their collection of 420 memorabilia and letters serves as tangible evidence of their significant role in creating a cultural phenomenon.

Looking forward, the legacy of 420 continues to thrive, opening up possibilities for documentaries or compilations that delve into the Waldos’ story. No matter which path they take, their impact on cannabis culture is undeniable, showing how friendship and curiosity can spark movements that endure through time.

FAQs

Q: What are some common misconceptions about the origins of “420”?
A: One common misconception is that “420” refers to the number of chemicals in marijuana, but it originated from a group of high school students in California.

Q: Did the Waldos ever find the hidden cannabis crop they were searching for?
A: No, despite their efforts, the Waldos never located the elusive cannabis treasure mentioned in the treasure map they received.

Q: How did the term “420” become associated with cannabis culture?
A: The term “420” became associated with cannabis culture through the influence of the Grateful Dead and the widespread adoption of the term among enthusiasts and countercultural communities.

Q: Are there any efforts to stop the celebration of 420?
A: Yes, some institutions, such as universities, have attempted to discourage participation in 420 celebrations, but these efforts have generally been unsuccessful.

Q: What artifacts serve as reminders of the Waldos’ role in popularizing “420”?
A: Artifacts such as original 420 memorabilia and correspondence kept by the Waldos serve as tangible reminders of their pivotal role in popularizing the term.

Advanced Outdoor Growing Techniques


In the cannabis industry, growers are always looking for ways to grow more plants and get better results. New technologies such as advanced outdoor growing techniques have made it easier for them to do this. These tools help growers produce more cannabis without harming the environment or the quality of the product. So, they can grow more plants without causing damage. Here are some advanced outdoor growing techniques you can incorporate for you to know and explore how to grow marijuana plants outdoors.

Understanding the Yield Gap Dilemma

advanced outdoor growing techniques

The yield gap shows the difference between how much cannabis is currently grown and the most it could produce ideally. It’s important to make sure we’re growing cannabis in the best possible way to get the most out of each plant. Things like the quality and amount of light, how long the plants get light for, and the temperature and humidity all play a big role in how much cannabis we can grow. Making sure these factors are just right can help us reach the full potential of each cannabis plant.

Harnessing Scientific Insights for Cultivation

advanced outdoor growing techniques

For growers who want to grow cannabis better, scientific research is like a light showing the way. Scientists have done experiments to understand how things like the environment affect cannabis plants. This helps growers know what to do based on evidence.

Leveraging LED Lighting for Enhanced Efficiency

LED lighting technology is a huge improvement for indoor growing. It gives growers a lot of control over how much and what kind of light their plants get. By adjusting the lights to fit the needs of different types of cannabis, LED lights help plants grow better. They use less energy and make the plants grow stronger and healthier.

Optimizing Nutrient Utilization with PGPR

Plant-Growth Promoting Rhizobacteria (PGPR) are helpful microbes that work together with cannabis roots, making them stronger and healthier. They help the roots absorb more nutrients from the soil and make the soil better for growing. PGPR also protects the plants from getting sick and from things like bad weather. They do this by releasing substances that help the plants grow and fight off harmful things. This partnership between PGPR and cannabis plants leads to bigger plants, more cannabinoids, and plants that can handle tough conditions better.

Exploring Advanced Cultivation Techniques

Hydroponic Cultivation: Maximizing Efficiency

Hydroponic systems change how we grow plants by not using soil. Instead, they give plants nutrients directly through water. There are different types of hydroponic systems like Deep Water Culture (DWC), Nutrient Film Technique (NFT), and Aeroponics. These systems are popular for growing cannabis because they let growers control how much nutrients and water the plants get. They also help keep the environment just right for the plants to grow well.

Organic Cultivation: Sustainable and High-Quality

Organic farming focuses on keeping the soil healthy and supporting a variety of living things. Instead of using man-made chemicals, organic farmers use natural materials and living organisms to help their plants grow. They take care of the tiny living things in the soil, like helpful bacteria, fungi, and worms, to create a soil full of nutrients. This helps the plants grow strong, fight off diseases, and develop unique flavors.

Hybrid Approaches: Balancing Efficiency and Affordability

Hybrid cultivation blends the best parts of both hydroponic and organic farming. It combines new technology with old-fashioned knowledge to get the best results. Hybrid growers use soil beds filled with natural materials like compost, vermicompost, and helpful microorganisms. This mix helps them grow cannabis in a way that’s efficient, affordable, and good for the environment. It ensures they can produce a lot of cannabis without harming the planet.

Harnessing the Power of Rhizobacteria

Understanding the Role of Rhizobacteria

Rhizobacteria do many important jobs in the soil. They act as natural fertilizers, pest controllers, and helpers for plants. These helpful microbes form close relationships with plant roots, which helps them with things like getting nutrients, fighting off bad bugs, and handling tough situations like bad weather. This makes the plants stronger, helps them produce more, and lets them survive better even when things aren’t ideal.

Integrating Rhizobacteria into Cultivation Practices

Using rhizobacterial inoculants in farming is a smart way to take care of the soil. It means adding helpful microorganisms to the soil to make plants healthier and grow better. When growers add specific strains of these good microbes to the soil, it helps the roots grow better, gives the plants more food, and protects them from problems like bugs and bad weather. This helps farmers grow more crops, makes the crops better quality, and keeps the whole farming system stronger and more resilient. So, using rhizobacterial inoculants is a good idea for farmers who want their crops to thrive.

Conclusion

In summary, getting the most out of growing cannabis means looking at everything together. That includes using the best technology, being really careful about science, and taking care of nature. When growers use new ways to grow cannabis, and make sure the good tiny living things in the soil are there, and focus on making sure everything is good for the planet and the quality of the product, they can make cannabis plants as good as they can be while keeping nature and people safe. As the cannabis world keeps changing, it’s going to be important for scientists, growers, and people who make rules to work together. That way, they can keep making things better, teach people the best ways to grow, and make sure cannabis is grown responsibly for a long time.

FAQs

Q: What is the optimal temperature range for cannabis cultivation?
A: The ideal temperature range for growing cannabis is between 70°F to 85°F (21°C to 29°C). Avoid temperatures below 60°F (15°C) or above 90°F (32°C) as it can stress the plants.

Q: Can I grow cannabis indoors without soil?
A: Yes, you can grow cannabis indoors without soil using hydroponic systems. These systems deliver nutrients directly to the plant’s roots through a nutrient-rich solution, leading to faster growth and higher yields.

Q: How can I increase THC levels in my cannabis plants?
A: To increase THC levels, you can extend the flowering period of your cannabis plants. This can be achieved by reducing the vegetative period and providing optimal lighting and nutrient conditions during flowering.

Q: Is organic cannabis cultivation better for the environment?
A: Yes, organic cannabis cultivation is better for the environment as it promotes soil health, reduces chemical usage, and minimizes environmental impact. Organic practices also produce cannabis with a more natural flavor profile.

Q: Can rhizobacteria help prevent plant diseases?
A: Yes, rhizobacteria can help prevent plant diseases by enhancing the plant’s natural defenses and creating a healthier soil environment that is less hospitable to pathogens. Regular application of rhizobacterial solutions can improve overall plant resilience.

How to Camouflage Outdoor Grow Your Cannabis Plants


In outdoor cannabis growing, keeping things secret is super important. Whether you’re growing in your backyard or hidden in the woods, staying stealthy is key because of the complicated rules about growing cannabis in different places around the world. In areas where it’s against the law to grow cannabis, being discreet isn’t just a choice, it’s a must. It helps protect growers from getting in trouble with the law and from being judged by society. This guide gives clear tips on how to camouflage outdoor grow your cannabis plants effectively, making sure both the grower and the plants stay safe and hidden.

Understanding the Significance of Camouflage

camouflage outdoor grow

Cannabis growers choose to hide their plants mostly because of rules and social beliefs about growing cannabis. In places where growing cannabis is punished harshly, hiding the plants is very important to avoid getting in trouble with the law. Even in areas where growing cannabis is allowed, people still hide their plants to avoid problems with their neighbors and to keep things peaceful.

Techniques for Concealment

camouflage outdoor grow

1. Integrate Fake and Decorative Plants

A fast way to hide cannabis plants is by mixing them with fake or pretty plants, particularly in areas where there aren’t many plants around. This trick can quickly cover up the cannabis plants, but it might not completely hide all the things that make them different from other plants.
Blending cannabis with artificial or decorative plants helps conceal them from view, especially in places where there aren’t many natural plants. While this tactic provides immediate camouflage, it may not completely hide the unique features of cannabis plants. This means that even though the cannabis plants might be harder to spot at first glance, someone who knows what to look for could still identify them. So, while this method can be helpful for a quick cover-up, it’s not foolproof for keeping the cannabis plants completely hidden.

2. Employ Companion Plants

Using companion planting is a smarter way to hide cannabis plants and is better for the environment too. When cannabis is grown alongside different kinds of fully grown plants, it helps hide them better because there’s more variety in the leaves and colors to blend in with. This natural mix of plants makes it harder to notice the unique look of cannabis plants. Also, some of these companion plants smell nice and can help cover up the smell of cannabis, making it even harder to detect.
By planting cannabis alongside other types of plants, it becomes easier to hide them visually because there’s a greater variety of foliage to blend in with. This technique relies on the natural diversity of plants to conceal the distinct appearance of cannabis. Additionally, some companion plants have fragrant properties that can mask the scent of cannabis, improving overall stealthiness.

3. Utilize Tall Vegetation and Thickets

For growers who have plenty of room and patience, growing tall plants, thickets, or bushes is the best way to hide cannabis plants. Although it takes a long time for these big plants to grow, once they do, their thick leaves create a dense cover that keeps the cannabis plants hidden from view.
Growing tall plants, thickets, or bushes is a great way for growers who have lots of space and time to hide their cannabis plants. While it takes a while for these larger plants to grow, once they do, their thick foliage provides excellent protection, making it hard for anyone to see the cannabis plants. This method requires patience because it takes a long time for the big plants to reach their full size, but the result is worth it for the extra cover it provides.

4. Establish Greenhouse Enclosures

Greenhouses and other man-made buildings provide a private space for growing cannabis, hiding the plants behind solid walls. Adding materials like polytunnels or cloudy covers makes it even harder for people outside to see what’s inside, keeping the plants hidden from view.
Using structures like greenhouses is a good way to grow cannabis discreetly because they create a private area where the plants can grow without being seen by others. By covering the greenhouse with materials like polytunnels or cloudy covers, it becomes even more difficult for anyone passing by to see what’s inside. This extra layer of protection helps keep the cannabis plants hidden from view, making it easier for growers to keep their activities confidential.

5. Opt for Low-Odor Strains

Choosing cannabis strains that don’t smell much helps reduce the chance of being noticed, especially in busy places where controlling smells is really important. These types of strains not only make it less likely for people to notice the smell of cannabis but also help keep things friendly with neighbors by not bothering them with strong smells.
Picking cannabis strains that don’t give off strong smells can make it easier to keep things under the radar, especially in places where it’s important to control odors. These strains not only reduce the risk of people noticing the smell of cannabis but also help maintain good relationships with neighbors by preventing strong smells from bothering them. This way, everyone can get along better, and growers can keep their cannabis-growing activities private.

6. Implement Training Techniques

Using methods like Low-Stress Training (LST) or Screen of Green (ScrOG) helps growers control how tall their plants grow and encourages them to spread out horizontally. This makes better use of the space and makes it easier to hide the plants. These techniques find a good balance between the size of the plants and how easy they are to see, making it possible to grow cannabis discreetly even in small areas.
By using methods like Low-Stress Training (LST) or Screen of Green (ScrOG), growers can control the height of their plants and encourage them to grow sideways. This helps make the most of the space available and makes it easier to keep the plants hidden. These techniques strike a good balance between the size of the plants and how noticeable they are, making it possible to grow cannabis secretly even in limited spaces.

Strategic Site Selection

Choosing the right spot to grow cannabis is crucial for staying hidden and avoiding problems. Things like how easy it is for neighbors to see, how much sunlight the area gets, and how easy it is to take care of the plants should all be considered when picking a spot. It’s important to choose a place where people outside can’t easily see what’s going on. This helps make sure the cannabis plants can grow without being noticed for as long as possible. So, picking the best location is key to keeping the grow operation safe and successful.

Conclusion

When growing cannabis outdoors while keeping things quiet, it’s crucial to use good camouflage techniques. By combining different ways to hide the plants, growers can protect their crops while dealing with the legal and social challenges of growing cannabis. With careful planning, picking the right spot, and sticking to stealthy methods, growers can make sure their outdoor cannabis growing is both secret and successful.

FAQs

Q: What are some common methods for hiding outdoor cannabis plants?
A: Using camouflage techniques like blending plants, growing tall plants to cover the cannabis, or using structures like greenhouses.

Q: Why is it important to choose the right location for outdoor cannabis cultivation?
A: Picking the right spot helps keep the plants hidden from view, reduces the risk of getting caught, ensures they get enough sunlight, and are easy to take care of.

Q: How do low-odor cannabis strains help with discreet cultivation?
A: Low-odor strains reduce the chance of people noticing the smell of cannabis, making it easier to keep the grow operation secret, especially in areas where controlling smells is important.

Q: What are some benefits of using companion planting in outdoor cannabis cultivation?
A: Companion planting helps hide cannabis plants among other types of plants, making them harder to spot visually. Some companion plants also have scents that can mask the smell of cannabis.

Q: How can techniques like Low-Stress Training (LST) or Screen of Green (ScrOG) help with outdoor cannabis cultivation?
A: LST and ScrOG methods help control the height and spread of cannabis plants, making them easier to hide and maximizing space utilization in outdoor grows.

My Dog Ate Cannabutter: What To Do?


Cannabutter, a common ingredient in cannabis-infused edibles, poses significant risks if your dog ate cannabutter. In this comprehensive guide, we delve into the potential dangers, symptoms, and actions to take if your beloved pet consumes cannabutter and other cannabis-related products.

The Toxicity of THC to Dogs

Dog Ate Cannabutter

THC, the chemical in cannabis that makes you feel high, can be really bad for pets like dogs. If they eat it, breathe in the smoke, or eat stuff made with THC like special butter, it can make them really sick. How bad it is depends on things like how big the dog is, what kind of dog it is, how old it is, and how healthy it is. Small dogs and puppies can get even sicker because they’re so tiny and not used to it. So it’s important to keep THC away from pets.

Other Cannabis Products

Dog Ate Cannabutter

Dog Eats Weed Gummy

When a dog eats a weed gummy, it’s like eating other cannabis treats. Weed gummies can have a lot of THC, which can be really bad for dogs. If a dog eats a weed gummy, it might start acting strange. It could get sad, have a slow heartbeat, run around a lot, feel really worried, get confused, have big pupils, shake, have diarrhea, or throw up. Dog owners need to be careful and notice if their dog is acting weird. It’s important to take the dog to the vet and watch it closely to make sure it gets better.

Dog Ate a Joint

If a dog eats a joint, it’s really important to act fast to help them. Joints usually have a lot of THC, which can make dogs very sick. If a dog eats a joint, it might get really tired, have low blood pressure, run around a lot, feel worried, get confused, have big pupils, shake, have diarrhea, throw up, have seizures, passes out, or even die if it’s really bad. Dog owners should never wait to get help from a vet if their pet eats a joint. Getting help right away can really help the dog and stop things from getting worse.

Recognizing Symptoms of Cannabutter Ingestion

It’s really important to notice if a dog eats cannabutter so you can help them quickly. Besides the obvious signs like feeling sad, having a slow heartbeat, running around a lot, and throwing up, other signs might show the dog has too much THC in its system. These signs include changes in how they act, like being tired or restless, having trouble moving smoothly, and not wanting to eat. Some dogs might also seem worried or confused, which can make it hard for their owners to figure out what’s wrong.

Dosage and Risks Associated with Cannabutter Consumption

Pet owners need to know how much cannabutter is safe for their dogs and what the risks are if they eat it by accident. Studies show that dogs can start showing signs of being too high from THC if they eat about 84.7 milligrams of THC for every kilogram they weigh. But every dog is different, so some might feel the effects more than others, depending on things like how fast their body processes things and how sensitive they are to THC. Even though dogs can handle quite a bit of THC before it becomes deadly—around 3 grams for every kilogram they weigh—any amount they eat can still be bad for them and make them sick.

Immediate Actions to Take

If your dog eats cannabutter, it’s really important to act fast to keep them safe and avoid problems. Sometimes, you might need to make them throw up, especially if they ate a lot of cannabutter not long ago. But before you try anything, you should talk to a vet because making a dog throw up the wrong way can lead to other problems like getting stuff in their lungs. Besides that, you should try to keep them comfortable by giving them water and keeping an eye on how they’re acting and if they seem different in any way. Just make sure to get help from a vet as soon as you can.

Long-Term Considerations

Even though cannabis can be dangerous for dogs, it’s important to know that it can also help them in certain medical situations if used carefully. One part of cannabis called cannabidiol (CBD), which doesn’t make you high, has been helpful for dogs with problems like arthritis, anxiety, tumors, cancer, and bowel issues. But if you’re thinking about giving your dog CBD, you should be careful and talk to a vet to make sure you’re giving them the right amount in the right way. It’s also important that scientists keep studying how CBD can help dogs so we can understand more about how it works and how safe it is.

Conclusion

To sum up, if your dog eats cannabutter or other cannabis-related products, it can make them sick and even put their life in danger. Knowing the signs, understanding how much can be harmful, and acting quickly are all important for keeping your furry friend safe. While cannabis might help dogs with some health problems, it’s best to let a vet decide if it’s right for them to avoid any risks. By being aware and taking good care of your pet, you can make sure they stay away from the dangers of eating cannabutter.

FAQs

Q: Can I give my dog cannabutter to help with their health issues?
A: No, it’s not safe. Cannabutter can make dogs really sick and even be life-threatening.

Q: What should I do if my dog accidentally eats cannabutter?
A: Act fast! Contact a vet right away. They’ll tell you what to do to help your dog feel better.

Q: Is it okay to give my dog CBD products?
A: Talk to your vet first. They can tell you if it’s safe and how much to give your dog.

Q: What are the signs that my dog might be affected by THC?
A: Watch out for changes in behavior like being really tired or restless, vomiting, shaking, or having big pupils.

Q: How can I keep my dog safe from cannabutter?
A: Keep it out of reach! Store it in a secure place where your dog can’t get to it.

How To Clean Weed Grinder


Cleaning your weed grinder is crucial for maintaining its functionality, hygiene, and the quality of your herb. Over time, residue buildup can affect the grinder’s performance, leading to difficulties in grinding and compromising the taste of your herb. Therefore, it’s essential to establish a regular cleaning routine to ensure optimal performance and hygiene.

How To Clean Weed Grinder

Proper maintenance not only extends the lifespan of your grinder but also enhances the overall experience of using it. By keeping your grinder clean, you can enjoy smoother grinding sessions, preserve the flavor and potency of your herb, and avoid potential health risks associated with contaminated residue.

How To Clean Weed Grinder

In this comprehensive guide, we’ll explore various methods of how to clean weed grinder, with a specific focus on the effectiveness of how to clean grinder with boiling water. Additionally, we’ll provide expert tips and insights to help you maintain your grinder in top condition, ensuring a seamless and enjoyable grinding experience every time.

Disassembly of the Weed Grinder

Disassembling your weed grinder correctly is the first step towards achieving a thorough cleaning. By dismantling the grinder into its components, you can access hard-to-reach areas and ensure that every part receives proper attention during the cleaning process.

  • Removing the Grinder Components
    When disassembling the grinder, pay close attention to each component, including the lid, grinding chamber, and pollen catcher. Carefully unscrew and detach each part, taking care not to lose any small pieces.
  • Detaching the Lid and Grinding Chamber
    Gently twist and remove the lid from the grinder’s main body, ensuring that any residual herb is emptied from the chamber. Next, separate the grinding chamber from the bottom compartment, inspecting each part for cleanliness and functionality.


Cleaning the Individual Components

Once disassembled, it’s time to clean each grinder component thoroughly. Proper cleaning techniques ensure the removal of any residue or buildup, restoring the grinder’s performance and hygiene.

  • Scrubbing with a Cleaning Brush
    Using a small cleaning brush, scrub the interior and exterior surfaces of the grinder components, paying special attention to areas where residue may accumulate. The bristles of the brush help dislodge stubborn buildup, allowing for easier removal during the cleaning process.
  • Soaking in Isopropyl Alcohol
    For more stubborn residue, consider soaking the disassembled grinder parts in isopropyl alcohol. The alcohol helps dissolve residue and buildup, making it easier to clean. Allow the components to soak for at least 30 minutes before rinsing thoroughly with water.


Cleaning Techniques for Weed Grinder with Boiling Water

Cleaning your weed grinder with boiling water is an effective and chemical-free method for removing residue and restoring its functionality. The application of heat helps loosen stubborn buildup, making it easier to clean and sanitize the grinder.

Boiling Water Method Overview

The boiling water method offers a simple yet powerful solution for cleaning your weed grinder. By harnessing the cleansing power of heat, you can effectively remove residue and contaminants without the need for harsh chemicals or abrasive scrubbing.

  • Boiling Water Preparation
    To begin, fill a pot with enough water to fully submerge the grinder components. Place the pot on the stove and bring the water to a rolling boil. Ensure that the pot is large enough to accommodate all the grinder parts comfortably.
  • Submerging the Grinder Parts
    Carefully place the disassembled grinder parts into the pot of boiling water, ensuring that they are fully submerged. Allow the components to boil for approximately 10-15 minutes, allowing the heat to penetrate and loosen any stubborn residue.


Scrubbing and Drying

Once the components have been boiled, remove them from the water using tongs or a slotted spoon. Allow the parts to cool slightly before handling them to avoid burns.

  • Scrubbing with a Cleaning Brush
    After boiling, use a cleaning brush to scrub away any remaining residue from the grinder components. The combination of heat and agitation helps dislodge stubborn buildup, leaving the parts clean and sanitized.
  • Drying and Reassembly
    After cleaning, thoroughly dry each grinder component with a clean towel or cloth. Ensure that all moisture has been removed to prevent rust or corrosion. Once dry, reassemble the grinder, ensuring that each part is securely fastened.


Conclusion

In conclusion, maintaining a clean weed grinder is essential for preserving its longevity, performance, and hygiene. By following the cleaning techniques outlined in this guide, particularly how to clean a grinder with boiling water, you can ensure that your grinder remains in optimal condition for years to come.

Regular cleaning not only enhances the functionality of your grinder but also improves the quality and taste of your herb. By establishing a cleaning routine and utilizing effective cleaning methods, you can enjoy a seamless and enjoyable grinding experience every time.

Remember to clean your grinder regularly, inspecting each component for residue or buildup. With proper maintenance and care, your weed grinder can continue to provide smooth and consistent grinding for all your herb needs.

FAQs

Q: How often should I clean my weed grinder?
A: Regular cleaning is essential to prevent residue buildup and maintain optimal performance. Aim to clean your grinder at least once every few weeks or whenever you notice a decrease in grinding efficiency.

Q: Can I use soap when cleaning my weed grinder?
A: While soap can be effective for removing residue, it’s best to avoid using it as it may leave behind a soapy residue or alter the taste of your herb. Stick to using water or alcohol for a thorough cleanse.

Q: Is it safe to boil metal grinder parts?
A: Yes, boiling metal grinder parts is safe and effective for removing residue and sanitizing the components. Just ensure that the parts are fully dry before reassembly to prevent rusting.

Q: Can I use the boiling water method for acrylic or plastic grinders?
A: It’s not recommended to use boiling water on acrylic or plastic grinders, as the heat may cause warping or damage to the material. Stick to gentler cleaning methods for these types of grinders.

Q: How can I prevent residue buildup in my weed grinder?
A: To prevent residue buildup, clean your grinder regularly and avoid overloading it with herb. Additionally, store your grinder in a cool, dry place to maintain cleanliness and hygiene.

The Art of Drying Autoflowers


Welcome to the ultimate guide on drying autoflowers! As a grower, mastering the art of drying is crucial for preserving the potency, flavor, and aroma of your beloved autoflowering cannabis plants. In this article, we’ll delve into the intricacies of drying autoflowers, providing you with expert tips, insights, and techniques to ensure a successful harvest every time.

Understanding Drying Autoflowers

Drying Autoflowers

What are Drying Autoflowers?

Drying autoflowers refers to the process of carefully removing moisture from harvested cannabis buds to achieve optimal potency, flavor, and shelf life. It involves controlling environmental factors such as humidity, temperature, and airflow to create the perfect conditions for drying.

Why Proper Drying is Essential for Autoflowers

Proper drying is essential for autoflowers to preserve their cannabinoids, terpenes, and overall quality. Inadequate drying can result in mold, mildew, and a harsh taste, compromising the quality and value of your harvest.

The Importance of Slow Drying

Slow drying allows for a gradual evaporation of moisture from the buds, preserving their integrity and preventing mold formation. By allowing the buds to dry slowly, you can maintain their cannabinoid and terpene profiles, resulting in a more flavorful and potent end product.

Benefits of Slow Drying

  • Preserve Terpene Profile: Slow drying helps retain the delicate terpenes responsible for the unique aroma and flavor of each strain.
    Enhances Flavor and Aroma: By preserving the terpenes, slow drying enhances the overall flavor and aroma of the buds, providing a more enjoyable smoking experience.
  • Minimizes Risk of Mold: Slow drying reduces the risk of mold and mildew growth by creating an environment that is less conducive to microbial proliferation.

How To Dry Autoflowers

Drying Autoflowers

1. Timing is Key

Harvest your auto flowers when the trichomes are milky white with a hint of amber. This indicates peak potency and is the ideal time to begin the drying process. By harvesting at the right time, you can ensure that your buds are at their maximum potency and flavor potential.

2. Hang Them Upside Down

Hang your harvested plants upside down in a cool, dark, and well-ventilated space. This allows for optimal air circulation around the buds, promoting even drying and preventing mold growth. Additionally, hanging the plants upside down helps preserve the shape and structure of the buds, ensuring they dry evenly.

Why Hanging Upside Down?

  • Promotes Even Drying: Hanging the plants upside down allows air to circulate around the buds evenly, ensuring that they dry uniformly and preventing moisture buildup.
  • Prevents Buds from Touching Each Other: Hanging the buds upside down prevents them from touching each other, reducing the risk of mold and ensuring that they retain their individual shape and structure.
  • Facilitates Trichome Preservation: Hanging the plants upside down helps preserve the delicate trichomes on the buds, ensuring that they remain intact and contribute to the overall potency and flavor of the final product.

3. Maintain Ideal Humidity Levels

Keep humidity levels between 45% and 55% during the drying process. High humidity can lead to mold, while low humidity can cause the buds to dry too quickly, resulting in a harsh taste and diminished potency. By maintaining optimal humidity levels, you can ensure a slow and steady drying process that preserves the quality of your buds.

How to Measure Humidity
Invest in a hygrometer to monitor humidity levels accurately. Place the hygrometer in the drying area and check it regularly to ensure that humidity levels remain within the optimal range. If humidity levels are too high, consider using a dehumidifier to remove excess moisture from the air.

4. Monitor Temperature

Maintain a consistent temperature between 60°F and 70°F (15°C to 21°C) during drying. Avoid high temperatures, as they can degrade cannabinoids and terpenes, leading to a loss of potency and flavor. By controlling the temperature in the drying environment, you can ensure that your buds dry slowly and evenly, preserving their quality and integrity.

The Role of Temperature in Drying

  • Influences Terpene Retention: Temperature plays a crucial role in terpene retention, with lower temperatures generally preserving terpenes more effectively. By maintaining a moderate temperature in the drying environment, you can ensure that your buds retain their full flavor and aroma.
  • Affects Cannabinoid Potency: High temperatures can degrade cannabinoids such as THC and CBD, leading to a loss of potency in the final product. By keeping the temperature within the optimal range, you can preserve the potency of your buds and ensure a more enjoyable smoking experience.
  • Impacts Flavor Profile: Temperature also affects the flavor profile of the buds, with higher temperatures often resulting in a harsher taste. By controlling the temperature during drying, you can preserve the delicate flavors of your cannabis strains, ensuring a more enjoyable smoking experience.

5. Patience is a Virtue

Resist the urge to rush the drying process. Slow and steady drying results in superior-quality buds with enhanced flavor and potency. While it may be tempting to expedite the drying process to enjoy your harvest sooner, patience is key to achieving the best results. By allowing your buds to dry slowly and naturally, you can preserve their potency, flavor, and aroma, resulting in a more satisfying smoking experience.

6. Avoid Direct Light

Exposure to direct light can degrade cannabinoids and terpenes, leading to a loss of potency and flavor in your buds. To preserve the quality of your harvest, store your drying buds in a dark environment away from direct sunlight. By keeping your buds in a dark, cool place, you can ensure that they retain their potency, flavor, and aroma, providing you with a more enjoyable smoking experience.

7. Use a Fan if Necessary

In humid environments, using a fan can help improve air circulation and prevent mold growth. However, be cautious not to point the fan directly at the buds, as this can cause them to dry too quickly, resulting in a harsh taste and diminished potency. Instead, position the fan so that it circulates air around the drying area without directly impacting the buds. By using a fan to improve airflow, you can create a more conducive environment for drying, resulting in higher-quality buds with enhanced flavor and potency.

8. Check Buds Regularly

Inspect your buds daily during the drying process. Look for signs of mold, mildew, or overdrying, such as a musty odor, discolored spots, or brittle texture. If you notice any signs of mold or mildew, remove the affected buds immediately to prevent further contamination. Additionally, monitor the humidity and temperature in the drying environment regularly to ensure that conditions remain optimal. By checking your buds regularly, you can identify and address any issues early on, ensuring a successful drying process and a high-quality final product.

9. Opt for a Slow Cure

After drying, cure your buds in glass jars for 1-2 weeks. This further enhances flavor, aroma, and smoothness. Curing allows the buds to continue developing their flavor and aroma profiles while further removing any residual moisture. By curing your buds slowly in glass jars, you can ensure that they reach their full potential in terms of flavor, aroma, and smoothness, providing you with a more enjoyable smoking experience.

10. Trust Your Senses

When in doubt, trust your senses. The buds should feel slightly crispy on the outside and have a slight stickiness in the center when properly dried. Additionally, pay attention to the aroma of the buds, which should be rich, complex, and fragrant. By trusting your senses and using them to guide you throughout the drying process, you can ensure that your buds are dried to perfection, resulting in a high-quality final product that is full of flavor, aroma, and potency.

FAQs

Q: How Long Does It Take to Dry Autoflowers?
A: The drying process typically takes 7-10 days, depending on factors such as humidity, temperature, and airflow. However, it’s essential to monitor the drying process closely and adjust conditions as needed to ensure optimal results.

Q: Can I Speed Up the Drying Process?
A: While it’s possible to speed up drying, it’s not recommended, as it can result in inferior quality buds with diminished potency and flavor. Instead, it’s best to allow your buds to dry slowly and naturally to preserve their quality and integrity.

Q: What Happens if I Overdry My Autoflowers?
A: Overdrying can lead to harsh-tasting buds with decreased potency and aroma. It’s essential to monitor the drying process closely and remove the buds from the drying area as soon as they reach the desired level of dryness to prevent overdrying.

Q: Should I Trim Before or After Drying?
A: It’s best to trim your buds after drying but before curing. This allows for easier handling and enhances the overall appearance of the buds. However, some growers prefer to trim their buds before drying to streamline the process. Ultimately, the choice is yours, but it’s essential to handle your buds gently to avoid damaging them during trimming.

Q: Can I Dry Autoflowers in the Microwave or Oven?
A: Drying autoflowers in the microwave or oven is not recommended, as it can degrade cannabinoids and terpenes, resulting in an inferior product. Instead, it’s best to dry your buds slowly and naturally in a cool, dark, and well-ventilated space to preserve their quality and integrity.

Must-Have Apps For Stoners


In today’s digital landscape, the cannabis community is thriving, and with it comes a lot of apps designed to cater to the needs and interests of stoners. These apps for stoners ranging from social networking platforms to innovative tools for cannabis consumption. However, navigating through this vast array of options can be daunting. Fear not! We’ve curated a list of the finest apps specifically tailored to enhance your experience as a cannabis enthusiast.

Weedmaps

apps for stoners

Weedmaps goes beyond being just a directory for dispensaries. It offers a comprehensive platform where users can explore menus, read reviews, and discover deals. With its user-friendly interface and extensive database, Weedmaps ensures that stoners can easily access high-quality cannabis products and services in their local area.

High There!

apps for stoners

High There! serves as a global community hub for cannabis enthusiasts to connect and engage in meaningful conversations. Whether you’re seeking friendship, networking opportunities, or romantic connections, this app provides a safe and inclusive space for stoners to interact without judgment or stigma.

Eaze

apps for stoners

Eaze revolutionizes the way stoners access their favorite cannabis products by offering a convenient and reliable delivery service. With just a few taps on their smartphone, users can browse a wide selection of products, place orders, and have their purchases delivered directly to their doorstep promptly.

My Canary

apps for stoners

My Canary is a must-have app for stoners who want to stay informed about the ever-changing legal landscape surrounding cannabis. From providing updates on local regulations to offering resources for legal assistance, My Canary ensures that users can navigate the legal complexities of cannabis consumption with confidence and peace of mind.

Bud Farm

apps for stoners

Bud Farm offers a unique and immersive gaming experience where players can cultivate their virtual cannabis farm from the ground up. With its addictive gameplay mechanics and attention to detail, Bud Farm allows stoners to indulge their entrepreneurial spirit while having fun and exploring the world of cannabis cultivation.

MassRoots

apps for stoners

MassRoots is more than just a social networking platform; it’s a vibrant community where stoners can come together to share their experiences, discover new products, and stay up-to-date on the latest trends in the cannabis industry. With its engaging interface and active user base, MassRoots offers a dynamic space for cannabis enthusiasts to connect and interact.

TokeTime

apps for stoners

TokeTime is a handy app designed to help stoners optimize their smoking sessions and track their cannabis consumption habits. With features such as dosage reminders, session logs, and personalized insights, TokeTime ensures that users can enjoy their cannabis responsibly while maximizing their enjoyment and wellness.

BlazeNow

apps for stoners

BlazeNow simplifies the process of finding cannabis-related businesses by providing users with a comprehensive directory of dispensaries, delivery services, and doctors. With its intuitive search functionality and user reviews, BlazeNow ensures that stoners can easily locate the products and services they need, wherever they are.

High There! Events

apps for stoners

High There! Events takes the social experience offline by organizing local gatherings, meetups, and cannabis-friendly activities for stoners to enjoy. Whether you’re attending a smoke sesh or participating in a cannabis-themed event, High There! Events provide opportunities for stoners to connect and build meaningful relationships in the real world.

420 Singles

apps for stoners

420 Singles is a dating app designed specifically for cannabis enthusiasts seeking romantic connections. With its user-friendly interface and emphasis on shared interests and values, 420 Singles facilitates meaningful connections and romantic relationships within the cannabis community.

Conclusion

With an abundance of apps catering to the unique needs and interests of stoners, enhancing your cannabis experience has never been easier. Whether you’re seeking product recommendations, legal guidance, or social connections, these apps have you covered. Embrace the digital revolution and elevate your stoner lifestyle with the power of technology.

FAQs

Q: Are these apps legal to use?
A: Yes, the apps listed cater to the cannabis community and comply with relevant regulations in jurisdictions where cannabis consumption is legal. Users should always ensure they are following local laws and regulations regarding cannabis use.

Q: Do I need to pay for these apps?
A: While many of the apps featured offer free versions with basic features, some may require a subscription or in-app purchases for access to premium content and features. Users should review the app’s terms of service and pricing before making a purchase.

Q: Are these apps available on both iOS and Android devices?
A: Yes, the majority of apps listed are available for both iOS and Android platforms, ensuring accessibility for users regardless of their device preference. Users can download these apps from the Apple App Store or Google Play Store.

Q: Can I trust the information provided on these apps?
A: The apps featured in this guide prioritize accuracy and reliability in the information they provide. However, users should exercise caution and cross-reference information from multiple sources to ensure its accuracy. Additionally, users should be aware that user-generated content, such as reviews and recommendations, may vary in quality and reliability.

Q: How do I ensure my privacy while using these apps?
A: Many apps offer privacy features such as encrypted messaging, anonymous browsing, and secure payment options to protect user privacy. Users should review the app’s privacy policy and adjust their privacy settings as needed to control the information they share with the app and other users.

Fast Flowering vs Autoflower: Which is the Best Option for Your Garden?


When you want a lively and thriving garden, picking the right plants matters a lot. There are many choices, but two are especially popular: fast flowering vs autoflower plants. Each type has its good points and things to think about for gardeners. In this article, we’ll compare fast flowering with autoflower plants in detail. We’ll look at what makes each type different, how they grow, and when they’re best for different gardening situations. Whether you’re an experienced gardener or just starting, knowing the differences between these types of plants can help you make smart choices and have a successful garden.

Understanding Fast Flowering vs Autoflower Plants

Fast Flowering vs Autoflower

Fast Flowering Plants:

Fast flowering plants refer to varieties that enter the flowering stage quickly after the vegetative phase. These plants have been selectively bred to accelerate the flowering process, allowing gardeners to enjoy blooms in a shorter time frame. With their rapid transition from vegetative growth to flowering, fast flowering plants offer several benefits for gardeners seeking timely harvests and consistent yields.

Fast flowering plants typically exhibit robust growth during the vegetative stage, developing sturdy stems and lush foliage. Once they transition to flowering, they undergo a rapid transformation, producing colorful blooms and setting fruits earlier than traditional varieties in the case of fruit-bearing plants. This accelerated flowering process is advantageous for gardeners with limited growing seasons or who wish to stagger their harvests throughout the year.

Autoflower Plants:

Autoflower plants, also known as automatic or auto-flowering plants, represent another category of cultivars prized for their unique characteristics. Unlike traditional photoperiod plants, which rely on changes in light cycles to initiate flowering, autoflower plants automatically transition from vegetative growth to flowering based on age. This inherent trait, derived from Cannabis Ruderalis genetics, offers several advantages for gardeners, particularly those seeking convenience and flexibility in their cultivation endeavors.

One of the primary benefits of autoflower plants is their ability to flower independently of light cycles. This means that gardeners can maintain a consistent lighting schedule throughout the growing season without needing to adjust the duration or intensity of light exposure to induce flowering. Additionally, autoflower plants typically have shorter life cycles compared to photoperiod varieties, allowing for quicker harvests and multiple crops in a single season.

Comparing Growth Characteristics

Fast Flowering vs Autoflower

Vegetative Growth:

In the vegetative stage, both fast flowering and autoflower plants focus on establishing robust root systems and developing foliage to support future flower production. However, there are differences in the duration and intensity of vegetative growth between these two types of plants.

  • Fast Flowering Plants: During the vegetative stage, fast flowering plants exhibit vigorous growth, with rapid stem elongation and leaf expansion. Gardeners may need to provide adequate spacing and structural support to accommodate the vigorous growth habit of these plants.
  • Autoflower Plants: Autoflower plants also undergo vegetative growth but for a shorter duration compared to fast flowering plants. The compact stature and rapid growth of autoflower varieties make them well-suited for small spaces or stealthy indoor grows.

Flowering Stage:

The flowering stage is a critical phase in the life cycle of plants, where the focus shifts from foliage production to the development of flowers, fruits, or seeds. Understanding the flowering characteristics of fast flowering vs autoflower plants is essential for optimizing yield and harvest timing.

  • Fast Flowering Plants: As the name suggests, fast flowering plants exhibit accelerated flower development, with shorter intervals between the onset of flowering and harvest. This rapid flowering trait makes them ideal for gardeners seeking quick turnaround times and multiple harvests per year.
  • Autoflower Plants: Autoflower plants enter the flowering stage automatically, typically after a predetermined period of vegetative growth. The transition to flowering is not influenced by changes in light cycles, allowing autoflower varieties to bloom under a wide range of lighting conditions.

Optimal Growing Conditions

Light Requirements:

Light is a crucial factor in plant growth and development, influencing various physiological processes, including photosynthesis, flowering, and fruit production. Understanding the light requirements of fast flowering vs autoflower plants can help gardeners provide optimal growing conditions for their crops.

  • Fast Flowering Plants: Fast flowering plants often thrive in environments with ample sunlight or artificial lighting. Providing sufficient light exposure during the vegetative and flowering stages is essential for promoting healthy growth and maximizing yields.
  • Autoflower Plants: Autoflower plants are renowned for their resilience and adaptability to different lighting conditions. While they can benefit from intense light during the flowering stage, autoflower varieties can also thrive in environments with less consistent or lower light intensity.

Nutrient Needs:

Proper nutrition is essential for supporting plant growth, vigor, and resilience against pests and diseases. Tailoring nutrient management practices to meet the specific needs of fast flowering vs autoflower plants is crucial for optimizing yield and quality.

  • Fast Flowering Plants: Fast flowering plants have relatively high nutrient demands, especially during periods of active growth and flowering. Providing a balanced fertilizer regimen rich in essential nutrients can promote vigorous growth and robust flower development.
  • Autoflower Plants: Autoflower plants may have more modest nutrient requirements compared to fast flowering varieties. However, maintaining optimal nutrient levels, particularly during the flowering stage, is essential for supporting healthy blooms and maximizing harvest potential.

Cultivation Tips for Success

1. Selecting the Right Varieties:

When choosing between fast flowering and autoflower plants, consider factors such as desired harvest times, available growing space, and environmental conditions. Select varieties that align with your gardening goals and preferences.

2. Providing Adequate Lighting:

Ensure that your plants receive sufficient light exposure during the vegetative and flowering stages. Consider using supplemental lighting, such as grow lights, to enhance growth and flower production, especially in indoor or low-light environments.

3. Monitoring Nutrient Levels:

Regularly monitor soil or hydroponic nutrient levels to ensure that your plants receive essential nutrients for healthy growth and development. Adjust fertilization practices based on plant growth stage and nutrient requirements.

4. Managing Environmental Variables:

Maintain optimal temperature, humidity, and airflow levels within your growing environment to promote plant health and minimize stress. Proper ventilation and climate control can help prevent mold, mildew, and other common issues.

5. Implementing Pest and Disease Management Strategies:

Stay vigilant against pests and diseases by regularly inspecting your plants and implementing appropriate management tactics, such as biological controls, cultural practices, or organic treatments.

Conclusion

In the debate between fast flowering vs autoflower plants, both options offer unique benefits and considerations for gardeners. Fast flowering plants excel in their rapid transition to the flowering stage, allowing for quicker harvests and multiple yields per year. On the other hand, autoflower plants offer convenience and flexibility, flowering automatically based on age rather than light cycles. By understanding the growth characteristics, optimal growing conditions, and cultivation tips for each type of plant, gardeners can make informed decisions to maximize their gardening success.

Remember, whether you choose fast flowering or autoflower plants, the key to a thriving garden lies in careful planning, attentive care, and a passion for cultivation.

FAQs

Q: Are fast flowering plants suitable for beginners?
A: Fast flowering plants can be suitable for beginners due to their robust growth and relatively short time to harvest. However, novice gardeners should still familiarize themselves with basic cultivation techniques and plant care principles.

Q: Do autoflower plants require special lighting schedules?
A: No, autoflower plants do not require specific lighting schedules to initiate flowering. Their ability to bloom automatically based on age makes them well-suited for growers seeking simplicity and convenience in their cultivation practices.

Q: Can I grow fast flowering and autoflower plants in the same garden?
A: Yes, you can grow fast flowering and autoflower plants together in the same garden, provided that you consider their specific needs and growth characteristics. Be mindful of spacing, lighting, and nutrient requirements to ensure optimal growth and yield for each variety.

Q: How long does it take for fast flowering plants to reach maturity?
A: The time to maturity for fast flowering plants can vary depending on the specific variety and growing conditions. However, many fast flowering cultivars are known for their quick turnaround times, with some reaching maturity in as little as 6-8 weeks after germination.

Q: What are the advantages of growing autoflower plants indoors?
A: Growing autoflower plants indoors offers several advantages, including greater control over environmental variables, increased privacy and security, and the ability to cultivate year-round without being limited by seasonal changes in daylight hours.

Knowing The Best Temperature and Humidity for Cannabis


Cultivating cannabis requires precise attention and careful handling. Environmental conditions are crucial for the well-being and productivity of the plants. Finding the best temperature and humidity for cannabis are particularly important factors that affect how the plants grow. In this detailed guide, we explore the ins and outs of maintaining the perfect temperature and humidity levels for successful cannabis growing, whether you’re doing it indoors or outdoors.

Ideal Temperature for Growing Cannabis

Temperature and Humidity for Cannabis

Establishing the ideal conditions for cannabis plants starts with controlling the temperature. Keeping the temperature within the right range encourages strong growth and boosts the plant’s capacity to yield potent flowers containing plenty of cannabinoids.

Understanding Temperature Requirements

Cannabis plants prefer temperatures similar to those in their original habitats, usually between 70 to 85 degrees Fahrenheit (21 to 29 degrees Celsius) during the day. However, it’s important for nighttime temperatures to slightly decrease, ideally ranging between 58 to 70 degrees Fahrenheit (14 to 21 degrees Celsius). This change in temperature mimics natural conditions and helps encourage healthy flowering.

Impact of Temperature Extremes

Extreme temperatures, whether too hot or too cold, can hinder the growth of cannabis and result in unfavorable outcomes like drooping leaves, lack of essential nutrients, or even complete crop failure. When temperatures soar above 90 degrees Fahrenheit (32 degrees Celsius), plant growth can be stunted, making them more vulnerable to pests and diseases. Conversely, extended exposure to cold temperatures below 50 degrees Fahrenheit (10 degrees Celsius) can slow down the plant’s metabolic processes, making it difficult for them to absorb necessary nutrients.

Humidity for Growing Cannabis

Temperature and Humidity for Cannabis

Humidity levels are crucial in growing cannabis, as they affect how plants absorb nutrients and release water vapor. Knowing and regulating humidity is important for preventing common problems like mold, mildew, and stress-related issues.

Determining Optimal Humidity Levels

Maintaining the right humidity levels is vital throughout the different stages of cannabis growth. In the vegetative phase, humidity should be kept between 40% to 70%. This range helps the plants grow lush leaves and develop strong roots. As the plants move into the flowering stage, humidity needs to be lowered to prevent mold and bud rot. Ideally, it should be between 40% to 50%.

Managing Humidity in Indoor Settings

Controlling humidity indoors while growing cannabis comes with its own set of challenges. Investing in equipment like dehumidifiers, air conditioners, and proper ventilation systems can help manage moisture levels and create the perfect growing conditions. Additionally, placing fans strategically can improve air flow, preventing pockets of stagnant humidity and stopping mold from spreading.

What Are the Optimum Humidity Levels for Indoor Cannabis Growing?

Achieving the ideal indoor humidity balance demands careful attention to detail and the use of successful methods to manage moisture levels effectively.

Strategies for Indoor Humidity Regulation

  • Invest in Dehumidification: Utilize high-quality dehumidifiers equipped with adjustable settings to extract excess moisture from the air.
  • Enhance Air Circulation: Position oscillating fans strategically to promote air movement and discourage humidity buildup in confined spaces.
  • Seal Grow Room Vents: Ensure airtight seals around vents and ducts to prevent outside humidity from infiltrating the growing area.
  • Monitor Humidity Levels: Employ hygrometers or humidity controllers to monitor and adjust humidity levels accurately, ensuring consistency throughout the cultivation cycle.
  • Implement Proper Drainage: Opt for well-draining soil or hydroponic systems to prevent waterlogged conditions that can elevate humidity and promote root rot.

Addressing Common Challenges

Even with careful planning, indoor cultivators might face changes in humidity because of environmental factors or equipment problems. Quickly recognizing problems and taking immediate steps, like changing ventilation or moving plants to dryer spots, can lessen potential harm and protect the health of the crop.

Conclusion

Maintaining the right temperature and humidity levels is crucial for successfully growing cannabis, whether it’s done indoors or outdoors. By knowing what cannabis plants need and using effective methods to control temperature and humidity, growers can increase their harvests, make their plants more potent, and keep them healthy overall. With careful attention to detail and taking action early on, growers can confidently and consistently produce high-quality cannabis.

FAQs

1. How does humidity affect cannabis growth?
Humidity influences transpiration rates, nutrient uptake, and overall plant health. High humidity levels can lead to mold and mildew, while low humidity may cause stress and hinder growth.

2. What are the risks of high humidity in cannabis cultivation?
High humidity increases the likelihood of mold, mildew, and bud rot, posing significant risks to plant health and overall yield.

3. Can I use household humidifiers for cannabis cultivation?
While household humidifiers can help increase humidity levels, they may not provide precise control required for optimal cannabis cultivation. Investing in specialized equipment designed for grow room environments is recommended.

4. How do I lower humidity in my grow room?
To lower humidity, ensure proper ventilation, invest in dehumidifiers, and avoid overwatering plants. Additionally, strategic placement of fans can improve air circulation and reduce humidity levels.

5. What is the ideal humidity for cannabis during the flowering stage?
During the flowering stage, humidity levels should ideally range between 40% to 50% to minimize the risk of mold and encourage healthy bud development.

6. How can I prevent mold in my indoor grow room?
To prevent mold, maintain proper ventilation, control humidity levels, and ensure adequate airflow around plants. Regular inspection and prompt removal of any signs of mold or mildew are essential.

How to Increase Terpene Production


Terpenes, those fragrant compounds found abundantly in nature’s plants, do more than just make things smell nice and taste good. They have many health benefits. Their chemistry is complex but interesting, and they can be used for therapy. Learning how to increase terpene production is really important for farmers who want to improve the quality and effectiveness of their crops. Knowing about how to increase terpenes in cannabis helps farmers make great plants that not only smell and taste good but also make people healthier when they use them.

What are Terpenes?

How to Increase Terpene Production

Terpenes, often referred to as the building blocks of plant essential oils, are organic compounds synthesized in the resin glands of plants. These compounds serve multiple functions in the plant kingdom, including attracting pollinators, repelling pests, and protecting the plant from environmental stressors. In addition to their biological roles, terpenes contribute significantly to the sensory experience associated with plants, influencing their aroma, flavor, and therapeutic properties.

Understanding Terpene Production

The process of making terpenes is complicated and affected by many things like genes, the environment, and how plants are taken care of. Genes decide a lot about what kind of terpenes a plant will have, but things like temperature, humidity, light, and nutrients also change how many terpenes a plant makes. Also, the way plants are treated, like cutting them or training them to grow in a certain way, can make them produce more terpenes by making them defend themselves.

Tips for Increasing Terpene Production

How to Increase Terpene Production

A. Genetic Selection

The first thing to do to make a lot of terpenes is to pick plants with the right terpenes. People who breed plants often mix different types to make new ones that smell and taste different, so growers can find ones that work best for them. Also, scientists have figured out ways to change how plants make terpenes using genetics, so now there are plants that make a lot more terpenes than before.

B. Environmental Factors

Making sure plants have the right conditions to grow is really important for making lots of terpenes. Keeping the temperature and humidity steady while the plants are growing helps them work well and make more terpenes. Also, it’s important to have good airflow and ventilation so the air doesn’t get too wet, which can cause mold and hurt how many terpenes the plants make.

C. Nutrient Management

Making sure plants get the right nutrients is really important for them to grow well and make lots of terpenes. Giving plants all the different kinds of nutrients they need, like big ones, small ones, and really tiny ones, helps them stay healthy and make more terpenes. Also, adding natural stuff like compost, worm poop, and seaweed juice to the soil makes it better for plants and the tiny creatures that help them grow, which helps plants take in more nutrients and make more terpenes.

D. Stress Induction Techniques

Sometimes, gently stressing the plant can make it protect itself and produce more terpenes. Ways like gently bending it, taking some leaves off, or changing the temperature a bit can make the plant defend itself more, which means more terpenes. But it’s important to watch the plant closely and not stress it too much, or it might not grow well and won’t make as many terpenes in the end.

E. Harvesting and Curing Methods

Getting the timing right when harvesting and drying plants is super important to keep the terpenes and make the smell and taste as good as possible. Picking plants when they have the most terpenes saves all those special compounds, getting the most out of the plant. Then, drying and curing the flowers slowly and gently lets the terpenes develop fully, making the final product smell and taste really good.

Advanced Techniques for Maximizing Terpene Levels

A. Temperature and Humidity Control

Maintaining precise control over temperature and humidity levels in the growing environment is crucial for optimizing terpene production. Investing in climate control systems such as heaters, air conditioners, and dehumidifiers ensures that environmental conditions remain stable, minimizing stress and maximizing terpene synthesis.

B. Light Spectrum Optimization

Tailoring the light spectrum to match the plant’s natural lighting conditions can enhance terpene production. LED grow lights with customizable spectrums allow growers to adjust light wavelengths to promote terpene synthesis during different growth stages. Additionally, incorporating supplemental UVB lighting can stimulate terpene production and increase resin production, leading to higher yields and better quality flowers.

C. CO2 Enrichment

Supplementing carbon dioxide levels in the growing environment can stimulate photosynthesis and enhance terpene production. CO2 enrichment systems, such as generators or tanks, provide plants with additional CO2, promoting faster growth and increased terpene synthesis. However, it’s essential to monitor CO2 levels closely and ensure proper ventilation to prevent buildup and maintain a healthy growing environment.

D. Terpene Boosting Supplements

Using organic supplements containing terpene precursors can stimulate terpene production and enhance aroma and flavor. These supplements provide the plant with essential nutrients and compounds involved in terpene synthesis, such as amino acids, vitamins, and minerals. Additionally, incorporating beneficial microbes such as mycorrhizae and beneficial bacteria can improve nutrient uptake and promote terpene production.

The Importance of Proper Harvesting and Curing

Harvesting and curing are really important for keeping terpenes in the plant and making the final product as good as it can be. Picking plants when they’re just right makes sure they have the most terpenes, bringing out all their smell and taste. Then, drying the flowers slowly and curing them in a special place lets the terpenes develop fully, making the final product smell and taste even better.

Conclusion

Making more terpenes needs looking at a lot of things like genes, the environment, how plants are taken care of, and smart farming methods. If growers know what affects terpenes and use the right methods, they can make their crops better in smell, strength, and how well they sell. This way, they can meet the needs of picky customers and pros in the industry.

FAQs

Q: What are terpenes?
A: Terpenes are organic compounds found in various plants, responsible for their distinct aroma and flavor profiles.

Q: How do terpenes contribute to the aroma and flavor of plants?
A: Terpenes interact with other compounds to create the diverse range of aromas and flavors associated with different plant varieties.

Q: Can terpene production be increased naturally?
A: Yes, terpene production can be enhanced through genetic selection, environmental optimization, and stress induction techniques.

Q: Is terpene production affected by the plant’s growth stage?
A: Yes, terpene production varies throughout the plant’s lifecycle, peaking during the flowering stage.

Q: Are there any risks associated with increasing terpene production?
A: While increasing terpene production can improve the quality of the crop, growers must be mindful of potential risks such as nutrient imbalances, environmental stressors, and pest infestations.

Different Ways In Growing Weed Cheaply


Growing weed can be an enjoyable and rewarding experience, but it doesn’t have to break the bank. Whether you’re a seasoned grower looking to cut costs or a beginner on a tight budget, there are plenty of ways in growing weed cheaply. In this guide, we’ll explore how to grow weed cheaply, including tips for indoor cultivation and methods for growing without seeds.

Understanding the Basics of Growing Weed

growing weed cheaply

Before diving into cost-saving strategies, it’s essential to understand the fundamental principles of growing weed. Cannabis plants require specific environmental conditions to thrive, including adequate light, water, nutrients, and ventilation. By creating an optimal growing environment, you can ensure healthy plant development and maximize yields.

How to Grow Weed Cheap

growing weed cheaply

1. Start with Quality Seeds or Clones

Investing in high-quality seeds or clones is crucial for successful and cost-effective weed cultivation. While it may be tempting to opt for cheaper options, inferior genetics can lead to poor yields and lower-quality buds. Consider purchasing seeds from reputable breeders or acquiring clones from trusted sources to set a strong foundation for your grow.

2. Choose the Right Growing Medium

When growing weed on a budget, choosing the appropriate growing medium can make a significant difference in cost savings. While soil is the most traditional medium, it can be more expensive than alternatives such as coco coir or perlite. Research different growing mediums to find one that fits your budget without sacrificing plant health.

3. DIY Grow Lights

Investing in grow lights can be one of the most significant expenses for indoor growers. However, there are cost-effective alternatives to commercial LED or HID lights. Consider building your own DIY grow lights using affordable components like compact fluorescent bulbs or LED strips. While these homemade solutions may not offer the same efficiency as professional fixtures, they can still provide sufficient light for cannabis cultivation at a fraction of the cost.

4. Make Your Own Nutrients

Commercial fertilizers and nutrients can be expensive, especially for larger grows. Fortunately, there are DIY nutrient recipes available that use common household ingredients to provide essential nutrients to your plants. From compost teas to organic amendments, homemade nutrient solutions can help reduce costs while promoting healthy growth.

5. Prune and Train Your Plants

Pruning and training your cannabis plants can help maximize yields and make the most of limited space. By removing excess foliage and shaping your plants through techniques like topping and low-stress training (LST), you can encourage more even canopy development and improve light penetration. This not only leads to higher yields but also reduces the need for additional grow space and resources.

Growing Weed Indoors Cheap

1. Optimize Your Grow Space

When growing weed indoors on a budget, optimizing your grow space is essential. Choose a location that receives ample natural light or supplement with artificial lighting as needed. Consider utilizing vertical space with shelves or trellises to maximize the number of plants you can grow in a small area. Additionally, insulating your grow space can help maintain consistent temperatures and reduce energy costs.

2. Use Affordable Equipment

While state-of-the-art grow equipment can be tempting, it’s not always necessary for successful indoor cultivation. Look for budget-friendly alternatives such as second-hand grow tents, fans, and ventilation systems. DIY solutions like homemade carbon filters can also help save money without sacrificing performance.

How to Grow Weed Without Seeds

1. Consider Cloning

Cloning is a cost-effective way to propagate cannabis plants without the need for seeds. By taking cuttings from a mature plant and encouraging them to root, you can create genetically identical clones that retain the desirable traits of the parent plant. This not only saves money on seed purchases but also ensures consistency in your crop.

2. Utilize Tissue Culture

Tissue culture is an advanced propagation technique that allows growers to clone plants on a large scale with minimal space and resources. While it requires more upfront investment in equipment and supplies, tissue culture can be a cost-effective option for commercial growers or those looking to propagate large quantities of plants without seeds.

Conclusion

Growing weed cheaply is achievable with the right knowledge and strategies. By implementing cost-saving techniques such as DIY grow lights, homemade nutrients, and space optimization, you can cultivate cannabis on a budget without sacrificing quality or yield. Whether you’re growing indoors or outdoors, there are plenty of ways to reduce expenses and enjoy a successful harvest.

FAQs

Q: Can I grow weed cheaply without investing in expensive equipment?
A: Yes, by utilizing DIY solutions and budget-friendly alternatives, you can minimize expenses while still achieving successful cultivation.

Q: Is it possible to grow weed indoors without spending a lot of money on grow lights?
A: Absolutely! DIY grow lights can be constructed using affordable components, providing adequate lighting for indoor cannabis cultivation.

Q: Are there any legal considerations when growing weed cheaply?
A: It’s essential to familiarize yourself with local laws and regulations regarding cannabis cultivation to ensure compliance and avoid potential legal issues.

Q: How can I save money on nutrients for my weed plants?
A: Homemade nutrient solutions using common household ingredients can be an excellent way to reduce costs while providing essential nutrients to your plants.

Q: What are some common mistakes to avoid when growing weed cheaply?
A: Overlooking environmental factors, neglecting proper plant care, and failing to invest in quality genetics are common pitfalls to avoid when growing weed on a budget.