500 NEW MARIJUANA SEEDS RELEASED

The Art of Making Hash at Home


Making hash at home is not just about crafting a product; it’s about indulging in an art form that amplifies the essence of cannabis. Whether you’re a novice or a seasoned enthusiast, mastering the art of hash making elevates your cannabis experience to new heights. In this comprehensive guide, we delve into the intricacies of creating hash at home, from understanding the fundamentals to exploring the most efficient methods for achieving the highest yield.

How to Make Hash Cannabis From Bud

Hash, derived from the resin glands of the cannabis plant, encapsulates the concentrated essence of cannabinoids and terpenes. To embark on your hash-making journey, you’ll need premium-quality cannabis buds rich in resin. Select strains renowned for their resin production, such as OG Kush or Afghan Kush, to ensure optimal results.

Deciphering the Extraction Process

1. Dry Sift Method: Begin by gently agitating your cannabis buds over a fine mesh screen to sift out the trichome-rich resin glands.

Making Hash at Home


2. Ice Water Hash: Submerge your cannabis buds in ice-cold water and agitate them to detach the resin glands, which then separate and settle through filtration.

Making Hash at Home

3. Rosin Press Technique: Apply heat and pressure to cannabis buds wrapped in parchment paper, resulting in the extraction of potent rosin.

Making Hash at Home

Refining Your Hash

After extracting the resin glands, it’s time to refine your hash for enhanced purity and potency.

  • Pressing: Utilize a hash press to compress the resin glands into cohesive blocks, enhancing their texture and potency.
  • Curing: Allow your freshly pressed hash to cure in a cool, dark environment to enhance its flavor profile and smoothness.


Elevating Your Experience

Indulge in the rich aromas and flavors of your homemade hash by incorporating it into various consumption methods, such as vaporization, smoking, or edibles. Experiment with different strains and extraction techniques to curate a personalized hash experience that tantalizes your senses.

Highest Yield Hash Method

Maximizing your hash yield requires precision, patience, and a deep understanding of extraction techniques tailored for optimal resin extraction.

  • Bubble Bag Technique: Utilize a series of progressively finer mesh bags to separate resin glands based on size, resulting in high-purity hash with exceptional yield.
  • Solvent Extraction: Employ solvents like ethanol or butane to dissolve resin glands, yielding potent extracts that can be further refined into premium-grade hash.


Enhancing Efficiency Through Technology

Investing in advanced extraction equipment, such as closed-loop extraction systems or rosin presses, empowers enthusiasts to streamline the hash-making process while maximizing yield and quality. Embrace technological innovations to elevate your hash-making endeavors to unprecedented heights.

Understanding Cannabis Side Lighting


Understanding how to use lighting is important. Having the right kind of light helps plants grow well and produce good buds. Light gives plants the energy they need to make food, which keeps them healthy and helps them grow. Some growers use lights that shine down from above, which works okay for many people. But there are newer methods that can give even better results. One of these is called under-canopy lighting, where lights are placed beneath the plant’s leaves. Another is cannabis side lighting, where lights come from the sides. These methods help make sure all parts of the plant get enough light. In this guide, we’ll talk about under-canopy and grow tent side lighting for growing cannabis. We’ll explain how to use them, why they’re good, and what to think about when using them.

Understanding Under-Canopy and Side Lighting Dynamics

Cannabis Side Lighting

Enhancing Light Distribution for Growth

Under-canopy lighting means putting lights under the leaves of the plants to make sure the light reaches everywhere evenly. This helps solve the problem of not enough light getting through, especially in thick or tall cannabis plants. When the lower parts of the plant get light, it helps the buds grow evenly. This reduces the number of small, low-quality buds and makes sure you get as many good buds as possible.

Optimizing Light Coverage with Side Lighting

Side lighting for grow tent involves putting lights next to the plants to add extra light to the top-down light they already get. This helps light reach all parts of the plant better, including the lower leaves. It also helps the plant absorb nutrients and make food more efficient. Side grow lights are especially useful for tall or wide cannabis plants because it make sure the whole plant gets enough light as it grows.

Advantages of Supplemental Lighting

Cannabis Side Lighting

Enhanced Yield Potential

The main reason why under-canopy and side lighting are so attractive is because they can greatly increase how much cannabis you can grow. By fixing any problems with not enough light and helping buds grow evenly, these methods let growers get bigger, denser buds. Even though setting up under-canopy and side lighting might cost a bit at first, the extra cannabis you can grow and the better quality buds make it worth it for growers who are serious about growing.

Better Light Distribution and Plant Development

Extra lighting options help spread light evenly across the plants, which makes them grow stronger and better. When all parts of the plant get enough light, they grow healthier and make bigger, more even buds. And when light is spread out well, it also helps plants stay strong against pests and diseases.

Improved Bud Uniformity and Quality

A big benefit of using under-canopy and side lighting is that it helps buds grow more evenly and look better. Instead of having some buds that are big and dense while others are small and airy, using these lighting methods helps all the buds on the plant grow more consistently. This means you end up with a product that looks better and is easier to sell because it’s all the same high quality. Having consistent buds also shows that you’re good at growing cannabis and that you pay attention to the little things.

Considerations and Best Practices for Implementing Additional Lighting

Selecting the Right Lighting Fixtures

Choosing the right lights for under-canopy or side lighting in your cannabis growing setup is really important. Many growers like using high-quality LED lights because they’re efficient, last a long time, and don’t produce much heat, which is good for indoor growing. Another option is CFL tubes, which are cheaper and use less energy while still giving enough light for side lighting.

Strategic Installation and Adjustment

Getting the installation and placement of extra lighting right is key to making sure it works well. For under-canopy lighting, it’s important to put the lights in the right spots under the leaves so they cover everything well but don’t get in the way of the plants growing. Likewise, with side lighting, you need to make sure the lights are at the right distance from the plants so they don’t get too much light and burn, but still get enough light to grow evenly.

Timing of Light Application

The timing of adding extra lighting is really important during the cannabis growth cycle. Even though you might want to add more light early, it’s better to wait until the plants are in the later vegetative or flowering stage. This helps avoid messing up the natural way the plants grow. When you add extra light at the right time, according to where the plant is in its growth cycle, you get the most benefits from it without causing any problems.

Conclusion

To sum up, using under-canopy and side lighting methods is really helpful for cannabis growers who want to get the most out of their plants in terms of how much they produce, the quality of the buds, and how healthy the plants are. These techniques help overcome the limitations of just using lights from above by spreading light around better and making sure buds grow evenly. Even though it might cost more at first and need some extra planning, the extra cannabis you can grow and the better quality buds make it worth it for growers who are serious about growing. By using smart lighting strategies, growers can make sure their cannabis plants reach their full potential and take their growing skills to the next level.

FAQs

Q: Are under-canopy lights necessary for every cannabis grow?
A: No, under-canopy lights are not essential for every cannabis grow. They are most beneficial for dense or tall plants where light penetration to lower parts of the canopy may be limited.

Q: Will side lighting always increase yields in cannabis cultivation?
A: Side lighting can improve yields, but it’s not guaranteed to do so in every scenario. Factors like plant size, density, and overall grow environment also influence the effectiveness of side lighting.

Q: Are there alternatives to using additional lighting for cannabis cultivation?
A: Yes, there are alternatives such as using reflective materials to maximize light exposure or employing training methods like Low-stress training (LST), Topping, and SOG/ScrOG techniques.

Q: Can adding more lights to a grow space lead to heat management issues?
A: Yes, adding more lights can increase temperatures in the grow space, potentially causing heat-related problems. Proper ventilation and heat dissipation methods are necessary to manage this issue.

Q: Is it advisable to use additional lighting during all stages of cannabis growth?
A: It’s best to use additional lighting during the late vegetative stage and flowering stage, or solely during the flowering stage to avoid distorting plant growth patterns influenced by light-seeking phytohormones.

Nutrient Burn Marijuana Symptoms


Nutrient burn marijuana is a common problem for cannabis growers. It can harm the plants and reduce how much they produce. This happens when plants get too much fertilizer, and the nutrients build up in their leaves. Too many nutrients can make the leaves change color and fall apart. They might turn yellow or brown at the ends, curl up, or droop. In serious cases, leaves can even die and fall off.

Causes of Nutrient Burn Plants

nutrient burn marijuana

Understanding what causes nutrient burn is important to prevent and manage it well. The main reason for this problem is giving plants too much nitrogen. Nitrogen is very important for plants to grow well. When cannabis plants are growing leaves during the vegetative stage, they need a lot of nitrogen. But if they get too much, it messes up the balance of nutrients in the plant. This makes it hard for the plant to take in other important nutrients, and that’s what causes nutrient burn. Also, using too much phosphorus and potassium, which are important for flowering and keeping the plant healthy, can lead to nutrient burn if not used carefully.

Identifying Nutrient Burn

nutrient burn marijuana

Accurately spotting the signs of nutrient burn is super important so you can fix the problem fast. Keep a close eye on your plants for any signs that something’s wrong, like the tips of the leaves turning yellow or brown, or the leaves curling or twisting. If you see these things happening, it means the nutrients in your plant are out of balance, and you need to do something about it right away to stop more damage.

Preventive Measures

Preventing nutrient burn requires a comprehensive approach that addresses various aspects of plant nutrition and management:

1. Proper Nutrient Dosage

Following the recommended amounts of nutrients is important to make sure you don’t give your plants too much and cause a nutrient burn. Each type of cannabis and each stage of its growth need different amounts of nutrients, so you have to be careful about how much fertilizer you give them. By following the instructions from the fertilizer maker and keeping an eye on how your plants are doing, you can adjust how much nutrients you give them to match exactly what they need.

2. pH Monitoring

Keeping the right pH levels in the soil or water where your cannabis plants grow is super important. This helps them soak up all the nutrients they need and makes sure they don’t get too much or too little of anything. Cannabis plants do best when the pH is a bit acidic, ideally between 6.0 and 7.0. Checking the pH regularly lets you know if it’s not right and helps you fix it by adjusting the pH or flushing out extra nutrients if necessary.

3. Adequate Watering Practices

Getting the watering just right is really important to keep your plants healthy and avoid nutrient burn. If you water them too much, it can make the soil too wet, and that stops the roots from taking in nutrients properly. But if you don’t water them enough, they might not get all the nutrients they need, and they could get stressed out. It’s best to stick to a regular watering schedule that matches how much water your plants need, so they stay hydrated but not drowned in water.

4. Vigilance for Symptoms

It’s really important to keep an eye on your plants regularly and look out for any signs that they might be getting too much or too little of certain nutrients. Check your cannabis plants often for any changes in how their leaves look, like if they change color or texture, or if they’re growing differently than usual. If you spot any signs of nutrient burn early on, you can do something about it quickly, like adjusting the nutrients you give them or fixing any problems to help them get back to normal and stop more damage.

5. Quality Nutrient Products

It’s also important to get good-quality nutrients for your plants to make sure they get all the nutrients they need and to avoid nutrient burn. Good fertilizers have the right mix of nutrients that cannabis plants need, so they can take them up easily and evenly. If you choose well-known brands and avoid cheap or low-quality products, you can protect your plants from nutrient problems and help them grow strong and healthy.

Addressing Nutrient Burn

When nutrient burn happens, it’s important to act quickly to help the plants recover. Flushing the growing medium with water that has the right pH can wash away extra nutrients and bring things back into balance for the plant. But if the nutrient burn is really bad, you might need to do more to help the plants. This could mean changing how you fertilize them, giving them extra nutrients, or letting them rest for a bit before you start their regular growing routine again.

Conclusion

Dealing with nutrient burn is a big deal for cannabis growers, but if you stay on top of things and follow the best ways to take care of your plants, you can keep it under control. Making sure you give the right amount of nutrients, checking the pH levels, watering the right way, watching out for signs of trouble, and using good-quality nutrients are all important steps to protect your plants from nutrient burn and help them grow well. The key is to stop problems before they get too bad and to look after your plants carefully to keep them healthy for a long time.

FAQs

Q: Can nutrient burn affect the overall health of cannabis plants?
A: Yes, nutrient burn can adversely impact the health of cannabis plants by inhibiting nutrient absorption, leading to stunted growth, reduced yield, and increased susceptibility to pests and diseases.

Q: How can I test the pH levels of my soil or hydroponic solution?
A: You can test pH levels using a pH testing kit or meter, readily available at gardening stores. Simply collect a small sample of soil or hydroponic solution, follow the kit’s instructions for testing, and adjust pH levels as needed to maintain optimal conditions.

Q: Is nutrient burn reversible, or will it permanently damage my plants?
A: In many cases, nutrient burn is reversible with prompt intervention. Flushing the growing medium with plain water to remove excess nutrients can help alleviate symptoms and facilitate plant recovery. However, severe cases of nutrient burn may cause irreversible damage, particularly if left untreated for an extended period.

Q: Can nutrient burn occur even if I follow recommended nutrient dosages?
A: Yes, nutrient burn can still occur if nutrient dosages are followed strictly. Factors such as variations in plant genetics, environmental conditions, and nutrient uptake rates can influence how plants respond to fertilization. It’s essential to monitor plants closely for signs of nutrient burn and adjust nutrient levels accordingly.

Q: Are there organic methods to prevent nutrient burn in cannabis plants?
A: Yes, several organic methods can help prevent nutrient burn in cannabis plants. These include using compost and organic fertilizers, maintaining healthy soil microbial activity, practicing crop rotation, and incorporating natural amendments like kelp meal and bone meal to enrich the soil with essential nutrients gradually.

Advanced Outdoor Growing Techniques


In the cannabis industry, growers are always looking for ways to grow more plants and get better results. New technologies such as advanced outdoor growing techniques have made it easier for them to do this. These tools help growers produce more cannabis without harming the environment or the quality of the product. So, they can grow more plants without causing damage. Here are some advanced outdoor growing techniques you can incorporate for you to know and explore how to grow marijuana plants outdoors.

Understanding the Yield Gap Dilemma

advanced outdoor growing techniques

The yield gap shows the difference between how much cannabis is currently grown and the most it could produce ideally. It’s important to make sure we’re growing cannabis in the best possible way to get the most out of each plant. Things like the quality and amount of light, how long the plants get light for, and the temperature and humidity all play a big role in how much cannabis we can grow. Making sure these factors are just right can help us reach the full potential of each cannabis plant.

Harnessing Scientific Insights for Cultivation

advanced outdoor growing techniques

For growers who want to grow cannabis better, scientific research is like a light showing the way. Scientists have done experiments to understand how things like the environment affect cannabis plants. This helps growers know what to do based on evidence.

Leveraging LED Lighting for Enhanced Efficiency

LED lighting technology is a huge improvement for indoor growing. It gives growers a lot of control over how much and what kind of light their plants get. By adjusting the lights to fit the needs of different types of cannabis, LED lights help plants grow better. They use less energy and make the plants grow stronger and healthier.

Optimizing Nutrient Utilization with PGPR

Plant-Growth Promoting Rhizobacteria (PGPR) are helpful microbes that work together with cannabis roots, making them stronger and healthier. They help the roots absorb more nutrients from the soil and make the soil better for growing. PGPR also protects the plants from getting sick and from things like bad weather. They do this by releasing substances that help the plants grow and fight off harmful things. This partnership between PGPR and cannabis plants leads to bigger plants, more cannabinoids, and plants that can handle tough conditions better.

Exploring Advanced Cultivation Techniques

Hydroponic Cultivation: Maximizing Efficiency

Hydroponic systems change how we grow plants by not using soil. Instead, they give plants nutrients directly through water. There are different types of hydroponic systems like Deep Water Culture (DWC), Nutrient Film Technique (NFT), and Aeroponics. These systems are popular for growing cannabis because they let growers control how much nutrients and water the plants get. They also help keep the environment just right for the plants to grow well.

Organic Cultivation: Sustainable and High-Quality

Organic farming focuses on keeping the soil healthy and supporting a variety of living things. Instead of using man-made chemicals, organic farmers use natural materials and living organisms to help their plants grow. They take care of the tiny living things in the soil, like helpful bacteria, fungi, and worms, to create a soil full of nutrients. This helps the plants grow strong, fight off diseases, and develop unique flavors.

Hybrid Approaches: Balancing Efficiency and Affordability

Hybrid cultivation blends the best parts of both hydroponic and organic farming. It combines new technology with old-fashioned knowledge to get the best results. Hybrid growers use soil beds filled with natural materials like compost, vermicompost, and helpful microorganisms. This mix helps them grow cannabis in a way that’s efficient, affordable, and good for the environment. It ensures they can produce a lot of cannabis without harming the planet.

Harnessing the Power of Rhizobacteria

Understanding the Role of Rhizobacteria

Rhizobacteria do many important jobs in the soil. They act as natural fertilizers, pest controllers, and helpers for plants. These helpful microbes form close relationships with plant roots, which helps them with things like getting nutrients, fighting off bad bugs, and handling tough situations like bad weather. This makes the plants stronger, helps them produce more, and lets them survive better even when things aren’t ideal.

Integrating Rhizobacteria into Cultivation Practices

Using rhizobacterial inoculants in farming is a smart way to take care of the soil. It means adding helpful microorganisms to the soil to make plants healthier and grow better. When growers add specific strains of these good microbes to the soil, it helps the roots grow better, gives the plants more food, and protects them from problems like bugs and bad weather. This helps farmers grow more crops, makes the crops better quality, and keeps the whole farming system stronger and more resilient. So, using rhizobacterial inoculants is a good idea for farmers who want their crops to thrive.

Conclusion

In summary, getting the most out of growing cannabis means looking at everything together. That includes using the best technology, being really careful about science, and taking care of nature. When growers use new ways to grow cannabis, and make sure the good tiny living things in the soil are there, and focus on making sure everything is good for the planet and the quality of the product, they can make cannabis plants as good as they can be while keeping nature and people safe. As the cannabis world keeps changing, it’s going to be important for scientists, growers, and people who make rules to work together. That way, they can keep making things better, teach people the best ways to grow, and make sure cannabis is grown responsibly for a long time.

FAQs

Q: What is the optimal temperature range for cannabis cultivation?
A: The ideal temperature range for growing cannabis is between 70°F to 85°F (21°C to 29°C). Avoid temperatures below 60°F (15°C) or above 90°F (32°C) as it can stress the plants.

Q: Can I grow cannabis indoors without soil?
A: Yes, you can grow cannabis indoors without soil using hydroponic systems. These systems deliver nutrients directly to the plant’s roots through a nutrient-rich solution, leading to faster growth and higher yields.

Q: How can I increase THC levels in my cannabis plants?
A: To increase THC levels, you can extend the flowering period of your cannabis plants. This can be achieved by reducing the vegetative period and providing optimal lighting and nutrient conditions during flowering.

Q: Is organic cannabis cultivation better for the environment?
A: Yes, organic cannabis cultivation is better for the environment as it promotes soil health, reduces chemical usage, and minimizes environmental impact. Organic practices also produce cannabis with a more natural flavor profile.

Q: Can rhizobacteria help prevent plant diseases?
A: Yes, rhizobacteria can help prevent plant diseases by enhancing the plant’s natural defenses and creating a healthier soil environment that is less hospitable to pathogens. Regular application of rhizobacterial solutions can improve overall plant resilience.

Fast Flowering vs Autoflower: Which is the Best Option for Your Garden?


When you want a lively and thriving garden, picking the right plants matters a lot. There are many choices, but two are especially popular: fast flowering vs autoflower plants. Each type has its good points and things to think about for gardeners. In this article, we’ll compare fast flowering with autoflower plants in detail. We’ll look at what makes each type different, how they grow, and when they’re best for different gardening situations. Whether you’re an experienced gardener or just starting, knowing the differences between these types of plants can help you make smart choices and have a successful garden.

Understanding Fast Flowering vs Autoflower Plants

Fast Flowering vs Autoflower

Fast Flowering Plants:

Fast flowering plants refer to varieties that enter the flowering stage quickly after the vegetative phase. These plants have been selectively bred to accelerate the flowering process, allowing gardeners to enjoy blooms in a shorter time frame. With their rapid transition from vegetative growth to flowering, fast flowering plants offer several benefits for gardeners seeking timely harvests and consistent yields.

Fast flowering plants typically exhibit robust growth during the vegetative stage, developing sturdy stems and lush foliage. Once they transition to flowering, they undergo a rapid transformation, producing colorful blooms and setting fruits earlier than traditional varieties in the case of fruit-bearing plants. This accelerated flowering process is advantageous for gardeners with limited growing seasons or who wish to stagger their harvests throughout the year.

Autoflower Plants:

Autoflower plants, also known as automatic or auto-flowering plants, represent another category of cultivars prized for their unique characteristics. Unlike traditional photoperiod plants, which rely on changes in light cycles to initiate flowering, autoflower plants automatically transition from vegetative growth to flowering based on age. This inherent trait, derived from Cannabis Ruderalis genetics, offers several advantages for gardeners, particularly those seeking convenience and flexibility in their cultivation endeavors.

One of the primary benefits of autoflower plants is their ability to flower independently of light cycles. This means that gardeners can maintain a consistent lighting schedule throughout the growing season without needing to adjust the duration or intensity of light exposure to induce flowering. Additionally, autoflower plants typically have shorter life cycles compared to photoperiod varieties, allowing for quicker harvests and multiple crops in a single season.

Comparing Growth Characteristics

Fast Flowering vs Autoflower

Vegetative Growth:

In the vegetative stage, both fast flowering and autoflower plants focus on establishing robust root systems and developing foliage to support future flower production. However, there are differences in the duration and intensity of vegetative growth between these two types of plants.

  • Fast Flowering Plants: During the vegetative stage, fast flowering plants exhibit vigorous growth, with rapid stem elongation and leaf expansion. Gardeners may need to provide adequate spacing and structural support to accommodate the vigorous growth habit of these plants.
  • Autoflower Plants: Autoflower plants also undergo vegetative growth but for a shorter duration compared to fast flowering plants. The compact stature and rapid growth of autoflower varieties make them well-suited for small spaces or stealthy indoor grows.

Flowering Stage:

The flowering stage is a critical phase in the life cycle of plants, where the focus shifts from foliage production to the development of flowers, fruits, or seeds. Understanding the flowering characteristics of fast flowering vs autoflower plants is essential for optimizing yield and harvest timing.

  • Fast Flowering Plants: As the name suggests, fast flowering plants exhibit accelerated flower development, with shorter intervals between the onset of flowering and harvest. This rapid flowering trait makes them ideal for gardeners seeking quick turnaround times and multiple harvests per year.
  • Autoflower Plants: Autoflower plants enter the flowering stage automatically, typically after a predetermined period of vegetative growth. The transition to flowering is not influenced by changes in light cycles, allowing autoflower varieties to bloom under a wide range of lighting conditions.

Optimal Growing Conditions

Light Requirements:

Light is a crucial factor in plant growth and development, influencing various physiological processes, including photosynthesis, flowering, and fruit production. Understanding the light requirements of fast flowering vs autoflower plants can help gardeners provide optimal growing conditions for their crops.

  • Fast Flowering Plants: Fast flowering plants often thrive in environments with ample sunlight or artificial lighting. Providing sufficient light exposure during the vegetative and flowering stages is essential for promoting healthy growth and maximizing yields.
  • Autoflower Plants: Autoflower plants are renowned for their resilience and adaptability to different lighting conditions. While they can benefit from intense light during the flowering stage, autoflower varieties can also thrive in environments with less consistent or lower light intensity.

Nutrient Needs:

Proper nutrition is essential for supporting plant growth, vigor, and resilience against pests and diseases. Tailoring nutrient management practices to meet the specific needs of fast flowering vs autoflower plants is crucial for optimizing yield and quality.

  • Fast Flowering Plants: Fast flowering plants have relatively high nutrient demands, especially during periods of active growth and flowering. Providing a balanced fertilizer regimen rich in essential nutrients can promote vigorous growth and robust flower development.
  • Autoflower Plants: Autoflower plants may have more modest nutrient requirements compared to fast flowering varieties. However, maintaining optimal nutrient levels, particularly during the flowering stage, is essential for supporting healthy blooms and maximizing harvest potential.

Cultivation Tips for Success

1. Selecting the Right Varieties:

When choosing between fast flowering and autoflower plants, consider factors such as desired harvest times, available growing space, and environmental conditions. Select varieties that align with your gardening goals and preferences.

2. Providing Adequate Lighting:

Ensure that your plants receive sufficient light exposure during the vegetative and flowering stages. Consider using supplemental lighting, such as grow lights, to enhance growth and flower production, especially in indoor or low-light environments.

3. Monitoring Nutrient Levels:

Regularly monitor soil or hydroponic nutrient levels to ensure that your plants receive essential nutrients for healthy growth and development. Adjust fertilization practices based on plant growth stage and nutrient requirements.

4. Managing Environmental Variables:

Maintain optimal temperature, humidity, and airflow levels within your growing environment to promote plant health and minimize stress. Proper ventilation and climate control can help prevent mold, mildew, and other common issues.

5. Implementing Pest and Disease Management Strategies:

Stay vigilant against pests and diseases by regularly inspecting your plants and implementing appropriate management tactics, such as biological controls, cultural practices, or organic treatments.

Conclusion

In the debate between fast flowering vs autoflower plants, both options offer unique benefits and considerations for gardeners. Fast flowering plants excel in their rapid transition to the flowering stage, allowing for quicker harvests and multiple yields per year. On the other hand, autoflower plants offer convenience and flexibility, flowering automatically based on age rather than light cycles. By understanding the growth characteristics, optimal growing conditions, and cultivation tips for each type of plant, gardeners can make informed decisions to maximize their gardening success.

Remember, whether you choose fast flowering or autoflower plants, the key to a thriving garden lies in careful planning, attentive care, and a passion for cultivation.

FAQs

Q: Are fast flowering plants suitable for beginners?
A: Fast flowering plants can be suitable for beginners due to their robust growth and relatively short time to harvest. However, novice gardeners should still familiarize themselves with basic cultivation techniques and plant care principles.

Q: Do autoflower plants require special lighting schedules?
A: No, autoflower plants do not require specific lighting schedules to initiate flowering. Their ability to bloom automatically based on age makes them well-suited for growers seeking simplicity and convenience in their cultivation practices.

Q: Can I grow fast flowering and autoflower plants in the same garden?
A: Yes, you can grow fast flowering and autoflower plants together in the same garden, provided that you consider their specific needs and growth characteristics. Be mindful of spacing, lighting, and nutrient requirements to ensure optimal growth and yield for each variety.

Q: How long does it take for fast flowering plants to reach maturity?
A: The time to maturity for fast flowering plants can vary depending on the specific variety and growing conditions. However, many fast flowering cultivars are known for their quick turnaround times, with some reaching maturity in as little as 6-8 weeks after germination.

Q: What are the advantages of growing autoflower plants indoors?
A: Growing autoflower plants indoors offers several advantages, including greater control over environmental variables, increased privacy and security, and the ability to cultivate year-round without being limited by seasonal changes in daylight hours.

Knowing The Best Temperature and Humidity for Cannabis


Cultivating cannabis requires precise attention and careful handling. Environmental conditions are crucial for the well-being and productivity of the plants. Finding the best temperature and humidity for cannabis are particularly important factors that affect how the plants grow. In this detailed guide, we explore the ins and outs of maintaining the perfect temperature and humidity levels for successful cannabis growing, whether you’re doing it indoors or outdoors.

Ideal Temperature for Growing Cannabis

Temperature and Humidity for Cannabis

Establishing the ideal conditions for cannabis plants starts with controlling the temperature. Keeping the temperature within the right range encourages strong growth and boosts the plant’s capacity to yield potent flowers containing plenty of cannabinoids.

Understanding Temperature Requirements

Cannabis plants prefer temperatures similar to those in their original habitats, usually between 70 to 85 degrees Fahrenheit (21 to 29 degrees Celsius) during the day. However, it’s important for nighttime temperatures to slightly decrease, ideally ranging between 58 to 70 degrees Fahrenheit (14 to 21 degrees Celsius). This change in temperature mimics natural conditions and helps encourage healthy flowering.

Impact of Temperature Extremes

Extreme temperatures, whether too hot or too cold, can hinder the growth of cannabis and result in unfavorable outcomes like drooping leaves, lack of essential nutrients, or even complete crop failure. When temperatures soar above 90 degrees Fahrenheit (32 degrees Celsius), plant growth can be stunted, making them more vulnerable to pests and diseases. Conversely, extended exposure to cold temperatures below 50 degrees Fahrenheit (10 degrees Celsius) can slow down the plant’s metabolic processes, making it difficult for them to absorb necessary nutrients.

Humidity for Growing Cannabis

Temperature and Humidity for Cannabis

Humidity levels are crucial in growing cannabis, as they affect how plants absorb nutrients and release water vapor. Knowing and regulating humidity is important for preventing common problems like mold, mildew, and stress-related issues.

Determining Optimal Humidity Levels

Maintaining the right humidity levels is vital throughout the different stages of cannabis growth. In the vegetative phase, humidity should be kept between 40% to 70%. This range helps the plants grow lush leaves and develop strong roots. As the plants move into the flowering stage, humidity needs to be lowered to prevent mold and bud rot. Ideally, it should be between 40% to 50%.

Managing Humidity in Indoor Settings

Controlling humidity indoors while growing cannabis comes with its own set of challenges. Investing in equipment like dehumidifiers, air conditioners, and proper ventilation systems can help manage moisture levels and create the perfect growing conditions. Additionally, placing fans strategically can improve air flow, preventing pockets of stagnant humidity and stopping mold from spreading.

What Are the Optimum Humidity Levels for Indoor Cannabis Growing?

Achieving the ideal indoor humidity balance demands careful attention to detail and the use of successful methods to manage moisture levels effectively.

Strategies for Indoor Humidity Regulation

  • Invest in Dehumidification: Utilize high-quality dehumidifiers equipped with adjustable settings to extract excess moisture from the air.
  • Enhance Air Circulation: Position oscillating fans strategically to promote air movement and discourage humidity buildup in confined spaces.
  • Seal Grow Room Vents: Ensure airtight seals around vents and ducts to prevent outside humidity from infiltrating the growing area.
  • Monitor Humidity Levels: Employ hygrometers or humidity controllers to monitor and adjust humidity levels accurately, ensuring consistency throughout the cultivation cycle.
  • Implement Proper Drainage: Opt for well-draining soil or hydroponic systems to prevent waterlogged conditions that can elevate humidity and promote root rot.

Addressing Common Challenges

Even with careful planning, indoor cultivators might face changes in humidity because of environmental factors or equipment problems. Quickly recognizing problems and taking immediate steps, like changing ventilation or moving plants to dryer spots, can lessen potential harm and protect the health of the crop.

Conclusion

Maintaining the right temperature and humidity levels is crucial for successfully growing cannabis, whether it’s done indoors or outdoors. By knowing what cannabis plants need and using effective methods to control temperature and humidity, growers can increase their harvests, make their plants more potent, and keep them healthy overall. With careful attention to detail and taking action early on, growers can confidently and consistently produce high-quality cannabis.

FAQs

1. How does humidity affect cannabis growth?
Humidity influences transpiration rates, nutrient uptake, and overall plant health. High humidity levels can lead to mold and mildew, while low humidity may cause stress and hinder growth.

2. What are the risks of high humidity in cannabis cultivation?
High humidity increases the likelihood of mold, mildew, and bud rot, posing significant risks to plant health and overall yield.

3. Can I use household humidifiers for cannabis cultivation?
While household humidifiers can help increase humidity levels, they may not provide precise control required for optimal cannabis cultivation. Investing in specialized equipment designed for grow room environments is recommended.

4. How do I lower humidity in my grow room?
To lower humidity, ensure proper ventilation, invest in dehumidifiers, and avoid overwatering plants. Additionally, strategic placement of fans can improve air circulation and reduce humidity levels.

5. What is the ideal humidity for cannabis during the flowering stage?
During the flowering stage, humidity levels should ideally range between 40% to 50% to minimize the risk of mold and encourage healthy bud development.

6. How can I prevent mold in my indoor grow room?
To prevent mold, maintain proper ventilation, control humidity levels, and ensure adequate airflow around plants. Regular inspection and prompt removal of any signs of mold or mildew are essential.

What Is Pheno Hunting?


Pheno Hunting plays a crucial role in the world of cannabis breeding. It’s like searching for the perfect ingredient to make the best dish. When breeders create a new strain by combining two parent plants, they end up with a bunch of seeds, each holding a potential new variation of the strain. These variations, called phenotypes, are like different flavors of ice cream – some might be sweet and creamy, while others are fruity or nutty. Pheno Hunting helps breeders find the most delicious flavor, or in this case, the best combination of traits, from all the seeds they’ve grown.

Understanding Pheno Hunting

pheno hunting

Let’s break down Pheno Hunting into simpler terms. Imagine you’re a gardener planting different types of flowers. Each flower grows in a unique way, with different colors, shapes, and scents. Similarly, when cannabis breeders grow different phenotypes, they’re essentially observing how each “flower” (or phenotype) turns out. They look at things like how tall the plants grow, what colors they are, how strong they smell, and how much “good stuff” they contain (like the cannabinoids THC and CBD). By carefully studying these characteristics, breeders can decide which phenotype is the best fit for what they’re trying to achieve.

How To Pheno Hunt

pheno hunting

Step 1: Growing the Seeds

To start Pheno Hunting, breeders plant the seeds from their newly created strain. Pheno hunters give each seed the right amount of water, light, and nutrients to help it grow into a healthy plant. It’s like giving a baby everything it needs to grow big and strong.

Step 2: Checking the Plants

Once the plants start growing, breeders keep a close eye on them. They look at things like how the leaves are shaped, what colors they turn, and how they smell when you give them a little squeeze. It’s kind of like being a detective, searching for clues to find the best phenotype.

Step 3: Choosing the Best

After observing all the different pheno weed, breeders pick the one that stands out the most. It’s like finding a shiny diamond in a pile of rocks. This chosen phenotype has all the qualities they’re looking for – it might be tall, with vibrant colors, a delightful aroma, and high levels of cannabinoids. Once they’ve found the perfect phenotype, they can clone it to make more plants with the exact same traits.

Conclusion

In conclusion, Pheno Hunting is like a treasure hunt for the perfect cannabis strain. By carefully selecting the best phenotype from a pool of options, breeders can create new and exciting varieties that meet the demands of consumers. With patience and dedication, Pheno Hunting unlocks the potential of cannabis genetics, paving the way for innovative and high-quality strains that delight enthusiasts around the world.

FAQs

Q: Why is pheno-hunting important in cannabis breeding?
A: Pheno-hunting helps breeders find the best traits in new cannabis strains, like taste, smell, and potency.

Q: How long does pheno-hunting usually take?
A: Pheno-hunting can take several months to a few years because breeders need to grow, observe, and test many different plants.

Q: Can anyone do pheno-hunting?
A: Yes, anyone with the right knowledge and equipment can try pheno-hunting, but it requires patience and attention to detail.

Q: What happens to the phenotypes that aren’t chosen?
A: The phenotypes that aren’t chosen might not be as strong or desirable, so they’re usually not used for further breeding.

Q: Is pheno-hunting only done for cannabis?
A: No, pheno-hunting is also done for other plants and animals to find the best traits for breeding purposes.

Heirloom Cannabis Strains: The Timeless Heritage


If you have been around in the industry for some time the term ‘heirloom’ goes beyond its everyday use and holds deep importance. Heirloom cannabis refers to strains that have lasted a long time, keeping their genetic makeup and purity intact for many years. In today’s fast-paced world of mixing different strains, these unique heirloom cannabis varieties often get overlooked. However, they provide a real look into the past for enthusiasts. The term ‘heirloom’ itself shows the worth of these strains, as they are considered valuable enough to be handed down from one generation to the next. These strains have been around for a while and have kept their special qualities, making them a fascinating part of cannabis cultivation.

Heirloom vs. Landrace Cannabis

heirloom cannabis

Heirloom and landrace cannabis strains are quite similar, with shared features like specific terpene profiles and stable genotypes. It’s important to grasp their subtle differences. Heirloom strains, originally landrace varieties, get transplanted to new cultivation areas. This creates an interesting mix of tradition and adaptation. In this section, we’ll explore both categories, highlighting what makes them unique and delving into the historical context that shaped their evolution. Understanding these distinctions is key for anyone interested in cannabis.

Tracing Heirloom Cannabis Origins – The Hippie Trail Legacy

heirloom cannabis

The roots of heirloom cannabis trace back to the cultural changes of the 1960s and 1970s, a time when the ‘hippie trail’ emerged. During this unconventional trade route, cannabis enthusiasts journeyed from the Middle East to the U.S., carrying seeds that later became heirloom strains. California’s climate, ideal for growing Sativa-heavy Kush strains, turned it into a hub for these unique varieties. Exploring this history helps us understand how heirloom cannabis made its way to the Western world. The 1960s and 1970s played a key role in shaping the path of these special strains from the East to the West.

Benefits of Heirloom Cannabis

Stable Genetics

For those who love growing cannabis, the stability of heirloom genetics is a big plus. Heirloom strains, unlike hybrid ones, are known for being easier to handle and more predictable. This makes them a perfect choice for people who like to grow their cannabis at home. In this part, we’ll go into detail about the genetic traits that make heirloom strains stable and what it means for growers looking for a dependable and satisfying experience. If you’re into DIY cannabis cultivation, understanding these genetic characteristics can make your growing journey more straightforward and enjoyable.

Balanced Cannabinoid Ratios

Heirloom cannabis stands out for its often well-balanced cannabinoid ratios, offering a more moderate cannabis experience compared to some modern strains with extremely high THC levels. This balance helps reduce the risk of undesirable side effects like anxiety and paranoia. In this part, we’ll explore the science behind cannabinoid ratios, clarifying why heirloom strains are a sensible choice for those looking for a controlled and measured cannabis encounter. If you prefer a more balanced and mellow experience, heirloom varieties might be the right fit for you.

Elevated CBD Levels

In the current focus on the therapeutic aspects of cannabis, heirloom strains stand out due to their higher CBD levels. This addition not only widens the range of potential benefits but also aligns with the growing interest in CBD’s medicinal properties. In this part of the article, we will delve into the significance of increased CBD levels in heirloom cannabis, highlighting the holistic and nuanced effects these strains can bring to users. If you’re looking for cannabis with potential therapeutic benefits, heirloom varieties with elevated CBD might be what you’re seeking.

Broad Terpene Blends

At the core of every heirloom strain is a unique terpene profile that shapes its distinct flavors and effects. Unlike mass-produced hybrids, heirloom cannabis offers a diverse range of terpene blends, enhancing the sensory experience beyond the ordinary. This part of the article enhances the understanding of terpenes, emphasizing their role in crafting the distinctive identity of each heirloom strain and the impact for enthusiasts seeking a more detailed cannabis encounter.

Nostalgia-Infused Experience

Apart from the health benefits, heirloom cannabis holds a special charm rooted in nostalgia. People who enjoyed the unique strains of the 60s, 70s, or 80s can reconnect with the past through heirloom varieties. In this section, we delve into the emotional journey that comes with experiencing heirloom cannabis, building a connection between different generations and nurturing a special appreciation for the historical importance of these strains.

Exploring Heirloom Cannabis Strains

Acapulco Gold

Acapulco Gold, a prized gem among heirloom strains, captures the hearts of enthusiasts with its mood-lifting effects and natural fragrance. Originating in Acapulco, Mexico, in 1964, this strain has attained legendary status, championed by famous figures and forever etched into mainstream culture. This part takes a deep dive into Acapulco Gold, unraveling its history, effects, and distinctive qualities that solidify its timeless status among heirloom strains.

Strawberry Cough

Known for its delightful berry scent and skunky flavor, Strawberry Cough emerges as a pure Sativa strain, bringing powerful cerebral effects. Rocket Seeds introduces this strain through carefully crafted pre-rolls, ensuring a smooth, slow-burning experience for enthusiasts seeking stress relief and an uplifting feeling. This section explores the characteristics of Strawberry Cough, revealing the subtle details that contribute to its popularity and distinct appeal.

Do-si-do

Do-si-do, an heirloom cannabis strain known for its vibrant appearance and sparkling trichomes, delivers a potent and bold high. Tailored for relaxation, Rocket Seeds presents this strain in high-quality pre-rolls, ensuring an unforgettable smoking experience. This section offers an immersive look into Do-si-do, shedding light on its visual allure, effects, and why it holds a special place as an essential heirloom strain.

Conclusion

The perfect blend of tradition and innovation reaches its peak. This complete guide honors the enduring charm of heirloom strains, shedding light on their historical importance, diverse advantages, and the significance of opting for brands dedicated to authenticity and eco-friendly practices. Enhance your cannabis journey with heirloom strains, where each exhale intertwines the past and present in a seamless experience.

FAQs

Q: What distinguishes heirloom cannabis from modern hybrid strains?
A: Heirloom cannabis maintains pure genetics and hasn’t been mixed with other strains, giving it a more traditional and stable nature compared to modern hybrids.

Q: How did heirloom cannabis strains make their way to the Western world?
A: During the 1960s and 1970s, cannabis enthusiasts transported seeds from the Middle East to the U.S. through the “hippie trail,” contributing to the spread of heirloom strains.

Q: Are heirloom cannabis strains easier to grow for beginners?
A: Yes, heirloom strains often have stabler genetics, making them more manageable and predictable, which is advantageous for those new to cannabis cultivation.

Q: What benefits does heirloom cannabis offer for users seeking a moderate experience?
A: Heirloom strains usually have more balanced cannabinoid ratios, reducing the risk of unwanted side effects like anxiety and paranoia often associated with higher THC levels.

Q: Why is authenticity important when choosing heirloom cannabis?
A: Authentic brands, like Rocket Seeds, uphold the legacy of heirloom cannabis, ensuring a genuine and high-quality experience for consumers who value the historical significance of these strains.

KNF Growing For Cannabis


KNF Growing For Cannabis or Korean Natural Farming is a unique approach to sustainable farming, with its roots in the idea of swapping out harsh chemicals for traditional Japanese and Korean farming methods. It all began in the 1960s, and KNF has been gaining attention for its focus on using indigenous microorganisms (IMO) to boost the health of both soil and plants. Over time, KNF cannabis growing has started to get some traction. Developed by Cho Han-kyu, KNF farming combines Japanese and Korean farming wisdom with fermentation techniques, offering a more environmentally friendly option for today’s farmers.

What Is KNF and Its Principles?

knf growing

KNF focuses on the “nutritive cycle theory,” which means using specific inputs at particular growth stages. This overall method includes nourishing seeds with nutrients, supporting indigenous microorganisms, unlocking genetic potential through occasional inputs, and steering clear of synthetic fertilizers and tilling. The approach flourishes by promoting the growth of beneficial bacteria and fungi, creating a healthy and organic environment. KNF recipes, made up of nine core solutions, provide a versatile toolkit for growers. This toolkit covers everything from indigenous microorganisms to fermented plant juice and water-soluble calcium phosphate.

The Global Impact of KNF

knf growing

In 1995, Cho Han-kyu’s journey between Korea and Japan, blending traditional farming with new techniques, gave rise to the Natural Farming Life School. The global impact of KNF became clear as Cho and his son hosted seminars worldwide, teaching over 18,000 individuals at the Janong Natural Farming Institute by 2014. KNF’s influence extends globally, from doubling crop productivity in Hawaii to overcoming challenging conditions in Mongolia’s Gobi Desert and addressing odor concerns in China during the Beijing Olympics. KNF isn’t just a farming technique; it’s a transformative approach that delivers real, positive results.

Importance of Indigenous Microorganisms (IMO) in KNF

A cornerstone of KNF lies in manipulating ecosystems using indigenous microorganisms (IMO). These aerobic microorganisms play diverse roles, including:

  • Yeast: Ventilates soil, eliminating foul odors and supporting microorganisms in their functions.
  • Purple bacteria: Thrives in oxygen-depleted water, performing photosynthesis and absorbing carbon through alternative means.
  • Lactic acid bacteria (LAB): Improves soil ventilation, promoting rapid growth and enhancing trichome and terpene production in cannabis.
  • Mycorrhizal fungi: Dramatically increases root system size, transforms soil nutrients, and enhances cannabis yield quality and quantity.
  • Purple bacteria: Thrives in oxygen-depleted water, performing photosynthesis and absorbing carbon through alternative means.


Pros and Cons of KNF

While KNF brings a groundbreaking approach to farming, it requires careful attention and effort. Getting the hang of it means grasping and creating the inputs, underlining the importance of dedication. Nevertheless, the advantages surpass the difficulties, offering lower expenses, less demanding practices, robust and healthier crops, and eco-friendly results. KNF’s thorough care and personal touch make it an excellent choice for those dedicated to sustainable, high-quality cultivation.

KNF Recipes – A Comprehensive Toolkit

KNF maintenance formulas consist of nine core solutions that, when used in various dilutions, aid plant and microorganism health. These include:

  • Microbes — Indigenous Microorganisms (IMO)
  • Police — Lactic Acid Bacteria (LAB)
  • Minerals — Diluted Seawater (SEA)
  • Food — Fermented Plant Juice (FPJ)
  • Cleanser — Brown Rice Vinegar (BRV)
  • Medicine — Oriental Herbal Nutrient (OHN)
  • Fuel — Fish Amino Acid (FAA)
  • Structure — Water-Soluble Calcium Phosphate (WCP)
  • Reproduction — Water-Soluble Calcium (WCA)


Integrating KNF Throughout the Cannabis Life Cycle

KNF’s adaptability shines through as it seamlessly fits into every stage of the cannabis life cycle. From using Indigenous Microorganisms (IMO) during seed soaking and clone dipping to applying Fish Amino Acid (FAA) for robust vegetative growth, KNF adjusts to the plant’s changing needs. Oriental Herb Nutrients (OHN) stand by as a constant supporter, enhancing resilience and growth. When it comes to the flowering stage, the significance of calcium and phosphorus takes center stage, with choices like Fermented Fruit Juice (FFJ) or Water-Soluble Calcium Phosphate (WCP) ensuring optimal bud development.

Application Techniques – Soil Enrichment and Foliar Feeding

KNF’s techniques go beyond just improving the soil; they also include foliar feeding, giving growers more flexibility. Soil enrichment involves gently spreading microbes and IMO, with LAB added in a diluted ratio to make phosphate soluble. The addition of Fermented Mixed Compost (FMC) becomes a valuable soil enhancer, boosting it with nutrients. Additionally, foliar feeding directly provides essential elements to plants, encouraging quick absorption and acting as a non-toxic pest repellent. When combined with the principles of no-till farming, these techniques create a complete approach that optimizes both soil health and nutrient cycling.

Conclusion

KNF stands out as a vital player, promoting sustainable and less wasteful cultivation methods. Beyond being just a farming technique, KNF broadens our outlook on nature and agriculture. Its role in cannabis cultivation becomes crucial, guiding us on a transformative journey toward living in harmony with our surroundings. The essence of KNF goes beyond its principles; it becomes a guiding philosophy for those who seek a thoughtful and environmentally responsible approach to marijuana cultivation.

FAQs

Q: How does KNF differ from traditional farming methods?
A: KNF differs by emphasizing natural inputs like indigenous microorganisms, avoiding synthetic chemicals, and promoting a holistic approach.

Q: Can KNF be used in small-scale gardens?
A: Yes, KNF is adaptable to various scales, making it suitable for small gardens with its DIY and cost-effective methods.

Q: Why is foliar feeding important in KNF?
A: Foliar feeding directly provides essential nutrients to plants, supporting rapid absorption and acting as a non-toxic pest repellent.

Q: How does KNF contribute to environmental sustainability?
A: KNF promotes eco-friendly practices by avoiding synthetic fertilizers, emphasizing local ingredients, and encouraging mindful cultivation.

Q: Is KNF only for cannabis cultivation?
A: No, while KNF gained popularity in cannabis, it is versatile and applicable to various crops, offering benefits like lower costs and healthier yields.

Chicken Manure for Cannabis And Other Potential Organic Fertilizers


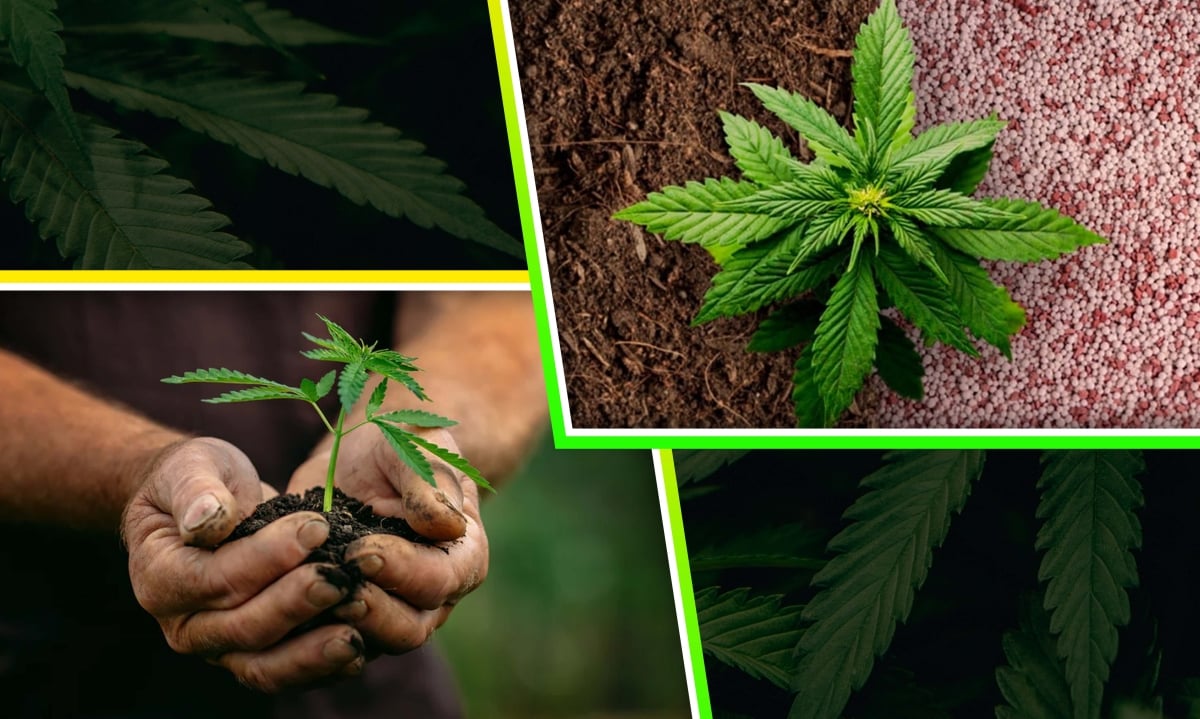
When growing cannabis, making your plants reach their full potential needs a smart approach. Using chicken manure for cannabis and other organic fertilizers in your gardening is a key step for great results. Unlike what some might think, manure isn’t just a pile of waste; it’s a strong fertilizer for pot plants for making the soil rich, boosting organic matter, and ensuring your cannabis plants grow well. In this guide, we’ll talk about the many benefits of using manure as a weed soil and fertilizer. We’ll look at how it helps the soil, especially as a fertilizer for cannabis plants, keeping your plants healthy, and making your harvest better.

Why Choose Manure for Cannabis Growth?

chicken manure for cannabis

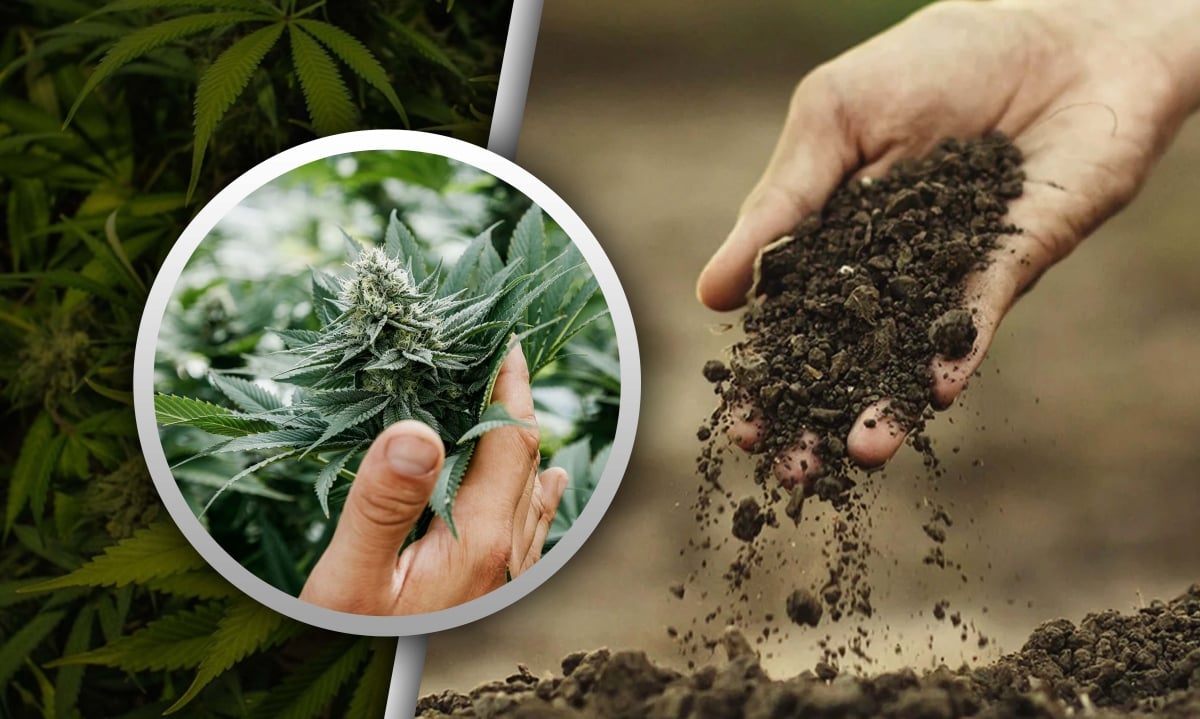
Enhancing Soil Structure

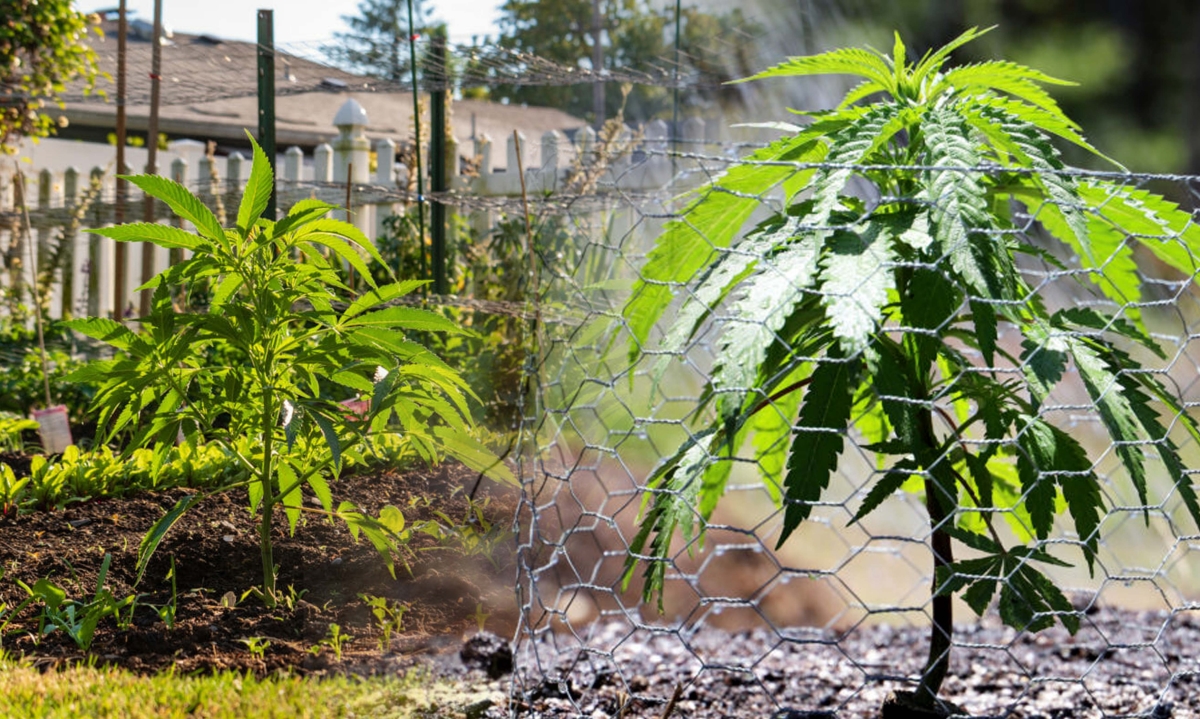
As outdoor growers move into the spring months, taking care of the soil becomes really important. Manure is a big helper during this time because it makes the soil much better as a fertilizer for weed plants. Whether you’re someone who likes to dig a lot or prefers not to dig much, putting a layer of manure on top is like giving your soil a strong shield. This shield stops the soil from washing away and gives a solid base for your cannabis plants. Knowing how to make the soil better is key for growers who want their gardens to stay healthy and strong.

Increase Water-Holding Capacity

When aiming for the best cannabis growth, managing water becomes super important. Manure plays a big role in this because it helps the soil hold onto water better. This is a real game-changer. By making the soil stronger, manure keeps water in, so you don’t have to water your plants as much. This not only saves water but also keeps your plants from getting too stressed out because of not having enough water. For cannabis growers, figuring out the right amount of water is crucial, and manure is like a trusty friend helping to keep that balance just right.

Nurturing Beneficial Microbes

The teamwork between manure and helpful tiny microbes is a cool part of making cannabis grow well. The special carbon in manure gives these tiny friends a lot of energy. For growers, knowing how these tiny helpers make plants healthy is super important. Manure sets up an environment where bacteria and fungi can do their jobs, like fixing nitrogen and breaking down organic stuff. This helps a lot in keeping the plants strong. Exploring how all this teamwork happens gives growers the know-how to build healthy cannabis gardens.

Providing Key Nutrients

Manure is like a gold mine of nutrients for cannabis plants. It’s full of important stuff like nitrogen, phosphorus, potassium, and tiny nutrients that plants need. This gives your cannabis a constant and natural supply of the things it really craves for growing well. Unlike fake fertilizers, manure slowly lets out organic nitrogen over time. This helps your plants grow steadily and strong. To get top-notch yields, growers need to look into what nutrients cannabis plants want, and how manure does a great job fulfilling those needs.

Determining the Right Amount of Manure

chicken manure for cannabis

Knowing Your Garden’s Needs

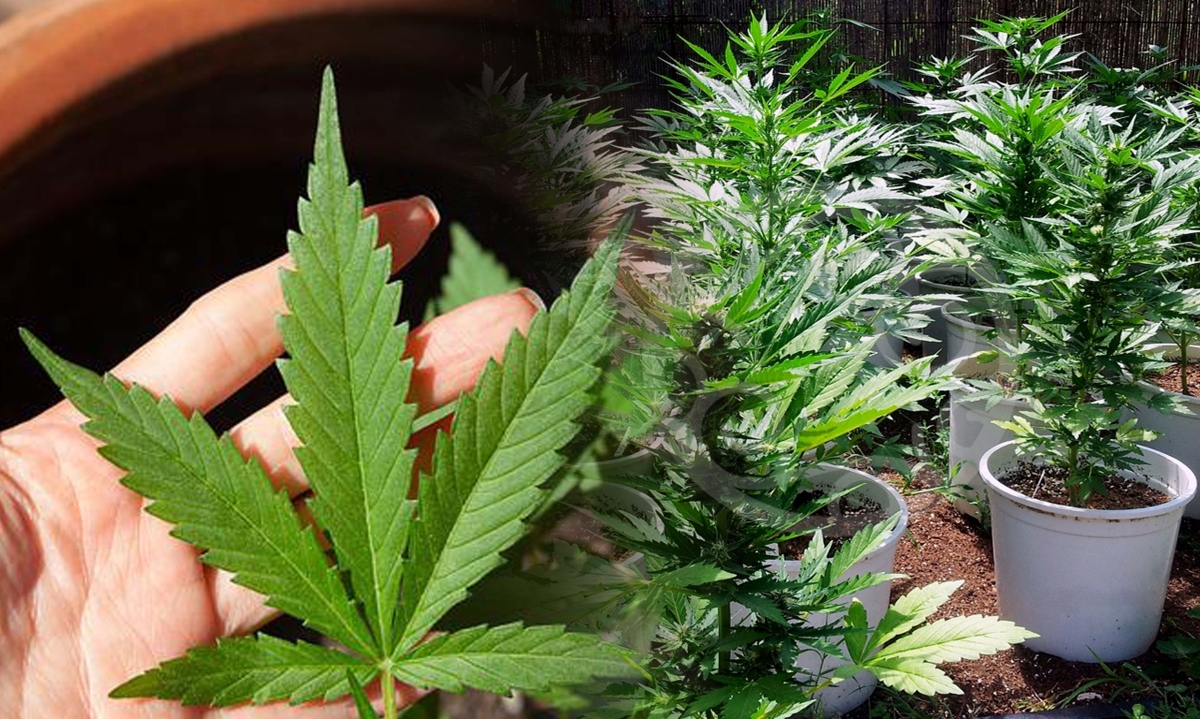
How much manure you use in your garden really matters for success. In the beginning, using around 317.5 – 458.6 ounces per 9m² isn’t just a random amount. It’s a smart way to set up your beds, get the tiny life in the soil going, and give your cannabis plants the necessary nutrients. As you get more into gardening, you can take it easy. Charles Dowding, a pro at no-dig gardening, suggests putting on 0.8 – 1.2 inches of manure or compost each winter. This helps slowly mix in nutrients, making your soil better over time.

Precision in Manure Application

Knowing how to use manure is like becoming a master at a craft. Being accurate is super important. In the winter, putting the right amount on your beds gets the soil ready for the upcoming growing season. But, it’s not a one-size-fits-all thing. You have to adjust how much manure you use based on how dense or loose your soil is. If your soil is dense, use a bit less; if it’s loose, use a bit more. Being precise with manure is a crucial skill. It makes sure your cannabis plants get just the right nutrients without the risk of using too much or too little.

Choosing the Best Manure for Cannabis

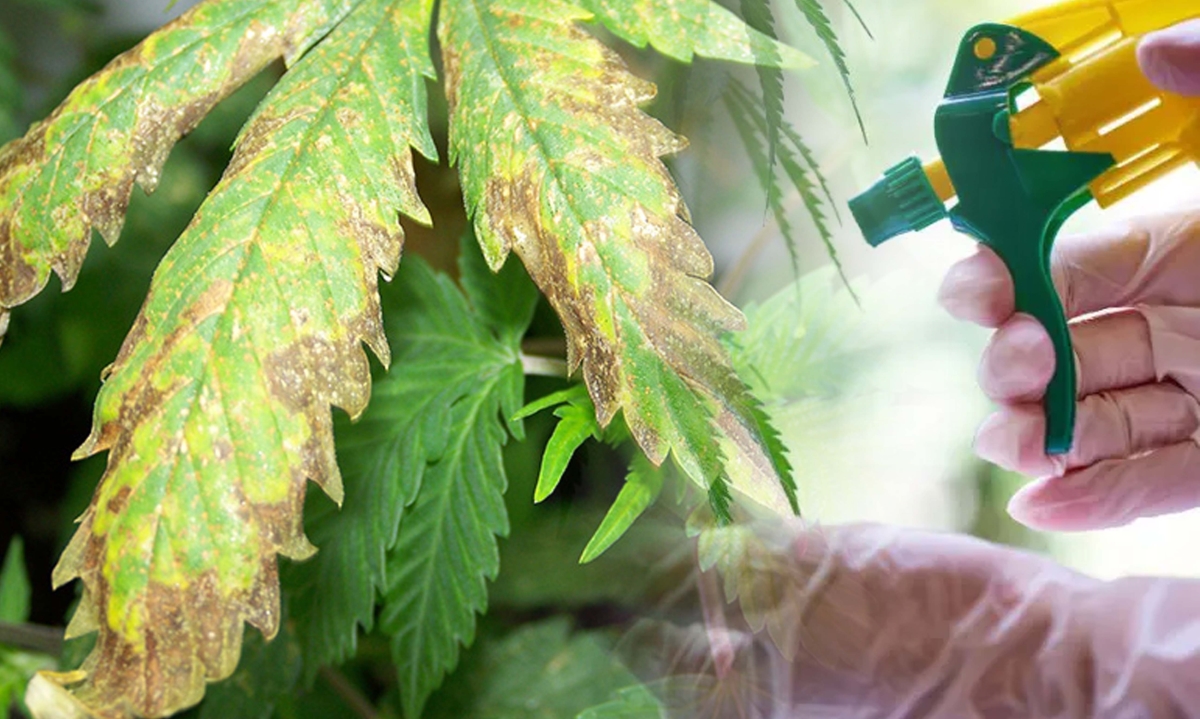
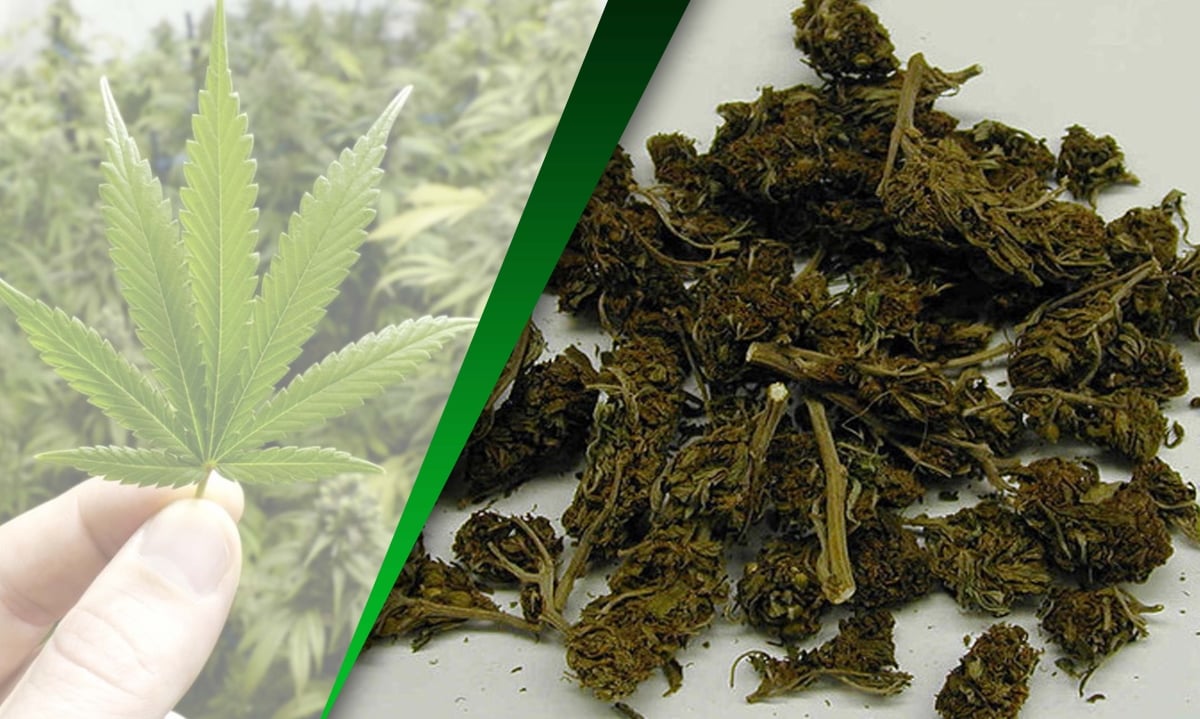
While we can’t deny how great manure is, choosing the right type needs some careful thinking. There’s this thing called aminopyralid (AP), a herbicide that can mess up manure and hurt your crops big time. It’s super important to get manure from trusted sources and check it well to avoid this problem. Knowing the differences between manure types, what they’re made of, and the risks they might bring is a must. This helps you pick the best option for your cannabis garden without any issues.

Chicken Manure: A Nitrogen-Rich Powerhouse

Looking closely at chicken manure, we find a nutrient-packed powerhouse with huge benefits for cannabis growers. It’s loaded with high amounts of nitrogen, phosphorus, and potassium, making it a great choice for those wanting a complete nutrient package. What’s special about chicken manure is you can turn it into a nutrient-rich mix by fermenting it in water. This gives you a quick way to get those nutrients into your plants, and you can use it in different ways. It adds a lot of flexibility to how you give your cannabis the nutrients it needs.

Rabbit Manure: Swift Nutrient Boost

Choosing rabbit manure is a smart move for growers who want nutrients to hit their plants fast. Not only does it work quickly, but rabbit manure is also packed with a bunch of nutrients like nitrogen, phosphorus, potassium, calcium, magnesium, and zinc. What makes it stand out is you can put it straight on top of the soil without having to do the hot composting thing. This makes it super easy and efficient for cannabis plants that need to gulp down nutrients in a hurry.

Horse and Cow Manure: Texture and Fertility Enhancement

Looking into the benefits of horse and cow manure, we find a valuable tool for making the soil better and richer. With about 1–2% nitrogen and 1–3% potassium, this type of manure gives your cannabis a mix of nutrients that works well. But, be careful. You need to do hot composting to get rid of possible germs. When you think about using horse and cow manure, think about how much it costs to bring it to you and the chance of finding AP. Taking these things into account is crucial.

Pig Manure: A Historical Option with Modern Considerations

Once a top pick for growing cannabis, pig manure needs extra care now because of higher risks of contamination. As pig farming methods changed, there’s more E. coli, salmonella, and parasites in pig manure. Growers have to be careful. You can either turn fresh pig manure into compost to get rid of germs, or get well-rotted pig manure from trusted suppliers to make sure it’s safe and works well for growing cannabis.

Sheep Manure: The Nitrogen-Rich Alternative

Choosing sheep manure is a smart move since it beats cow and horse manure with more nitrogen, phosphorus, and potassium. It’s not just about the nutrients – sheep manure is also full of stuff that brings good bacteria to the soil, making it better. But, there’s a rule to follow. Before using fresh sheep manure, make sure to compost it. This gets rid of any seeds and makes sure your cannabis plants won’t get burned.

Alpaca Manure: Quick Fertilization Without Composting

Alpaca manure is a top pick for growers wanting a quick fertilizer that doesn’t need composting. It’s packed with a lot of nitrogen and potassium, making it a fast and efficient way to give your cannabis plants the nutrients they need. While it doesn’t have as much organic stuff as some other choices, you can use it directly on top of the soil. This makes it a great option for certain cultivation needs because it’s easy and convenient to apply.

Tips for Optimal Cannabis Growth with Manure

  • Precise Application: When putting on manure, make sure to spread it evenly and precisely across the area you want to cover. This helps cannabis plants take in nutrients evenly and lowers the chance of uneven growth.
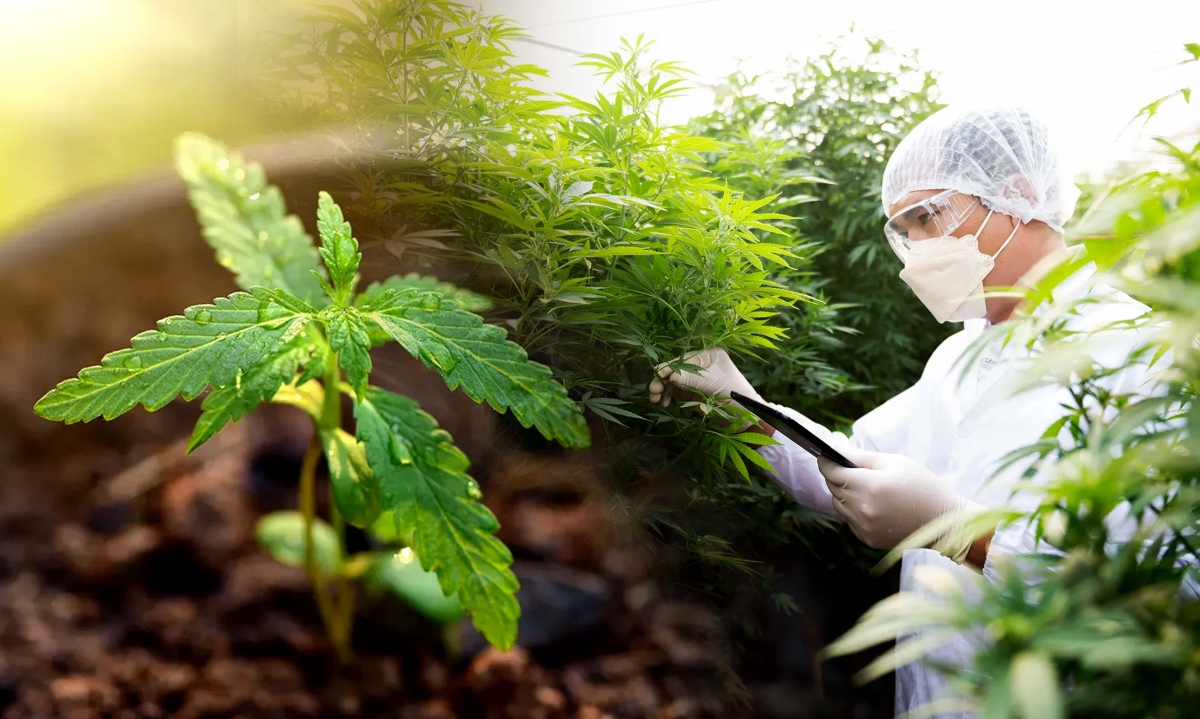
  • Thorough Checking: Before getting manure, thoroughly check out the suppliers. Read reviews online, ask experienced growers for advice, and talk directly to suppliers to make sure the manure is good quality and doesn’t have any bad stuff in it.
  • Regular Checking: Keep an eye on how manure affects your cannabis plants during the growing season. Watch for signs that your plants either don’t have enough nutrients or have too much. Change how you put on manure if needed and adjust the amount based on what your garden specifically needs.
  • Adaptation to Soil: Adjust how you use manure based on how your soil changes. Do soil tests now and then to see how many nutrients are in there, check the pH, and see how healthy your soil is overall. Change the type and amount of manure you use to keep a good balance between the soil and your cannabis plants.


Conclusion

To sum it up, adding manure as a weed fertilizer outdoors in your cultivation routine isn’t just a random choice; it’s a smart move that brings big benefits to your soil, plants, and overall harvest success. Following the tips in this guide gives your gardening efforts a boost with the amazing power of manure. Learn about the different types of manure, get good at putting it on just right, and see your cannabis plants grow better than ever. Happy growing!

FAQs

1. Can I use any type of manure for my cannabis plants?
Not all manures are created equal. Opt for well-rotted manure from trusted sources, avoiding herbicide-contaminated varieties. Popular choices include chicken, rabbit, and alpaca manure.

2. Is manure safe for my cannabis plants, or could it harm them?
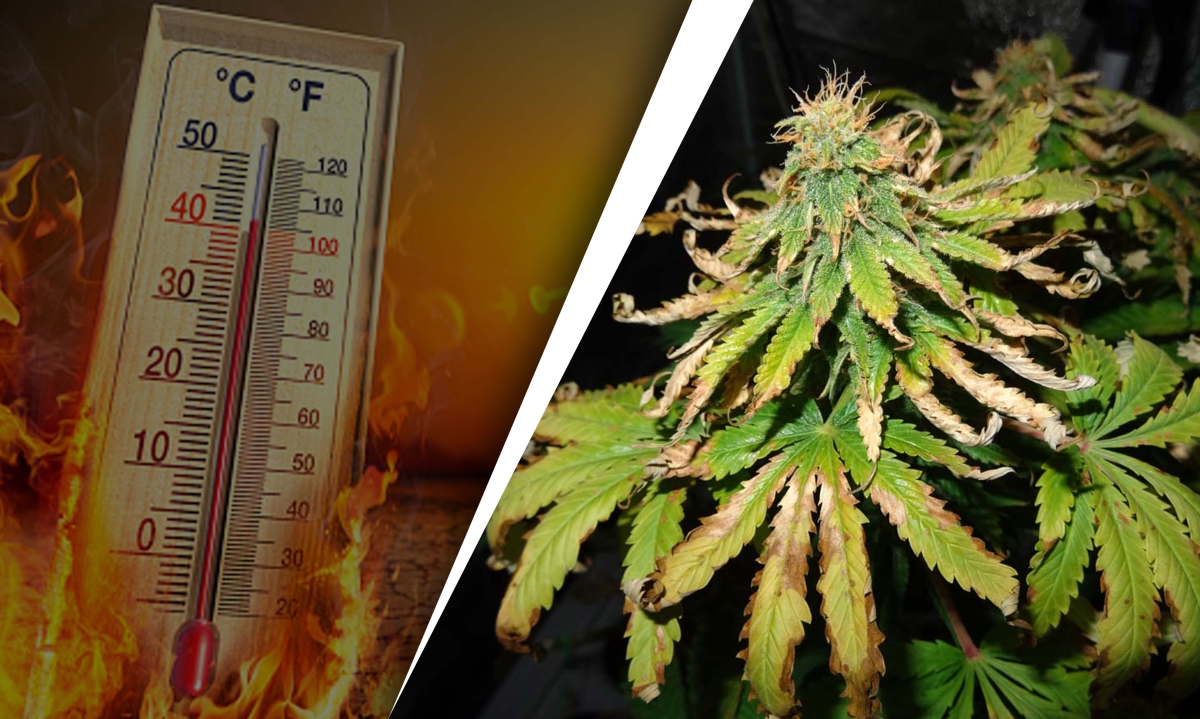
While manure offers valuable nutrients, ensure it’s well-rotted to avoid burning your plants. Fresh or “hot” manure may contain high levels of nitrogen and salts, potentially harming cannabis, especially young seedlings.

3. How often should I apply manure to my cannabis garden?
For initial bed establishment, apply 317.5 – 458.6 oz per 9m². As your garden matures, consider a more laid-back approach, following no-dig gardening practices, and applying a 0.8 – 1.2 inches layer each winter.

4. Can I mix different types of manure for my cannabis plants?
Yes, you can mix manures for a balanced nutrient profile. However, ensure all manures are well-rotted. Avoid mixing fresh manure, as it may have different nutrient levels and pose a risk to your cannabis plants.

5. Is there a risk of pests or diseases with manure in cannabis cultivation?

Proper composting and sourcing from reputable suppliers minimize the risk. Pig manure, in particular, may carry pathogens, so ensure it’s well-rotted or sourced from trusted providers to mitigate potential issues.

Cannabis Heat Stress: Learning Effective Solutions for Optimal Cultivation


Cannabis cultivation is a constantly changing field. Heat stress on weed plants is a big problem that requires a deep understanding. As a cultivator, it’s important to know how the environment and the plant’s biology interact. This guide will teach you about heat stress weed plants and how to handle it. By following this guide, you can make sure your cannabis plants grow strong and potent and avoid cannabis heat stress.

Weed plant heat stress is more than just an inconvenience. It’s a physical reaction to high temperatures that can greatly affect your harvest. Picture your healthy cannabis plants suddenly dealing with intense heat, with their leaves curling up to protect themselves. This visual sign is just the beginning, showing that there’s a bigger problem happening within the plant’s cells. To truly understand heat stress cannabis, we need to uncover the complex biological processes that happen when temperatures rise.

Biological Mechanisms Behind Heat Stressed Weed Plant

heat stress on weed plants

Cannabis plants have a way of dealing with excessive heat. When it gets too hot, the plant cuts back on water to prevent evaporation. But this survival tactic also means the plant can’t absorb important nutrients, which makes it less healthy overall.

Under the heat, important parts of the plant like chloroplasts can get damaged. To protect itself, the plant makes special proteins that act like armor against the high temperatures. But these proteins take away energy that could be used for growth and development, which affects the plant’s overall health.

Understanding how plants respond to heat stress helps us appreciate their ability to survive. It also shows how important it is to find ways to handle heat stress on weed plants when cultivating.

Key Causes of Cannabis Heat Stress

heat stress on weed plants

Excessive Light Intensity

Plants need sunlight for growth. But too much sunlight can hurt cannabis plants. It makes the plant’s temperature go up quickly and messes up important processes. This hurts the cells and stops the plant from growing well. Growers have to pick between LEDs and HIDs for light. LEDs are a good choice because they don’t make as much heat and their brightness can be changed. This helps stop heat problems and keeps the plant’s growth healthy.

Insufficient Ventilation

Imagine being in a room without any air moving around – a stifling experience that is similar to what cannabis plants go through when they don’t have proper ventilation. When the air is still and hot, it becomes difficult for the plant to cool down, so it has to use energy to try to regulate its temperature. This not only makes the plant uncomfortable, but it also creates a good environment for molds and pests to grow. Fans, air conditioners, and heat extractors are really important in this situation. They act like lifelines, making sure that fresh air keeps flowing and that heat doesn’t get trapped.

Incorrect Room or Outdoor Environment Design

Cannabis plants need a specific environment to grow well. If the environment isn’t right, they can get stressed. If they are grown outdoors or in a place without good ventilation, they may show signs of heat stress on weed plants earlier than expected. It’s really important to provide shade, good ventilation, and take care of the soil. In dry climates, the balance between the soil and how much water the plant has is very important. When the humidity is lower than 50-60%, the plant releases more water, which causes wilting. This is a sign that something is wrong and needs attention. Making sure the soil and plant have the right moisture levels is crucial to avoid the negative effects of heat stress.

Recognizing Symptoms of Cannabis Heat Stress

Leaf Symptoms

Heat stress on plants first shows on the leaves. These signs are important for growers to take action and protect the plants.

  • Leaf Curling: One sign of heat stress is when the edges of the leaves curl upwards. This helps the plant by reducing the amount of leaf exposed to intense light and heat.
  • Leaf Cupping: Another sign, called leaf cupping, is often seen in indoor cannabis setups. It happens closer to the light source and the leaves may look like they are cupped. Interestingly, the leaves lower down on the stem might not be affected, showing that heat stress is localized. This symptom can get worse during a heatwave and affect both upper and lower leaves
  • Discoloration: As heat stress continues, the green leaves can change color. They might start turning yellow at the tips and edges. This discoloration can progress to browning, and eventually the whole leaf may dry out and become crispy. The color change shows how severe and how long the plants have been exposed to heat.


Flowering Buds Symptoms

Heat stress not only affects plant growth but also affects the flowering stage, which can affect the quality of the final harvest.

  • THC and Terpene Production: Excessive heat can reduce the production of THC and terpenes, which are responsible for the potency and aroma of cannabis. This can make cannabis less effective and enjoyable for consumers.
  • Foxtailing: In strains that are prone to foxtailing, extreme heat can cause buds to grow elongated with unusual protrusions. These buds have spaced-out calyxes, which gives them a different appearance compared to normal, tightly packed buds.
  • Pistil Coloration: Heat stress can cause premature color changes in the pistils of cannabis buds. Normally, these pistils turn amber or brown towards the end of the flowering cycle. However, under heat stress, they might change color too early when the buds are still not fully developed. This premature coloration can affect the overall maturity and potency of the buds.


Solutions for Optimal Cultivation

Cultivating cannabis with resilience against heat stress requires a multifaceted approach, addressing both environmental factors and plant management strategies.

  1. First, you need to manage the light. It’s important to have the right amount of light for cannabis to grow well. Choosing LED lights instead of HIDs can help control the intensity of the light and reduce the risk of too much heat. You should also adjust the light schedule to match cooler times of the day to avoid heat-related problems.
  2.  Next, you need to have good ventilation. This is essential for preventing heat stress. Using fans, air conditioners, and heat extractors in the right places will keep the air flowing and prevent heat from building up. It will also help avoid mold and pests.
  3. Creating the right environment is also important. You want to mimic the natural habitat of cannabis. Providing shade, especially during the hottest parts of the day, will protect the plants from excessive heat. You should also pay attention to the soil and make sure it has the right amount of moisture. Adjusting your irrigation practices based on the plants’ needs and the current environmental conditions is crucial.
  4. Lastly, it’s important to monitor and make adjustments as needed. Keep a close eye on things like temperature, humidity, and soil moisture. This way, you can catch any problems early on and make changes to keep the plants healthy.

Conclusion

To master cannabis heat stress, you need to understand how the environment and plant physiology interact. As a cultivator, you must constantly adapt and be aware of what cannabis plants need. By understanding heat stress, recognizing its symptoms, and using targeted solutions, you can overcome its challenges. This guide will help you become a master of cannabis cultivation, leading to successful yields and strong, high-quality buds.

FAQs

1. Can humidity levels contribute to cannabis heat stress?
Yes, high humidity levels can exacerbate heat stress in cannabis. While the article emphasizes the impact of low humidity in arid climates, excessively high humidity can impede the plant’s ability to cool itself through transpiration, leading to increased susceptibility to heat stress.

2. Is there a specific temperature range ideal for cannabis cultivation to prevent heat stress?
Yes, maintaining a temperature range between 70-85°F (21-29°C) is generally optimal for cannabis cultivation. Beyond this range, plants may experience heat stress. However, individual strains may have slightly different temperature preferences, and growers should consider these hints.

3. How does the choice of potting soil influence cannabis heat stress?
The type of potting soil is crucial. In extremely dry climates, fast-draining soils can contribute to rapid moisture loss, intensifying heat stress. Conversely, in humid conditions, poorly draining soils can lead to waterlogged roots, compounding stress. Balancing soil moisture is essential for preventing heat stress.

4. Can excessive pruning worsen heat stress in cannabis plants?
Yes, extensive pruning, especially during periods of high temperature, can contribute to heat stress. Pruning reduces the overall leaf surface area, limiting the plant’s ability to cool itself through transpiration. Careful pruning practices and timing are essential to avoid undue stress during heat-sensitive phases.

5. Do certain strains exhibit higher resistance to heat stress?
Yes, some cannabis strains demonstrate better resilience to heat stress. Strains originating from warm climates may inherently possess adaptations that make them more tolerant to elevated temperatures. When selecting strains, considering their natural habitat and climate preferences can contribute to a more robust and heat-resistant cultivation experience.

What Is Uncured Weed?


Cannabis consumption is the final step in the cannabis journey. It involves curing uncured weed to make it ready for smoking. The curing process is important because it ensures a better smoking experience. When cannabis is harsh and tastes like fresh grass, it can be disappointing. But proper curing can transform it into a more enjoyable state. This guide will walk you through the essential process of cannabis curing. It explains why smoking uncured weed can lead to a less-than-ideal experience. Explore the curing process and discover how it enhances your smoking journey.

What is Cannabis Curing?

Curing, a process that follows the initial harvest and drying stages, is akin to the aging of fine wine. It involves preserving the delicate balance of cannabinoids and terpenes. They contribute to the plant’s psychoactive and aromatic properties. Enthusiasts and commercial growers alike need to understand the nuances of this process. It influences the potency, longevity, aroma, and flavors of cannabis. It also affects the very essence of the cannabis experience.

Cured Weed vs. Uncured Weed

Uncured Weed

Potency Boost

The potency of cannabis is a pivotal factor for enthusiasts seeking a robust psychoactive experience. Curing plays a transformative role in enhancing this potency. Beyond the conversion of THCA into THC, it safeguards the entire spectrum of cannabinoids and terpenes, ensuring a refined and enduring impact. A deeper dive into the complex biochemistry reveals that curing allows for the synthesis of additional THC, contributing to a more potent final product.

Extended Lifespan

The longevity of cannabis is a critical consideration for both enthusiasts and commercial cultivators. Curing emerges as the guardian against the perils of mold, bacteria, and mildew, providing a shield that extends the lifespan of the cannabis buds. Commercial growers, in particular, benefit from the ability to store their product for extended periods without compromising its quality. The art of curing, therefore, becomes not only a matter of taste but also a strategic element in the cannabis industry’s supply chain.

Aroma Alchemy

The aromatic profile of cannabis is as diverse as the strains themselves. Curing, however, acts as an alchemist, transforming the pungent and overpowering scent of fresh weed into a mellow, inviting aroma. This olfactory evolution is not just about pleasant smoke; it is a testament to the preservation of terpenes, the organic compounds responsible for the distinctive scents of different strains. Uncured or improperly cured weed, on the other hand, may emit undesirable odors such as ammonia or the unmistakable scent of chlorophyll, signaling incomplete curing.

Flavor Symphony

Beyond the aroma, the flavor profile of cannabis is a symphony of terpenes and cannabinoids. Properly cured weed delivers a full-bodied experience, with each strain boasting its unique set of flavors. Terpenes, the aromatic compounds responsible for these flavors, are delicate and easily lost in the absence of proper curing. This emphasis on flavor is not just a matter of preference but a marker of quality and craftsmanship in the cannabis world.

The Smoke Test

Discerning cannabis quality can be as simple as inspecting the ash color after combustion. Properly cured cannabis yields a light gray or white ash, indicative of a clean burn and a smoother smoke. This visual cue is not just an aesthetic preference; it is a tangible sign of a well-cured product. On the contrary, improperly cured cannabis produces a darker ash, resulting in a harsh and abrasive smoking experience. Understanding this visual indicator is key for enthusiasts seeking a premium smoking experience.

Can You Smoke Uncured Weed

While the allure of immediate consumption may tempt some to smoke uncured weed, it’s essential to recognize the potential downsides. Smoking uncured cannabis often translates to a lackluster experience, devoid of the nuanced flavors and aromas that define quality cannabis. The absence of proper curing may lead to side effects, such as throat irritation and persistent coughing, attributed to the presence of chlorophyll and other undesired compounds.

Exception: Live Resin

An intriguing exception to the rule of avoiding uncured cannabis is found in the world of live resin. Live resin, a concentrated form of cannabis, is crafted by freezing fresh buds immediately after harvest, bypassing the traditional drying and curing process. This unconventional method preserves the live plant’s essence, capturing a unique spectrum of cannabinoids and terpenes. While live resin is an exception, it underscores the importance of alternatives for those seeking unconventional and potent experiences.

The Art and Science of Curing Weed

Uncured Weed

Curing cannabis is not a mere waiting game; it’s a delicate balance of art and science that demands attention to detail. The standard curing period of two to four weeks can be extended to six months by enthusiasts aiming for the pinnacle of taste, flavor, and potency.

Optimal Curing Conditions

Achieving optimal curing conditions is a multifaceted endeavor that encompasses several crucial factors:

  • Proper Storage: The choice of airtight containers made of glass, ceramic, metal, or wood is paramount. Avoiding plastic containers is advised to prevent undesirable smells that can compromise the final product.
  • Humidity Control: Maintaining a humidity level between 55%-65% is crucial for optimal moisture content. Striking this balance prevents microbial growth and ensures the ideal conditions for THC biosynthesis. Too high humidity can lead to mold, while too low humidity can compromise the potency of the buds.
  • Temperature: The curing environment should ideally be kept between 60-70 degrees Fahrenheit (15-21 degrees Celsius). This temperature range fosters the slow and controlled release of moisture, contributing to the development of rich flavors and aromas.
  • Jar Filling: Jars should be filled two-thirds full to manage moisture effectively. This allows the buds to breathe while preventing excess moisture buildup that can lead to mold or mildew.
  • Light Avoidance: To protect cannabinoids and terpenes from UV light damage, it is imperative to store curing jars in a dark room. This preventive measure ensures the preservation of the plant’s chemical integrity throughout the curing process.


The Crucial “Burping” Process

Central to the curing process is the “burping” of jars, a practice that involves opening them once or twice a day. This seemingly simple act plays a pivotal role in enhancing the overall quality of the cured cannabis. During the first week of curing, “burping” serves multiple functions:

  • Moisture and Gas Escape: Opening the jars allows built-up moisture and gases to escape into the air, preventing excess humidity within the container.
  • Aroma and Flavor Enhancement: Tossing the buds during “burping” not only evenly distributes moisture but also enhances the overall aromas and flavors of the cannabis.
  • Mold and Mildew Prevention: Regularly opening the jars helps detect and address any mold or mildew growth on the buds. This proactive approach ensures that the final product is free from contaminants.


The Bottom Line

In conclusion, the meticulous process of curing cannabis is not just a final step; it’s the crowning touch for an unparalleled smoking experience. Cured weed preserves the flavor, aroma, and chemical compounds of the buds, ensuring the final product is potent and of high quality. While it may seem tempting to bypass the curing process and indulge in uncured marijuana, the myriad benefits of patience and proper curing underscore its undeniable significance. To truly master the art of cannabis consumption, one must embrace the journey of cultivation, curing, and ultimately savoring the fruits of this extraordinary plant.

FAQs

1. Can I cure cannabis in plastic containers?
No, it’s recommended to avoid plastic containers during curing. Opt for glass, ceramic, metal, or wood to prevent the development of a plastic-like smell in your cannabis.

2. Why is “burping” jars crucial in the curing process?
“Burping” jars releases moisture, enhances aromas, and addresses mold or mildew issues. This process is vital, especially in the first week of curing, ensuring optimal conditions for your cannabis.

3. Can I cure cannabis for longer than six months?
Yes, some enthusiasts choose to cure cannabis for an extended six-month period to further enhance taste, flavors, and potency, resulting in a more refined end product.

4. What are the dangers of smoking uncured marijuana?
While not necessarily dangerous, smoking uncured marijuana can lead to an unpleasant experience, including throat irritation and coughing. The lack of desirable flavors and aromas contributes to this discomfort.

5. Does the curing process impact the color of the ash when smoking cannabis?
Yes, it does. Properly cured cannabis produces a light gray or white ash, indicative of a smoother and gentler smoke. Improperly cured cannabis, on the other hand, leaves a darker ash, resulting in a harsh and abrasive smoking experience.