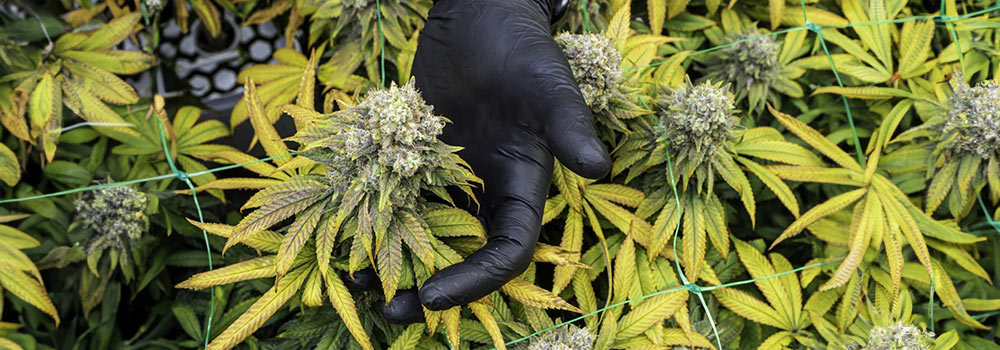
Cultivating marijuana requires careful consideration of the cannabis growing medium and style. Choosing between hydroponics, traditional soil, or innovative options like coco coir can significantly impact your yields and bud quality. This comprehensive guide will delve into each cannabis growing medium, weighing its pros and cons, ease of use, effects on crop yields, and bud quality. Whether you’re a novice or an experienced grower, this tutorial aims to assist you in determining the right approach for your cannabis cultivation journey.
Cultivating Cannabis in Soil
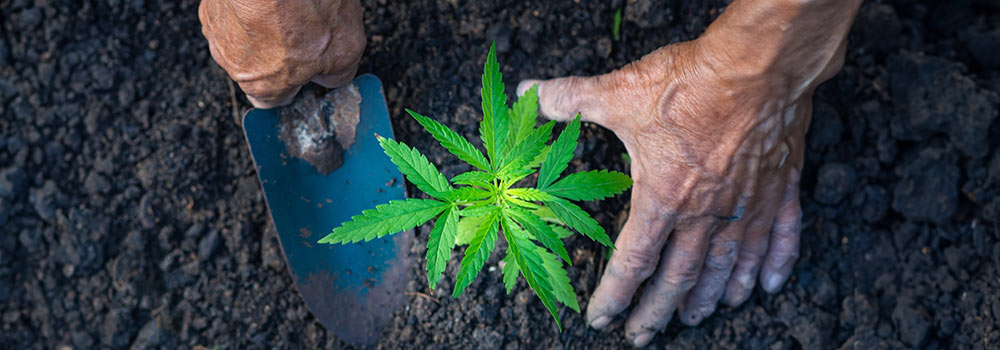
Growing cannabis in soil remains a preferred choice, especially for beginners and those with prior gardening experience. If you’re familiar with nurturing other plants in soil or maintaining a garden, this option may align seamlessly with your existing knowledge.
Pros and Cons of Soil-Based Cultivation
Pros
Growing cannabis in soil offers several advantages, particularly for individuals well-versed in traditional gardening practices. It closely resembles cultivating other plants like tomatoes or corn. Hand-watering container-grown cannabis simplifies the management process, making it accessible to many.
For outdoor growers, using soil is often the preferred method due to cannabis’ natural habitat. Soil-based outdoor cultivation is intuitive and requires less intervention. Employing composted “super soil” eliminates the need for synthetic nutrients or pH management, appealing to those seeking a low-maintenance approach.
There are two options for soil-based cannabis cultivation: Option 1 involves purchasing soil from a store and adding nutrients incrementally during growth. Option 2 entails amending and composting your specialized “super soil” for cannabis or purchasing pre-composted super soil. Although the latter option demands more initial effort, it’s a simpler route for experienced composters. It’s worth noting that some growers believe that using organic composted super soil with a rich microbial ecosystem enhances cannabis’ taste and aroma by increasing terpene and terpenoid production.
However, a downside of soil-based cannabis cultivation is its susceptibility to pests, necessitating increased maintenance compared to hydroponic systems.
Cons
Soil-based cultivation does have a few drawbacks. The presence of pests in soil poses a constant threat to plants, making soil growers more vulnerable to infestations than their hydroponic counterparts.
Another disadvantage is the longer growth cycle associated with soil-based cultivation compared to soilless or hydroponic setups. Hydroponic plants, in general, exhibit faster growth rates, particularly during the vegetative stage.
Setting Up Soil-Based Cultivation
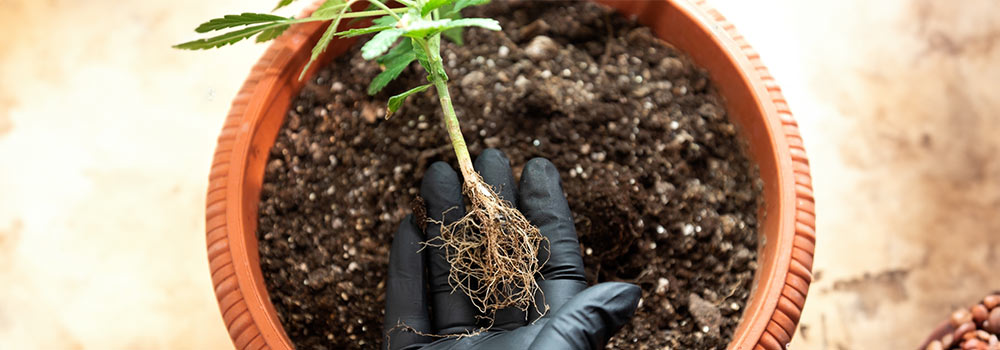
When it comes to setup costs, soil-based cannabis cultivation is relatively budget-friendly. All you need is soil and a suitable container. Common choices for soil mixes include Fox Farms Happy Frog and Fox Farms Ocean Forest, although any high-quality organic soil mix suffices. However, avoid using soil with “extended-release” nutrients, and consider adding 30% perlite and 10% vermiculite if the soil appears dense. Composting your super soil is a proven method for optimal results. As for containers, classic plastic pots, terra cotta pots, smart pots (fabric pots), and air pots are all viable options. Standard gardening pots work well when adding perlite to ensure proper aeration for cannabis roots. Smart and air pots offer additional air circulation to the root zones, reducing the need for extra aeration or perlite in soil mixes.
Regarding setup effort, soil-based cultivation demands relatively little effort compared to other methods, especially when compared to soilless mixes. Your primary focus will likely revolve around selecting the appropriate soil and nutrients.
Maintaining Your Soil-Based System
The ongoing cost of soil-based cultivation remains relatively low after the initial setup, with the primary expense being soil replacement for each growth cycle. Reusing soil can yield satisfactory results if you know how to amend it with the necessary nutrients. Additionally, occasional container replacements may be necessary if they become damaged.
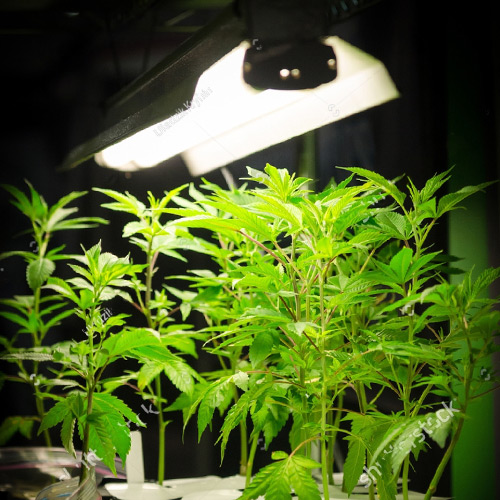
Maintenance efforts for soil-based cultivation primarily involve regular watering, nutrient supplementation as required, and pH management for non-composted super soil setups. While soil-based grows tend to have slower growth rates than hydroponic methods, optimal growth can still be achieved with proper environmental conditions and ample lighting. The vegetative stage typically spans 1-3 months, while the flowering/budding stage can extend for 2-3 months, depending on the strain. It’s worth noting that debates among growers persist regarding whether cannabis grown in organic supersoil truly possesses the best taste and aroma profile, especially when compared to hydroponic alternatives.
For first-time growers, it’s crucial to remain closely involved with your garden, especially if you need more experience. While experienced growers can afford more time away from their gardens, checking on your plants at least once daily is advisable. While constant watering isn’t necessary, larger containers hold more water, giving growers more flexibility. Nonetheless, unforeseen events like pest infestations or accidental damage can occur at any time, underscoring the importance of vigilance.
Choosing the right growing medium, such as soil-based cultivation, is critical for cannabis growers. By weighing the pros and cons, understanding setup requirements, and committing to diligent maintenance, you can ensure a successful cannabis cultivation experience. Whether you opt for soil or explore other mediums, your journey toward high-quality buds begins with a solid foundation of knowledge and dedication.
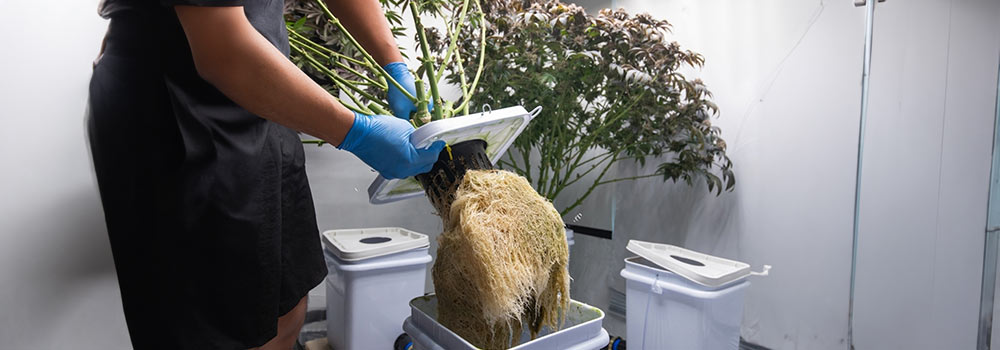
Cultivating Cannabis in Hydroponics
When we mention hydroponics, the image of plants thriving in a water-based environment often comes to mind. However, it’s essential to clarify that any medium other than soil, including soilless options like coco coir, falls under the hydroponics umbrella. To distinguish solution culture hydroponics from other forms, solution culture encompasses hydroponic methods without the use of an inert medium.
In this section, our focus centers on hydroponic systems where cannabis roots grow directly in water or require the maintenance of a water reservoir. In the subsequent section, we will delve into soilless mediums, a technically hydroponic approach that often feels more akin to traditional soil cultivation.
Pros and Cons of Hydroponic Cannabis Cultivation
Pros
Hydroponic cultivation presents numerous advantages over alternative methods. First and foremost, it facilitates faster vegetative growth, resulting in earlier harvests. Additionally, experienced hydroponic growers can typically achieve larger yields than their soil-growing counterparts, provided they have access to the same conditions, such as light and nutrients.
Another notable advantage is hydroponic systems’ reduced susceptibility to pest infestations. Many pests rely on soil during their life cycle, which is absent in hydroponic setups. While it’s still possible to introduce pests into a hydroponic environment, the risk is significantly lower compared to soil-based cultivation. Furthermore, some hydroponic techniques require relatively low maintenance, with certain options being as straightforward as soil-based cultivation in terms of ease.
Cons
Hydroponic setups usually entail a higher initial investment compared to other cultivation methods and may involve some do-it-yourself (DIY) work. Proper nutrient management can be challenging for hydroponic growers, particularly when employing supplements from different manufacturers. Following a proven nutrient formula becomes crucial in this context. Additionally, hydroponic growers must promptly address any issues, as root problems can pose challenges. However, steps can be taken to ensure healthy roots, including providing sufficient oxygen and maintaining water temperatures around 70°F (20°C).
Certain hydroponic methods demand high maintenance levels and frequent monitoring to achieve optimal growth rates. Moreover, hydroponic outdoor cultivation presents challenges due to difficulties in controlling essential variables such as sterility, temperature, and pump power.
Exploring Different Types of Hydroponic Setups
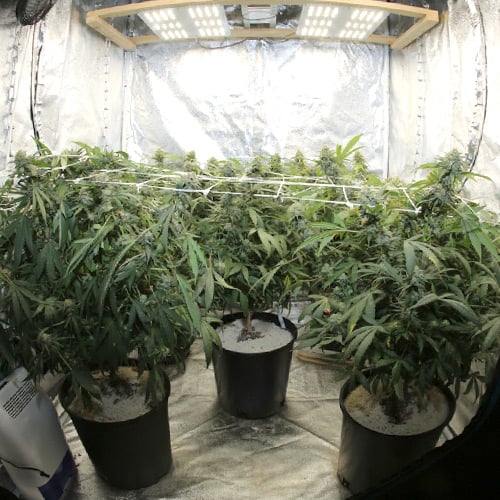
DWC (Deep Water Culture):
This hydroponic system suspends plants in a nutrient-rich water solution, with air stones providing oxygen to the roots. It’s a simple yet effective system, particularly favored by beginners.
Top-Fed DWC (Bubbleponics):
A variation of DWC, in which plants are suspended in a water solution, and water is fed to the container’s top through a drip line or spray nozzle. This approach supplies roots with both oxygen and water, promoting faster growth.
NFT (Nutrient Film Technique):
In this system, a thin film of nutrient-rich water flows through a slanted tray or tube, with plants placed in small net cups, allowing their roots to dangle in the water. Continuous nutrient flow is required for optimal plant growth.
Ebb & Flow (Flood & Drain):
This hydroponic system involves flooding the growing container with a nutrient solution for a set period and draining it back into a reservoir. This approach enhances nutrient uptake and growth rates but necessitates a timer and drainage system.
Aquaponics (Fish for Nutrients):
Combining hydroponics with aquaculture, this system cultivates fish in a tank, utilizing their waste to fertilize hydroponically grown plants. The plants, in turn, purify the water, creating a sustainable closed-loop system.
Aeroponics (Misted Air):
Plants are suspended in the air, and their roots are misted with a nutrient-rich solution in this system. This method optimizes oxygenation and nutrient absorption by the roots, leading to faster growth and larger yields.
Drip System (Automatic Watering):
Hydroponic cultivation involving dripping nutrient solution onto the base of each plant through a drip line or tubing. This system is relatively simple and requires minimal maintenance.
Hand-Watered Hydro (Soil-Hydro Fusion):
A fusion of soil and hydroponics, where plants grow in soil, but water and nutrients are supplied through a hydroponic system. This approach combines the benefits of both methods, allowing better control over nutrient uptake and faster growth rates. However, careful management of watering and nutrient levels is essential.
Setting Up Hydroponic Cultivation
The cost of establishing a hydroponic system can vary significantly based on its complexity. DIY systems can be budget-friendly if you’re willing to assemble them yourself, with parts readily available at hardware stores. Alternatively, kits containing all the necessary components are also accessible and can be competitively priced compared to DIY options. Setting up a hydroponic system may require some effort, so conducting thorough research and emulating a proven setup for your first growth cycle is essential. Systems incorporating timers may necessitate some adjustments to ensure proper functionality, while aquaponics demands additional time and effort to establish a fish-supporting tank.
Maintaining Your Hydroponic System
Hydroponic maintenance costs primarily revolve around nutrients and grow lights, with occasional tubing, pumps, and air stones replacements. First-time growers may need to invest more effort in maintenance, but experienced growers can maintain a hydroponic setup in as little as half an hour per week. Hydroponic systems generally promote faster vegetative growth, although flowering/budding duration is still determined by genetics. The amount of time you can be away from your hydroponic garden depends on the specific setup, with larger reservoirs allowing for more extended absences and finely tuned systems requiring more frequent checks. To avoid unforeseen events, checking on your plants at least once a day is advisable.
Hydroponic cannabis cultivation offers various advantages and options, catering to growers of all levels of expertise. By carefully considering the pros and cons, selecting an appropriate hydroponic setup, and maintaining it diligently, you can embark on a successful journey towards cultivating high-quality cannabis with precision and efficiency.
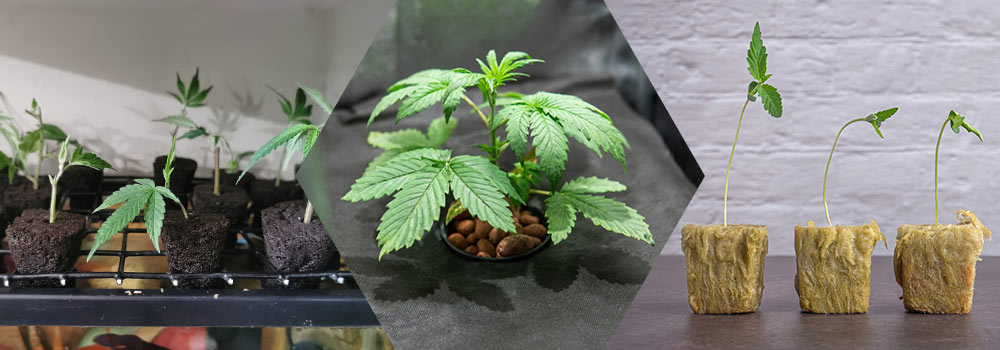
Cultivating Cannabis Soilless

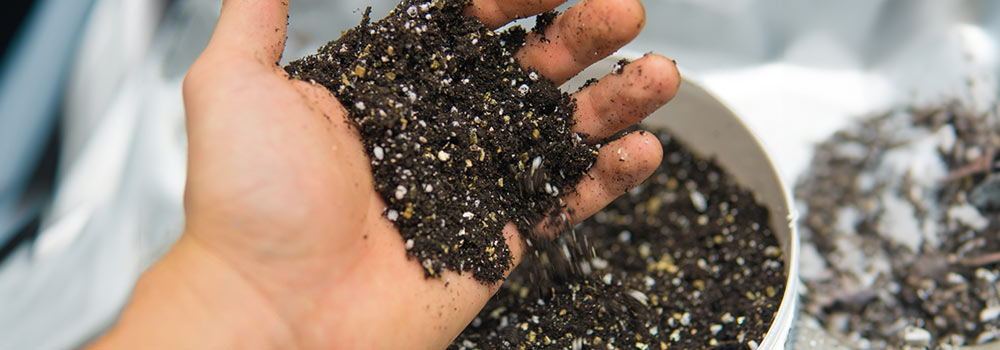
As the popularity of indoor cannabis cultivation continues to soar, soilless mediums like coco coir, perlite, vermiculite, and rock wool are gaining widespread acclaim among growers. These alternatives provide a clean, consistent, and highly customizable growing environment, empowering cultivators to finely control nutrient delivery, water absorption, and root aeration. Among these, coco coir stands out, revered for its exceptional water retention capacity, neutral pH, and low electrical conductivity (EC) levels, making it a preferred choice for hydroponic and soilless systems. Whether you’re a seasoned grower or a novice, understanding the advantages and drawbacks of different soilless mediums is paramount for maximizing yields and nurturing robust cannabis plants.
Pros and Cons of Soilless Cannabis Cultivation
Pros
Growing cannabis in soilless mediums, such as coco coir, has gained immense popularity among cultivators, primarily due to its distinct advantages over traditional soil-based methods. One of the most notable benefits is the significantly accelerated vegetative growth it facilitates. Furthermore, soilless mediums tend to be less attractive to pests and generally require easier management. When employing hand-watering techniques, growing in a soilless medium demands a level of effort akin to soil cultivation. Consequently, soilless mediums present a convenient and efficient option for cannabis growers.
Cons
While soilless mediums like coco coir can indeed deliver faster growth rates for cannabis plants compared to traditional soil, they may not match the rapid growth achieved in full hydroponic setups with optimal oxygen supply. However, for some growers, achieving the right nutrient balance in soilless mediums can be a challenge, especially when utilizing a variety of nutrient and supplement products from different companies. Overcoming this challenge necessitates adhering to a proven cannabis nutrient formula tailored to the chosen growing medium.
Setting Up Soilless Cultivation
Soilless growing mediums, such as coco coir, have gained favor among cannabis cultivators due to their capacity for accelerating vegetative growth and mitigating pest issues. However, establishing the ideal soilless mix requires careful consideration, especially for less experienced growers. A recommended soilless mix for cannabis comprises hydrated coco coir bricks blended with 30% perlite and 10% vermiculite. Container choices range from classic plastic pots to terra cotta pots, smart pots, and air pots, each offering varying potting mix densities. Although the setup process for soilless systems demands minimal effort, selecting the right mix and nutrients may necessitate research, as soil-based nutrients are typically unsuitable for soilless cultivation.
Maintaining Your Soilless System
Soilless cultivation presents numerous benefits and considerations. The primary ongoing cost involves replacing the potting mix with each growth cycle, as reusing old potting mixes can lead to the accumulation of nutrient salts that are challenging to flush out effectively. Additionally, containers may require replacement over time. Maintenance tasks encompass watering the plants, administering nutrients, and regulating the pH of the root zone, a critical aspect when cultivating in a soilless mix to ensure optimal nutrient availability to the plant roots. Soilless mixes generally facilitate faster growth rates than traditional soil, particularly when complemented by an ideal environment and ample lighting.
For less experienced growers, maintaining a close presence in the garden during the first growth cycle is advisable. In contrast, experienced cultivators can safely allocate more time away, especially when employing larger containers with enhanced water-holding capacities. Nonetheless, regularly inspecting the plants, ideally at least once a day, remains prudent to forestall nutrient deficiencies, prevent plants from toppling, or address any unforeseen events demanding prompt attention.
Mastering soilless cannabis cultivation is a rewarding endeavor that empowers growers to optimize growth and harvests while mitigating certain challenges associated with traditional soil-based methods. By harnessing the unique benefits of soilless mediums, carefully managing nutrient balance, and adhering to vigilant maintenance practices, cultivators can embark on a journey towards nurturing thriving and bountiful cannabis crops.