500 NEW MARIJUANA SEEDS RELEASED

Autoflower Not Flowering After 8 Weeks: Troubleshooting Guide


Autoflowering cannabis strains have gained immense popularity among growers for their ease of cultivation and quick harvest times. However, it’s not uncommon for growers to encounter challenges, particularly when their autoflowers do not begin flowering as anticipated after 8 weeks. In this detailed guide, we will delve into common issues related to autoflowering plants not flowering on schedule and provide practical solutions to address autoflower not flowering after 8 weeks and ensure a successful harvest.

Understanding Autoflowering Cannabis

Before diving into troubleshooting, it’s essential to understand the unique characteristics of autoflowering cannabis. Unlike photoperiod strains, autoflowers transition from the vegetative stage to the flowering stage automatically, regardless of changes in light cycles. They typically have a shorter growth cycle, which is why many cultivators prefer them. However, this automatic transition can occasionally lead to unexpected delays in flowering, and that’s what we’ll address in this article.

Autoflowers usually have a predetermined flowering window, but external factors can influence this timeframe. Factors such as genetics, light, nutrients, and environmental conditions all play a crucial role in determining when your autoflowers will start flowering. By comprehending these factors and their impact, you’ll be better equipped to troubleshoot and optimize your cultivation.

Why Is My Autoflower Not Flowering – Troubleshooting Causes

Week 5 Unexpected Hiccups

Facing issues earlier in the growth cycle for your week 5 autoflower not flowering? Let’s address them head-on:

  • Disease and Pest Management: Vigilance is key in identifying and addressing disease or pest infestations promptly. Early intervention can save your plants from significant damage.
  • Watering Precision: Accurate watering is crucial for autoflowers not flowering. Overwatering or underwatering can stress your autoflowers and impact overall health. Establish a consistent watering routine based on the specific needs of your plants.
  • Optimal Lighting: Ensure that your light source is appropriate for the size of your growing area. Inadequate light can hinder growth and flowering. Consider upgrading your lighting setup if needed.


Week 6 No Signs of Flowering

Arriving at week 6 without any visible signs of flowering for your autoflower not flowering after 6 weeks can be disheartening for growers.

However, it’s essential to remain patient and consider the following factors:

  • Genetics: Autoflower strains vary in their flowering times. Some naturally take longer to initiate flowering, so consult the specific strain’s characteristics to determine if this is the case.
  • Light Intensity and Duration: Adequate lighting is crucial during the vegetative stage. Ensure your plants receive 18-20 hours of light daily to encourage healthy growth before flowering.
  • Nutrient Management: Over or underfeeding can significantly impact flowering. It’s essential to maintain a balanced nutrient regimen tailored to the needs of autoflowers.


Week 7 Still No Buds

If you reach week 7 without any signs of buds for your autoflower week 7 no buds, it’s time to take proactive steps to address the delay:

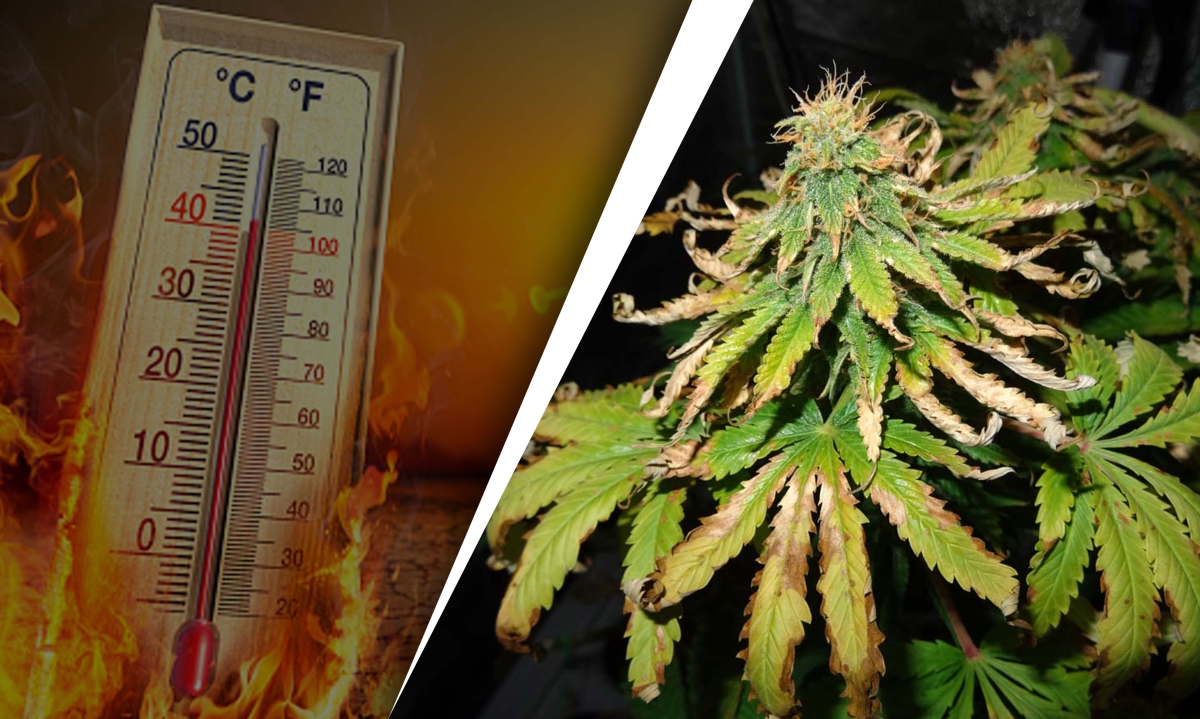
  • Environmental Stressors: High temperatures or excessive humidity levels can stall flowering. Maintain optimal conditions within the range of 70-85°F (21-29°C) and manage humidity levels accordingly.
  • Root Health: Check for signs of root-bound plants. If your autoflowers have outgrown their pots, transplant them to provide more space for root expansion, which is essential for flowering.
  • Light Control: Ensure complete darkness during the 12-hour dark period. Even slight light leaks during this phase can disrupt the flowering process.


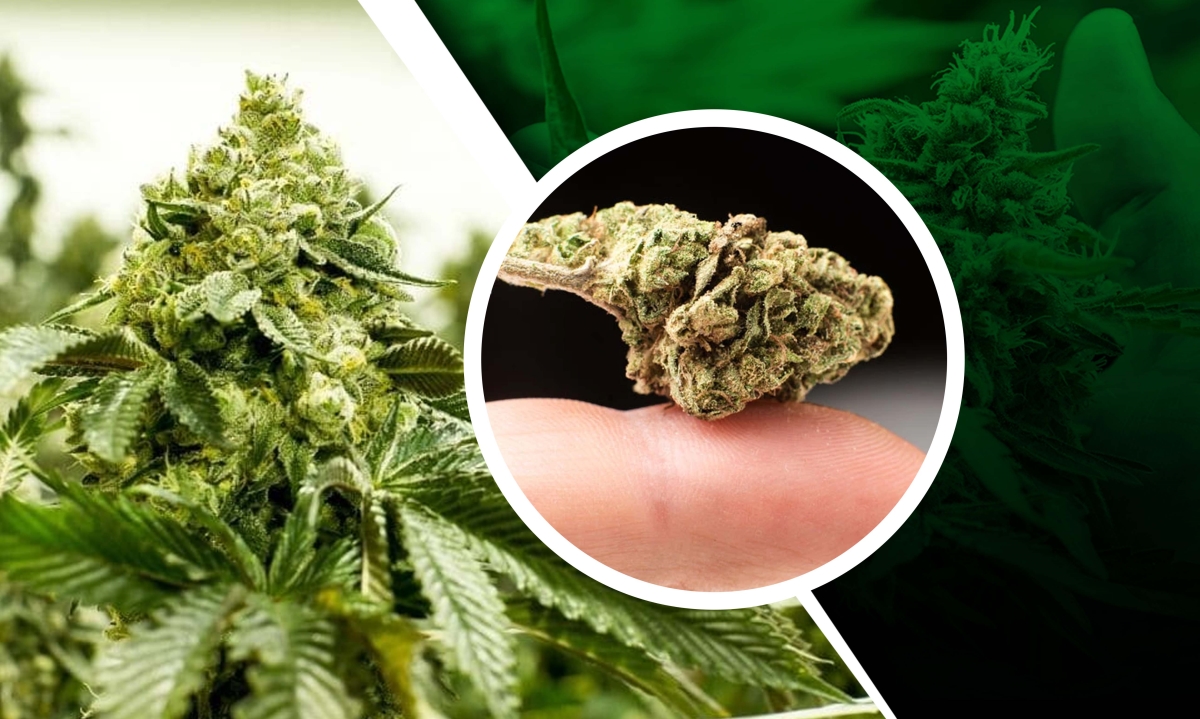
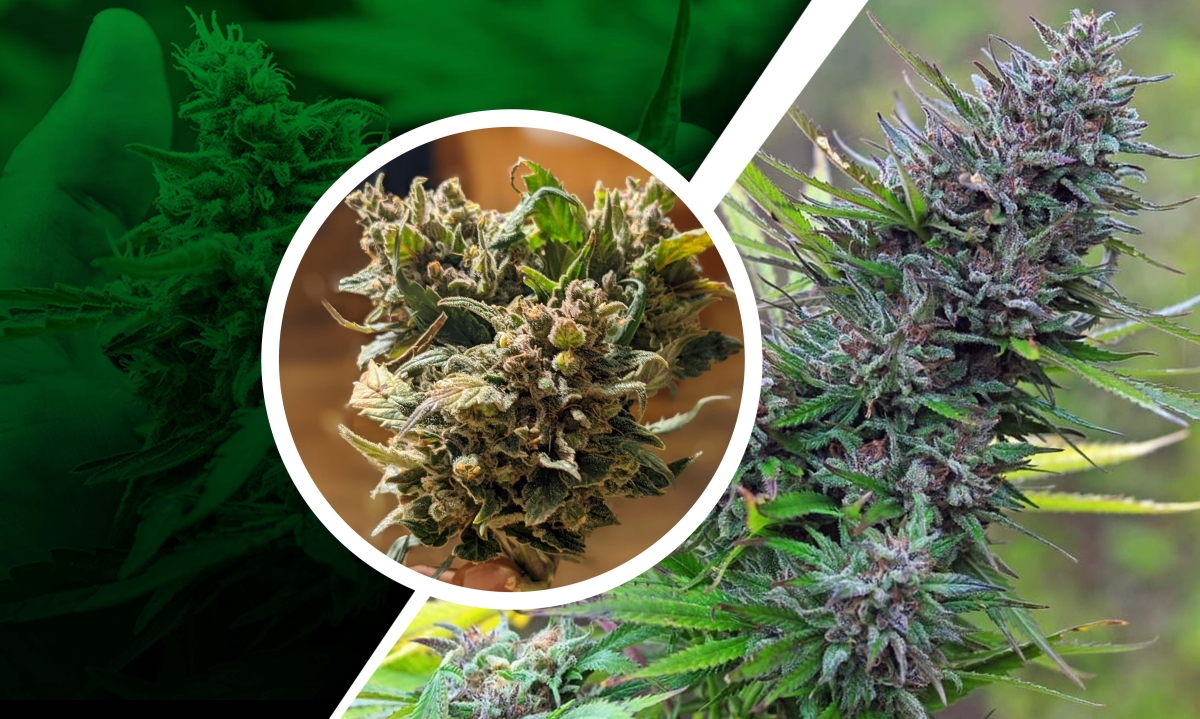
Week 8 Pistils, but No Buds

Encountering pistils without developing buds for your autoflower pistils but no buds can be perplexing. To address this issue:

  • Pollination Concerns: If male plants are present nearby, they may have pollinated your female autoflowers, which can hinder bud development. Remove any male plants promptly.
  • Nutrient Imbalance: Incorrect pH levels in your growing medium can lead to nutrient lockout, affecting bud formation. Regularly monitor and adjust the pH to maintain optimal nutrient absorption.
  • Extended Patience: While most autoflowers start flowering within a specific timeframe, some may take longer due to genetic variations or environmental stressors. Be patient and give them up to 12 weeks if necessary.


Conclusion

Cultivating autoflowering cannabis can be both rewarding and challenging. When your autoflowers are not flowering as expected after 8 weeks, it’s essential to remain patient and methodically address potential issues. By carefully managing genetics that is why always choose Crop King Seeds, also manage the light, nutrients, and environmental conditions, you can increase the likelihood of a successful harvest. Remember that every cannabis plant is unique, and fine-tuning your cultivation techniques is key to achieving the best results. Happy growing!

FAQs

Q: Can I force my autoflowers to flower?
A: No, autoflowers will naturally transition to the flowering stage based on their genetic programming, typically within 2-4 weeks from germination.

Q: Is it normal for autoflowers to take longer to flower than stated in their genetics?
A: Yes, variations in environmental factors and stress can occasionally extend the flowering time beyond what is specified in the strain’s genetics.

Q: Should I prune my autoflowers to encourage flowering?
A: It’s advisable to limit pruning with autoflowers to avoid unnecessary stress. Minor defoliation may be performed, but extensive pruning is not recommended.

Q: What is the ideal pH level for autoflowers during flowering?
A: Maintain a pH level between 6.0 and 6.5 in your growing medium during the flowering stage to optimize nutrient absorption.

Q: Can I use bloom boosters to speed up flowering?
A: While bloom boosters can enhance flowering, they won’t drastically shorten the flowering time. Use them as directed for optimal results.

Q: Should I change the light cycle to 12/12 to induce flowering in autoflowers?
A: No, autoflowers do not require a change in light cycle. They will transition to flowering automatically, regardless of the light duration.

How Often To Foliar Feed Cannabis


Enhancing plant growth and ensuring optimal nutrient uptake are essential goals for every gardener or farmer. One effective technique to achieve these objectives is foliar feeding. But the question arises: how often to foliar feed cannabis for the best results? In this comprehensive guide, we will guide you into the careful way to cannabis foliar feed, providing expert insights and practical tips to help you maximize your plant’s potential.

Understanding Foliar Feeding

How Often To Foliar Feed

Understanding how often to foliar feed cannabis is easier when you know why it works. Plants have tiny openings called stomata on the bottom of their leaves. These openings help with breathing and let in water and nutrients when we spray the leaves. Instead of going through the roots, the nutrients go straight to the leaves. This method has benefits like making the plant take in nutrients quickly and use them better.

The Importance of Macronutrients and Micronutrients

Plants need a lot of macronutrients like nitrogen, phosphorus, and potassium to grow well. They also need smaller amounts of micronutrients like iron, zinc, and manganese. When you spray the leaves with nutrients, it’s important to have the right balance of both kinds. If a plant doesn’t get enough of any nutrient, it can’t grow properly and might have health problems.

Factors Influencing Foliar Feeding Frequency

The number of times you spray leaves with nutrients depends on different things like what kind of plant it is, how old it is, the weather, and what nutrients it needs. Usually, young plants or ones that are growing fast need to be sprayed more often to help them get all the nutrients they need. But older plants might not need to be sprayed as much because they’re not growing as fast and just need to maintain themselves.

Determining the Ideal Frequency

How Often To Foliar Feed

To figure out how often to spray leaves with nutrients, you need to watch the plants closely and try different things to see what works best. Start by testing the soil to see what nutrients are there and if anything’s missing. Then, keep a close eye on how the plants are growing and what their leaves look like. If they’re not getting enough of a certain nutrient, or if they’re getting too much of something, you might need to change how often you spray or what kind of nutrients you use. The goal is to make sure the plants have everything they need to grow well and have healthy leaves.

Guidelines for Foliar Feeding Frequency

1. Young Seedlings and Transplants

When plants are just starting to grow from seeds or are recently transplanted, they are more likely to lack certain nutrients, which can slow down their growth. To help them grow strong roots and leaves, it’s a good idea to spray them with a mix of balanced fertilizer and water every 7 to 10 days. Watch how they’re doing closely, and if they seem to be growing well, you can stick with that schedule. But if they’re not growing as fast as you’d like, you might need to spray them more often. Adjust the spraying schedule based on how the plants are doing and how quickly they’re growing.

2. Vegetative Stage

When plants are in the vegetative stage, they grow quickly and need a lot of nutrients to help their leaves grow big and strong. For plants like tomatoes and peppers that you grow every year, spraying them with a fertilizer that’s rich in nitrogen every 10 to 14 days can help their leaves get bigger and make the plants stronger overall. Keep an eye on the color and size of the leaves, and if they look healthy and are growing well, you can stick with that schedule. But if they start to look pale or small, you might need to spray them more often. Adjust how often you spray based on how the leaves look and how fast the plants are growing.

3. Flowering and Fruit Set

As plants start making flowers and fruits, they need different kinds of nutrients to help them grow. At this time, you might not need to spray them with fertilizer as often because they’re not growing leaves as much. Instead, focus on making sure they have the right balance of nutrients. Spray them with a balanced fertilizer every 14 to 21 days, making sure there’s enough phosphorus and potassium to help the flowers and fruits grow well. Keep an eye on how the plants are doing, and if the flowers and fruits look healthy, you can stick with that schedule. But if they’re not growing as well as you’d like, you might need to spray them more often. Adjust how often you spray based on how the flowers and fruits are developing.

4. Perennial Plants

Perennial plants like fruit trees and ornamental shrubs have specific needs for nutrients that change with the seasons as they grow and rest. In the early spring, it’s a good idea to spray these plants with a balanced fertilizer to help them grow new leaves and flowers. But as they start to go dormant in the fall, you don’t need to spray them with fertilizer as often. This helps prevent them from growing too much late in the season, which can be damaged by frost. Adjust how often you spray based on the time of year and what stage of growth the plants are in.

Expert Tips for Maximizing Foliar Feeding Benefits

1. Timing Is Key

To help plants absorb nutrients better and reduce stress on them, it’s best to spray them with foliar sprays either early in the morning or late in the afternoon. This way, they’re not dealing with the heat of the day, which can make their leaves burn and cause the sprayed solution to evaporate quickly. By spraying at these times, you give the plants the best chance to take in the nutrients they need without causing them harm.

2. Use High-Quality Products

To get the most out of foliar spraying without harming the leaves, it’s wise to use top-notch fertilizers made for this purpose. These fertilizers are designed to be sprayed on leaves and are less likely to cause damage. When choosing a product, opt for ones with chelated micronutrients. These are easier for plants to use and absorb effectively. It’s all about giving your plants the best nutrients in a way that’s safe and efficient.

3. Rotate Nutrient Sources

To keep your plants healthy and prevent them from lacking certain nutrients, switch between different kinds of fertilizers during the growing season. Try using both synthetic and organic options. Organic choices like compost tea or fish emulsion can add nutrients to the soil and help it stay healthy. By mixing things up, you give your plants a variety of nutrients they need to grow well.

4. Monitor Plant Response

Keep an eye on your plants and check them often for any signs that they might not be getting enough or too much of certain nutrients. Look out for things like leaves turning yellow, the plants not growing as much as they should, or the tips of the leaves getting burnt. If you notice any of these signs, change how often you spray them with nutrients or try a different mix to see if it helps. The goal is to make sure your plants have everything they need to be healthy and strong.

FAQs

Q: Can foliar feeding replace traditional soil fertilization methods?
A: No, foliar feeding supplements soil fertilization but cannot replace it entirely. While it provides a quick nutrient boost directly to the leaves, soil fertilization is essential for overall plant growth and development.

Q: Is foliar feeding suitable for all types of plants?
A: Foliar feeding benefits a wide range of plants, but leaf structure and sensitivity can affect its effectiveness and safety. Some plants, especially those with hairy or waxy leaves, may be less receptive or prone to leaf burn.

Q: Can foliar feeding harm plants if overdone?
A: Yes, excessive foliar feeding or using the wrong products can harm plants by causing nutrient imbalances, leaf burn, or toxicity. Following recommended application rates, diluting fertilizers, and avoiding spraying during hot, sunny conditions can minimize risks.

Q: How soon can I expect to see results from foliar feeding?
A: Results from foliar feeding vary depending on factors like plant type and environmental conditions. While some improvements may be visible within days, long-term benefits like increased yield may require consistent foliar feeding over weeks or months.

Q: Can I make my own foliar fertilizer at home?
A: Yes, homemade foliar fertilizers can be made using simple ingredients like compost or organic fertilizers. However, it’s crucial to research recipes carefully, follow proper dilution ratios, and test on a small area of plants before widespread use to ensure effectiveness and compatibility.

What Are Delta 8 Seeds?


Delta 8 seeds are fundamental in producing Delta 8 THC, a type of cannabis known for its milder effects. Unlike regular cannabis seeds that mainly grow plants with Delta 9 THC, Delta 8 THC seeds are specially crafted to boost Delta 8 THC levels. These seeds are carefully bred to ensure they produce plants with high-quality Delta 8 THC. They go through strict genetic selection processes to pick out traits that help in yielding more Delta 8 THC. Moreover, continuous improvements in seed breeding techniques are constantly enhancing the effectiveness and reliability of Delta 8 seeds for cannabis farming.

The Science Behind Delta 8 THC

delta 8 seeds

Delta 8 THC, also known as delta-8-tetrahydrocannabinol, is a natural compound found in cannabis plants. It’s similar to Delta 9 THC but has slight differences that affect how it interacts with the body’s endocannabinoid system. Delta 8 THC is produced when Delta 9 THC breaks down, showing how important Delta 8 seeds are in growing cannabis. Recent studies have looked closely at how Delta 8 THC is made in the body, revealing the enzymes and genes involved. Understanding these processes helps us see how Delta 8 THC is different from other cannabinoids, which is valuable for exploring its potential benefits and effects on the body.

Is Delta 8 THC Legal?

delta 8 seeds

The legality of Delta 8 THC and its seeds can be different depending on where you are. In the United States, it’s legal at the federal level because of the 2018 Farm Bill. This bill says hemp products with less than 0.3% Delta 9 THC are okay. But states might have their own extra rules. So, before you get Delta 8 seeds or start growing them, you need to make sure it’s legal where you are. To deal with these changing rules, experts and lawmakers are always talking about how to make the rules more consistent and fair for everyone.

Growing Delta 8 THC Seeds

Growing cannabis for Delta 8 THC needs careful planning. Since Delta 8 THC is not naturally found in large amounts, growers use special breeding techniques to increase its levels in cannabis plants. A crucial part of this process is using high-quality Delta 8 seeds and controlling the environment carefully. This includes making sure the plants have the right amount of light, the correct temperature, and getting the nutrients they need. New ways of growing, like hydroponics (growing plants without soil) and vertical farming (stacking plants vertically to save space), help make the most of resources and increase how much Delta 8 THC can be produced sustainably.

Extracting Delta 8 THC

Getting Delta 8 THC out of cannabis plants is a complex process. Since Delta 8 THC isn’t found in large amounts, we use advanced methods like CO2 extraction or fractional distillation. While Delta 8 seeds don’t directly affect how we get the THC out, their genes matter for the final THC levels. This shows how important it is to use the right seeds to make sure we get the best quality product. New technology and better equipment keep making the extraction process faster and cleaner. This helps us make Delta 8 THC extracts that are pure enough for medicine and research.

Benefits and Applications

Delta 8 THC is getting more attention because people say it might help with health problems. Users often feel calm, relaxed, and happier when they use it. Scientists are studying if it can help with things like pain, feeling sick, and making you hungry. This could make Delta 8 THC a good option for taking care of your whole body. Also, scientists, doctors, and people in the business are working together to turn what they learn into new Delta 8 THC products. They want to make products that suit different people’s needs and likes.

Delta 8 THC vs. Other Cannabinoids

Delta 8 THC is one of many cannabinoids found in cannabis. Unlike Delta 9 THC, it doesn’t make you feel high in the same way. Instead, it gives a more subtle feeling of clarity and relaxation. On the other hand, cannabidiol (CBD) doesn’t make you high at all but still has therapeutic benefits. Comparing how these cannabinoids work in the body helps us understand their different effects and how they can help with health problems. This helps people choose the right cannabis products for them.

FAQs

Q: Are Delta 8 seeds legal to purchase and grow anywhere?
A: The legality of Delta 8 seeds varies by location. While they are federally legal in the United States under certain conditions, it’s important to check local laws before buying or cultivating them.

Q: Can Delta 8 THC cause any side effects?
A: Like any cannabis product, Delta 8 THC may cause side effects such as dizziness, anxiety, or changes in heart rate, especially with overconsumption. It’s important to use it responsibly and start with a low dose.

Q: How do Delta 8 seeds differ from regular cannabis seeds?
A: Delta 8 seeds are specifically bred to produce high levels of Delta 8 THC, while regular cannabis seeds typically yield plants with higher concentrations of Delta 9 THC. This makes Delta 8 seeds ideal for those seeking milder psychoactive effects.

Q: Can Delta 8 THC be used for medical purposes?
A: Some users report experiencing benefits such as relaxation, mood improvement, pain relief, nausea reduction, and appetite stimulation with Delta 8 THC. However, more research is needed to fully understand its medical potential.

Q: Where can I buy Delta 8 seeds and products?
A: Delta 8 seeds and products can be purchased from specialized seed banks, online retailers, and dispensaries in areas where they are legal. It’s important to choose reputable suppliers to ensure quality and compliance with regulations.

How to Camouflage Outdoor Grow Your Cannabis Plants


In outdoor cannabis growing, keeping things secret is super important. Whether you’re growing in your backyard or hidden in the woods, staying stealthy is key because of the complicated rules about growing cannabis in different places around the world. In areas where it’s against the law to grow cannabis, being discreet isn’t just a choice, it’s a must. It helps protect growers from getting in trouble with the law and from being judged by society. This guide gives clear tips on how to camouflage outdoor grow your cannabis plants effectively, making sure both the grower and the plants stay safe and hidden.

Understanding the Significance of Camouflage

camouflage outdoor grow

Cannabis growers choose to hide their plants mostly because of rules and social beliefs about growing cannabis. In places where growing cannabis is punished harshly, hiding the plants is very important to avoid getting in trouble with the law. Even in areas where growing cannabis is allowed, people still hide their plants to avoid problems with their neighbors and to keep things peaceful.

Techniques for Concealment

camouflage outdoor grow

1. Integrate Fake and Decorative Plants

A fast way to hide cannabis plants is by mixing them with fake or pretty plants, particularly in areas where there aren’t many plants around. This trick can quickly cover up the cannabis plants, but it might not completely hide all the things that make them different from other plants.
Blending cannabis with artificial or decorative plants helps conceal them from view, especially in places where there aren’t many natural plants. While this tactic provides immediate camouflage, it may not completely hide the unique features of cannabis plants. This means that even though the cannabis plants might be harder to spot at first glance, someone who knows what to look for could still identify them. So, while this method can be helpful for a quick cover-up, it’s not foolproof for keeping the cannabis plants completely hidden.

2. Employ Companion Plants

Using companion planting is a smarter way to hide cannabis plants and is better for the environment too. When cannabis is grown alongside different kinds of fully grown plants, it helps hide them better because there’s more variety in the leaves and colors to blend in with. This natural mix of plants makes it harder to notice the unique look of cannabis plants. Also, some of these companion plants smell nice and can help cover up the smell of cannabis, making it even harder to detect.
By planting cannabis alongside other types of plants, it becomes easier to hide them visually because there’s a greater variety of foliage to blend in with. This technique relies on the natural diversity of plants to conceal the distinct appearance of cannabis. Additionally, some companion plants have fragrant properties that can mask the scent of cannabis, improving overall stealthiness.

3. Utilize Tall Vegetation and Thickets

For growers who have plenty of room and patience, growing tall plants, thickets, or bushes is the best way to hide cannabis plants. Although it takes a long time for these big plants to grow, once they do, their thick leaves create a dense cover that keeps the cannabis plants hidden from view.
Growing tall plants, thickets, or bushes is a great way for growers who have lots of space and time to hide their cannabis plants. While it takes a while for these larger plants to grow, once they do, their thick foliage provides excellent protection, making it hard for anyone to see the cannabis plants. This method requires patience because it takes a long time for the big plants to reach their full size, but the result is worth it for the extra cover it provides.

4. Establish Greenhouse Enclosures

Greenhouses and other man-made buildings provide a private space for growing cannabis, hiding the plants behind solid walls. Adding materials like polytunnels or cloudy covers makes it even harder for people outside to see what’s inside, keeping the plants hidden from view.
Using structures like greenhouses is a good way to grow cannabis discreetly because they create a private area where the plants can grow without being seen by others. By covering the greenhouse with materials like polytunnels or cloudy covers, it becomes even more difficult for anyone passing by to see what’s inside. This extra layer of protection helps keep the cannabis plants hidden from view, making it easier for growers to keep their activities confidential.

5. Opt for Low-Odor Strains

Choosing cannabis strains that don’t smell much helps reduce the chance of being noticed, especially in busy places where controlling smells is really important. These types of strains not only make it less likely for people to notice the smell of cannabis but also help keep things friendly with neighbors by not bothering them with strong smells.
Picking cannabis strains that don’t give off strong smells can make it easier to keep things under the radar, especially in places where it’s important to control odors. These strains not only reduce the risk of people noticing the smell of cannabis but also help maintain good relationships with neighbors by preventing strong smells from bothering them. This way, everyone can get along better, and growers can keep their cannabis-growing activities private.

6. Implement Training Techniques

Using methods like Low-Stress Training (LST) or Screen of Green (ScrOG) helps growers control how tall their plants grow and encourages them to spread out horizontally. This makes better use of the space and makes it easier to hide the plants. These techniques find a good balance between the size of the plants and how easy they are to see, making it possible to grow cannabis discreetly even in small areas.
By using methods like Low-Stress Training (LST) or Screen of Green (ScrOG), growers can control the height of their plants and encourage them to grow sideways. This helps make the most of the space available and makes it easier to keep the plants hidden. These techniques strike a good balance between the size of the plants and how noticeable they are, making it possible to grow cannabis secretly even in limited spaces.

Strategic Site Selection

Choosing the right spot to grow cannabis is crucial for staying hidden and avoiding problems. Things like how easy it is for neighbors to see, how much sunlight the area gets, and how easy it is to take care of the plants should all be considered when picking a spot. It’s important to choose a place where people outside can’t easily see what’s going on. This helps make sure the cannabis plants can grow without being noticed for as long as possible. So, picking the best location is key to keeping the grow operation safe and successful.

Conclusion

When growing cannabis outdoors while keeping things quiet, it’s crucial to use good camouflage techniques. By combining different ways to hide the plants, growers can protect their crops while dealing with the legal and social challenges of growing cannabis. With careful planning, picking the right spot, and sticking to stealthy methods, growers can make sure their outdoor cannabis growing is both secret and successful.

FAQs

Q: What are some common methods for hiding outdoor cannabis plants?
A: Using camouflage techniques like blending plants, growing tall plants to cover the cannabis, or using structures like greenhouses.

Q: Why is it important to choose the right location for outdoor cannabis cultivation?
A: Picking the right spot helps keep the plants hidden from view, reduces the risk of getting caught, ensures they get enough sunlight, and are easy to take care of.

Q: How do low-odor cannabis strains help with discreet cultivation?
A: Low-odor strains reduce the chance of people noticing the smell of cannabis, making it easier to keep the grow operation secret, especially in areas where controlling smells is important.

Q: What are some benefits of using companion planting in outdoor cannabis cultivation?
A: Companion planting helps hide cannabis plants among other types of plants, making them harder to spot visually. Some companion plants also have scents that can mask the smell of cannabis.

Q: How can techniques like Low-Stress Training (LST) or Screen of Green (ScrOG) help with outdoor cannabis cultivation?
A: LST and ScrOG methods help control the height and spread of cannabis plants, making them easier to hide and maximizing space utilization in outdoor grows.

Knowing The Best Temperature and Humidity for Cannabis


Cultivating cannabis requires precise attention and careful handling. Environmental conditions are crucial for the well-being and productivity of the plants. Finding the best temperature and humidity for cannabis are particularly important factors that affect how the plants grow. In this detailed guide, we explore the ins and outs of maintaining the perfect temperature and humidity levels for successful cannabis growing, whether you’re doing it indoors or outdoors.

Ideal Temperature for Growing Cannabis

Temperature and Humidity for Cannabis

Establishing the ideal conditions for cannabis plants starts with controlling the temperature. Keeping the temperature within the right range encourages strong growth and boosts the plant’s capacity to yield potent flowers containing plenty of cannabinoids.

Understanding Temperature Requirements

Cannabis plants prefer temperatures similar to those in their original habitats, usually between 70 to 85 degrees Fahrenheit (21 to 29 degrees Celsius) during the day. However, it’s important for nighttime temperatures to slightly decrease, ideally ranging between 58 to 70 degrees Fahrenheit (14 to 21 degrees Celsius). This change in temperature mimics natural conditions and helps encourage healthy flowering.

Impact of Temperature Extremes

Extreme temperatures, whether too hot or too cold, can hinder the growth of cannabis and result in unfavorable outcomes like drooping leaves, lack of essential nutrients, or even complete crop failure. When temperatures soar above 90 degrees Fahrenheit (32 degrees Celsius), plant growth can be stunted, making them more vulnerable to pests and diseases. Conversely, extended exposure to cold temperatures below 50 degrees Fahrenheit (10 degrees Celsius) can slow down the plant’s metabolic processes, making it difficult for them to absorb necessary nutrients.

Humidity for Growing Cannabis

Temperature and Humidity for Cannabis

Humidity levels are crucial in growing cannabis, as they affect how plants absorb nutrients and release water vapor. Knowing and regulating humidity is important for preventing common problems like mold, mildew, and stress-related issues.

Determining Optimal Humidity Levels

Maintaining the right humidity levels is vital throughout the different stages of cannabis growth. In the vegetative phase, humidity should be kept between 40% to 70%. This range helps the plants grow lush leaves and develop strong roots. As the plants move into the flowering stage, humidity needs to be lowered to prevent mold and bud rot. Ideally, it should be between 40% to 50%.

Managing Humidity in Indoor Settings

Controlling humidity indoors while growing cannabis comes with its own set of challenges. Investing in equipment like dehumidifiers, air conditioners, and proper ventilation systems can help manage moisture levels and create the perfect growing conditions. Additionally, placing fans strategically can improve air flow, preventing pockets of stagnant humidity and stopping mold from spreading.

What Are the Optimum Humidity Levels for Indoor Cannabis Growing?

Achieving the ideal indoor humidity balance demands careful attention to detail and the use of successful methods to manage moisture levels effectively.

Strategies for Indoor Humidity Regulation

  • Invest in Dehumidification: Utilize high-quality dehumidifiers equipped with adjustable settings to extract excess moisture from the air.
  • Enhance Air Circulation: Position oscillating fans strategically to promote air movement and discourage humidity buildup in confined spaces.
  • Seal Grow Room Vents: Ensure airtight seals around vents and ducts to prevent outside humidity from infiltrating the growing area.
  • Monitor Humidity Levels: Employ hygrometers or humidity controllers to monitor and adjust humidity levels accurately, ensuring consistency throughout the cultivation cycle.
  • Implement Proper Drainage: Opt for well-draining soil or hydroponic systems to prevent waterlogged conditions that can elevate humidity and promote root rot.

Addressing Common Challenges

Even with careful planning, indoor cultivators might face changes in humidity because of environmental factors or equipment problems. Quickly recognizing problems and taking immediate steps, like changing ventilation or moving plants to dryer spots, can lessen potential harm and protect the health of the crop.

Conclusion

Maintaining the right temperature and humidity levels is crucial for successfully growing cannabis, whether it’s done indoors or outdoors. By knowing what cannabis plants need and using effective methods to control temperature and humidity, growers can increase their harvests, make their plants more potent, and keep them healthy overall. With careful attention to detail and taking action early on, growers can confidently and consistently produce high-quality cannabis.

FAQs

1. How does humidity affect cannabis growth?
Humidity influences transpiration rates, nutrient uptake, and overall plant health. High humidity levels can lead to mold and mildew, while low humidity may cause stress and hinder growth.

2. What are the risks of high humidity in cannabis cultivation?
High humidity increases the likelihood of mold, mildew, and bud rot, posing significant risks to plant health and overall yield.

3. Can I use household humidifiers for cannabis cultivation?
While household humidifiers can help increase humidity levels, they may not provide precise control required for optimal cannabis cultivation. Investing in specialized equipment designed for grow room environments is recommended.

4. How do I lower humidity in my grow room?
To lower humidity, ensure proper ventilation, invest in dehumidifiers, and avoid overwatering plants. Additionally, strategic placement of fans can improve air circulation and reduce humidity levels.

5. What is the ideal humidity for cannabis during the flowering stage?
During the flowering stage, humidity levels should ideally range between 40% to 50% to minimize the risk of mold and encourage healthy bud development.

6. How can I prevent mold in my indoor grow room?
To prevent mold, maintain proper ventilation, control humidity levels, and ensure adequate airflow around plants. Regular inspection and prompt removal of any signs of mold or mildew are essential.

How to Increase Terpene Production


Terpenes, those fragrant compounds found abundantly in nature’s plants, do more than just make things smell nice and taste good. They have many health benefits. Their chemistry is complex but interesting, and they can be used for therapy. Learning how to increase terpene production is really important for farmers who want to improve the quality and effectiveness of their crops. Knowing about how to increase terpenes in cannabis helps farmers make great plants that not only smell and taste good but also make people healthier when they use them.

What are Terpenes?

How to Increase Terpene Production

Terpenes, often referred to as the building blocks of plant essential oils, are organic compounds synthesized in the resin glands of plants. These compounds serve multiple functions in the plant kingdom, including attracting pollinators, repelling pests, and protecting the plant from environmental stressors. In addition to their biological roles, terpenes contribute significantly to the sensory experience associated with plants, influencing their aroma, flavor, and therapeutic properties.

Understanding Terpene Production

The process of making terpenes is complicated and affected by many things like genes, the environment, and how plants are taken care of. Genes decide a lot about what kind of terpenes a plant will have, but things like temperature, humidity, light, and nutrients also change how many terpenes a plant makes. Also, the way plants are treated, like cutting them or training them to grow in a certain way, can make them produce more terpenes by making them defend themselves.

Tips for Increasing Terpene Production

How to Increase Terpene Production

A. Genetic Selection

The first thing to do to make a lot of terpenes is to pick plants with the right terpenes. People who breed plants often mix different types to make new ones that smell and taste different, so growers can find ones that work best for them. Also, scientists have figured out ways to change how plants make terpenes using genetics, so now there are plants that make a lot more terpenes than before.

B. Environmental Factors

Making sure plants have the right conditions to grow is really important for making lots of terpenes. Keeping the temperature and humidity steady while the plants are growing helps them work well and make more terpenes. Also, it’s important to have good airflow and ventilation so the air doesn’t get too wet, which can cause mold and hurt how many terpenes the plants make.

C. Nutrient Management

Making sure plants get the right nutrients is really important for them to grow well and make lots of terpenes. Giving plants all the different kinds of nutrients they need, like big ones, small ones, and really tiny ones, helps them stay healthy and make more terpenes. Also, adding natural stuff like compost, worm poop, and seaweed juice to the soil makes it better for plants and the tiny creatures that help them grow, which helps plants take in more nutrients and make more terpenes.

D. Stress Induction Techniques

Sometimes, gently stressing the plant can make it protect itself and produce more terpenes. Ways like gently bending it, taking some leaves off, or changing the temperature a bit can make the plant defend itself more, which means more terpenes. But it’s important to watch the plant closely and not stress it too much, or it might not grow well and won’t make as many terpenes in the end.

E. Harvesting and Curing Methods

Getting the timing right when harvesting and drying plants is super important to keep the terpenes and make the smell and taste as good as possible. Picking plants when they have the most terpenes saves all those special compounds, getting the most out of the plant. Then, drying and curing the flowers slowly and gently lets the terpenes develop fully, making the final product smell and taste really good.

Advanced Techniques for Maximizing Terpene Levels

A. Temperature and Humidity Control

Maintaining precise control over temperature and humidity levels in the growing environment is crucial for optimizing terpene production. Investing in climate control systems such as heaters, air conditioners, and dehumidifiers ensures that environmental conditions remain stable, minimizing stress and maximizing terpene synthesis.

B. Light Spectrum Optimization

Tailoring the light spectrum to match the plant’s natural lighting conditions can enhance terpene production. LED grow lights with customizable spectrums allow growers to adjust light wavelengths to promote terpene synthesis during different growth stages. Additionally, incorporating supplemental UVB lighting can stimulate terpene production and increase resin production, leading to higher yields and better quality flowers.

C. CO2 Enrichment

Supplementing carbon dioxide levels in the growing environment can stimulate photosynthesis and enhance terpene production. CO2 enrichment systems, such as generators or tanks, provide plants with additional CO2, promoting faster growth and increased terpene synthesis. However, it’s essential to monitor CO2 levels closely and ensure proper ventilation to prevent buildup and maintain a healthy growing environment.

D. Terpene Boosting Supplements

Using organic supplements containing terpene precursors can stimulate terpene production and enhance aroma and flavor. These supplements provide the plant with essential nutrients and compounds involved in terpene synthesis, such as amino acids, vitamins, and minerals. Additionally, incorporating beneficial microbes such as mycorrhizae and beneficial bacteria can improve nutrient uptake and promote terpene production.

The Importance of Proper Harvesting and Curing

Harvesting and curing are really important for keeping terpenes in the plant and making the final product as good as it can be. Picking plants when they’re just right makes sure they have the most terpenes, bringing out all their smell and taste. Then, drying the flowers slowly and curing them in a special place lets the terpenes develop fully, making the final product smell and taste even better.

Conclusion

Making more terpenes needs looking at a lot of things like genes, the environment, how plants are taken care of, and smart farming methods. If growers know what affects terpenes and use the right methods, they can make their crops better in smell, strength, and how well they sell. This way, they can meet the needs of picky customers and pros in the industry.

FAQs

Q: What are terpenes?
A: Terpenes are organic compounds found in various plants, responsible for their distinct aroma and flavor profiles.

Q: How do terpenes contribute to the aroma and flavor of plants?
A: Terpenes interact with other compounds to create the diverse range of aromas and flavors associated with different plant varieties.

Q: Can terpene production be increased naturally?
A: Yes, terpene production can be enhanced through genetic selection, environmental optimization, and stress induction techniques.

Q: Is terpene production affected by the plant’s growth stage?
A: Yes, terpene production varies throughout the plant’s lifecycle, peaking during the flowering stage.

Q: Are there any risks associated with increasing terpene production?
A: While increasing terpene production can improve the quality of the crop, growers must be mindful of potential risks such as nutrient imbalances, environmental stressors, and pest infestations.

Different Ways In Growing Weed Cheaply


Growing weed can be an enjoyable and rewarding experience, but it doesn’t have to break the bank. Whether you’re a seasoned grower looking to cut costs or a beginner on a tight budget, there are plenty of ways in growing weed cheaply. In this guide, we’ll explore how to grow weed cheaply, including tips for indoor cultivation and methods for growing without seeds.

Understanding the Basics of Growing Weed

growing weed cheaply

Before diving into cost-saving strategies, it’s essential to understand the fundamental principles of growing weed. Cannabis plants require specific environmental conditions to thrive, including adequate light, water, nutrients, and ventilation. By creating an optimal growing environment, you can ensure healthy plant development and maximize yields.

How to Grow Weed Cheap

growing weed cheaply

1. Start with Quality Seeds or Clones

Investing in high-quality seeds or clones is crucial for successful and cost-effective weed cultivation. While it may be tempting to opt for cheaper options, inferior genetics can lead to poor yields and lower-quality buds. Consider purchasing seeds from reputable breeders or acquiring clones from trusted sources to set a strong foundation for your grow.

2. Choose the Right Growing Medium

When growing weed on a budget, choosing the appropriate growing medium can make a significant difference in cost savings. While soil is the most traditional medium, it can be more expensive than alternatives such as coco coir or perlite. Research different growing mediums to find one that fits your budget without sacrificing plant health.

3. DIY Grow Lights

Investing in grow lights can be one of the most significant expenses for indoor growers. However, there are cost-effective alternatives to commercial LED or HID lights. Consider building your own DIY grow lights using affordable components like compact fluorescent bulbs or LED strips. While these homemade solutions may not offer the same efficiency as professional fixtures, they can still provide sufficient light for cannabis cultivation at a fraction of the cost.

4. Make Your Own Nutrients

Commercial fertilizers and nutrients can be expensive, especially for larger grows. Fortunately, there are DIY nutrient recipes available that use common household ingredients to provide essential nutrients to your plants. From compost teas to organic amendments, homemade nutrient solutions can help reduce costs while promoting healthy growth.

5. Prune and Train Your Plants

Pruning and training your cannabis plants can help maximize yields and make the most of limited space. By removing excess foliage and shaping your plants through techniques like topping and low-stress training (LST), you can encourage more even canopy development and improve light penetration. This not only leads to higher yields but also reduces the need for additional grow space and resources.

Growing Weed Indoors Cheap

1. Optimize Your Grow Space

When growing weed indoors on a budget, optimizing your grow space is essential. Choose a location that receives ample natural light or supplement with artificial lighting as needed. Consider utilizing vertical space with shelves or trellises to maximize the number of plants you can grow in a small area. Additionally, insulating your grow space can help maintain consistent temperatures and reduce energy costs.

2. Use Affordable Equipment

While state-of-the-art grow equipment can be tempting, it’s not always necessary for successful indoor cultivation. Look for budget-friendly alternatives such as second-hand grow tents, fans, and ventilation systems. DIY solutions like homemade carbon filters can also help save money without sacrificing performance.

How to Grow Weed Without Seeds

1. Consider Cloning

Cloning is a cost-effective way to propagate cannabis plants without the need for seeds. By taking cuttings from a mature plant and encouraging them to root, you can create genetically identical clones that retain the desirable traits of the parent plant. This not only saves money on seed purchases but also ensures consistency in your crop.

2. Utilize Tissue Culture

Tissue culture is an advanced propagation technique that allows growers to clone plants on a large scale with minimal space and resources. While it requires more upfront investment in equipment and supplies, tissue culture can be a cost-effective option for commercial growers or those looking to propagate large quantities of plants without seeds.

Conclusion

Growing weed cheaply is achievable with the right knowledge and strategies. By implementing cost-saving techniques such as DIY grow lights, homemade nutrients, and space optimization, you can cultivate cannabis on a budget without sacrificing quality or yield. Whether you’re growing indoors or outdoors, there are plenty of ways to reduce expenses and enjoy a successful harvest.

FAQs

Q: Can I grow weed cheaply without investing in expensive equipment?
A: Yes, by utilizing DIY solutions and budget-friendly alternatives, you can minimize expenses while still achieving successful cultivation.

Q: Is it possible to grow weed indoors without spending a lot of money on grow lights?
A: Absolutely! DIY grow lights can be constructed using affordable components, providing adequate lighting for indoor cannabis cultivation.

Q: Are there any legal considerations when growing weed cheaply?
A: It’s essential to familiarize yourself with local laws and regulations regarding cannabis cultivation to ensure compliance and avoid potential legal issues.

Q: How can I save money on nutrients for my weed plants?
A: Homemade nutrient solutions using common household ingredients can be an excellent way to reduce costs while providing essential nutrients to your plants.

Q: What are some common mistakes to avoid when growing weed cheaply?
A: Overlooking environmental factors, neglecting proper plant care, and failing to invest in quality genetics are common pitfalls to avoid when growing weed on a budget.

Cloning Marijuana with Clonex


Using cloning techniques strategically can really make a big difference in how good and consistent your harvest turns out especially when using one of the best cloning method. Cloning is a technique deeply connected to the science of growing plants, allowing growers to make copies of plants with the traits they want. This guide will walk you through the detailed steps of cloning marijuana with Clonex, one of the best cloning solution for cannabis, giving you a clear path to how to make clones weed and successfully grow more plants to have a thriving cannabis garden.

Before You Begin – Marijuana Cloning Tips

cloning marijuana with clonex

Watering the Mother Plant

Before you start the cloning process, it’s crucial to focus on keeping the mother plant healthy. Giving it enough clean water, balanced in pH, at least 24 hours before taking cuttings sets the stage for strong clones. This hydration step before cloning doesn’t just make sure the mother plant stays healthy overall, but it also helps in producing strong and lively cuttings.

Workspace Preparation

Setting up the right workspace is more than just a practical need; it’s a crucial part of making cloning successful. Dipping peat moss plugs in water and carefully arranging them in trays creates the perfect surroundings for your clones. At the same time, getting a shot glass ready with a good amount of Clonex rooting hormone gel is the key to making the cloning process smooth and effective.

Step 1 – Selecting the Right Mother Plant

cloning marijuana with clonex

The initial step in cloning is picking out a top-notch mother plant. The best candidates show strong health, vigor, and lush leaves. It’s ideal to go for a plant from the first generation (seed) because the farther you get from the first generation, the more the genetic quality can be affected. Concentrate on selecting smaller branches near the bottom of the plant to ensure not just great cuttings but also to enhance airflow under the canopy.

Step 2 – Taking Cuttings

After finding the perfect mother plant, the next step is the precise task of taking cuttings. Accuracy is crucial here; cutting the stem at an angle of 45-60 degrees maximizes the area for applying rooting hormone. Trimming the stem below the node is a must to ensure that when the clone is placed into its plug, it stands tall enough to compete for sunlight with other clones. Choosing to take both large and small cuttings is a strategic move, allowing for a varied approach that considers different success rates based on size.

Step 3 – Planting the Cuttings

With the cuttings ready, the focus shifts to planting. Each cutting gets a generous dip into the Clonex-filled shot glass. This step is crucial because the rooting gel gives the hormones needed to kickstart root growth. Putting the treated cuttings into pre-soaked peat moss plugs creates the right environment for roots to develop. The intentional use of plenty of Clonex in this stage increases the chances of successfully growing new plants.

Step 4 – The Waiting Game

After planting, the waiting game begins. Picking the right spot, whether it’s indoors or outdoors, is crucial. If growing indoors, make sure to position the light above to give the clones the light they need. A careful watering approach, filling the tray only up to a quarter and misting the inside of the dome, creates the best conditions for initial growth. Checking the clones daily for a week and keeping an eye out for signs of root growth sets the stage for the next step – transplanting.

Step 5 – Transplanting and Beyond

Once you see visible signs of roots, it’s time to transplant the clones. You can choose slightly larger pots or go straight to their permanent ones. This crucial step ensures that the clones have enough room to thrive and keep growing. Keeping a close eye on them and giving them care after transplanting is important as they get used to their new home. Adjusting watering schedules and providing the right nutrients are key to the long-term success of your cloned marijuana plants.

Conclusion

In summary, cloning marijuana with Clonex involves careful steps, starting from picking the right mother plant to the post-transplanting phase. By following these guidelines, you not only ensure successful growth but also lay the groundwork for a strong and flourishing cannabis garden. Use this thorough guide to improve your cultivation skills, embracing the science and art of cloning for a rich harvest.

FAQs

Q: How long does it take for marijuana clones to show roots after planting?
A: Typically, marijuana clones start showing roots within one to two weeks after planting, but this can vary based on environmental factors and specific strains.

Q: Can I use tap water for hydrating the mother plant before taking cuttings?
A: Yes, you can use tap water, but it’s essential to ensure it’s clean and pH-balanced. This helps maintain the overall health of the mother plant, promoting successful cuttings.

Q: Why is it important to trim the stem below the node when taking cuttings?
A: Trimming below the node ensures the clone, when placed into its plug, is tall enough to compete for sunlight. This aids in the overall growth and development of the marijuana plant.

Q: What should be the ideal temperature for the location where clones are growing?
A: The ideal temperature for clone growth is warm, preferably between 70-80 degrees Fahrenheit. Maintaining a warm environment fosters optimal root development.

Q: What is the optimal temp for clones to root successfully?
A: The optimal temperature for marijuana clones to root successfully ranges between 75-80 degrees Fahrenheit (24-27 degrees Celsius). Maintaining this warm environment encourages the development of healthy and robust roots, enhancing the overall success of the cloning process.

The Secrets of How To Grow Dense Buds


How to grow dense buds? That is one of the questions people ask when starting to grow cannabis. Aiming for a good harvest needs a careful understanding of the factors that affect the plant’s yield and quality. Many growers usually focus on how much they can harvest, but the tightness of each cannabis bud is just as important and directly affects the final result. This guide will go through different aspects of growing cannabis, helping both new and experienced growers with useful tips for success. We’ll explore how to make sure your cannabis plants produce dense and visually appealing flowers.

What is Dense Weed Buds?

how to grow dense buds

Knowing why bud density matters is crucial for any grower aiming to produce high-quality cannabis. It goes beyond just looks – dense buds are directly linked to a higher yield. Imagine two identical plants, each producing the same amount of buds. The plant with dense, nugget-shaped flowers effectively doubles the amount of plant material compared to its airy counterpart. This means twice as many joints and bong bowls for the grower. For those in the business, like commercial cultivators and dispensary owners, the visual appeal of dense buds makes their products stand out in a competitive market. Understanding the importance of bud density becomes a key factor in achieving a successful harvest.

Genetics – How To Grow Denser Buds

how to grow dense buds

Growing dense cannabis buds starts by carefully selecting the right genetics. With numerous cannabis varieties available, each with unique traits, understanding the genetic inclination for bud density is crucial. Some strains naturally give rise to light, fluffy buds, while others tend to produce thick, compact colas. To enhance density, it’s recommended to begin with a pure indica plant or a heavily indica-dominant hybrid. Exploring the extensive collection of indica genetics allows growers to pick strains that match their preferences in taste, effect, and flowering time.

Temperature Control for Optimal Growth

Keeping the temperature just right is crucial when growing cannabis, and it has a big impact on the shape and size of the colas. Cannabis plants prefer a temperature range of 18–26°C, and they can handle temperatures as high as 30°C. If the temperature goes too high or too low, like during cold snaps or heat waves, the buds can end up being light and airy. Indoor growers have it easier since they can control the temperature with tools like air conditioning, fans, heaters, and hygrometers. Outdoor growers, on the other hand, have to deal with the unpredictable weather, so they use things like shade cloth and fans in polytunnels to avoid too much heat.

Light Intensity and Spectrum Optimization

Light plays a crucial role in growing cannabis, especially if you want those dense buds. Plants need just the right amount of light and the correct kind of light to make big, sticky flowers. Outdoor plants love soaking up direct sunlight for about 10–12 hours every day, while indoor growers get to pick from different types of lights. LEDs are a great choice because they save energy and don’t make too much heat. It’s important to hit a light intensity of 1000W per square meter for the plants to grow well and produce those dense flowers. Placing the lights carefully is key to avoid problems like reduced photosynthesis or heat stress, which can mess with the density of the buds.

Training Techniques – Shaping for Maximum Density

Simply letting cannabis plants grow upward on their own might not give you the density you want. It’s crucial to use training methods, like low-stress training (LST), to help the plants spread out and grow multiple main colas. In LST, growers gently tie down the main stem with garden wire, making the side branches grow upward, essentially becoming extra stems. By consistently using these techniques, growers can significantly boost the amount they harvest, improve how much light the plants get, and make the flowers better quality. More advanced methods, like topping, can also be used to encourage branching and enhance the overall density of the buds.

Harvest Timing – Patience for Denser Buds

During harvest time, the excitement can make new growers want to pick their buds too early, and that might reduce how dense they could be. While it might be tempting to rush, being patient is super important. Buds grow fast during the flowering stage, and just waiting a bit longer can really make them denser. Keeping an eye on the trichomes, those tiny crystals on the flowers and sugar leaves, is a good way to know when it’s time to harvest. Trichomes start off see-through and turn cloudy as they get mature. When most of them look cloudy, that’s the best time to harvest. Also, checking the pistils, those hairlike things on the flowers, helps figure out if the buds are ready. When pistils are young, they’re white, but as they mature, they change to orange-red or brown.

Nutrient Management – Striking the Right Balance

Keeping a careful balance in handling nutrients is key to getting those dense cannabis buds. Cannabis plants need a mix of nutrients, like nitrogen, phosphorus, and potassium, and also smaller nutrients like zinc and manganese. It’s crucial to follow product recommendations when giving nutrients, especially in the early growing stage. Maintaining slightly acidic soil helps prevent nutrient problems, and adding helpful microorganisms, like mycorrhizal fungi, boosts nutrient absorption. Finding the right balance makes sure cannabis plants get what they need without having too much or too little, which could both hurt how dense the buds end up being.

Conclusion

To sum it up, growing dense cannabis buds involves looking at the big picture, considering various factors like genetics, temperature, light, training, and nutrients. By carefully handling each step of the growing process, growers set themselves up for a harvest that not only meets expectations but goes beyond them. The teamwork of these factors makes sure the cannabis harvest is not just plentiful but also high-quality, making the cultivation stand out in a competitive field. As you start your journey in growing cannabis, use this guide as a roadmap to cultivate dense, top-quality buds that catch the eye and pack a punch.

FAQs

Q: Can I grow dense cannabis buds indoors without using LEDs?
A: Yes, you can. While LEDs are recommended for optimal light intensity, other grow lights like HPS or CFL can be used. Ensure proper placement and monitor for signs of stress.

Q: Is it necessary to use shade cloth for outdoor cannabis cultivation?
A: It’s not always necessary, but shading can help mitigate excess heat during peak sunlight hours. Monitor temperatures and adjust as needed for optimal growth.

Q: What happens if I harvest cannabis buds too early?
A: Harvesting prematurely can result in less dense buds. Waiting for trichomes to turn cloudy and pistils to mature ensures better density and potency.

Q: Can I overdo nutrient administration for cannabis plants?
A: Yes, excessive nutrients can harm plants and reduce bud density. Follow product recommendations, and err on the side of caution, especially during the early vegetative stage.

Q: Are all indica strains guaranteed to produce dense buds?
A: While indica strains generally produce dense buds, individual genetics play a role. Some indica strains may still produce airy flowers, so it’s essential to choose wisely based on strain characteristics.

KNF Growing For Cannabis


KNF Growing For Cannabis or Korean Natural Farming is a unique approach to sustainable farming, with its roots in the idea of swapping out harsh chemicals for traditional Japanese and Korean farming methods. It all began in the 1960s, and KNF has been gaining attention for its focus on using indigenous microorganisms (IMO) to boost the health of both soil and plants. Over time, KNF cannabis growing has started to get some traction. Developed by Cho Han-kyu, KNF farming combines Japanese and Korean farming wisdom with fermentation techniques, offering a more environmentally friendly option for today’s farmers.

What Is KNF and Its Principles?

knf growing

KNF focuses on the “nutritive cycle theory,” which means using specific inputs at particular growth stages. This overall method includes nourishing seeds with nutrients, supporting indigenous microorganisms, unlocking genetic potential through occasional inputs, and steering clear of synthetic fertilizers and tilling. The approach flourishes by promoting the growth of beneficial bacteria and fungi, creating a healthy and organic environment. KNF recipes, made up of nine core solutions, provide a versatile toolkit for growers. This toolkit covers everything from indigenous microorganisms to fermented plant juice and water-soluble calcium phosphate.

The Global Impact of KNF

knf growing

In 1995, Cho Han-kyu’s journey between Korea and Japan, blending traditional farming with new techniques, gave rise to the Natural Farming Life School. The global impact of KNF became clear as Cho and his son hosted seminars worldwide, teaching over 18,000 individuals at the Janong Natural Farming Institute by 2014. KNF’s influence extends globally, from doubling crop productivity in Hawaii to overcoming challenging conditions in Mongolia’s Gobi Desert and addressing odor concerns in China during the Beijing Olympics. KNF isn’t just a farming technique; it’s a transformative approach that delivers real, positive results.

Importance of Indigenous Microorganisms (IMO) in KNF

A cornerstone of KNF lies in manipulating ecosystems using indigenous microorganisms (IMO). These aerobic microorganisms play diverse roles, including:

  • Yeast: Ventilates soil, eliminating foul odors and supporting microorganisms in their functions.
  • Purple bacteria: Thrives in oxygen-depleted water, performing photosynthesis and absorbing carbon through alternative means.
  • Lactic acid bacteria (LAB): Improves soil ventilation, promoting rapid growth and enhancing trichome and terpene production in cannabis.
  • Mycorrhizal fungi: Dramatically increases root system size, transforms soil nutrients, and enhances cannabis yield quality and quantity.
  • Purple bacteria: Thrives in oxygen-depleted water, performing photosynthesis and absorbing carbon through alternative means.


Pros and Cons of KNF

While KNF brings a groundbreaking approach to farming, it requires careful attention and effort. Getting the hang of it means grasping and creating the inputs, underlining the importance of dedication. Nevertheless, the advantages surpass the difficulties, offering lower expenses, less demanding practices, robust and healthier crops, and eco-friendly results. KNF’s thorough care and personal touch make it an excellent choice for those dedicated to sustainable, high-quality cultivation.

KNF Recipes – A Comprehensive Toolkit

KNF maintenance formulas consist of nine core solutions that, when used in various dilutions, aid plant and microorganism health. These include:

  • Microbes — Indigenous Microorganisms (IMO)
  • Police — Lactic Acid Bacteria (LAB)
  • Minerals — Diluted Seawater (SEA)
  • Food — Fermented Plant Juice (FPJ)
  • Cleanser — Brown Rice Vinegar (BRV)
  • Medicine — Oriental Herbal Nutrient (OHN)
  • Fuel — Fish Amino Acid (FAA)
  • Structure — Water-Soluble Calcium Phosphate (WCP)
  • Reproduction — Water-Soluble Calcium (WCA)


Integrating KNF Throughout the Cannabis Life Cycle

KNF’s adaptability shines through as it seamlessly fits into every stage of the cannabis life cycle. From using Indigenous Microorganisms (IMO) during seed soaking and clone dipping to applying Fish Amino Acid (FAA) for robust vegetative growth, KNF adjusts to the plant’s changing needs. Oriental Herb Nutrients (OHN) stand by as a constant supporter, enhancing resilience and growth. When it comes to the flowering stage, the significance of calcium and phosphorus takes center stage, with choices like Fermented Fruit Juice (FFJ) or Water-Soluble Calcium Phosphate (WCP) ensuring optimal bud development.

Application Techniques – Soil Enrichment and Foliar Feeding

KNF’s techniques go beyond just improving the soil; they also include foliar feeding, giving growers more flexibility. Soil enrichment involves gently spreading microbes and IMO, with LAB added in a diluted ratio to make phosphate soluble. The addition of Fermented Mixed Compost (FMC) becomes a valuable soil enhancer, boosting it with nutrients. Additionally, foliar feeding directly provides essential elements to plants, encouraging quick absorption and acting as a non-toxic pest repellent. When combined with the principles of no-till farming, these techniques create a complete approach that optimizes both soil health and nutrient cycling.

Conclusion

KNF stands out as a vital player, promoting sustainable and less wasteful cultivation methods. Beyond being just a farming technique, KNF broadens our outlook on nature and agriculture. Its role in cannabis cultivation becomes crucial, guiding us on a transformative journey toward living in harmony with our surroundings. The essence of KNF goes beyond its principles; it becomes a guiding philosophy for those who seek a thoughtful and environmentally responsible approach to marijuana cultivation.

FAQs

Q: How does KNF differ from traditional farming methods?
A: KNF differs by emphasizing natural inputs like indigenous microorganisms, avoiding synthetic chemicals, and promoting a holistic approach.

Q: Can KNF be used in small-scale gardens?
A: Yes, KNF is adaptable to various scales, making it suitable for small gardens with its DIY and cost-effective methods.

Q: Why is foliar feeding important in KNF?
A: Foliar feeding directly provides essential nutrients to plants, supporting rapid absorption and acting as a non-toxic pest repellent.

Q: How does KNF contribute to environmental sustainability?
A: KNF promotes eco-friendly practices by avoiding synthetic fertilizers, emphasizing local ingredients, and encouraging mindful cultivation.

Q: Is KNF only for cannabis cultivation?
A: No, while KNF gained popularity in cannabis, it is versatile and applicable to various crops, offering benefits like lower costs and healthier yields.

Chicken Manure for Cannabis And Other Potential Organic Fertilizers


When growing cannabis, making your plants reach their full potential needs a smart approach. Using chicken manure for cannabis and other organic fertilizers in your gardening is a key step for great results. Unlike what some might think, manure isn’t just a pile of waste; it’s a strong fertilizer for pot plants for making the soil rich, boosting organic matter, and ensuring your cannabis plants grow well. In this guide, we’ll talk about the many benefits of using manure as a weed soil and fertilizer. We’ll look at how it helps the soil, especially as a fertilizer for cannabis plants, keeping your plants healthy, and making your harvest better.

Why Choose Manure for Cannabis Growth?

chicken manure for cannabis

Enhancing Soil Structure

As outdoor growers move into the spring months, taking care of the soil becomes really important. Manure is a big helper during this time because it makes the soil much better as a fertilizer for weed plants. Whether you’re someone who likes to dig a lot or prefers not to dig much, putting a layer of manure on top is like giving your soil a strong shield. This shield stops the soil from washing away and gives a solid base for your cannabis plants. Knowing how to make the soil better is key for growers who want their gardens to stay healthy and strong.

Increase Water-Holding Capacity

When aiming for the best cannabis growth, managing water becomes super important. Manure plays a big role in this because it helps the soil hold onto water better. This is a real game-changer. By making the soil stronger, manure keeps water in, so you don’t have to water your plants as much. This not only saves water but also keeps your plants from getting too stressed out because of not having enough water. For cannabis growers, figuring out the right amount of water is crucial, and manure is like a trusty friend helping to keep that balance just right.

Nurturing Beneficial Microbes

The teamwork between manure and helpful tiny microbes is a cool part of making cannabis grow well. The special carbon in manure gives these tiny friends a lot of energy. For growers, knowing how these tiny helpers make plants healthy is super important. Manure sets up an environment where bacteria and fungi can do their jobs, like fixing nitrogen and breaking down organic stuff. This helps a lot in keeping the plants strong. Exploring how all this teamwork happens gives growers the know-how to build healthy cannabis gardens.

Providing Key Nutrients

Manure is like a gold mine of nutrients for cannabis plants. It’s full of important stuff like nitrogen, phosphorus, potassium, and tiny nutrients that plants need. This gives your cannabis a constant and natural supply of the things it really craves for growing well. Unlike fake fertilizers, manure slowly lets out organic nitrogen over time. This helps your plants grow steadily and strong. To get top-notch yields, growers need to look into what nutrients cannabis plants want, and how manure does a great job fulfilling those needs.

Determining the Right Amount of Manure

chicken manure for cannabis

Knowing Your Garden’s Needs

How much manure you use in your garden really matters for success. In the beginning, using around 317.5 – 458.6 ounces per 9m² isn’t just a random amount. It’s a smart way to set up your beds, get the tiny life in the soil going, and give your cannabis plants the necessary nutrients. As you get more into gardening, you can take it easy. Charles Dowding, a pro at no-dig gardening, suggests putting on 0.8 – 1.2 inches of manure or compost each winter. This helps slowly mix in nutrients, making your soil better over time.

Precision in Manure Application

Knowing how to use manure is like becoming a master at a craft. Being accurate is super important. In the winter, putting the right amount on your beds gets the soil ready for the upcoming growing season. But, it’s not a one-size-fits-all thing. You have to adjust how much manure you use based on how dense or loose your soil is. If your soil is dense, use a bit less; if it’s loose, use a bit more. Being precise with manure is a crucial skill. It makes sure your cannabis plants get just the right nutrients without the risk of using too much or too little.

Choosing the Best Manure for Cannabis

While we can’t deny how great manure is, choosing the right type needs some careful thinking. There’s this thing called aminopyralid (AP), a herbicide that can mess up manure and hurt your crops big time. It’s super important to get manure from trusted sources and check it well to avoid this problem. Knowing the differences between manure types, what they’re made of, and the risks they might bring is a must. This helps you pick the best option for your cannabis garden without any issues.

Chicken Manure: A Nitrogen-Rich Powerhouse

Looking closely at chicken manure, we find a nutrient-packed powerhouse with huge benefits for cannabis growers. It’s loaded with high amounts of nitrogen, phosphorus, and potassium, making it a great choice for those wanting a complete nutrient package. What’s special about chicken manure is you can turn it into a nutrient-rich mix by fermenting it in water. This gives you a quick way to get those nutrients into your plants, and you can use it in different ways. It adds a lot of flexibility to how you give your cannabis the nutrients it needs.

Rabbit Manure: Swift Nutrient Boost

Choosing rabbit manure is a smart move for growers who want nutrients to hit their plants fast. Not only does it work quickly, but rabbit manure is also packed with a bunch of nutrients like nitrogen, phosphorus, potassium, calcium, magnesium, and zinc. What makes it stand out is you can put it straight on top of the soil without having to do the hot composting thing. This makes it super easy and efficient for cannabis plants that need to gulp down nutrients in a hurry.

Horse and Cow Manure: Texture and Fertility Enhancement

Looking into the benefits of horse and cow manure, we find a valuable tool for making the soil better and richer. With about 1–2% nitrogen and 1–3% potassium, this type of manure gives your cannabis a mix of nutrients that works well. But, be careful. You need to do hot composting to get rid of possible germs. When you think about using horse and cow manure, think about how much it costs to bring it to you and the chance of finding AP. Taking these things into account is crucial.

Pig Manure: A Historical Option with Modern Considerations

Once a top pick for growing cannabis, pig manure needs extra care now because of higher risks of contamination. As pig farming methods changed, there’s more E. coli, salmonella, and parasites in pig manure. Growers have to be careful. You can either turn fresh pig manure into compost to get rid of germs, or get well-rotted pig manure from trusted suppliers to make sure it’s safe and works well for growing cannabis.

Sheep Manure: The Nitrogen-Rich Alternative

Choosing sheep manure is a smart move since it beats cow and horse manure with more nitrogen, phosphorus, and potassium. It’s not just about the nutrients – sheep manure is also full of stuff that brings good bacteria to the soil, making it better. But, there’s a rule to follow. Before using fresh sheep manure, make sure to compost it. This gets rid of any seeds and makes sure your cannabis plants won’t get burned.

Alpaca Manure: Quick Fertilization Without Composting

Alpaca manure is a top pick for growers wanting a quick fertilizer that doesn’t need composting. It’s packed with a lot of nitrogen and potassium, making it a fast and efficient way to give your cannabis plants the nutrients they need. While it doesn’t have as much organic stuff as some other choices, you can use it directly on top of the soil. This makes it a great option for certain cultivation needs because it’s easy and convenient to apply.

Tips for Optimal Cannabis Growth with Manure

  • Precise Application: When putting on manure, make sure to spread it evenly and precisely across the area you want to cover. This helps cannabis plants take in nutrients evenly and lowers the chance of uneven growth.
  • Thorough Checking: Before getting manure, thoroughly check out the suppliers. Read reviews online, ask experienced growers for advice, and talk directly to suppliers to make sure the manure is good quality and doesn’t have any bad stuff in it.
  • Regular Checking: Keep an eye on how manure affects your cannabis plants during the growing season. Watch for signs that your plants either don’t have enough nutrients or have too much. Change how you put on manure if needed and adjust the amount based on what your garden specifically needs.
  • Adaptation to Soil: Adjust how you use manure based on how your soil changes. Do soil tests now and then to see how many nutrients are in there, check the pH, and see how healthy your soil is overall. Change the type and amount of manure you use to keep a good balance between the soil and your cannabis plants.


Conclusion

To sum it up, adding manure as a weed fertilizer outdoors in your cultivation routine isn’t just a random choice; it’s a smart move that brings big benefits to your soil, plants, and overall harvest success. Following the tips in this guide gives your gardening efforts a boost with the amazing power of manure. Learn about the different types of manure, get good at putting it on just right, and see your cannabis plants grow better than ever. Happy growing!

FAQs

1. Can I use any type of manure for my cannabis plants?
Not all manures are created equal. Opt for well-rotted manure from trusted sources, avoiding herbicide-contaminated varieties. Popular choices include chicken, rabbit, and alpaca manure.

2. Is manure safe for my cannabis plants, or could it harm them?
While manure offers valuable nutrients, ensure it’s well-rotted to avoid burning your plants. Fresh or “hot” manure may contain high levels of nitrogen and salts, potentially harming cannabis, especially young seedlings.

3. How often should I apply manure to my cannabis garden?
For initial bed establishment, apply 317.5 – 458.6 oz per 9m². As your garden matures, consider a more laid-back approach, following no-dig gardening practices, and applying a 0.8 – 1.2 inches layer each winter.

4. Can I mix different types of manure for my cannabis plants?
Yes, you can mix manures for a balanced nutrient profile. However, ensure all manures are well-rotted. Avoid mixing fresh manure, as it may have different nutrient levels and pose a risk to your cannabis plants.

5. Is there a risk of pests or diseases with manure in cannabis cultivation?

Proper composting and sourcing from reputable suppliers minimize the risk. Pig manure, in particular, may carry pathogens, so ensure it’s well-rotted or sourced from trusted providers to mitigate potential issues.

Cannabis Heat Stress: Learning Effective Solutions for Optimal Cultivation


Cannabis cultivation is a constantly changing field. Heat stress on weed plants is a big problem that requires a deep understanding. As a cultivator, it’s important to know how the environment and the plant’s biology interact. This guide will teach you about heat stress weed plants and how to handle it. By following this guide, you can make sure your cannabis plants grow strong and potent and avoid cannabis heat stress.

Weed plant heat stress is more than just an inconvenience. It’s a physical reaction to high temperatures that can greatly affect your harvest. Picture your healthy cannabis plants suddenly dealing with intense heat, with their leaves curling up to protect themselves. This visual sign is just the beginning, showing that there’s a bigger problem happening within the plant’s cells. To truly understand heat stress cannabis, we need to uncover the complex biological processes that happen when temperatures rise.

Biological Mechanisms Behind Heat Stressed Weed Plant

heat stress on weed plants

Cannabis plants have a way of dealing with excessive heat. When it gets too hot, the plant cuts back on water to prevent evaporation. But this survival tactic also means the plant can’t absorb important nutrients, which makes it less healthy overall.

Under the heat, important parts of the plant like chloroplasts can get damaged. To protect itself, the plant makes special proteins that act like armor against the high temperatures. But these proteins take away energy that could be used for growth and development, which affects the plant’s overall health.

Understanding how plants respond to heat stress helps us appreciate their ability to survive. It also shows how important it is to find ways to handle heat stress on weed plants when cultivating.

Key Causes of Cannabis Heat Stress

heat stress on weed plants

Excessive Light Intensity

Plants need sunlight for growth. But too much sunlight can hurt cannabis plants. It makes the plant’s temperature go up quickly and messes up important processes. This hurts the cells and stops the plant from growing well. Growers have to pick between LEDs and HIDs for light. LEDs are a good choice because they don’t make as much heat and their brightness can be changed. This helps stop heat problems and keeps the plant’s growth healthy.

Insufficient Ventilation

Imagine being in a room without any air moving around – a stifling experience that is similar to what cannabis plants go through when they don’t have proper ventilation. When the air is still and hot, it becomes difficult for the plant to cool down, so it has to use energy to try to regulate its temperature. This not only makes the plant uncomfortable, but it also creates a good environment for molds and pests to grow. Fans, air conditioners, and heat extractors are really important in this situation. They act like lifelines, making sure that fresh air keeps flowing and that heat doesn’t get trapped.

Incorrect Room or Outdoor Environment Design

Cannabis plants need a specific environment to grow well. If the environment isn’t right, they can get stressed. If they are grown outdoors or in a place without good ventilation, they may show signs of heat stress on weed plants earlier than expected. It’s really important to provide shade, good ventilation, and take care of the soil. In dry climates, the balance between the soil and how much water the plant has is very important. When the humidity is lower than 50-60%, the plant releases more water, which causes wilting. This is a sign that something is wrong and needs attention. Making sure the soil and plant have the right moisture levels is crucial to avoid the negative effects of heat stress.

Recognizing Symptoms of Cannabis Heat Stress

Leaf Symptoms

Heat stress on plants first shows on the leaves. These signs are important for growers to take action and protect the plants.

  • Leaf Curling: One sign of heat stress is when the edges of the leaves curl upwards. This helps the plant by reducing the amount of leaf exposed to intense light and heat.
  • Leaf Cupping: Another sign, called leaf cupping, is often seen in indoor cannabis setups. It happens closer to the light source and the leaves may look like they are cupped. Interestingly, the leaves lower down on the stem might not be affected, showing that heat stress is localized. This symptom can get worse during a heatwave and affect both upper and lower leaves
  • Discoloration: As heat stress continues, the green leaves can change color. They might start turning yellow at the tips and edges. This discoloration can progress to browning, and eventually the whole leaf may dry out and become crispy. The color change shows how severe and how long the plants have been exposed to heat.


Flowering Buds Symptoms

Heat stress not only affects plant growth but also affects the flowering stage, which can affect the quality of the final harvest.

  • THC and Terpene Production: Excessive heat can reduce the production of THC and terpenes, which are responsible for the potency and aroma of cannabis. This can make cannabis less effective and enjoyable for consumers.
  • Foxtailing: In strains that are prone to foxtailing, extreme heat can cause buds to grow elongated with unusual protrusions. These buds have spaced-out calyxes, which gives them a different appearance compared to normal, tightly packed buds.
  • Pistil Coloration: Heat stress can cause premature color changes in the pistils of cannabis buds. Normally, these pistils turn amber or brown towards the end of the flowering cycle. However, under heat stress, they might change color too early when the buds are still not fully developed. This premature coloration can affect the overall maturity and potency of the buds.


Solutions for Optimal Cultivation

Cultivating cannabis with resilience against heat stress requires a multifaceted approach, addressing both environmental factors and plant management strategies.

  1. First, you need to manage the light. It’s important to have the right amount of light for cannabis to grow well. Choosing LED lights instead of HIDs can help control the intensity of the light and reduce the risk of too much heat. You should also adjust the light schedule to match cooler times of the day to avoid heat-related problems.
  2.  Next, you need to have good ventilation. This is essential for preventing heat stress. Using fans, air conditioners, and heat extractors in the right places will keep the air flowing and prevent heat from building up. It will also help avoid mold and pests.
  3. Creating the right environment is also important. You want to mimic the natural habitat of cannabis. Providing shade, especially during the hottest parts of the day, will protect the plants from excessive heat. You should also pay attention to the soil and make sure it has the right amount of moisture. Adjusting your irrigation practices based on the plants’ needs and the current environmental conditions is crucial.
  4. Lastly, it’s important to monitor and make adjustments as needed. Keep a close eye on things like temperature, humidity, and soil moisture. This way, you can catch any problems early on and make changes to keep the plants healthy.

Conclusion

To master cannabis heat stress, you need to understand how the environment and plant physiology interact. As a cultivator, you must constantly adapt and be aware of what cannabis plants need. By understanding heat stress, recognizing its symptoms, and using targeted solutions, you can overcome its challenges. This guide will help you become a master of cannabis cultivation, leading to successful yields and strong, high-quality buds.

FAQs

1. Can humidity levels contribute to cannabis heat stress?
Yes, high humidity levels can exacerbate heat stress in cannabis. While the article emphasizes the impact of low humidity in arid climates, excessively high humidity can impede the plant’s ability to cool itself through transpiration, leading to increased susceptibility to heat stress.

2. Is there a specific temperature range ideal for cannabis cultivation to prevent heat stress?
Yes, maintaining a temperature range between 70-85°F (21-29°C) is generally optimal for cannabis cultivation. Beyond this range, plants may experience heat stress. However, individual strains may have slightly different temperature preferences, and growers should consider these hints.

3. How does the choice of potting soil influence cannabis heat stress?
The type of potting soil is crucial. In extremely dry climates, fast-draining soils can contribute to rapid moisture loss, intensifying heat stress. Conversely, in humid conditions, poorly draining soils can lead to waterlogged roots, compounding stress. Balancing soil moisture is essential for preventing heat stress.

4. Can excessive pruning worsen heat stress in cannabis plants?
Yes, extensive pruning, especially during periods of high temperature, can contribute to heat stress. Pruning reduces the overall leaf surface area, limiting the plant’s ability to cool itself through transpiration. Careful pruning practices and timing are essential to avoid undue stress during heat-sensitive phases.

5. Do certain strains exhibit higher resistance to heat stress?
Yes, some cannabis strains demonstrate better resilience to heat stress. Strains originating from warm climates may inherently possess adaptations that make them more tolerant to elevated temperatures. When selecting strains, considering their natural habitat and climate preferences can contribute to a more robust and heat-resistant cultivation experience.