500 NEW MARIJUANA SEEDS RELEASED

What To Do With Cannabis Stems?


In growing cannabis, people usually pay attention to the flower buds, forgetting about the stems. But, these parts of the plant also have some good stuff. Even though they don’t have as many of the active ingredients as the buds do, cannabis stems still have some helpful things in them so, what to do with weed stems? This guide wants to talk about how we can use cannabis stems better, giving ideas on how to get the most out of them.

Crafting Unique Cannabis Jewelry

Turning cannabis stems into wearable art is a crafty project that blends nature with skill. Artisans can dry and mold the stems, shaping them into beads, pendants, or detailed designs. Adding materials like hemp cord or wooden touches enhances the beauty of the final jewelry. Crafting with cannabis stems not only provides a sustainable option compared to regular jewelry-making materials but also lets people express their bond with nature in a special and individualized manner.

Brewing Cannabis Stem Tea

what to do with cannabis stems

For those wanting a relaxing and healing time, cannabis stem tea gives a milder option compared to usual ways of using it. Simply steeping cleaned and finely chopped stems in hot water, along with favorite herbs or tea leaves, makes a soothing drink with a hint of cannabis flavor. This process lets out various compounds from the stems, like cannabinoids and terpenes, making a gentle yet tasty tea. Whether for unwinding or as part of a wellness habit, cannabis stem tea offers a holistic way to include cannabis in everyday routines.

Creating Infused Cannabis Stem Butter

what to do with cannabis stems

Take your cooking skills up a notch with cannabis stem-infused butter, a flexible ingredient that gives recipes an extra kick. Like regular cannabutter, this infusion includes simmering finely chopped stems with butter over low heat to get out the good stuff. Once strained, the butter can be used in many different dishes, both sweet and savory, like baking or making sauces and spreads. Using cannabis stem butter not only boosts the taste and smell of your dishes but also adds a subtle touch of cannabis that makes them even more enjoyable.

Building Eco-Friendly Cannabis Stem Structures

Considering innovative ideas, cannabis stems can be reused as eco-friendly building materials, providing a sustainable option compared to regular construction methods. Constructors can make strong and environmentally friendly designs by compacting stems into blocks or using them as natural supports in buildings. The natural strength and toughness of cannabis stems make them perfect for things like insulation, soundproofing, and even supporting weight. Using cannabis for building not only cuts down on waste but also encourages the growth of eco-friendly architecture methods.

Enhancing Skincare with Cannabis Stem Extracts

Unlocking the skincare advantages of cannabis stems, beauty lovers can add stem extracts to their daily routines for glowing and healthy skin. Packed with antioxidants and anti-inflammatory properties, cannabis stem extracts provide a natural remedy for different skin issues, like irritation, redness, aging, and dryness. When added to skincare products like serums, creams, and masks, these extracts moisturize, nourish, and shield the skin, giving it a youthful look and a radiant shine

Conclusion

Cannabis stems aren’t just leftovers from growing cannabis. With some creativity and cleverness, these adaptable plant parts can become valuable assets for many different uses. Whether you’re making jewelry, brewing tea, cooking fancy meals, constructing eco-friendly buildings, or improving your skincare routine, cannabis stems open up endless opportunities for trying new things and coming up with innovative ideas. By recognizing what cannabis stems can do, we not only reduce waste but also discover fresh ways to live sustainably and stay healthy in mind and body.

FAQs (Frequently Asked Questions)

Q: Can I smoke cannabis stems?
A: While smoking cannabis stems is technically possible, it’s generally not recommended due to the harsh taste and minimal cannabinoid content.

Q: How should I store cannabis stems?
A: To preserve their freshness and potency, store cannabis stems in an airtight container in a cool, dry place away from direct sunlight.

Q: Can I compost cannabis stems?
A: Yes, cannabis stems are compostable and can enrich the soil with nutrients as they break down over time.

Q: Are there any safety concerns with using cannabis stems?
A: When handling cannabis stems, it’s essential to exercise caution and avoid ingesting raw stems, as they may contain harsh compounds.

Q: Can I make cannabis stem oil?
A: Absolutely! Cannabis stem oil can be extracted by infusing carrier oils with finely ground stems, offering a versatile ingredient for topical applications.

Q: How long do cannabis stems last?
A: When stored properly, cannabis stems can retain their quality for several months to a year, although their potency may diminish over time.

Maximizing Growth: Foliar Feeding Cannabis


Growing marijuana requires careful attention to many details to make sure the plants grow strong and healthy. Among the different methods available, foliar feeding cannabis is a standout technique. In this detailed guide, we’ll explore foliar feeding weed, its amazing benefits, and the best ways to use it on marijuana plants to help them grow better and stay healthy.

What is Cannabis Foliar Feeding

foliar feeding cannabis

Foliar feeding is a groundbreaking way to give plants nutrients by putting them directly onto the leaves. This method takes advantage of how plants can absorb nutrients through tiny pores called stomata, which helps them take in the nutrients quickly and use them right away. By going straight to the leaves, foliar feeding skips any problems in the soil that might stop the plant from getting enough nutrients, making it a fast and efficient way to give plants what they need to grow.

Benefits of Foliar Feeding for Marijuana Plants

foliar feeding cannabis

Enhanced Nutrient Utilization

Marijuana plants need a lot of nutrients, and foliar feeding is a great way to give them what they need quickly and effectively. By putting nutrients right onto the leaves, foliar feeding helps the plants absorb them fast without any delays. This means the plants grow better, stay healthy, and in the end, produce more buds.

Targeted Nutrient Delivery

Foliar feeding gives growers the power to focus on certain nutrients exactly where they’re needed, fixing any shortages or helping with different stages of growth very precisely. Whether it’s giving more nitrogen for leafy growth in the vegetative stage or adding extra phosphorus to encourage lots of flowers during flowering, foliar feeding lets growers customize how they help marijuana plants grow, making sure they develop in the best way possible.

Immediate Response and Corrective Measures

Foliar feeding gets quick reactions from marijuana plants, which means growers can fix nutrient problems right away if they show up. This fast action helps avoid any issues and makes sure the plants keep growing really well in an environment that’s always changing and helping them do their best.

Application of Foliar Feeding for Marijuana Plants

Strategic Timing for Maximum Impact

Timing is key to getting the most out of foliar feeding. It’s best to do it early in the morning when the stomata, tiny pores on the leaves, are most open and ready to take in nutrients. Also, focusing on foliar feeding during the vegetative stage, when plants need a lot of nitrogen for growing lots of leaves and stems, is a smart move. This helps the plants develop strong and healthy right from the start.

Selecting the Right Nutrients

The success of foliar feeding depends on choosing the right nutrients that fit the needs of marijuana plants. Using balanced mixes that have lots of important nutrients, both big ones and tiny ones, gives the plants everything they need to grow well. Chelated nutrients, which are nutrients bound to molecules to help them get absorbed better, can also help make sure the plants take in and use as much of the nutrients as possible.

Precision in Application Techniques

To get the best outcomes from foliar feeding, it’s important to apply it carefully. Using fine mist sprayers helps spread the nutrients evenly all over the leaves, making sure they’re all covered and none of it runs off. Coating both the top and bottom of the leaves really well makes sure the plants get all the nutrients they need, which helps them grow really strong and healthy.

Precautions and Considerations for Optimal Results

Ensuring Compatibility with Other Treatments

It’s really important not to mix foliar feeding with other treatments or stuff that might make it not work as well or cause problems. Thinking about what products can go together and talking to experts can help avoid any risks and keep marijuana plants healthy and strong.

Avoiding Potential Risks

While foliar feeding is usually safe if done right, it’s important to be careful to avoid any risks. Using too much or strong solutions can hurt the leaves, so it’s important to follow the recommended amounts and dilute the nutrients carefully. Also, making sure the environment is right can help prevent any damage to the leaves and make sure foliar feeding works the best it can.

Conclusion

Foliar feeding is a crucial method in marijuana growing, providing unmatched benefits in giving nutrients to the plants and making them grow their best. By using this new way of growing, growers can make their crops reach their full potential, bringing in a new era of success and plenty in cannabis growing.

FAQs

Q: Can foliar feeding harm my marijuana plants?
A: When done correctly, foliar feeding is safe, but using too much or doing it in extreme weather can damage leaves.

Q: Is foliar feeding the same as watering my marijuana plants?
A: No, foliar feeding involves spraying nutrients directly onto the leaves, while watering is giving water to the soil.

Q: Can I use any fertilizer for foliar feeding?
A: It’s best to use a fertilizer specifically made for foliar feeding and designed for marijuana plants.

Q: Will foliar feeding make my marijuana plants grow faster?
A: Yes, foliar feeding can help plants grow faster by giving them nutrients they need right away.

Q: Is foliar feeding better than giving nutrients through the soil?
A: Both methods are important, but foliar feeding can be quicker and more direct, especially in emergencies.

Cannabis Nutrient Requirements: A Comprehensive Guide


Growing cannabis requires careful attention, especially when it comes to giving them the right cannabis nutrient requirements. How well your cannabis plants grow depends a lot on making sure they get the right mix of nutrients. In this guide, we’ll talk about the weed nutrients for beginners that are super important for growing strong cannabis plants. We’ll look at what they do, where they come from, and how to give them to your plants.

Understanding Key Nutrients

cannabis nutrient requirements

Nitrogen (N)

Nitrogen is super important for cannabis plants, especially when they’re growing lots of leaves and stems. Usually, they get nitrogen from the soil, but if you’re growing them in water, you might need to add extra nitrogen. When cannabis plants are in the stage where they’re growing a lot, called the vegetative stage, they need a bunch of nitrogen to make all those leaves. But when they start flowering, too much nitrogen can cause problems, so it’s important to keep the right balance of nutrients.
Nitrogen does more than just help plants grow—it also helps make enzymes and proteins, which keeps the plant healthy and strong. When growers understand all the different things nitrogen does, they can make sure their cannabis plants grow really well.

Phosphorus (P)

Phosphorus is really important for cannabis because it helps them grow faster, especially when they’re making flowers. If you’re growing cannabis in water, you’ll need special fertilizers with phosphorus in them. Not having enough phosphorus can make it hard for the plant to grow properly and make flowers, which is a big deal when you’re growing cannabis.
But phosphorus does more than just help with flowers—it also helps move energy around in the plant. This affects how the roots grow, how well the plant makes food from sunlight (photosynthesis), and how it takes in nutrients. By making sure there’s enough phosphorus all through the plant’s life, growers can make sure their cannabis plants make lots of flowers and grow really well.

Potassium (K)

Potassium is super important for keeping cannabis plants healthy. You can get potassium from different places, like special fertilizers or stuff like compost. If you’re growing cannabis in water, you’ll need to add extra potassium to make sure the levels are just right. But adding too much potassium can cause problems, so it’s important to keep an eye on it.
Potassium does more than just help with getting nutrients—it also helps balance how much water is in the plant, helps activate enzymes, and helps the plant use carbohydrates. This is really important for making sure the plant can handle tough situations and fight off diseases. When growers make sure there’s enough potassium, they help their cannabis plants stay strong, grow well, and make lots of good stuff.

Magnesium (Mg)

Magnesium is really important for cannabis plants because it helps make chlorophyll, which is what plants use to turn sunlight into food (photosynthesis). If a plant doesn’t have enough magnesium, its leaves might turn yellow, which makes it hard for the plant to make food and stay healthy.

But magnesium does more than just help with photosynthesis—it also helps activate enzymes, move nutrients around the plant, and make DNA, which is important for growing. When growers fix magnesium problems quickly, they help their plants stay healthy and grow well, making sure they produce a lot of good stuff.

Calcium (Ca)

Calcium is super important for cannabis plants because it helps roots grow and makes the walls of their cells strong, especially when they’re growing in water. Adding extra calcium is really important to make sure the plant’s structure stays strong and it can use nutrients well.

But calcium doesn’t just help with making the plant strong—it also helps cells talk to each other, activates enzymes, and helps the plant handle tough situations. When growers make sure there’s enough calcium, they help their plants stay healthy, avoid not having enough nutrients, and make a lot of good stuff.

Non-Mineral Elements

Apart from the main nutrients, cannabis also needs elements that come from water and air, like carbon, oxygen, and hydrogen, which are really important for basic body functions.

  • Carbon dioxide is what plants use to get carbon for making food from sunlight (photosynthesis), which helps them grow and make a lot of plant material.
  • Oxygen helps cells in the plant breathe, which gives them energy to do all the things they need to grow and develop.
  • Hydrogen is part of water molecules and it’s really important for moving nutrients around the plant, helping enzymes work, and making sure the plant stays strong and healthy.


Nutrition Management Basics

For cannabis to grow well, it’s really important to understand the basics of nutrition. The main nutrients plants need are nitrogen, phosphorus, and potassium (NPK), along with other important minerals like calcium, magnesium, and sulfur. Making sure the plant gets the right mix of nutrients, tailored to its specific needs and the environment it’s growing in, is key to helping it grow as much as possible.
Managing nutrition well means getting the right nutrients from good sources, applying them in the right way, and keeping an eye on how the plant is doing to make sure it stays healthy and productive. By following the best ways of doing things and using high-quality nutrients, growers can grow really strong, high-yielding cannabis plants, making sure they have the best chance to grow well.

Nutrient Solution Application

Throughout different stages of cannabis growth, it’s important to adjust how often and how much nutrient solution is given, paying close attention to keeping the right balance of nitrogen, phosphorus, and potassium (NPK). Testing the pH of the soil regularly helps make sure it’s just right for cannabis to grow well, ideally between 5.8 and 6.2.

Different techniques can be used to give plants the nutrients they need, like spraying them on the leaves, putting them in the water, or pouring them directly onto the roots. Choosing the right method and following the recommended amounts helps make sure the plant gets enough nutrients without getting too much, which can cause problems. This helps the plant grow strong and healthy, making sure it grows well without any issues.

Organic vs. Mineral Nutrition

cannabis nutrient requirements

Growers have to decide between using organic or mineral nutrients, each with its own benefits. Organic sources, like compost, release nutrients slowly, while mineral nutrients are quickly absorbed, which is great for hydroponic systems and LED grow lights. It’s important to balance the right mix of nutrients and fix any problems like not enough or too much of something.

Organic growing focuses on being sustainable and taking care of the environment by using natural stuff to make the soil better and help good microbes grow. Mineral nutrition gives more control and lets growers customize nutrients to fit exactly what the plant needs. By thinking about the good and bad parts of each way, growers can pick the one that works best for what they want to do.

Sourcing Nutrients

Choosing the right nutrients is really important for growing cannabis successfully. There are special stores, online shops, and garden supply places that sell nutrients made just for cannabis, which are great for helping the plants grow well. Or, growers can pick and choose individual nutrients to make their own custom mix, making sure they give the plants exactly what they need for where they’re growing.
It’s crucial to check that the nutrients are good quality by looking at things like nutrient analysis, certifications, and the reputation of the brand or supplier. By spending money on trustworthy brands and suppliers, growers can lower the risk of the plants not getting enough nutrients, making sure they have what they need to grow consistently and well from start to finish.

FAQs

Q: What nutrients are essential for marijuana cultivation?
A: Nitrogen, phosphorus, potassium, calcium, magnesium, and sulfur are indispensable for marijuana growth.

Q: Can cannabis be grown without soil?
A: Yes, cannabis can thrive hydroponically without soil.

Q: How can I supply nutrients to my cannabis plants?
A: Nutrients can be supplied through liquid fertilizers or by incorporating dry fertilizers into the soil.

Q: What type of manure is suitable for cannabis plants?
A: Various types of manure, including chicken, cow, horse, or rabbit manure, can be utilized.

Q: How much fertilizer solution and water do cannabis plants require?
A: Cannabis plants typically require a fertilizer solution at a rate of 1-2 teaspoons per gallon of water, with watering frequency of at least thrice every two weeks.

THCA Seeds: Everything You Need to Know


In growing cannabis, THCA seeds spark curiosity and excitement. They offer the potential to discover many benefits and opportunities for both fans and growers. Join us on a journey to uncover the secrets of THCA seeds, learning about where they come from, how they’re used, how to grow them, and more.

What are THCA Seeds?

thca seeds

THCA seeds, also called tetrahydrocannabinolic acid seeds, are a special type of cannabis seeds known for having lots of THCA. THCA, short for tetrahydrocannabinolic acid, is what THC, the stuff that gets you high in cannabis, comes from. These seeds are grown carefully to have a lot of THCA while keeping THC levels low. This matters because THCA doesn’t make you high by itself. Instead, it might have helpful effects, which is why it’s interesting for medical users and people who care about wellness.

The Science Behind THCA Flower Seeds

THCA seeds have a special makeup that sets them apart. Unlike THC, which makes you feel high, THCA doesn’t do that when you have it raw. Instead, it might help with things like reducing inflammation, protecting your brain, and stopping nausea. These seeds have a lot of tetrahydrocannabinolic acid, which turns into THC when it’s heated up. Usually, this happens when you smoke or vape cannabis. But if you have THCA without heating it, like by juicing cannabis leaves or eating raw cannabis, you can get its benefits without feeling high.

Benefits of THCA Seeds

THCA seeds offer a lot of hope for holistic wellness and alternative medicine. Even though we’re still learning about their exact benefits, early studies show that THCA might help with:

  • Anti-inflammatory Properties: THCA has shown promise as a strong anti-inflammatory. This makes it useful for people dealing with conditions like arthritis, inflammatory bowel disease, and chronic pain.
  • Neuroprotective Effects: Some studies suggest that THCA might help protect the brain, which could be good news for people with neurodegenerative diseases like Alzheimer’s, Parkinson’s, and multiple sclerosis.
  • Antiemetic Properties: THCA might have antiemetic properties, meaning it could help ease nausea and vomiting for people going through chemotherapy or dealing with motion sickness.


Growing THCA Seeds

thca seeds

Growing THCA seeds successfully takes careful attention to detail and knowing what the plants need. Here are some tips for doing it right:
Genetics: Begin with high-quality THCA seeds from trusted breeders like Rocket Seeds to make sure you get the best genetics and cannabinoid levels.

  • Environment: Provide an optimal growing environment with adequate lighting, ventilation, humidity, and temperature control.
  • Nutrition: Use nutrient-rich soil or hydroponic systems to provide essential nutrients for plant growth and development.
  • Pruning and Training: Regularly prune and train your plants to promote healthy growth and maximize THCA production.
  • Harvesting: Harvest your THCA-rich cannabis plants at the peak of maturity to ensure maximum potency and quality.


Conclusion

THCA seeds give us an exciting look into how cannabis could help with wellness and healing. As we learn more about them, we’ll likely find out even more about how they can help. Whether you’re using cannabis for medical reasons or just curious about it, THCA seeds offer a lot of potential for making health better.

FAQs (Frequently Asked Questions)

Q: Are THCA seeds legal to cultivate?
A: Yes, in regions where cannabis cultivation is legal, THCA seeds can be legally cultivated for personal use or commercial purposes.

Q: How can THCA seeds be consumed?
A: THCA seeds can be consumed raw, juiced, or incorporated into various recipes. Some users also prefer to vaporize or smoke THCA-rich cannabis products.

Q: Do THCA seeds contain THC?
A: While THCA seeds contain high levels of THCA, they typically have minimal THC content, making them non-psychoactive.

Q: What are the potential side effects of consuming THCA seeds?
A: Side effects of consuming THCA seeds are generally mild and may include dry mouth, red eyes, and increased appetite.

Q: Can THCA seeds be used for medical purposes?
A: Yes, THCA seeds hold promise for various medical applications, including pain management, inflammation reduction, and nausea relief.

Q: How can I purchase THCA seeds?
A: THCA seeds can be purchased from licensed dispensaries, seed banks, or reputable online retailers like Rocket Seeds.

7 Crucial Weed Growers Tips Everyone Must Know


Whether you’re new to gardening or have some experience, knowing the weed grower tips for successful weed cultivation is important. We will explore seven essential tips every beginner weed grower should understand. We’ll cover everything from choosing the right strains to creating optimal growing conditions. By the end, you’ll have the knowledge and skills to grow healthy cannabis plants with our cannabis growing tips.

Tip 1 – Understand Your Weed-Growing Environment

weed growers tips

It’s important to know about the environment where your plants will grow best. Things like the weather, how humid it is, and how much sunlight they get is important for how well your plants will grow. By looking at where you’re going to grow them and making any changes you need to, you can make sure your weed plants have the best chance to grow well.

Tip 2 – Select the Right Weed Strains

weed growers tips

Choosing the right weed strains is important for a good harvest. You need to pick ones that match the conditions where you’re growing and what you want from your weed. Whether you want strong weed, special tastes, or medicinal effects, there are lots of different strains out there. Do some research and think about things like how much THC or CBD they have, how long they take to flower, and how they grow to find the best strains for what you want to do.

Tip 3 – Provide Proper Nutrients and Watering Techniques

weed growers tips

Managing nutrients is really important for making sure your weed plants grow well and give you lots of buds. You need to know what your plants need as they grow, so they don’t miss out on anything important and grow strong. It’s also important to water them right, keeping the soil damp but not too wet, so their roots don’t rot and they stay healthy.

Tip 4 – Implement Effective Pest and Disease Control

weed growers tips

Keeping your weed plants safe from bugs and diseases is really important for growing them well. You can stop problems before they start by checking your plants often and using bugs that eat bad bugs to keep them away. Also, keeping everything clean, like washing your tools and making sure where you grow your plants is clean, can stop diseases from spreading.

Tip 5 – Optimize Light and Temperature Conditions

weed growers tips

Light and temperature are really important for making sure your weed plants grow well. They need enough light and the right temperature to make food and grow flowers. Whether you’re using sunlight or special lights, it’s important to give them enough light for the right amount of time. Also, keeping the temperature just right in the place where you grow your plants helps them grow steadily and stay healthy.

Tip 6 – Learn Pruning and Training Techniques

weed growers tips

Pruning and training your weed plants can help you get more buds and make sure they grow well. You can do things like cutting off extra leaves and shaping your plants in ways like topping or LST (Low-Stress Training) to let light and air get to them better and make bigger buds. Also, using methods like SCROG (Screen of Green) or SOG (Sea of Green) can help you use your space better and get more buds overall.

Tip 7 – Harvest Timely and Cure Properly

weed growers tips

After growing your weed plants, the last steps are harvesting and curing, which are really important for keeping your weed strong, tasty, and smelling good. You need to pick the right time to harvest by looking at things like how mature the trichomes are and what stage the flowers are in. Also, drying and curing your weed properly, in a place with the right humidity, can make it even better and last longer.

Conclusion

Growing top-notch weed takes a mix of know-how, practice, and sticking with it. If you follow the seven key tips we’ve talked about here, you’ll be well on your way to a great harvest and enjoying the fruits of your labor. Keep learning and improving as you go, and don’t be afraid to ask other growers or pros for help when you need it.

FAQs

Q: How often should I water my weed plants?
A: Watering frequency depends on various factors such as the stage of growth, environmental conditions, and soil moisture levels. Generally, it’s recommended to water your weed plants when the top inch of soil feels dry to the touch.

Q: What are some natural pest control methods for weed cultivation?
A: Natural pest control methods include introducing beneficial insects such as ladybugs and praying mantises, using neem oil or insecticidal soaps, and implementing physical barriers such as row covers to protect your plants from pests.

Q: How can I tell when my weed plants are ready for harvest?
A: You can determine readiness for harvest by examining the trichomes on your plants’ buds using a magnifying tool. Harvest when the majority of trichomes have turned cloudy or amber-colored for optimal potency and flavor.

Q: What are the best strains for beginner weed growers?
A: Some beginner-friendly strains include Blue Dream, Northern Lights, and White Widow, known for their resilience, ease of cultivation, and balanced effects.

Q: How can I prevent mold and mildew in my growing environment?
A: To prevent mold and mildew, ensure proper airflow and ventilation in your growing space, maintain moderate humidity levels, and avoid overcrowding plants. Additionally, consider using preventative treatments such as sulfur burners or fungicides.

Q: Can I grow weed indoors without grow lights?
A: While natural sunlight is ideal for outdoor cultivation, indoor growers can achieve successful harvests using supplemental lighting such as LED or HPS grow lights. However, it’s essential to ensure adequate light intensity and duration to support healthy growth and flowering.

How to Fix a Stunted Autoflower


Autoflowering cannabis plants grow fast and are easy to take care of. But sometimes they don’t grow well and give less yield. This guide will explain why this happens and teach you how to fix stunted autoflower, so your plants can grow better.

Understanding Stunted Autoflower Growth

Autoflowering cannabis plants have a set growth cycle, going from seedling to vegetative to flowering stages. Knowing these stages well helps diagnose and fix growth problems. Each stage has its challenges and needs for good growth. When growers understand these stages, they can take better care of their plants to make them healthier and more productive.

Identifying Stunted Autoflowers

The first thing to do when fixing stunted growth is to notice the signs. Apart from obvious slow growth and small plants, watch out for other signs like yellow leaves, short spaces between leaves, and weak plants. Keep a close eye on your plants all the time. If you see any issues, fix them quickly. This will help your autoflowers grow healthier and stronger.

Causes of Stunted Growth

Stunted growth in autoflowers can happen because of different reasons, like environment or genetics. Bad growing conditions, like not enough light, wrong humidity, or very hot or cold temperatures, can slow down growth. Also, some strains might be more likely to have stunted growth. Not having enough nutrients or having the wrong balance of them can also cause problems and stop the plant from growing well. When growers know why their plants aren’t growing well, they can find solutions to fix each problem.

How to Fix a Stunted Autoflower

Optimizing Growing Conditions

how to fix a stunted autoflower

Making the right environment is crucial for healthy autoflower growth. Give your plants enough light, water, and air all the time. Keep an eye on temperature and humidity to keep them in good conditions and help them use sunlight well. Also, think about things like pH levels and what your plants are growing in, because these can affect how well they get nutrients. When you keep the conditions just right, your plants will grow well and you’ll get the most yield from them.

Nutrient Management

how to fix a stunted autoflower

Giving autoflowers the right nutrients is key for strong growth. Use a balanced fertilizer that has all the important nutrients, both big and small. Test your soil often to see how many nutrients are in it, and change how you feed your plants based on the results. Watch how your plants use nutrients and fix any problems, like yellow or weird-looking leaves, quickly. You can also add natural stuff or extra things to your soil to make it better for your plants. When you take care of nutrients well, you’ll get the best harvest with good taste and strength.

Pruning and Training Techniques

how to fix a stunted autoflower

Trimming and shaping your plants can reduce stunted growth and make them grow more branches and buds. Try methods like cutting the top off, bending branches gently (called low-stress training), and taking off some leaves to let in more light and air. These tricks make your plant’s shape better and help buds grow more evenly. When you remove extra leaves and focus on making buds, your plants can make more buds and better-quality crops. Test out different ways to trim and see what works best for your plants, changing as needed to get the results you want.

Pest and Disease Control

how to fix a stunted autoflower

Bugs and diseases are big problems for autoflowers and can make them grow slowly if you don’t stop them. Do things like checking your plants often, keeping things clean, and using strategies that mix different ways to control pests (called integrated pest management). If you can, pick plants that bugs don’t like, and don’t bring in soil or plants that might have bugs or diseases. If your plants do get bugs, treat them quickly with natural or chemical methods to stop them from hurting your plants too much. When you keep a close watch on pests and diseases, you’ll keep your plants safe and get the best crops possible.

Conclusion

Dealing with stunted growth in autoflowers needs a comprehensive plan that looks at everything from the environment to genetics and nutrient care. By finding out why your plants aren’t growing well and fixing those problems, you can help them grow strong and give you more buds. Keep watching your plants closely and change how you take care of them as needed. With patience, hard work, and a focus on doing your best, you can overcome challenges and get great results from your autoflower cultivation.

FAQs

Q: How can I tell if my autoflower is stunted?
A: Signs of stunted growth include slow development, small stature, and pale or discolored leaves. Additionally, stunted autoflowers may exhibit reduced vigor, with undersized buds and sparse branching.

Q: What causes stunted growth in autoflowers?
A: Stunted growth can result from a combination of environmental stressors, genetic factors, and nutrient imbalances. Common culprits include inadequate lighting, extreme temperatures, poor soil quality, and insufficient or excessive nutrient levels.

Q: Can stunted autoflowers recover?
A: With proper care and intervention, stunted autoflowers can often recover and resume healthy growth. By addressing underlying issues such as nutrient deficiencies, environmental stress, or pest infestations, growers can facilitate recovery and encourage new growth.

Q: How can I fix nutrient deficiencies in my autoflowers?
A: To address nutrient deficiencies, start by conducting a soil test to identify specific imbalances. Then, adjust your fertilizer regimen accordingly, supplementing with appropriate nutrients to meet plant needs. Consider using organic amendments or foliar sprays for rapid nutrient uptake and absorption.

Q: Are there any natural remedies for pest control in autoflowers?
A: Yes, several natural remedies can effectively control pests in autoflowers without resorting to chemical treatments. Examples include neem oil, insecticidal soap, diatomaceous earth, and predatory insects such as ladybugs or lacewings. These eco-friendly alternatives help manage pest populations while minimizing harm to beneficial organisms and the environment.

Q: What is the optimal temperature range for autoflower growth?
A: Autoflowers thrive in temperatures between 70-85°F (21-29°C) during the day and slightly cooler temperatures at night. Maintaining consistent temperatures within this range promotes healthy growth, robust metabolism, and optimal resin production, resulting in high-quality harvests.

Peat Moss Cannabis: Make Your Own Potting Mix


Attention to detail is needed when growing cannabis, focusing on things like soil and watering. Among many choices, peat moss cannabis cultivation is a natural option that can help your cannabis plants grow. Peat moss isn’t just for growing; it’s important for keeping your cannabis plants healthy and strong.

Understanding Peat Moss

Peat moss, also known as sphagnum peat moss, comes from plants breaking down in wet places like bogs or swamps. It’s made mostly of partly broken-down sphagnum moss. This makes it great for growing cannabis because it can hold water, help soil breathe, and make roots grow strong. That’s why growers everywhere like using it.

Types of Peat Moss

  • Sphagnum Peat Moss: This type of peat moss is very popular among cannabis growers. It can soak up a lot of water, which helps keep cannabis plants consistently hydrated.

peat moss cannabis

  • Sedge Peat Moss: Sedge peat moss has more fibrous material, which makes it great for giving soil mixes strong support. Its fibers help air move well in the soil, which helps roots grow strong.

peat moss cannabis

  • Reed-Sedge Peat Moss: This type, made from a mix of reed and sedge mosses, balances holding water and letting air in. It’s perfect for growing cannabis because it keeps just enough moisture without making the soil too wet.

peat moss cannabis

Peat Moss – Homemade Potting Mix

Adding peat moss to your cannabis growing methods can really make your plants better. Whether you’re getting soil ready or making potting mixes, peat moss helps in many ways for cannabis growers. When you’re getting soil ready for planting, mixing peat moss with other natural stuff like compost or perlite can make the soil better for your plants. Also, using potting mixes with peat moss is great for young plants, helping their roots grow well and making them grow better overall.

Pros and Cons

  • Advantages of Peat Moss for Cannabis: Peat moss brings many benefits to growing cannabis, like making soil better, keeping moisture in, and giving plants more nutrients. Because it creates a good place for cannabis plants to grow, they become healthier, stronger, and give bigger yields.
  • Disadvantages of Peat Moss for Cannabis: Although peat moss has many advantages, growers need to think about its downsides too. One big issue is its impact on the environment. Getting peat moss can harm habitats and add to carbon emissions. Also, peat moss isn’t something that can be replaced quickly, as it takes hundreds of years to form. This means it’s not a good long-term option.

Peat Moss Alternatives

Even though peat moss is still liked for growing cannabis, there are other options that are more sustainable. One of them is coco coir, which comes from coconut shells and does similar things to peat moss, like holding water well and letting air in. Perlite and vermiculite are other choices used in potting mixes to make soil better without the same worries about the environment that come with peat moss.

Environmental Impact

Although peat moss works well for growing, using it can cause big environmental problems. Peatlands, where peat moss comes from, are important for storing carbon and protecting different plants and animals. But getting peat moss can mess up these places, making animals lose their homes, letting out carbon, and ruining the soil. Because of this, many growers are looking for other options that are better for the environment, so they can help protect nature.

Peat Moss Cannabis Care Tips

  • pH Level Management: Keeping the right pH level is important for making sure plants get the right nutrients and stay healthy. Peat moss makes soil more acidic, so it’s best to aim for a pH of about 6.0 to 6.5 when growing cannabis.
  • Moisture Control: Making sure plants get the right amount of water is important to help them grow well. Peat moss holds onto water well, but it’s still important to check the soil often and give water only when needed. Too much water can drown the plants, while too little can make them dry out and stress.
  • Fertilization: Although peat moss has some nutrients that plants need, it might not have everything cannabis plants require to grow well all the time. Using organic fertilizers with lots of nitrogen, phosphorus, and potassium can make sure plants get all the nutrients they need to grow strong and flower well.

Conclusion

Peat moss remains a valuable resource for cannabis cultivators, offering numerous benefits for plant health and growth. However, it’s essential to consider its environmental impact and explore sustainable alternatives to ensure the long-term viability of cannabis cultivation practices. By understanding the properties of peat moss and implementing best practices for its use, growers can nurture healthy, thriving cannabis plants while minimizing their ecological footprint.

FAQs

Q: Is Peat Moss Sustainable for Cannabis?
A: Peat moss usage raises sustainability concerns due to its extraction impact on peatlands.

Q: How Often Should I Water Cannabis with Peat Moss?
A: Water cannabis when the top soil layer feels dry; avoid overwatering.

Q: Can I Reuse Peat Moss for Cannabis?
A: Yes, reuse peat moss by mixing it with fresh soil or compost after harvesting.

Q: What pH Should Peat Moss be for Cannabis?
A: Adjust peat moss pH to 6.0-6.5 for optimal cannabis nutrient uptake.

Q: Are There Any Risks of Using Peat Moss?
A: Risks include environmental impact and potential pathogens or pests.

Q: How Much Peat Moss Should I Use for Cannabis?
A: Use 30-50% peat moss in soil mix; adjust based on pot size and moisture levels.

How to Stop Post Harvest Bud Rot


Post harvest bud rot can cause big problems for your crop yields if you don’t deal with it. Many growers face this issue, but you can reduce its impact and save your harvest with the right methods. This guide covers effective techniques and steps to prevent post harvest bud rot. We’ll explain what causes it and how to stop it from happening. From figuring out the reasons to taking preventive actions, we’ve got you covered.

What is Post Harvest Bud Rot?

post harvest bud rot

Post harvest bud rot, also called botrytis cinerea, is a fungal disease affecting various crops like fruits, veggies, and flowers. It thrives in damp conditions and spreads fast, causing significant harm to your crop. Knowing what causes bud rot is crucial to prevent it effectively.

Bud rot usually starts with small, wet spots on the buds or flowers of the plant. As it advances, these spots can grow, get covered in fuzzy gray mold, and give off a bad smell. If not treated, bud rot can rot entire buds or flowers, leading to lower yields and poorer quality.

What Are The Common Causes of Bud Rot

post harvest bud rot

To effectively fight bud rot, it’s vital to recognize the common causes and risks linked with the disease. Various factors can play a role in the growth of bud rot, including:

  • High Humidity Levels: High humidity levels in the air provide the ideal conditions for fungal growth, which is a major risk factor for bud rot. Insufficient ventilation and lack of airflow can worsen this problem by trapping moisture around the buds, encouraging fungal growth.
  • Damp or Wet Conditions: Bud rot flourishes in damp or wet conditions, especially during extended rainy periods or heavy dew. Soil that’s soaked with water and overwatering can also add to the surplus moisture around the buds, providing a perfect environment for fungal spores to thrive.
  • Poor Air Circulation: Lack of airflow in the growing space can trap moisture, stopping it from dispersing. This creates stagnant conditions perfect for fungal growth. Good ventilation is crucial to keep humidity levels right and stop bud rot from starting.
  • Plant Stress: Plants under stress are more prone to fungal infections like bud rot. Things like not enough nutrients, extreme temperatures, and pest attacks can weaken the plant’s defenses, making it easier for diseases to take hold.


How To Prevent Bud Rot?

Preventing bud rot needs a proactive plan that deals with the main causes and risks. By using these preventive steps, you can protect your crops from this harmful disease:

  • Maintain Proper Ventilation: Make sure there’s enough airflow in the growing space by using fans or vents to keep the air moving. This stops moisture from building up and lowers the chance of fungal infections, such as bud rot.
  • Monitor Humidity Levels: Regularly check the humidity levels in the growing area and keep them in the right range. Use dehumidifiers or humidity controllers to manage moisture and stop conditions that help fungi grow.
  • Practice Proper Watering Techniques: Water your plants in the morning so any extra moisture can dry up before night. Try not to water from above too much because it can make the air damp and help bud rot grow.
  • Remove Infected Plant Material: Quickly take out any buds or flowers that look like they’re rotting to stop the disease from spreading. Throw away infected plant bits properly to keep fungal spores from spreading to other plants.
  • Apply Preventive Treatments: You might want to use fungicides or natural extracts that fight fungus to keep your plants safe from bud rot. Follow the instructions from the manufacturer and use treatments before any infection happens to lower the chance of getting sick.


Conclusion

Understanding why post harvest bud rot happens and using good preventive steps can keep your crops safe and make sure you get a good harvest. Check things often, keep everything clean, and act early to stop bud rot and get more crops. Remember to keep the growing conditions just right, do things the right way, and watch out for any signs of trouble. If you do things right, you can beat post harvest bud rot and have strong, healthy crops.

Frequently Asked Questions (FAQs)

Q: How does bud rot affect crop yields?
A: Bud rot can significantly reduce crop yields by causing the decay of buds or flowers, leading to losses in both quantity and quality.

Q: Can bud rot be cured once it develops?
A: Once bud rot develops, it can be challenging to cure, especially in advanced stages. Prevention is key to minimizing the impact of bud rot on your harvest.

Q: What are some natural remedies for preventing bud rot?
A: Natural remedies such as neem oil, potassium bicarbonate, and compost teas can help prevent bud rot by boosting plant immunity and inhibiting fungal growth.

Q: Is bud rot contagious to other plants?
A: Yes, bud rot is highly contagious and can spread rapidly to nearby plants if not promptly addressed. It’s essential to remove infected plant material and practice good sanitation to prevent the spread of the disease.

Q: How can I prevent bud rot in greenhouse environments?
A: In greenhouse environments, maintaining proper ventilation, humidity levels, and sanitation practices is essential for preventing bud rot. Consider installing fans or ventilation systems to promote airflow and reduce humidity levels.

Q: Are there any resistant plant varieties that are less susceptible to bud rot?
A: Some plant varieties may exhibit greater resistance to bud rot than others. Consult with local experts or extension services to identify resistant varieties suitable for your growing conditions.

Retro Cannabis Strains Of The 90s


Remember the 90s? Grunge music, scrunchies, and of course, the iconic cannabis strains that defined an era. If you’re feeling nostalgic and curious about what weed was like back then, you’re in for a treat. In this article, we’ll take a deep dive into the world of 1990s weed, exploring its cultural significance, appearance, the most sought-after strains, the unique experience it offered, and how it compares to the cannabis of today. So, roll one up and join us on this enlightening journey to discover what weed from the 90s was all about.

The 90s Weed Culture

The 90s were a transformative period for cannabis culture. It was a time when the counterculture movement of the 1960s and 70s had matured into a widespread acceptance of cannabis as a recreational substance. The 90s witnessed an emergence of a vibrant and diverse weed culture, from college campuses to underground music scenes. It became a symbol of rebellion and freedom, representing a break from conventional norms.

But it wasn’t just about rebellion; it was about unity and bonding. Cannabis was the common thread that brought people together. Sharing a joint or passing a homemade bong was a social activity that transcended boundaries. It was a way for friends and strangers alike to connect, talk, and unwind. The 90s weed culture was characterized by an ethos of communal enjoyment and celebration of the plant.

What Did Weed Look Like in the 90s?

One of the distinctive features of 90s weed was its appearance. Cannabis from this era often came in colorful and psychedelic packaging, reflecting the spirit of the times. The buds themselves were less potent compared to contemporary strains, but they had a unique charm.
They were typically laden with seeds, which needed to be meticulously removed before consumption. Rolling a joint with 90s weed often meant dealing with stems and seeds, but it was all part of the experience.

The aroma of 90s weed was also distinct, often characterized by earthy, skunky, or spicy notes. It’s worth noting that the genetic diversity of cannabis strains was not as extensive as it is today. So, while the aroma and flavor profiles were less varied, they carried a certain nostalgic appeal. Smoking 90s weed was a sensory journey in itself, with each puff evoking memories of a bygone era.

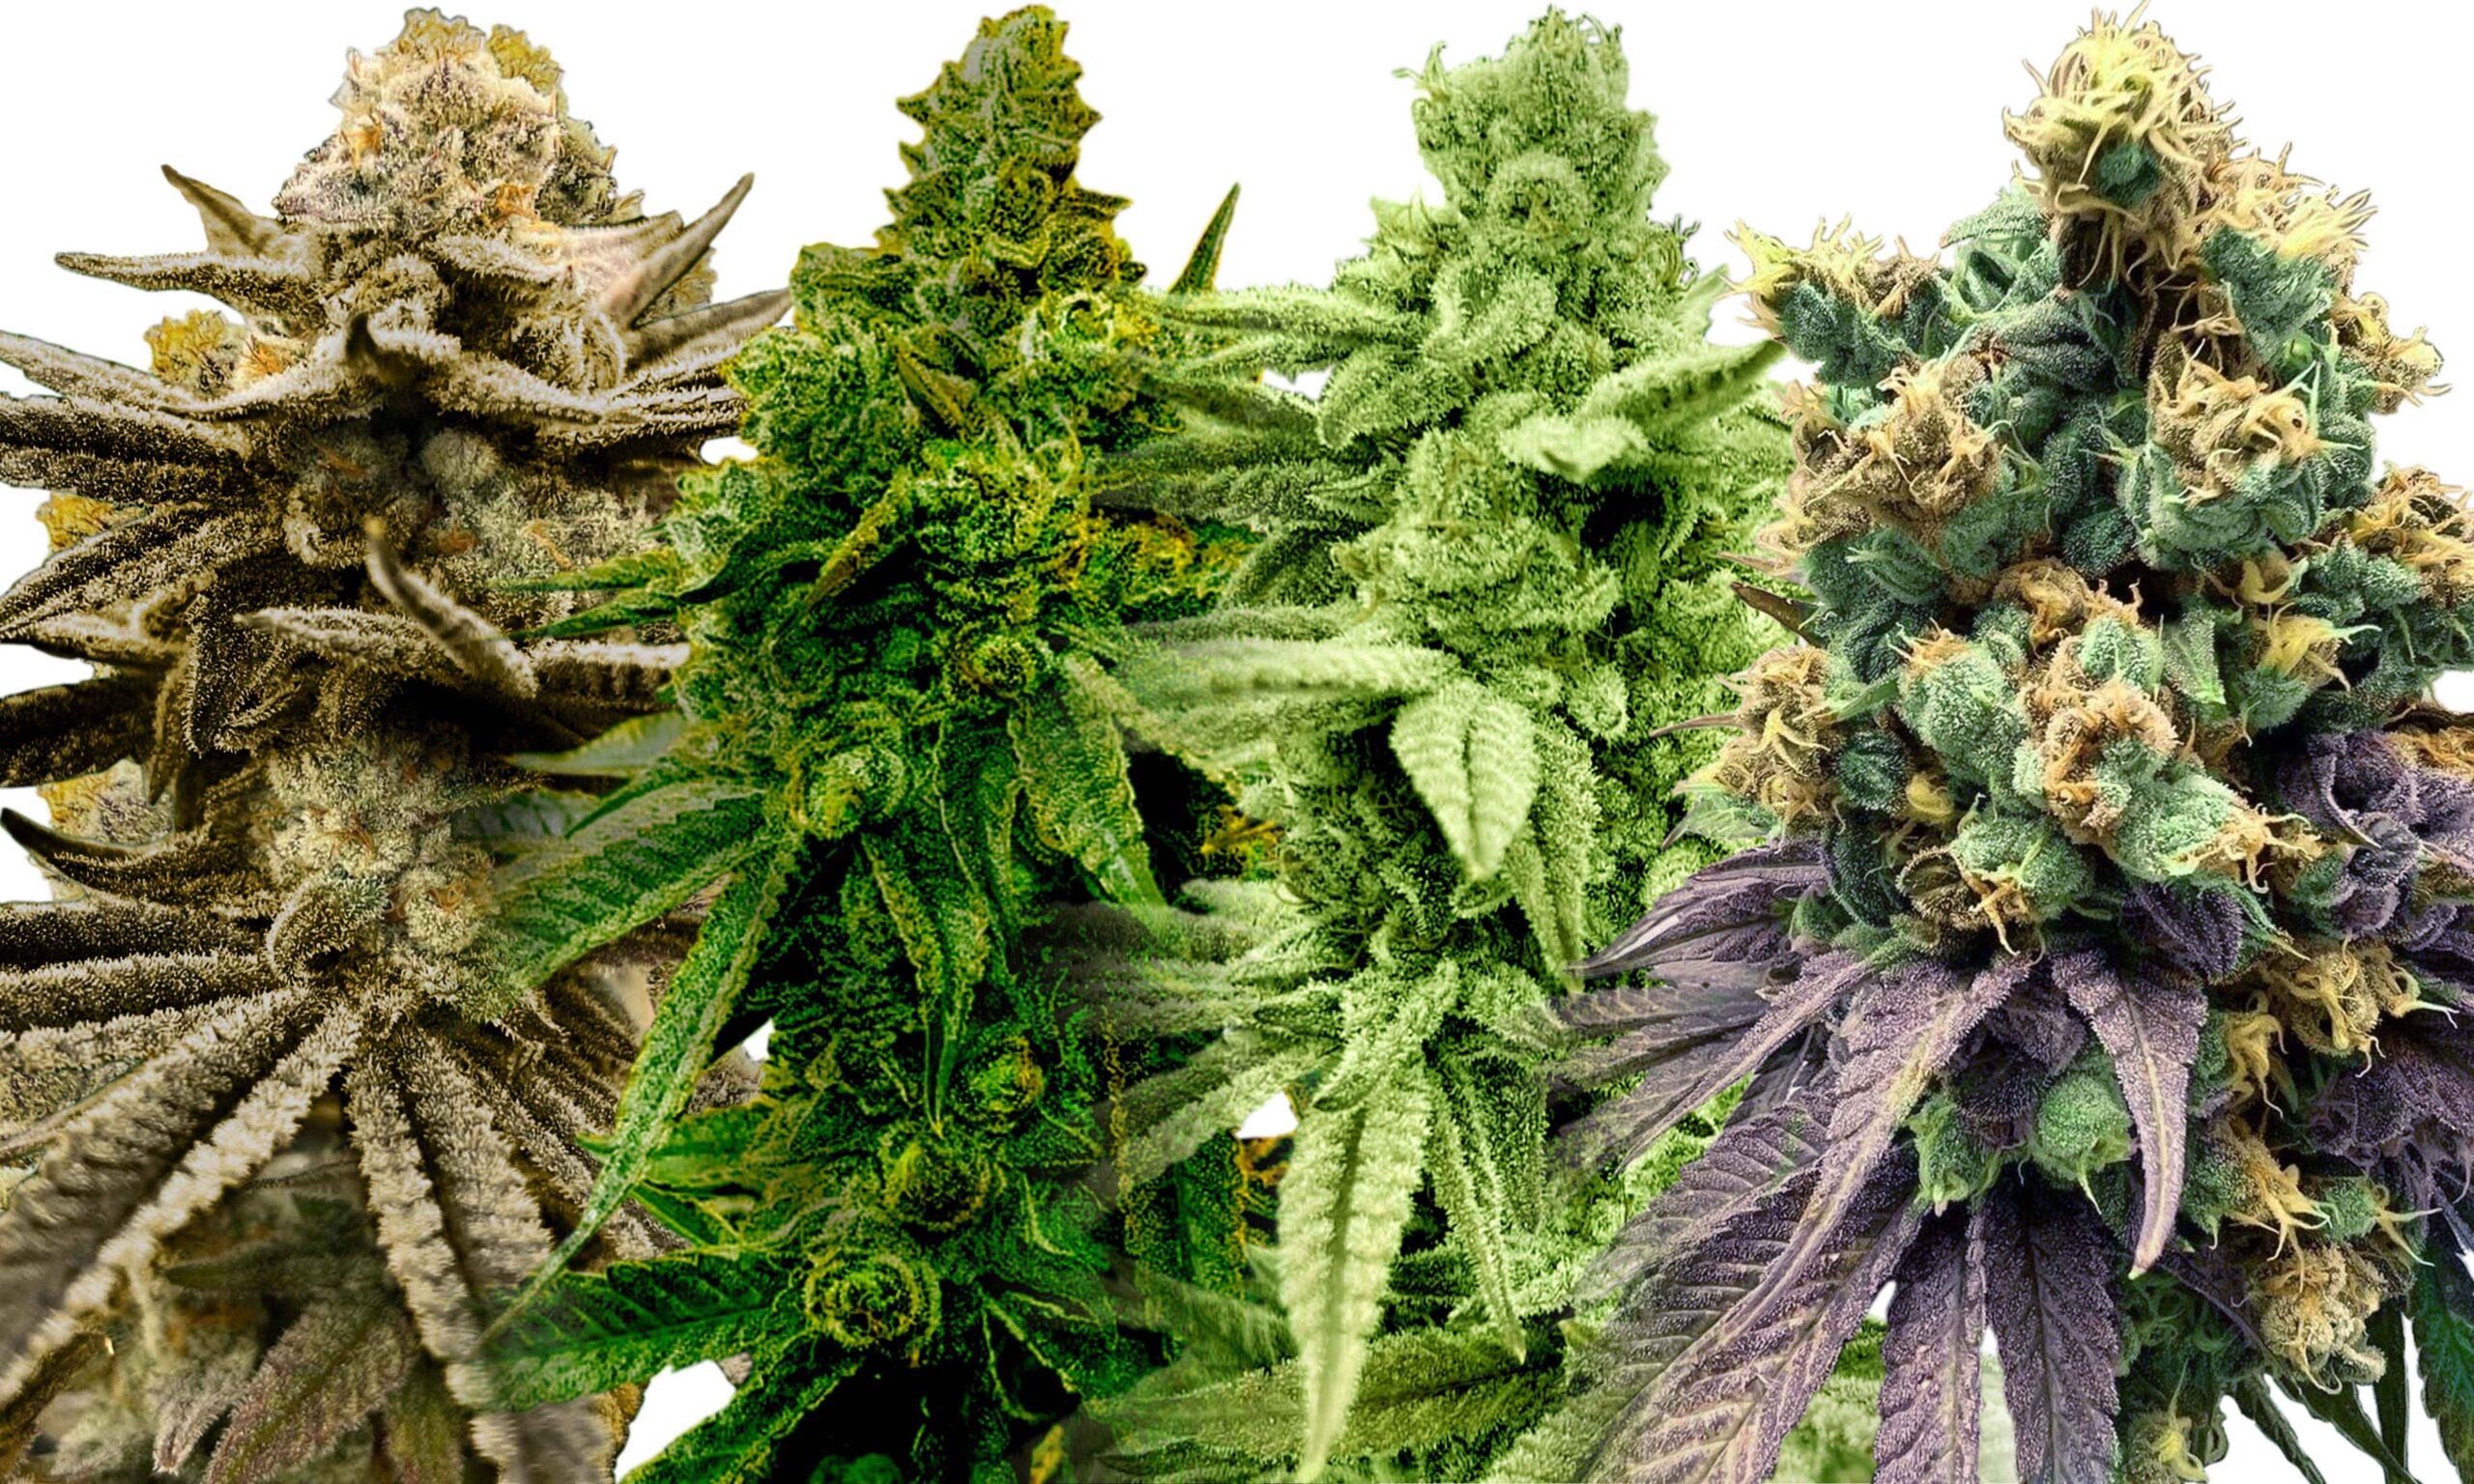
The Most Popular 90s Weed Strains

When reminiscing about 90s weed, several iconic strains come to mind. These strains not only contributed to the popularity of cannabis during that decade but also left a lasting legacy. Let’s delve into some of the most sought-after 90s weed strains:

Northern Lights

weed from the 90s

Northern Lights is an iconic indica strain that gained fame for its relaxation-inducing properties. It was a staple choice for those seeking stress relief and a good night’s sleep. The strain’s sweet and earthy flavor profile, coupled with a tranquilizing high, made it a beloved classic.

Skunk #1

weed from the 90s

Skunk #1 is another legendary strain known for its pungent aroma and balanced effects. It offered a mix of cerebral euphoria and physical relaxation, making it a versatile choice for various occasions. The name “Skunk” originated from its unmistakable scent, which was a defining characteristic.

Haze

weed from the 90s

Haze strains were cherished for their uplifting and energizing effects. They were favored by creative minds looking to enhance focus and inspiration. The citrusy and fruity flavors of Haze strains added to their appeal.

These strains, along with others like “Blueberry,” “White Widow,” and “AK-47,” contributed to the diverse cannabis landscape of the 90s. Each strain had its own unique characteristics, offering a wide range of experiences for cannabis enthusiasts. These strains have become a part of cannabis history, and some are still cultivated and cherished by connoisseurs today.

A Blast from the Past – 90s Weed Experience

Smoking 90s weed was an adventure in itself. The slow burn, the earthy taste, and the soothing high were all part of the charm. It was a time when rolling papers and homemade bongs were essential tools for any weed enthusiast. The act of sharing a joint with friends, passing it around while listening to your favorite grunge band, created memories that would last a lifetime.

The experience of smoking 90s weed was often a communal one. It brought people together in a way that transcended age, background, and differences. It was a shared ritual, a moment of connection and relaxation. The slow pace of life back then allowed for deep conversations and introspection, all while the aromatic smoke hung in the air.

While the potency of 90s weed was lower compared to modern strains, it had its own allure. The gentle euphoria it provided was perfect for unwinding after a long day or simply enjoying the company of friends. It encouraged a slower pace, where moments were savored, and laughter flowed freely. The experience of 90s weed was not just about getting high; it was about enjoying the journey.

How Has Weed Changed Since the 90s?

Fast forward to today, and the cannabis landscape has transformed dramatically. Weed is now legal in many places, and there’s a dizzying array of strains to choose from. The potency of modern weed strains far exceeds that of 90s weed, thanks to advances in cultivation techniques. If you’re used to today’s high-THC strains, smoking 90s weed might feel like a trip back in time.

The evolution of cannabis cultivation has led to a significant increase in THC content. While 90s weed typically had THC levels ranging from 5% to 15%, modern strains can easily exceed 30% THC. This has brought about a shift in the effects experienced by users. Modern cannabis often delivers a more potent and immediate high, which can be overwhelming for some.

Beyond potency, the variety of strains available today is staggering. From indica and sativa hybrids to strains rich in CBD (cannabidiol), consumers have a plethora of options to tailor their experience. Terpene profiles, which influence the flavor and aroma of cannabis, are also a focus of modern breeders. This means that not only is the THC content higher, but the sensory experience of consuming cannabis has become more diverse and refined.

Rediscovering 90s Weed – Is It Still Available?

Believe it or not, some enthusiasts are on a quest to rediscover the classic 90s strains. While they may not be as prevalent as they once were, dedicated growers and seed banks are working to preserve these nostalgic varieties. So, if you’re yearning for a taste of the past, you might just be able to find some authentic 90s weed strains.

Many cannabis enthusiasts view 90s strains as a piece of history worth preserving. These strains represent a different era in cannabis culture, and they evoke a sense of nostalgia for those who experienced it. Thanks to the dedication of growers and breeders, these strains are not entirely lost to time.

Some growers specialize in heirloom or landrace strains, which are cannabis varieties that have been cultivated in their natural environment for generations. These strains are often the closest you can get to the cannabis of the past. Additionally, some seed banks offer seeds of classic 90s strains, allowing you to cultivate your own piece of cannabis history.

90s Weed vs. Modern Strains – A Comparison

Let’s dive into the fascinating world of comparisons between 90s weed and modern strains. The differences are stark, and understanding them can help you appreciate the evolution of cannabis over the years.

  • Potency
    One of the most noticeable distinctions is potency. 90s weed typically had THC levels in the single digits or low teens, making for a milder high. It was the era of relaxation and contemplation. Modern strains, on the other hand, can pack a punch with THC levels exceeding 30%. This potency can lead to a more intense and immediate high, sometimes bordering on psychedelic.
  • Flavor and Aroma
    In terms of flavor and aroma, 90s weed often had earthy, skunky, or spicy notes. These were the classic scents that filled the room when you lit up a joint. In contrast, modern cannabis offers a vast array of flavors and aromas. Terpene profiles have become a focal point for breeders, leading to strains with citrus, berry, mint, and even cheese-like scents. This diversity allows consumers to choose strains that cater to their specific taste preferences.
  • Medical Applications
    While 90s weed was primarily enjoyed recreationally, modern strains have expanded their utility in the medical field. The higher THC content in some strains has proven beneficial for managing pain, insomnia, and anxiety. Additionally, CBD-rich strains have gained popularity for their potential therapeutic effects without the psychoactive high, offering relief to those seeking medical benefits without the buzz.
  • Consumption Methods
    The methods of consuming cannabis have also evolved. In the 90s, joints, homemade pipes, and bongs were the standard. Today, cannabis enthusiasts have a plethora of options, including vaporizers, edibles, tinctures, and concentrates. These various consumption methods cater to different preferences and needs, from discreet vaping to precise dosing with edibles.
  • Cultural Perception
    Perhaps one of the most significant changes is the shift in cultural perception. In the 90s, cannabis was often associated with rebellion and counterculture. Today, it is increasingly recognized for its medicinal and recreational potential, with legalization efforts gaining traction in many regions. Cannabis has come out of the shadows and into the mainstream, shedding some of its historical stigmas.


Understanding these differences can help you navigate the world of cannabis with greater insight. Whether you’re a connoisseur of 90s weed or a modern enthusiast, both eras have their unique charms and offerings. It’s all about personal preference and the experience you seek.

The Enduring Appeal of 90s Weed

What is it about 90s weed that still captivates us today? It’s more than just nostalgia; it’s a connection to a simpler time. The enduring appeal of 90s weed lies in several key factors:

  • Nostalgia
    For those who experienced the 90s firsthand, 90s weed is a powerful nostalgia trigger. It transports people back to their youth, to a time of exploration and self-discovery. The memories of hazy dorm rooms, road trips with friends, and unforgettable concerts are all intertwined with the cannabis of that era. Nostalgia has a unique way of making us yearn for the past, and 90s weed is a potent conduit for those emotions.
  • Cultural Significance
    The 90s were a pivotal period in cannabis culture. It was a time when the counterculture movement of the previous decades had made significant strides. Cannabis was no longer relegated to the fringes of society; it was becoming a part of mainstream culture. This cultural significance is not easily forgotten, and it continues to shape the way we perceive cannabis today.
  • Simplicity and Connection
    In the 90s, the cannabis experience was marked by simplicity. Rolling a joint, sharing it with friends, and letting the music wash over you was a ritual that required nothing more than the plant itself. There was a sense of connection in those moments, a feeling of being present with others and with the experience. In today’s fast-paced world, many long for the simplicity and connection that 90s weed represented.
  • Cultural Icons
    The 90s produced cultural icons and references that are still celebrated today. Movies like “Dazed and Confused” and music from artists like Cypress Hill and Sublime immortalized the 90s weed experience. These cultural touchstones continue to influence how we perceive and celebrate cannabis.


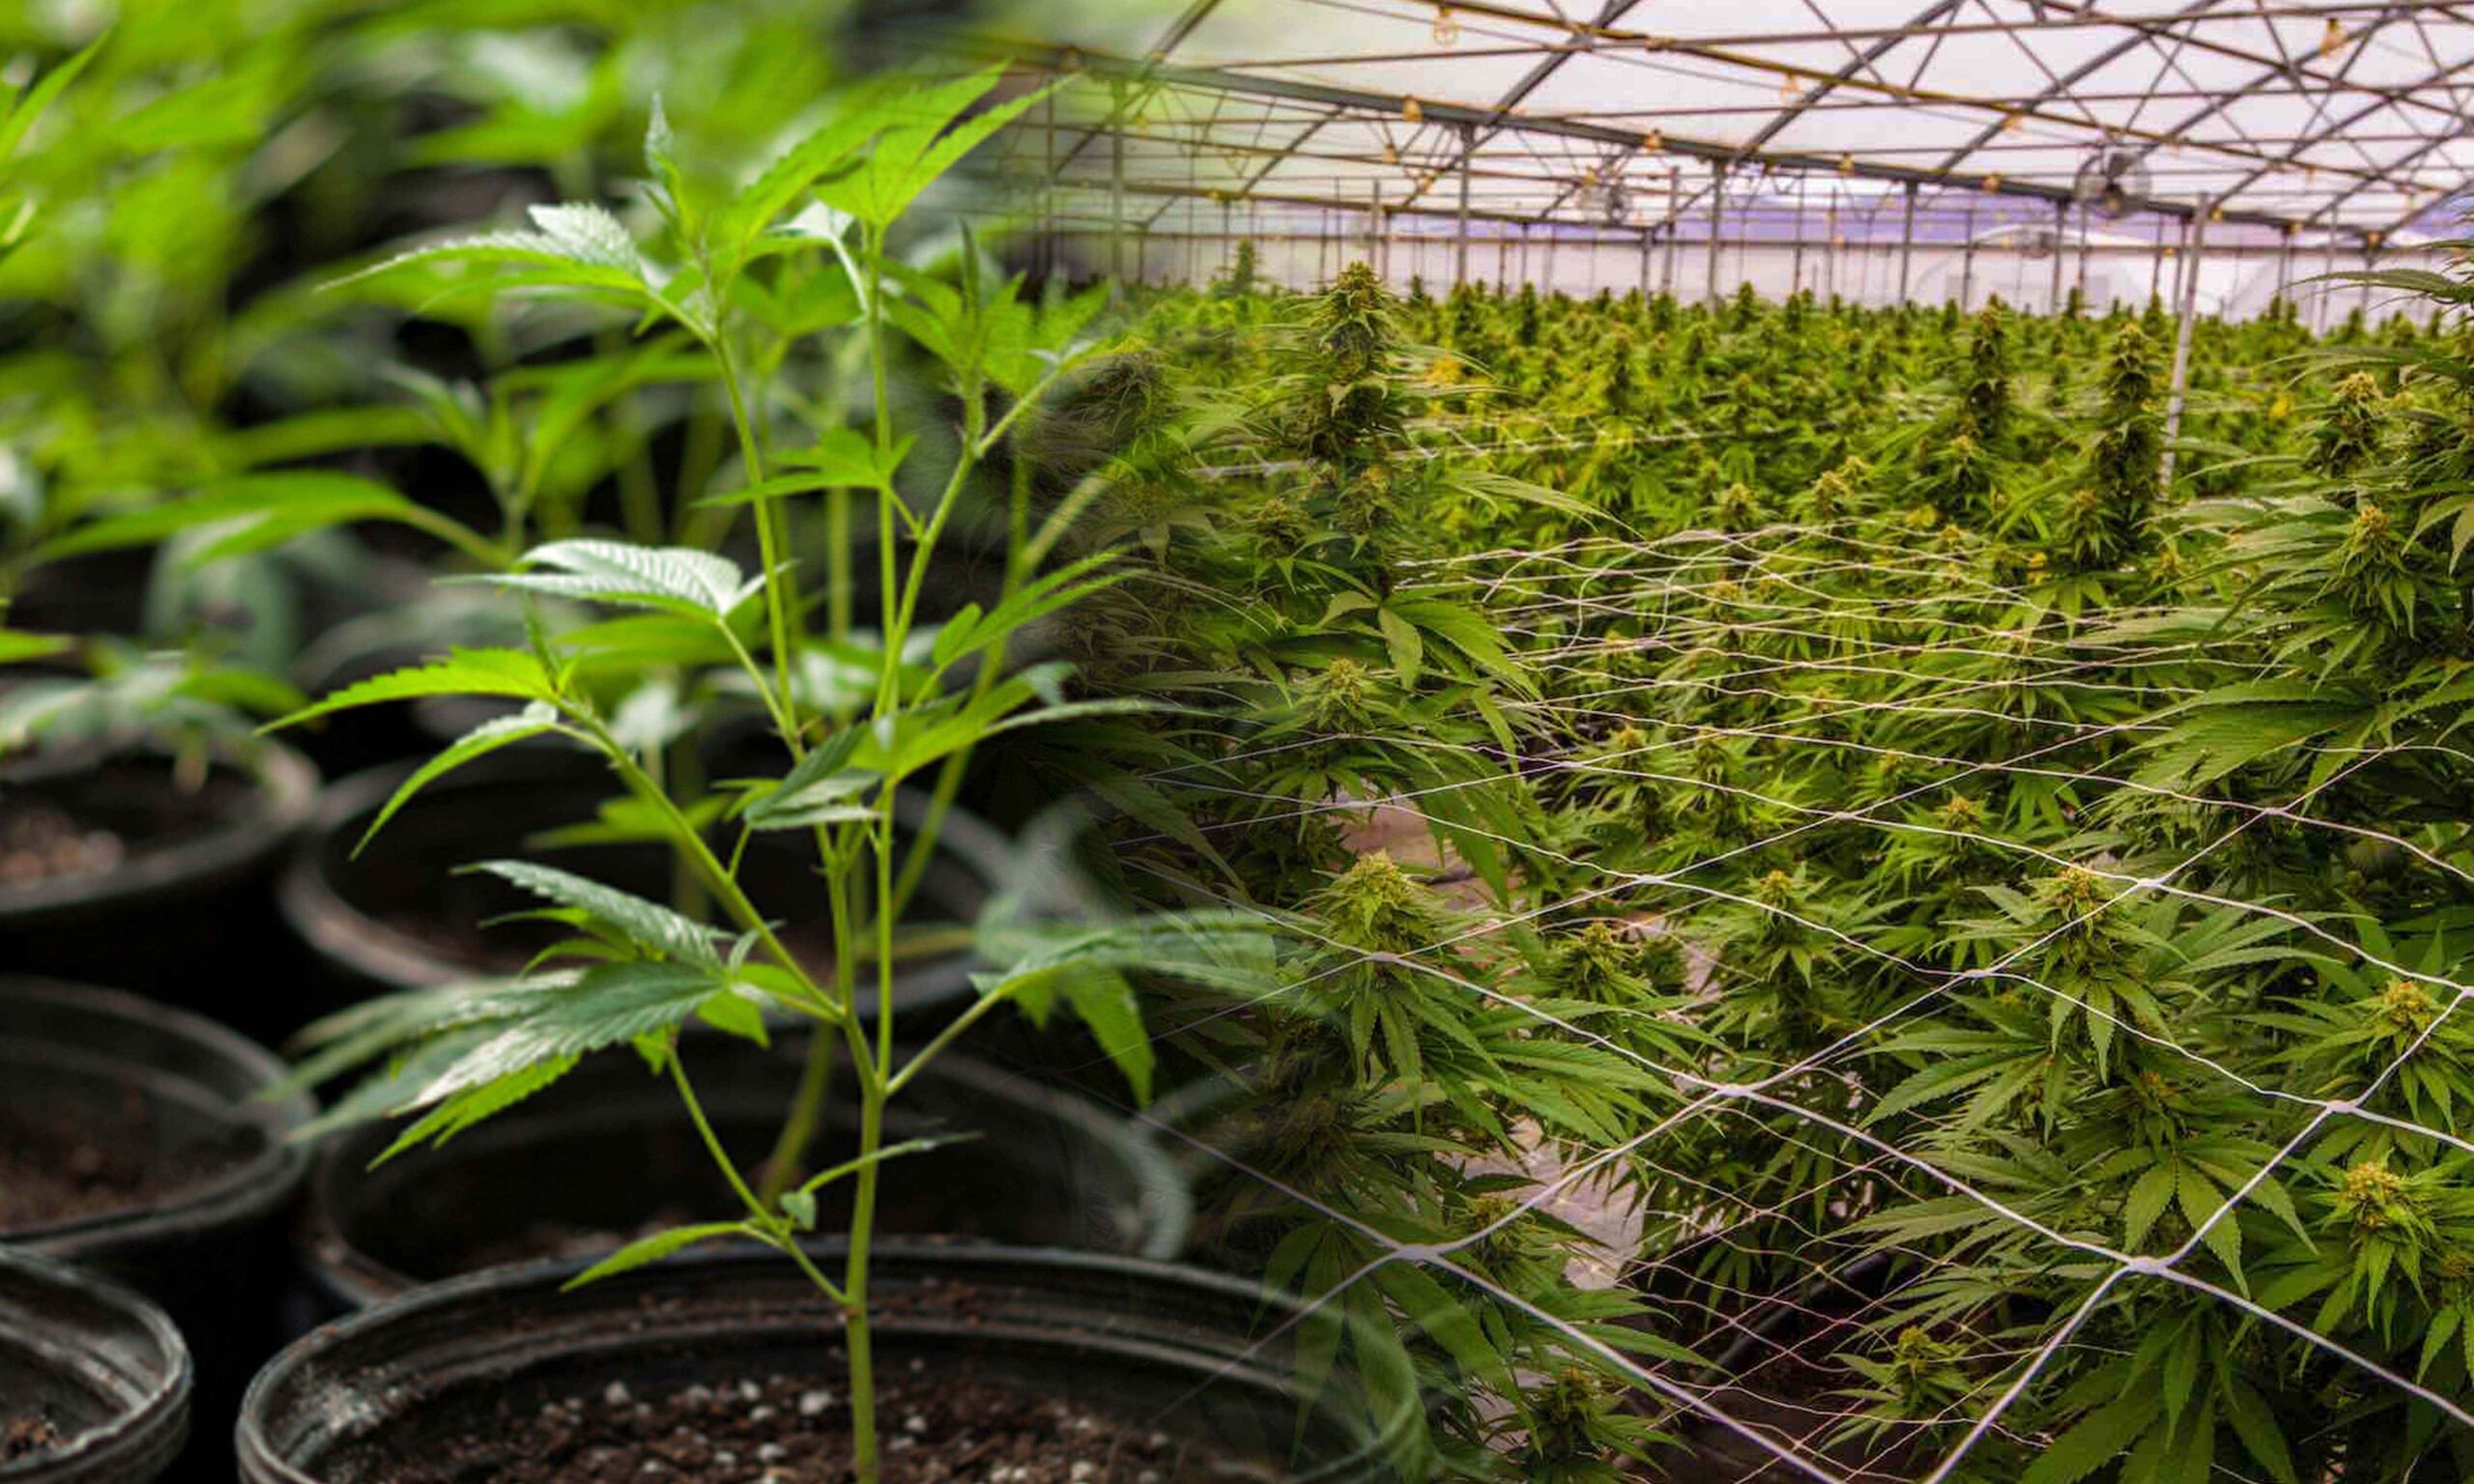
Growing 90s Weed Strains Today

If you’re inspired to try your hand at growing some 90s weed strains today, you’re in luck. Many of these classic varieties are still available as seeds. However, keep in mind that the cultivation techniques have come a long way since the 90s. Here’s a brief overview of how to get started:

  • Choosing Seeds
    Look for reputable seed banks that offer 90s strains or heirloom varieties. Make sure to read reviews and select seeds that match your skill level as a grower. Some 90s strains, like Northern Lights or Skunk #1, are relatively easy to cultivate, making them suitable for beginners.
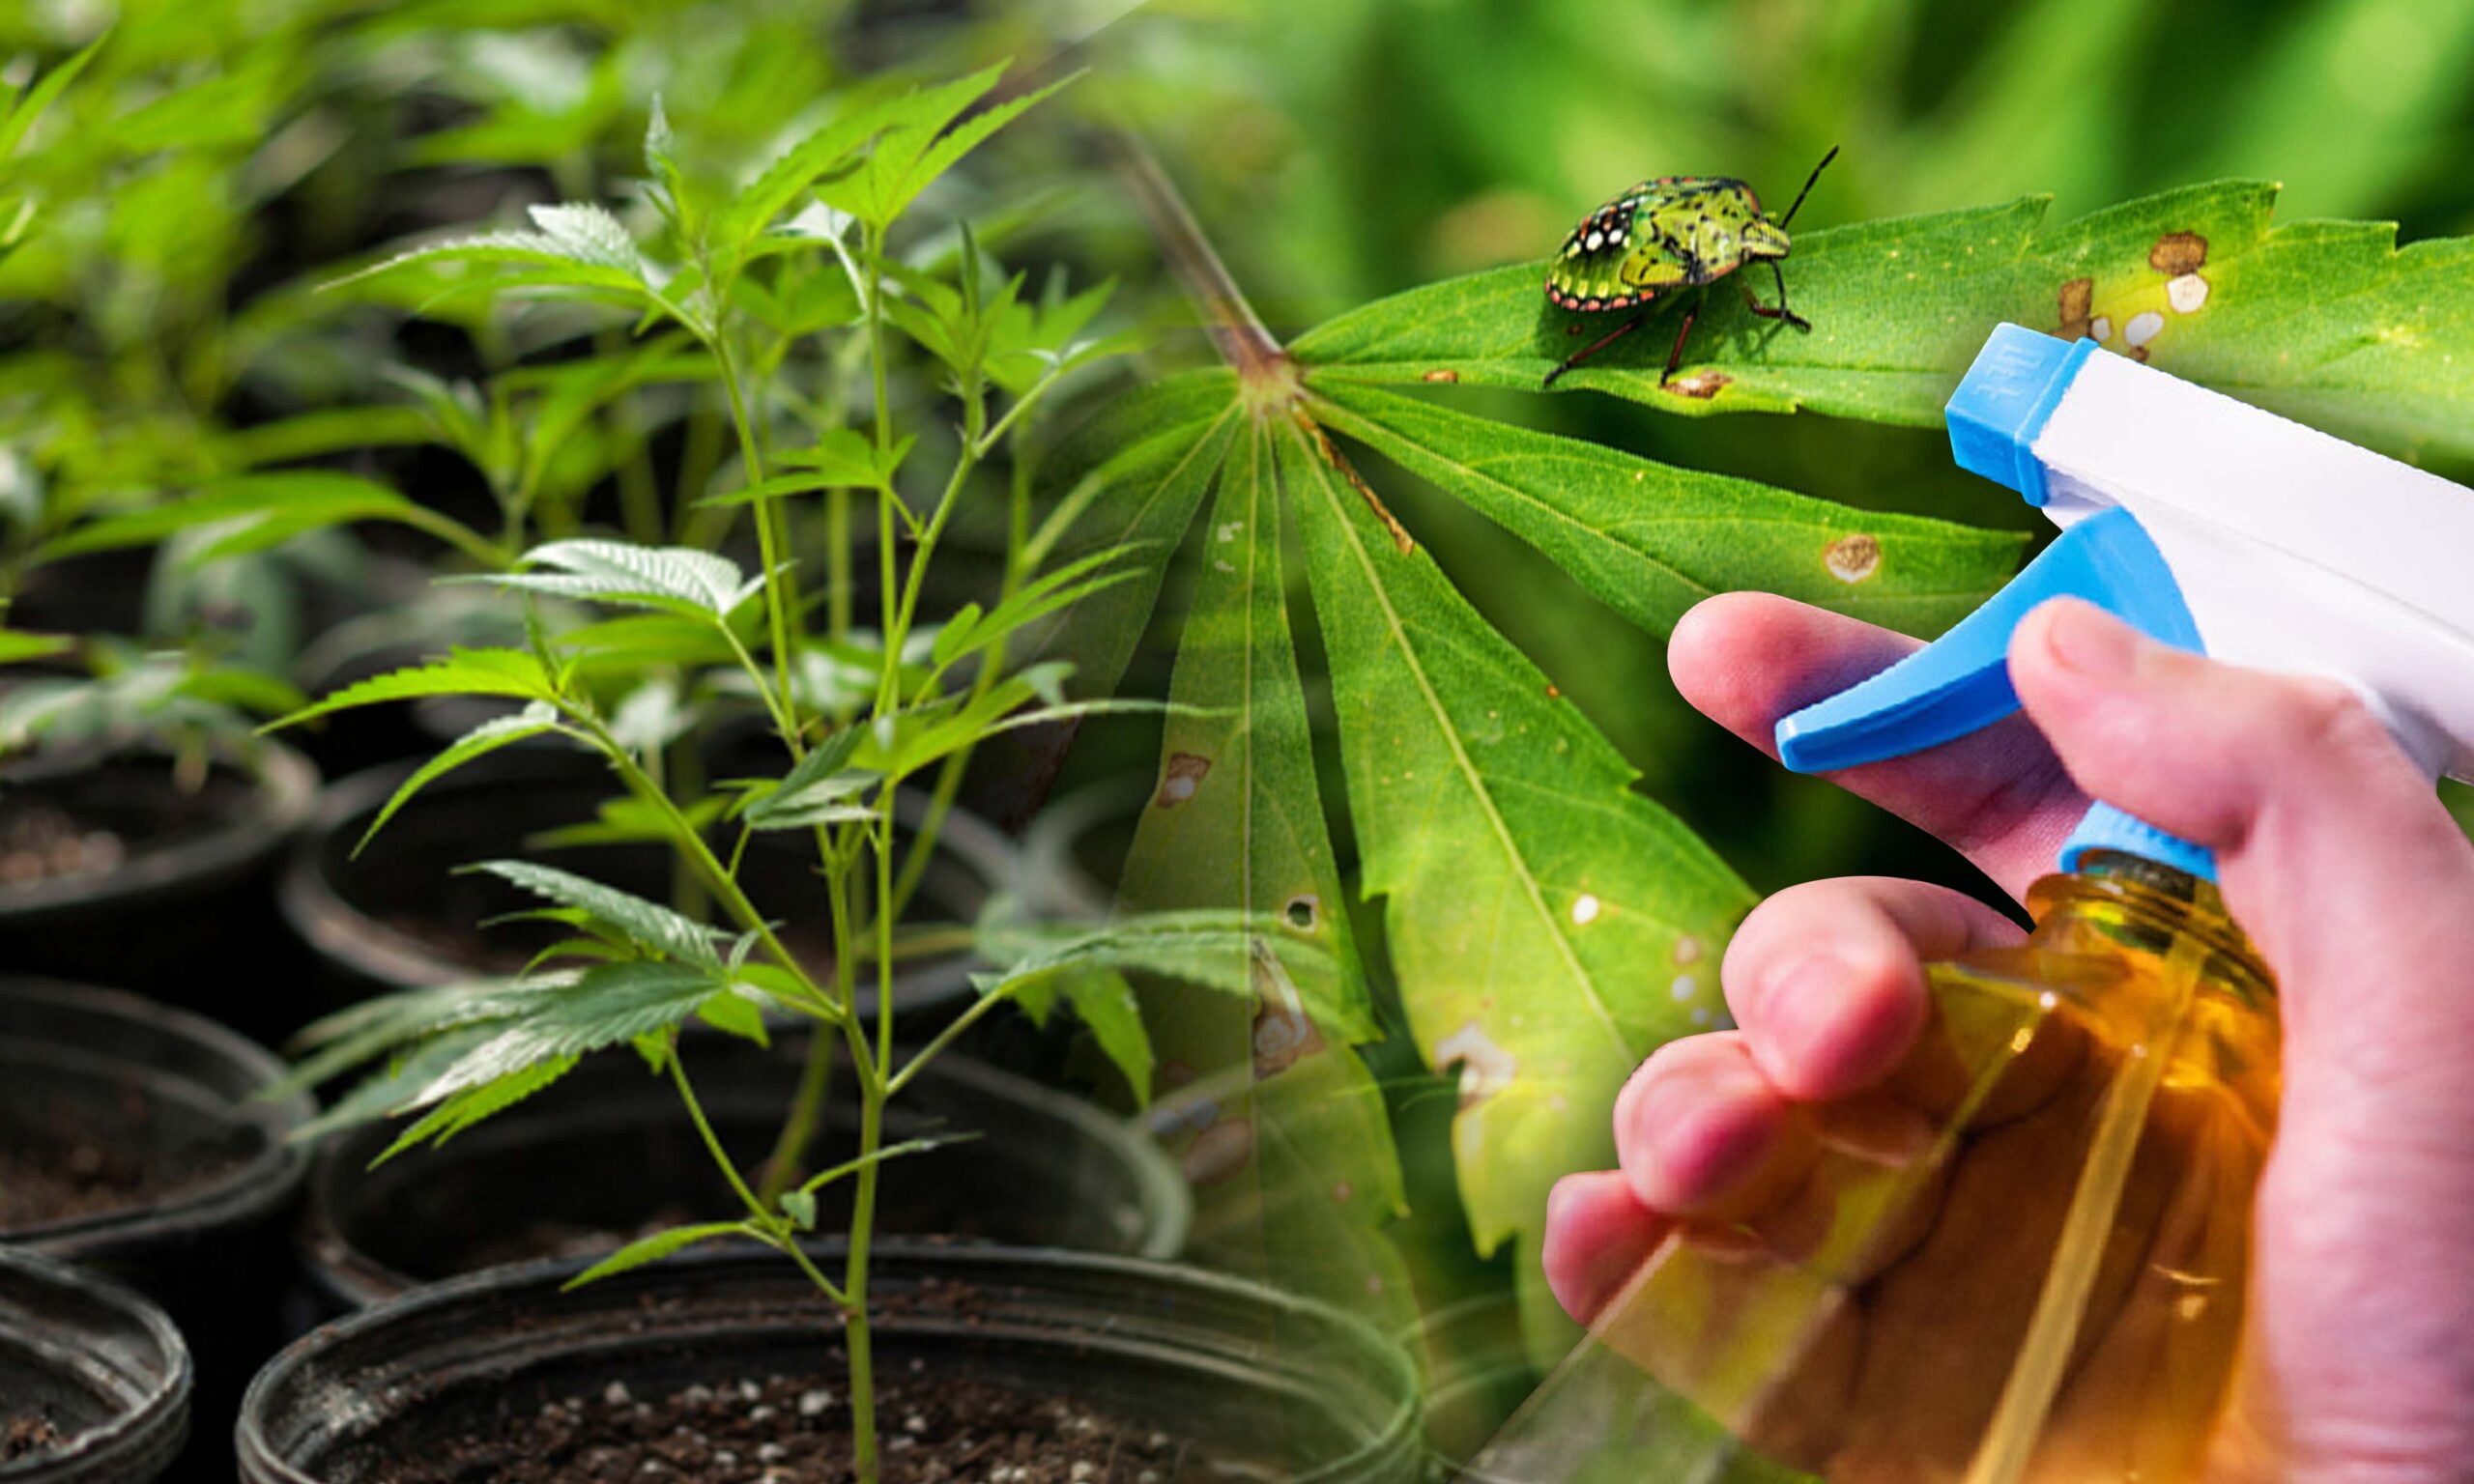
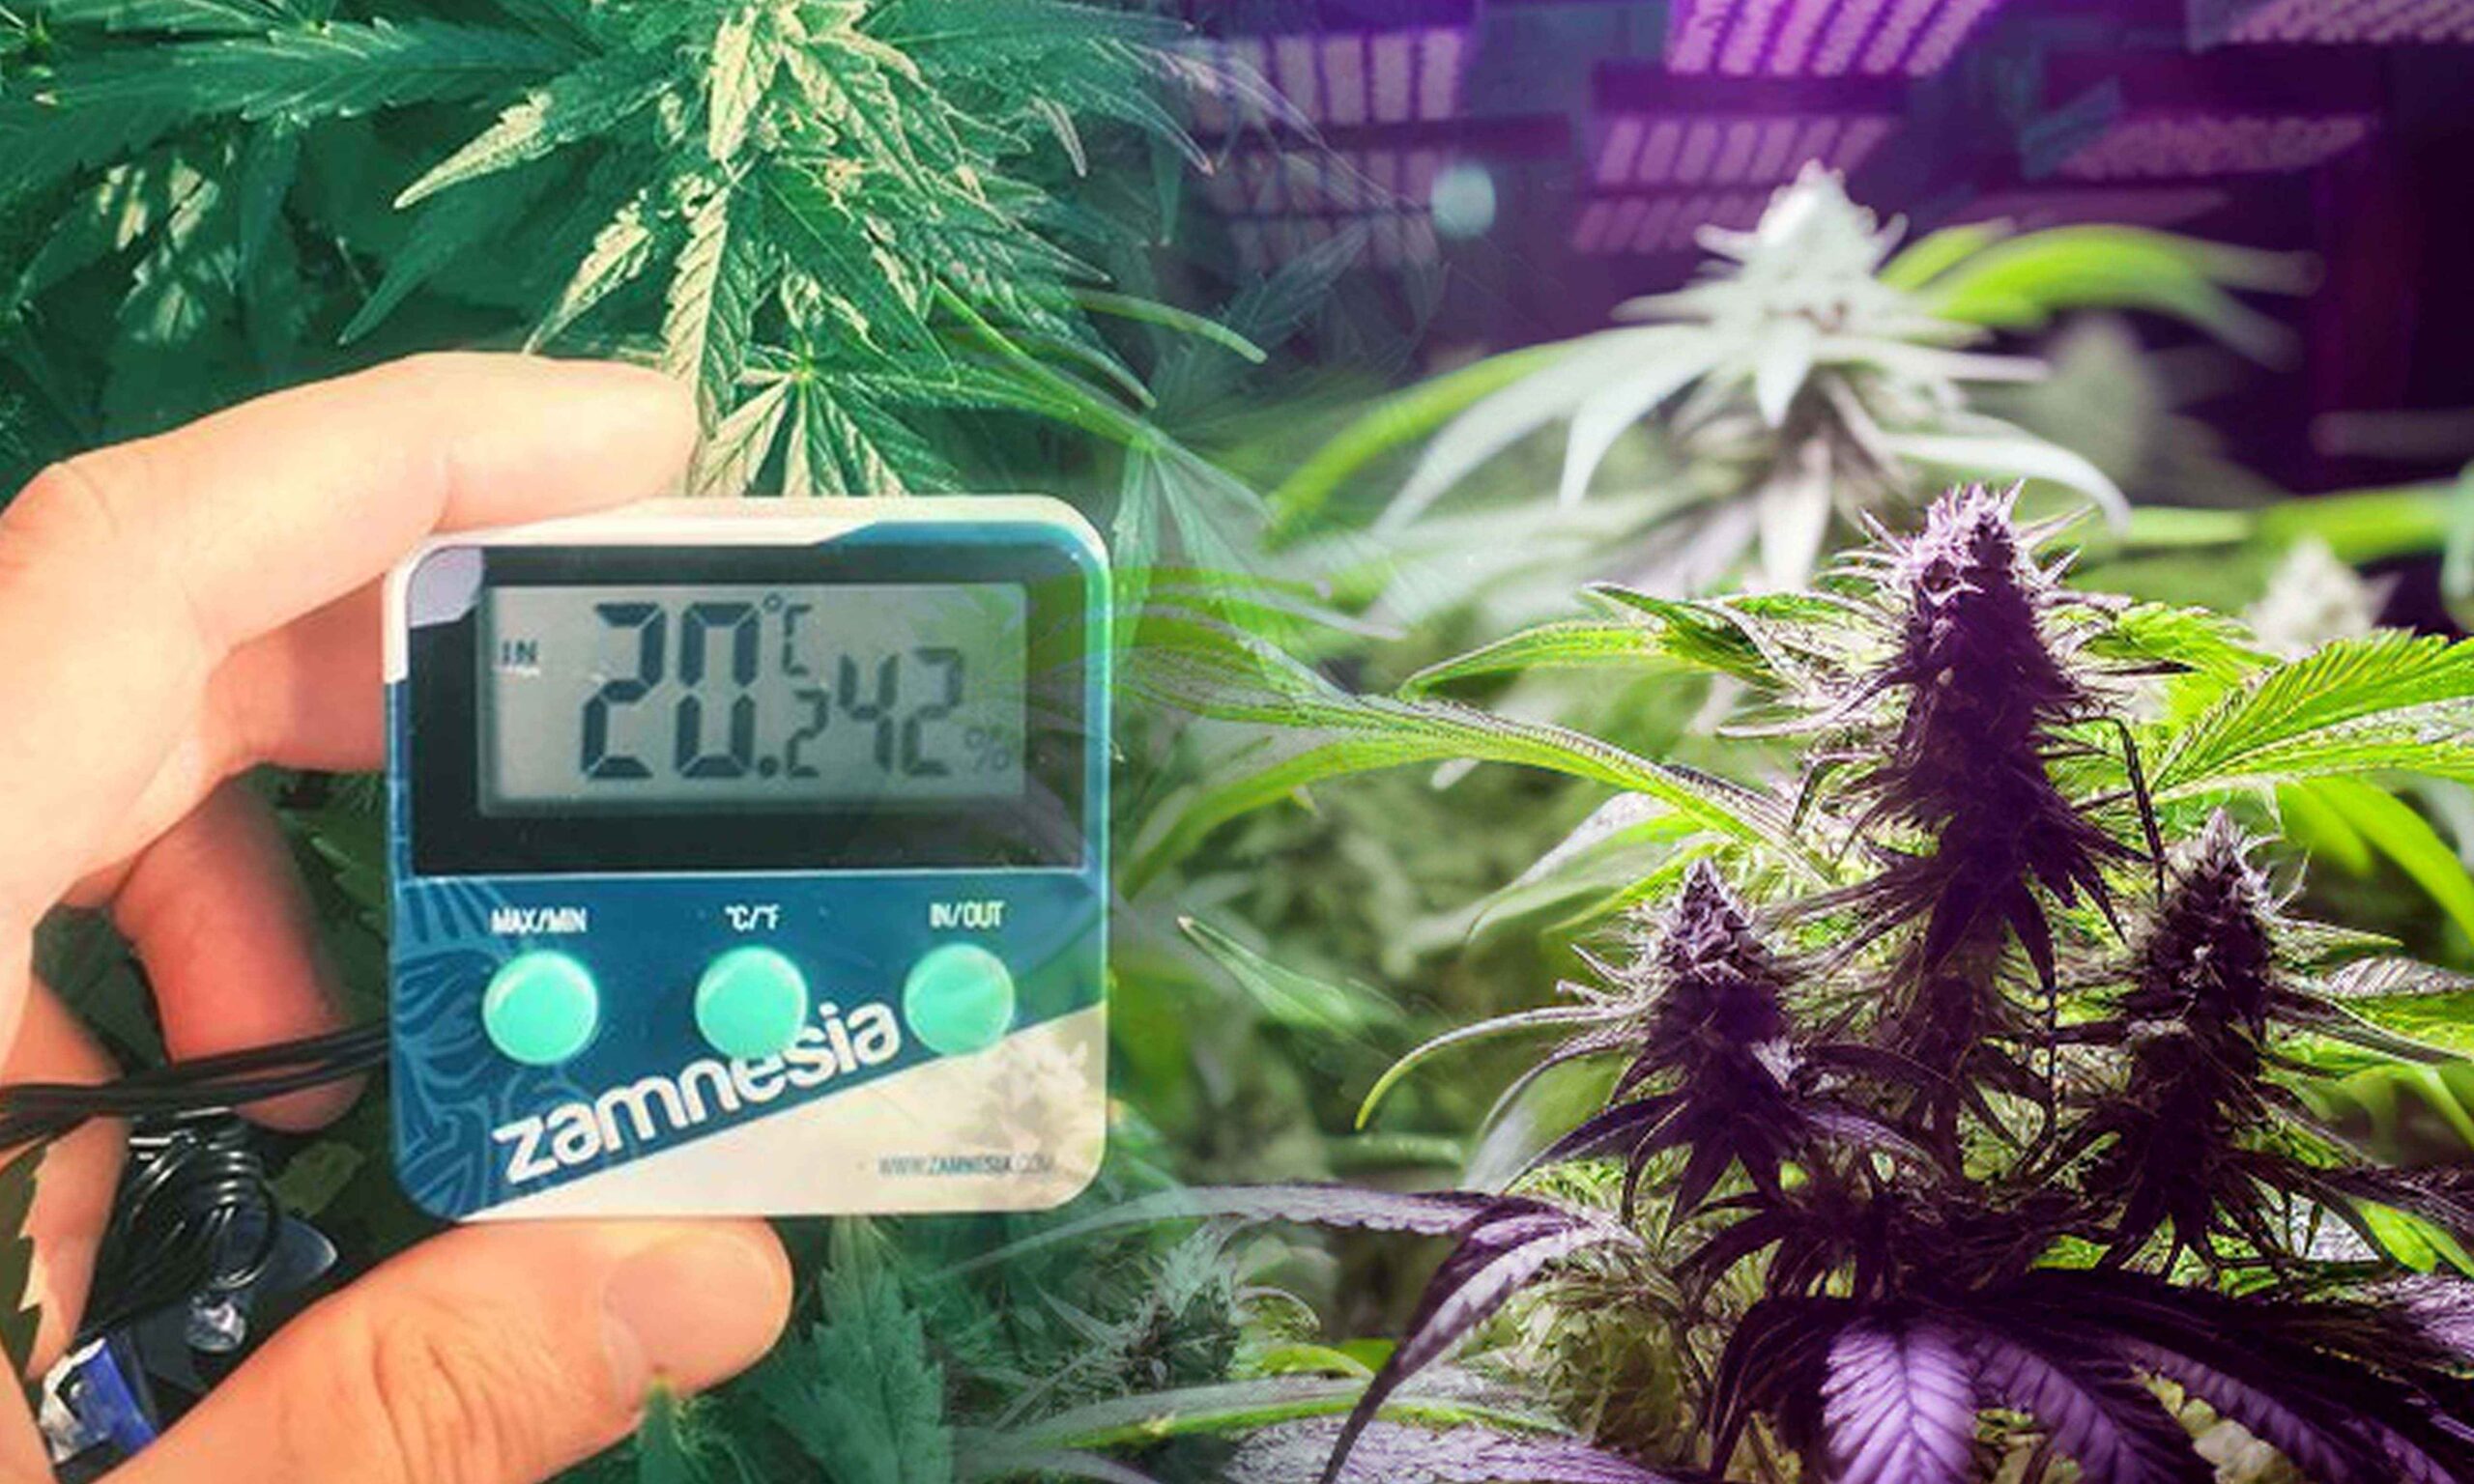
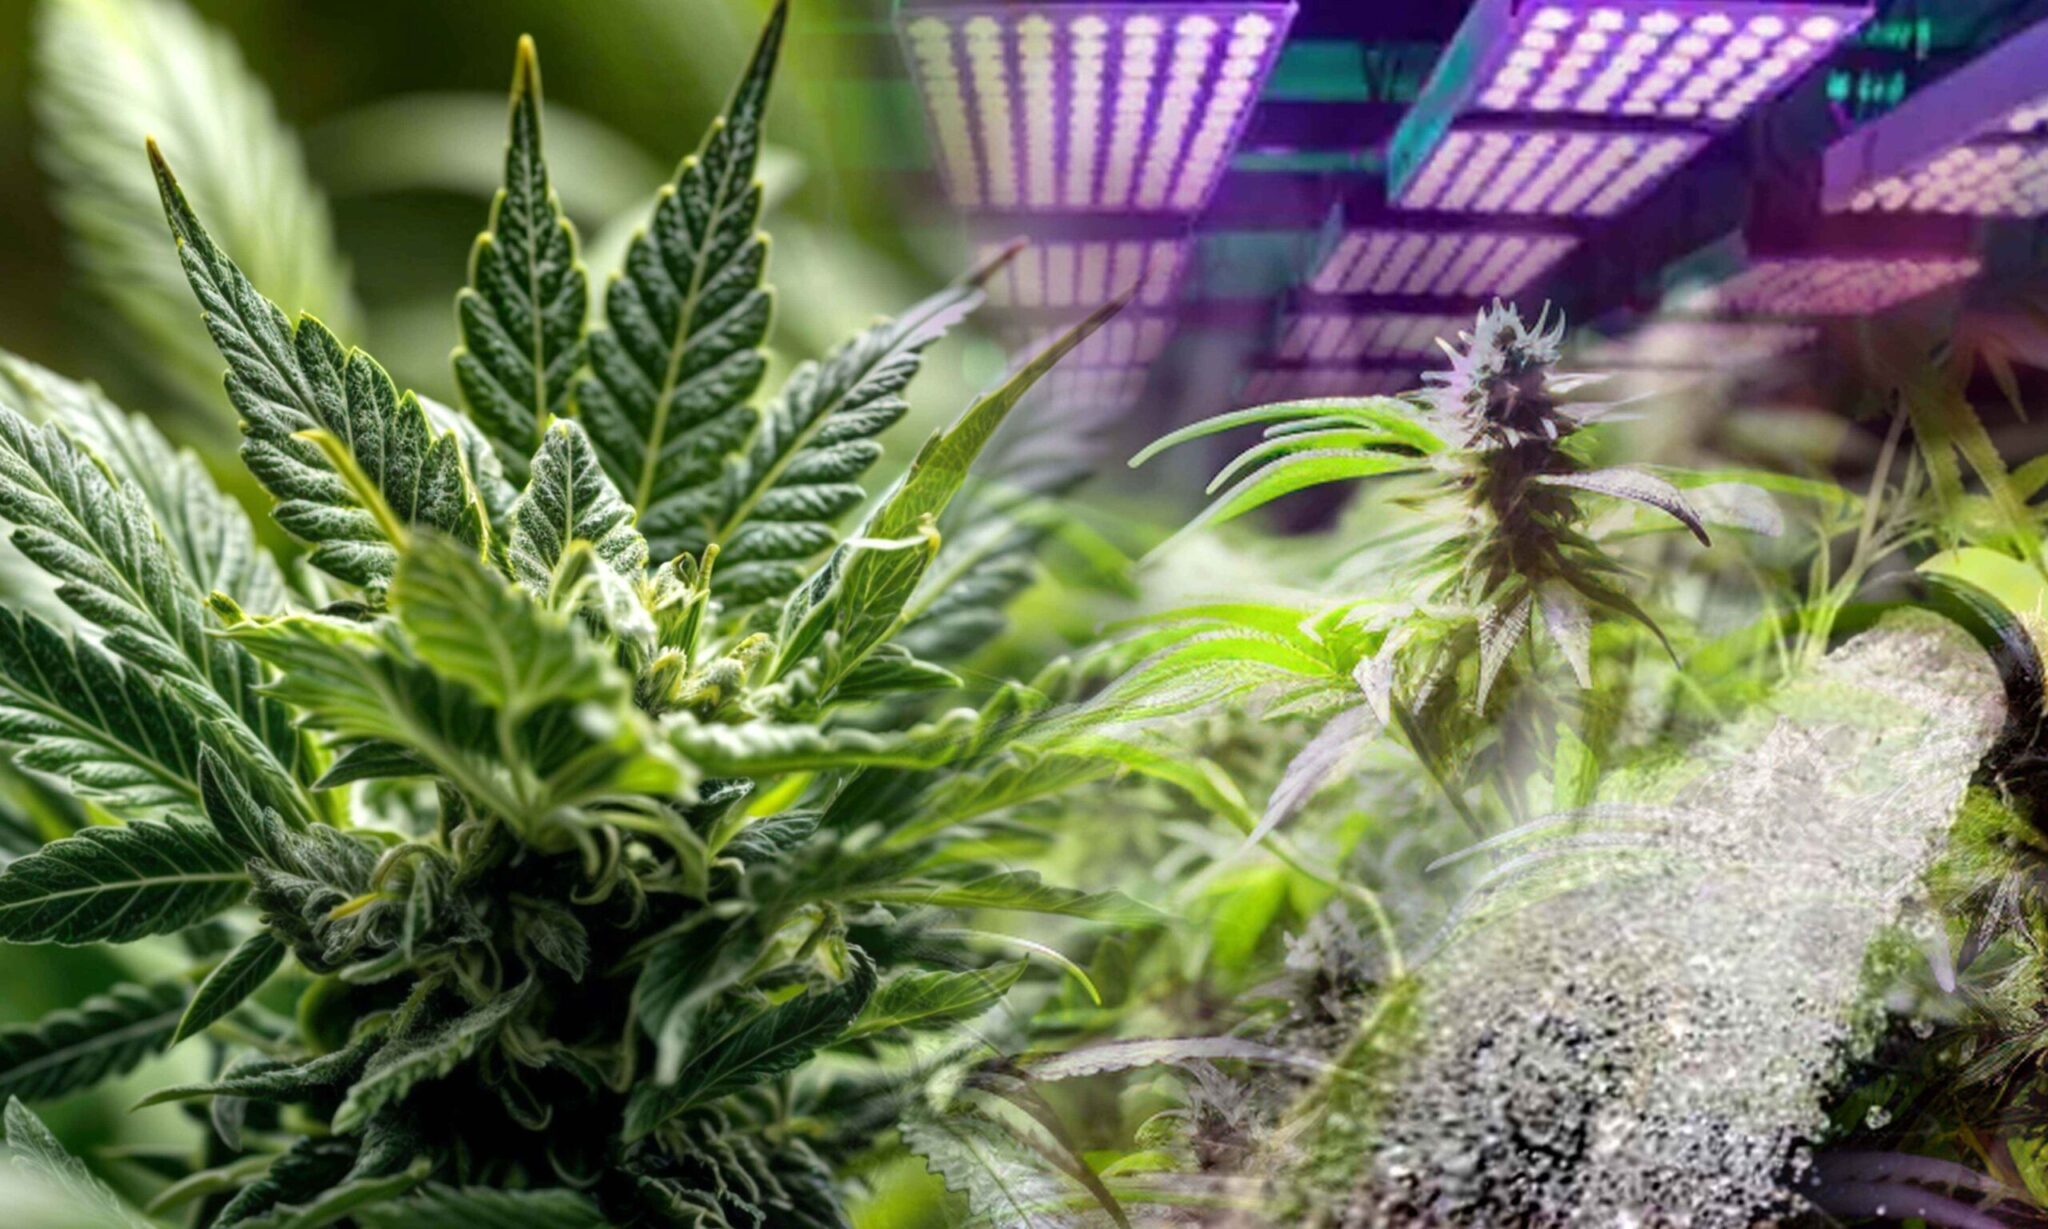
  • Cultivation Environment
    Create an ideal environment for your cannabis plants. This includes proper lighting, temperature, humidity, and ventilation. Modern grow technology can help you mimic the optimal conditions for your chosen 90s strains.
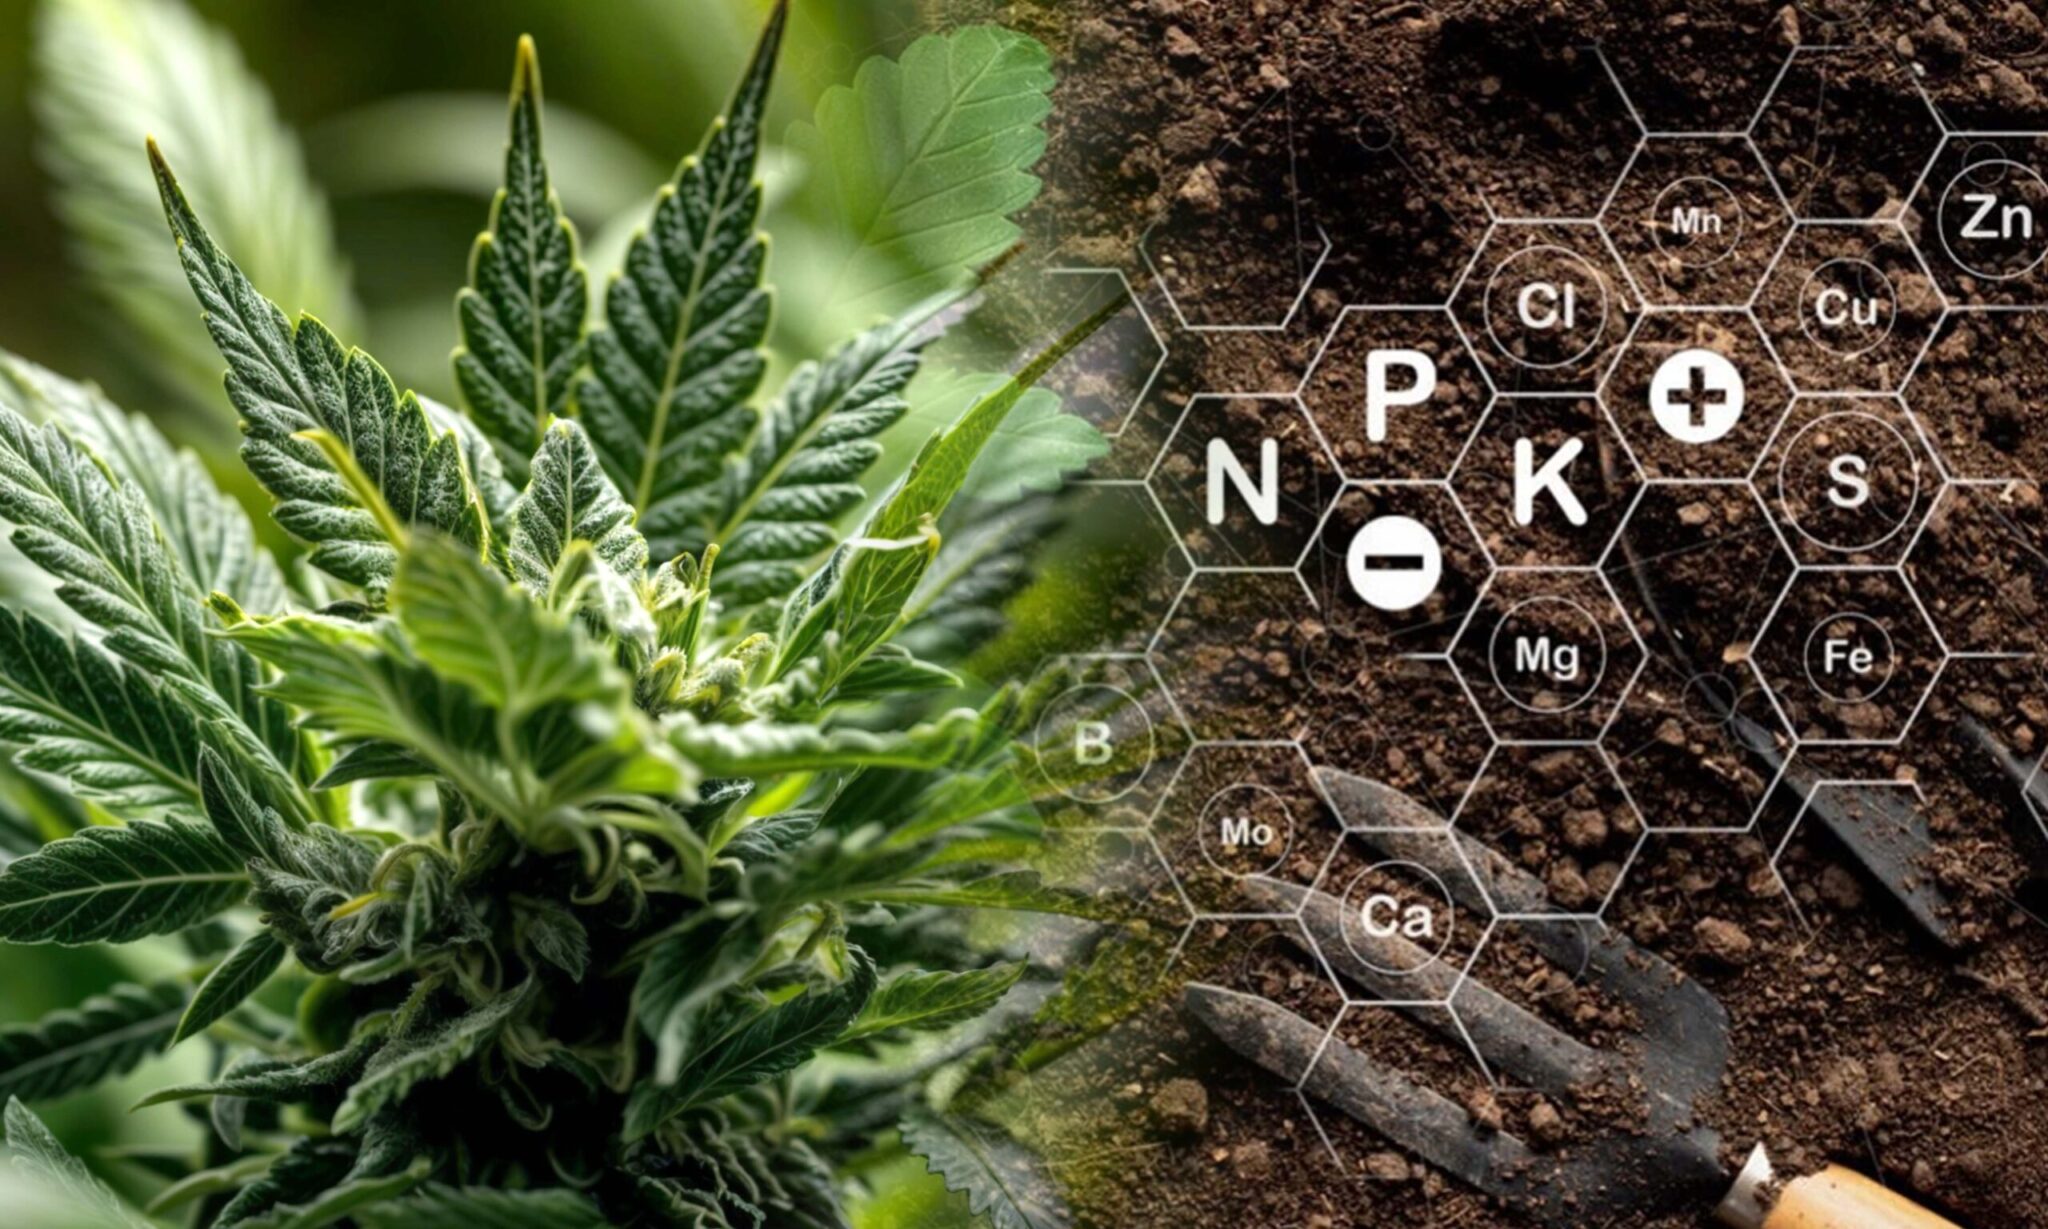
  • Nutrient Management
    Nutrient management is crucial for healthy plant growth. Research the specific needs of your chosen strains and provide the right balance of nutrients at each growth stage.
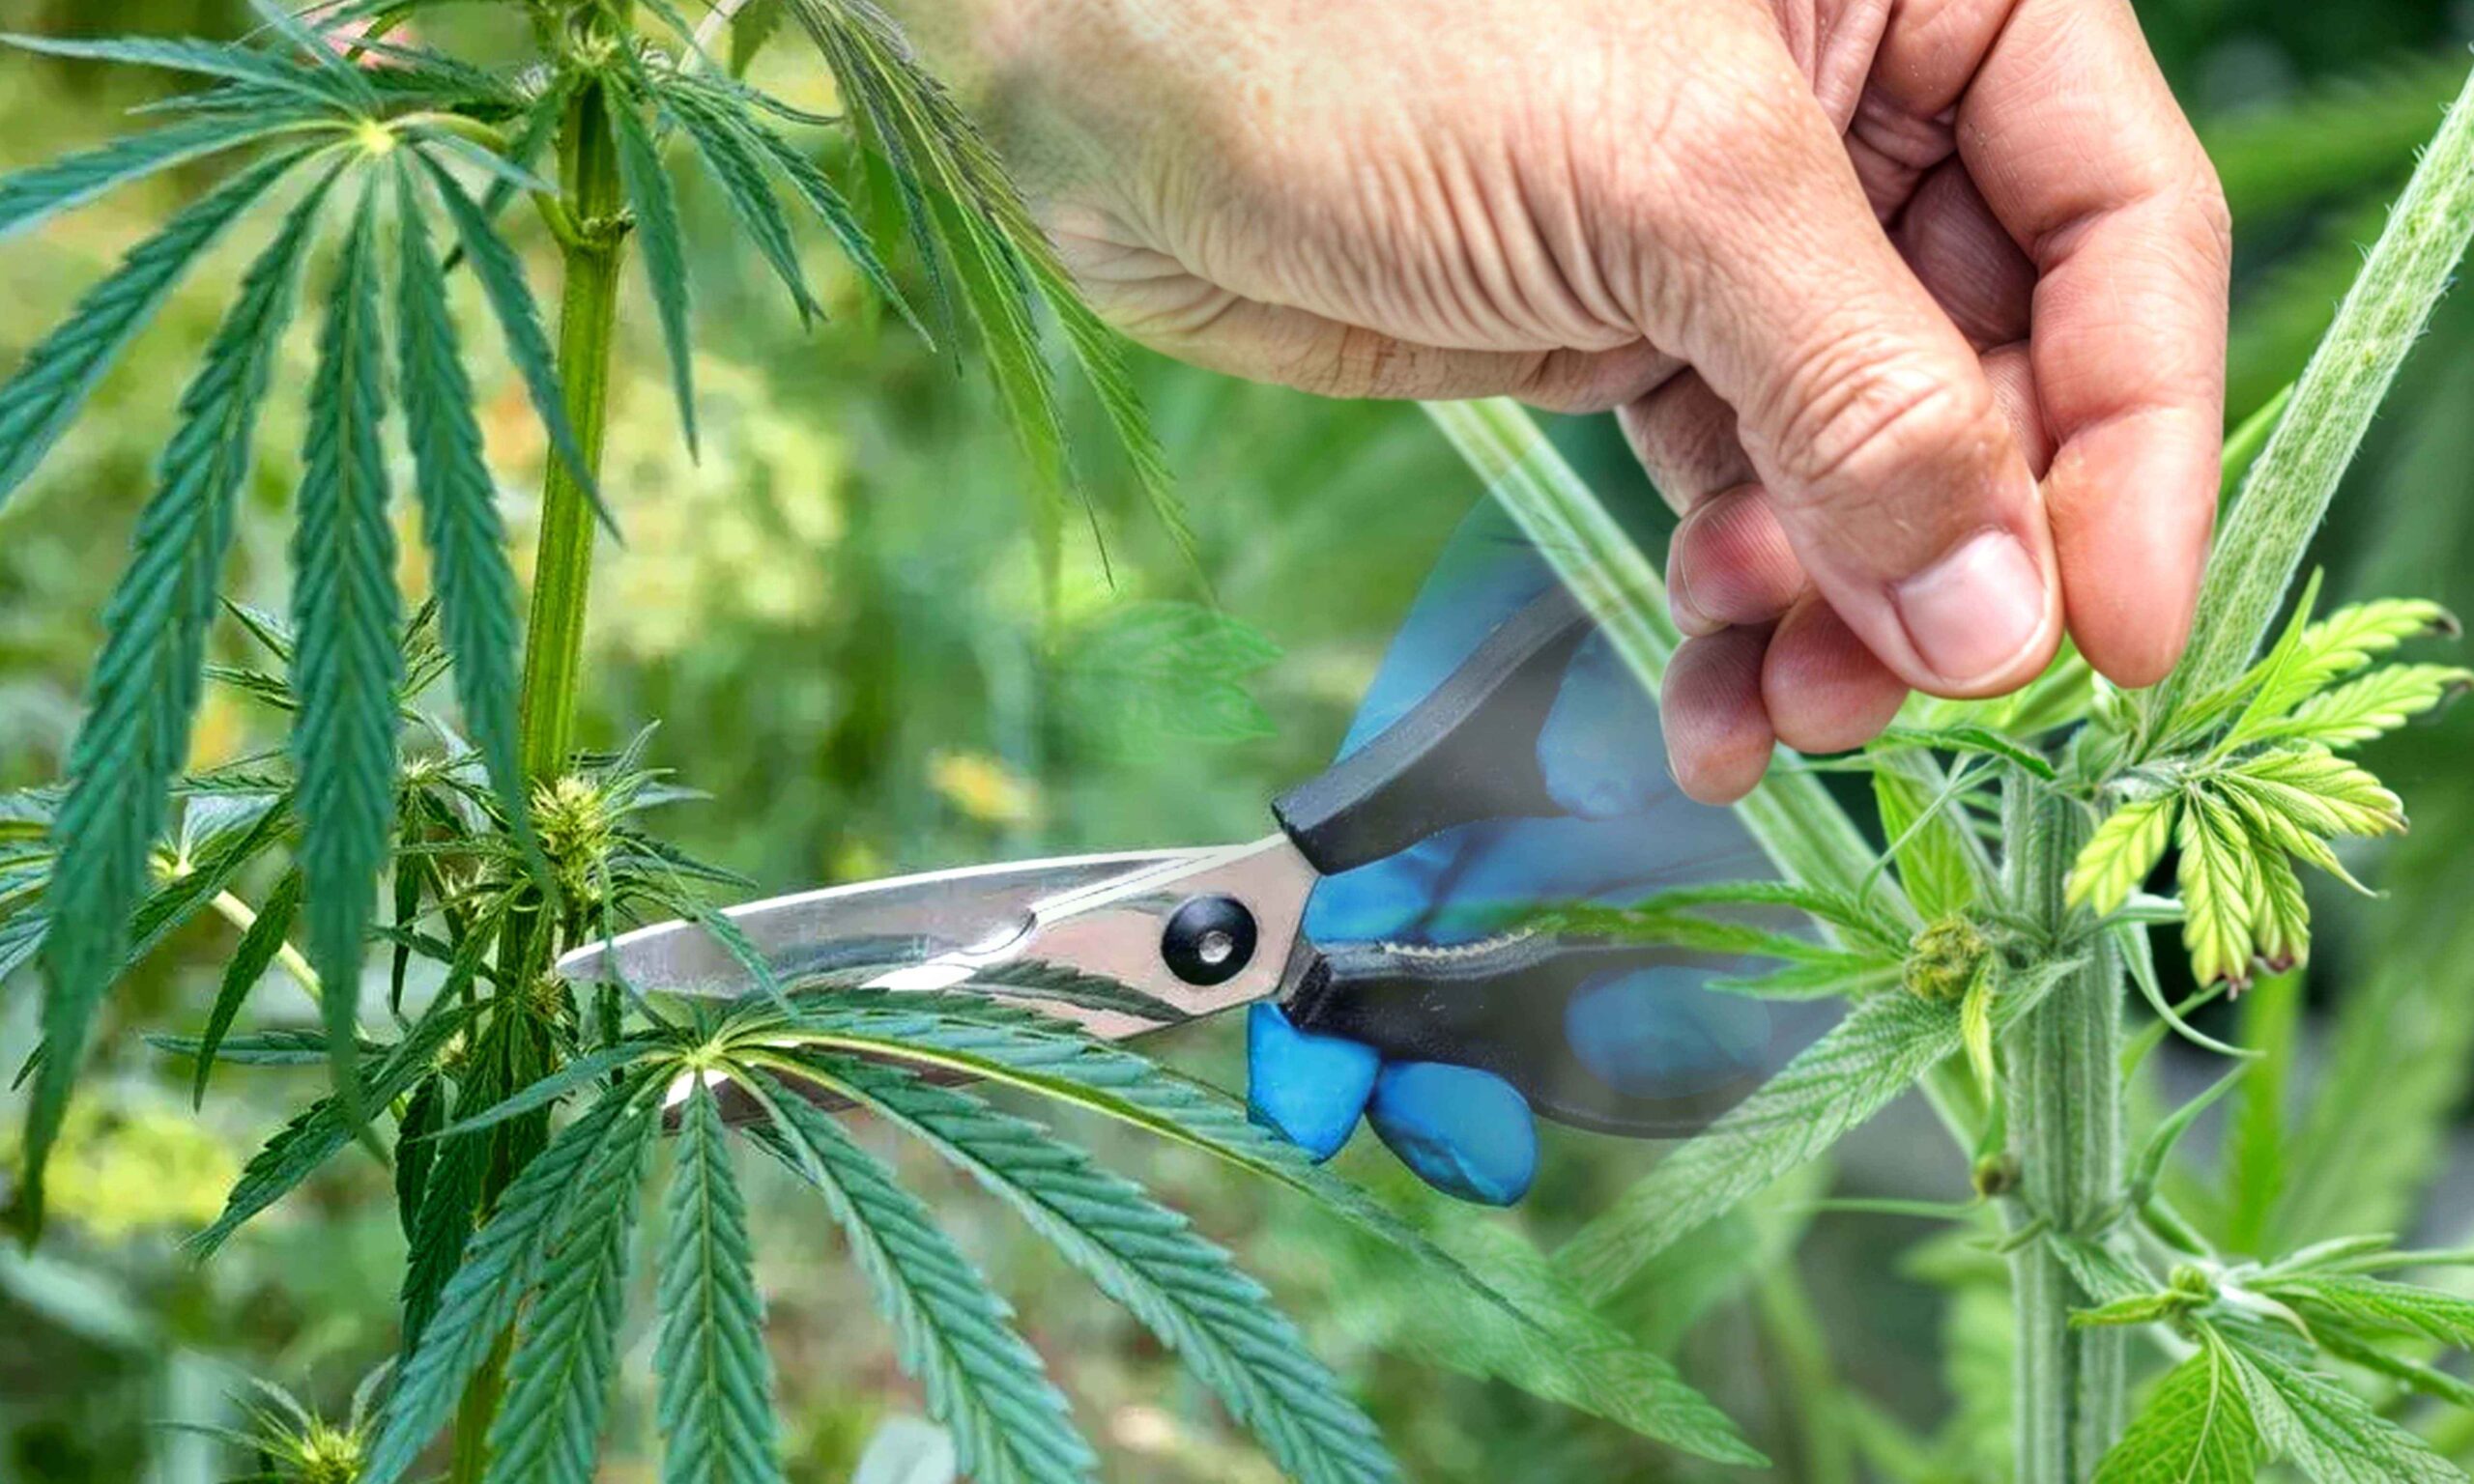
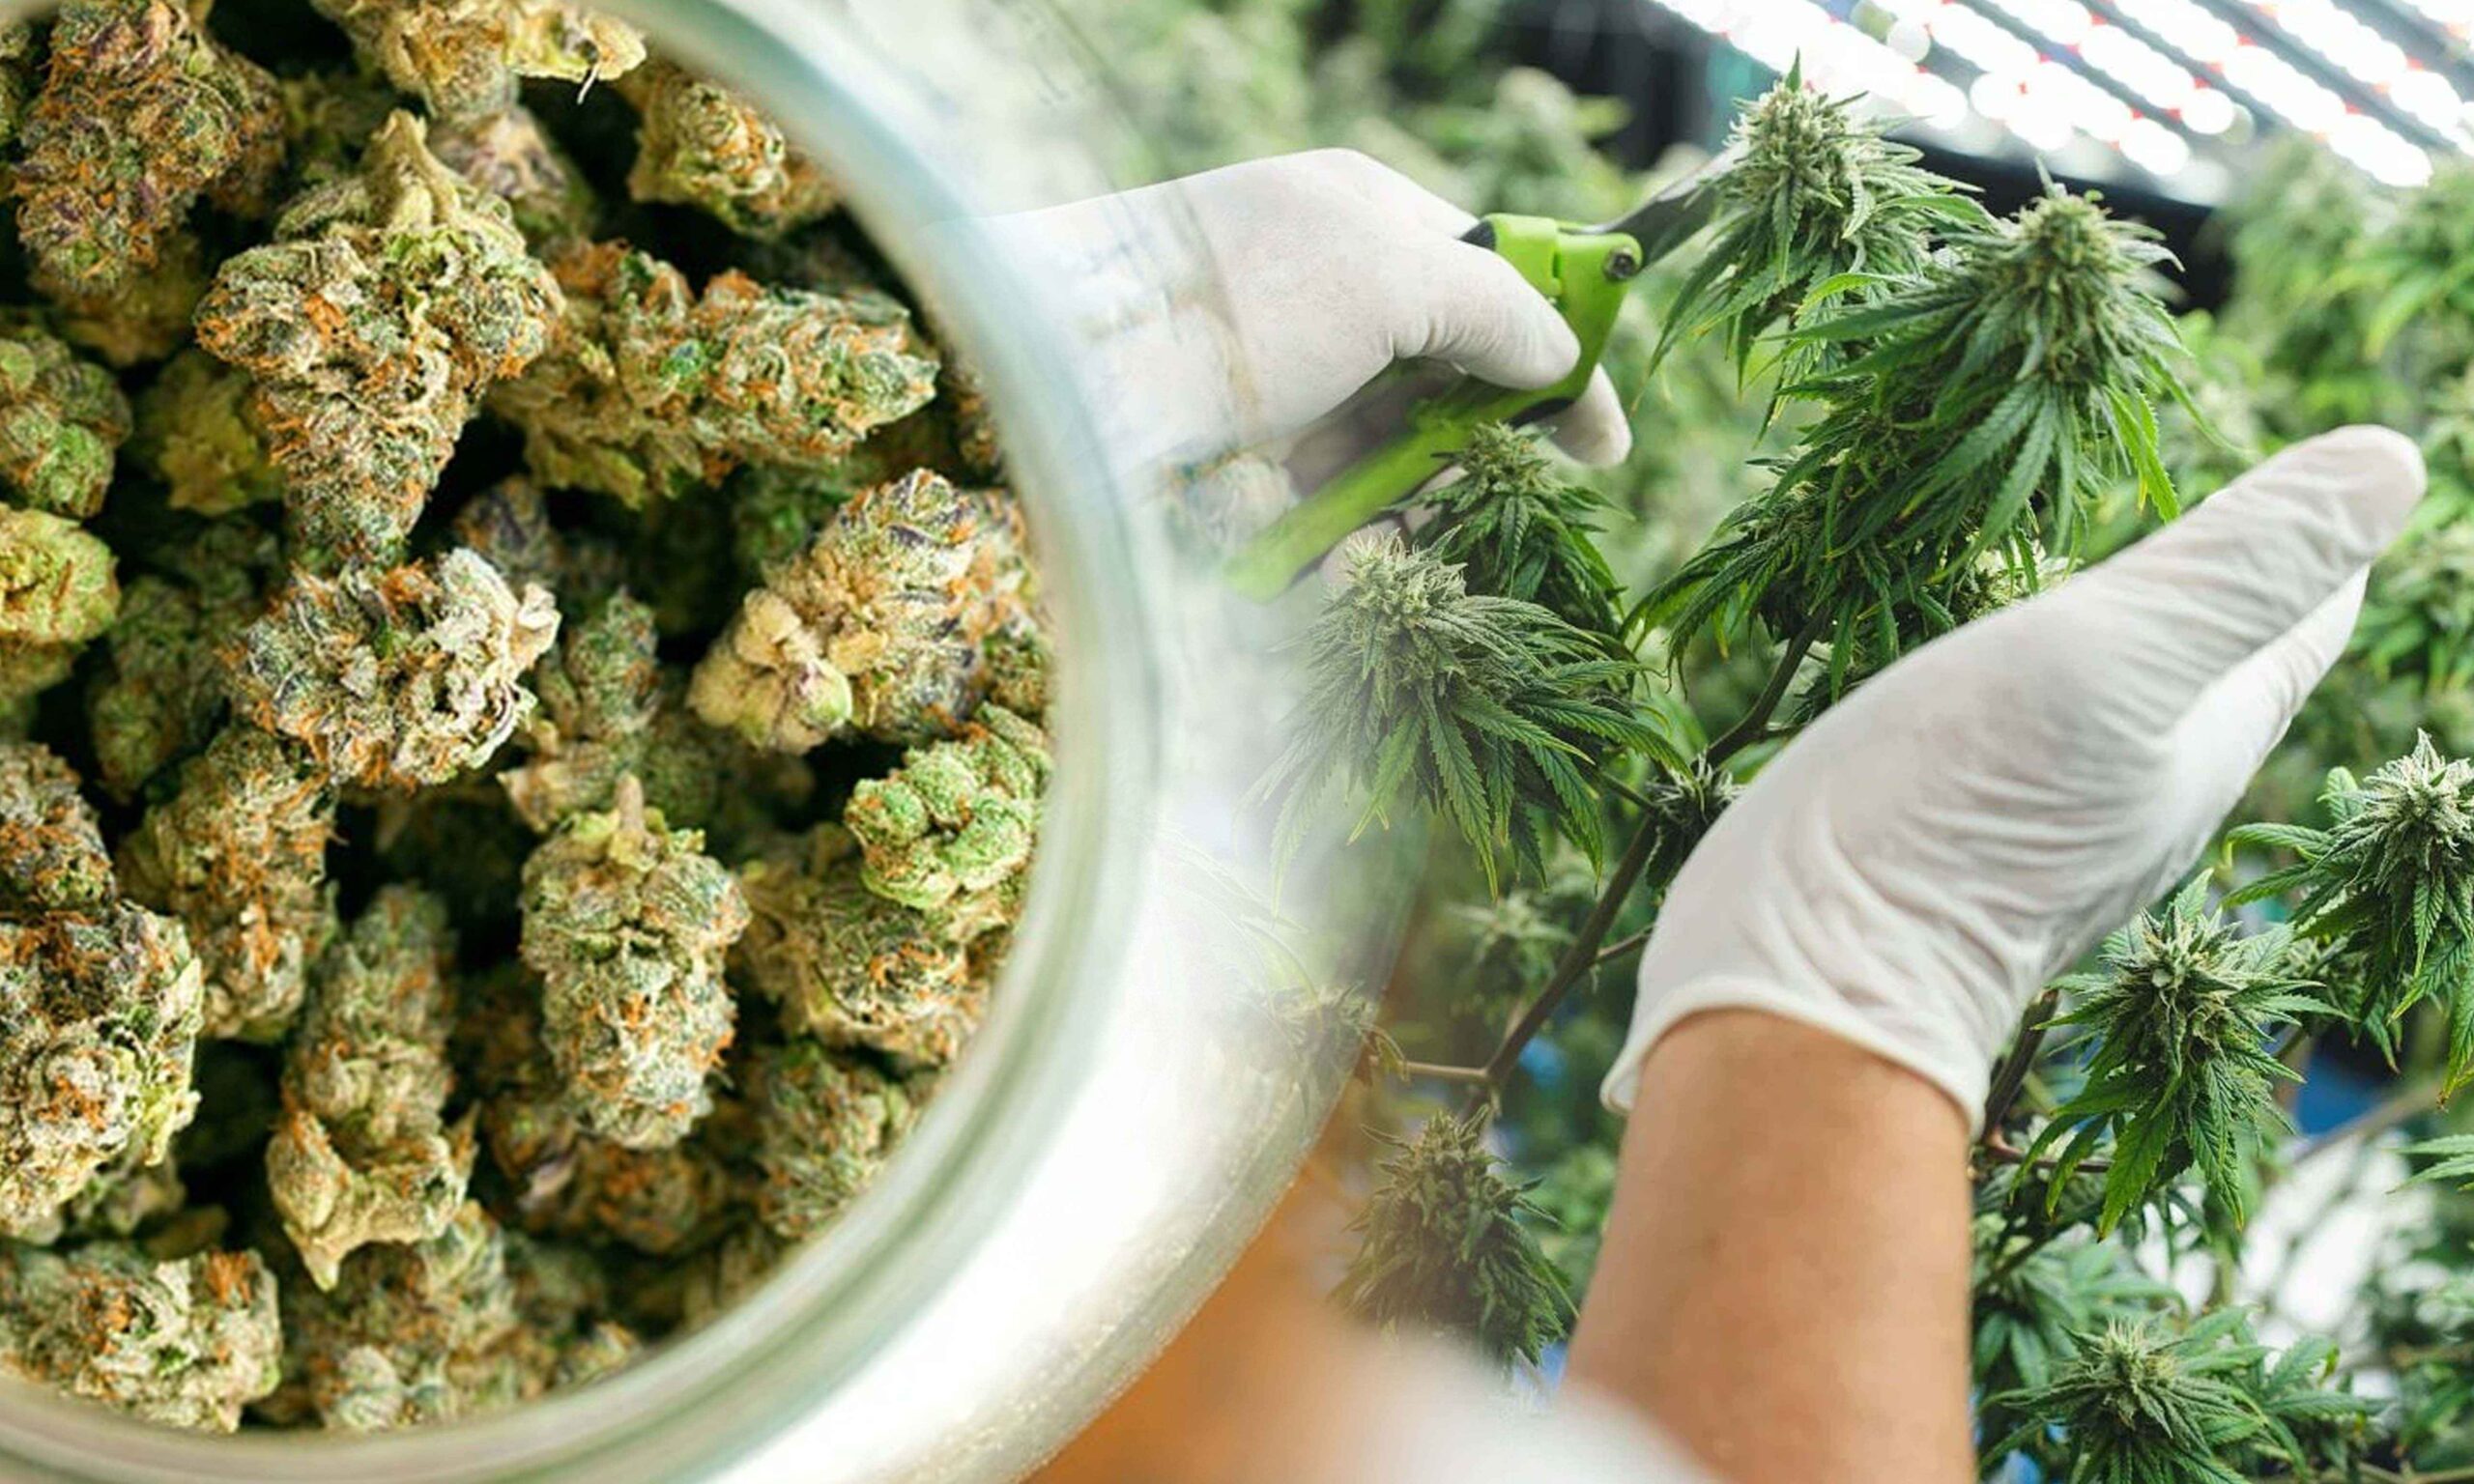
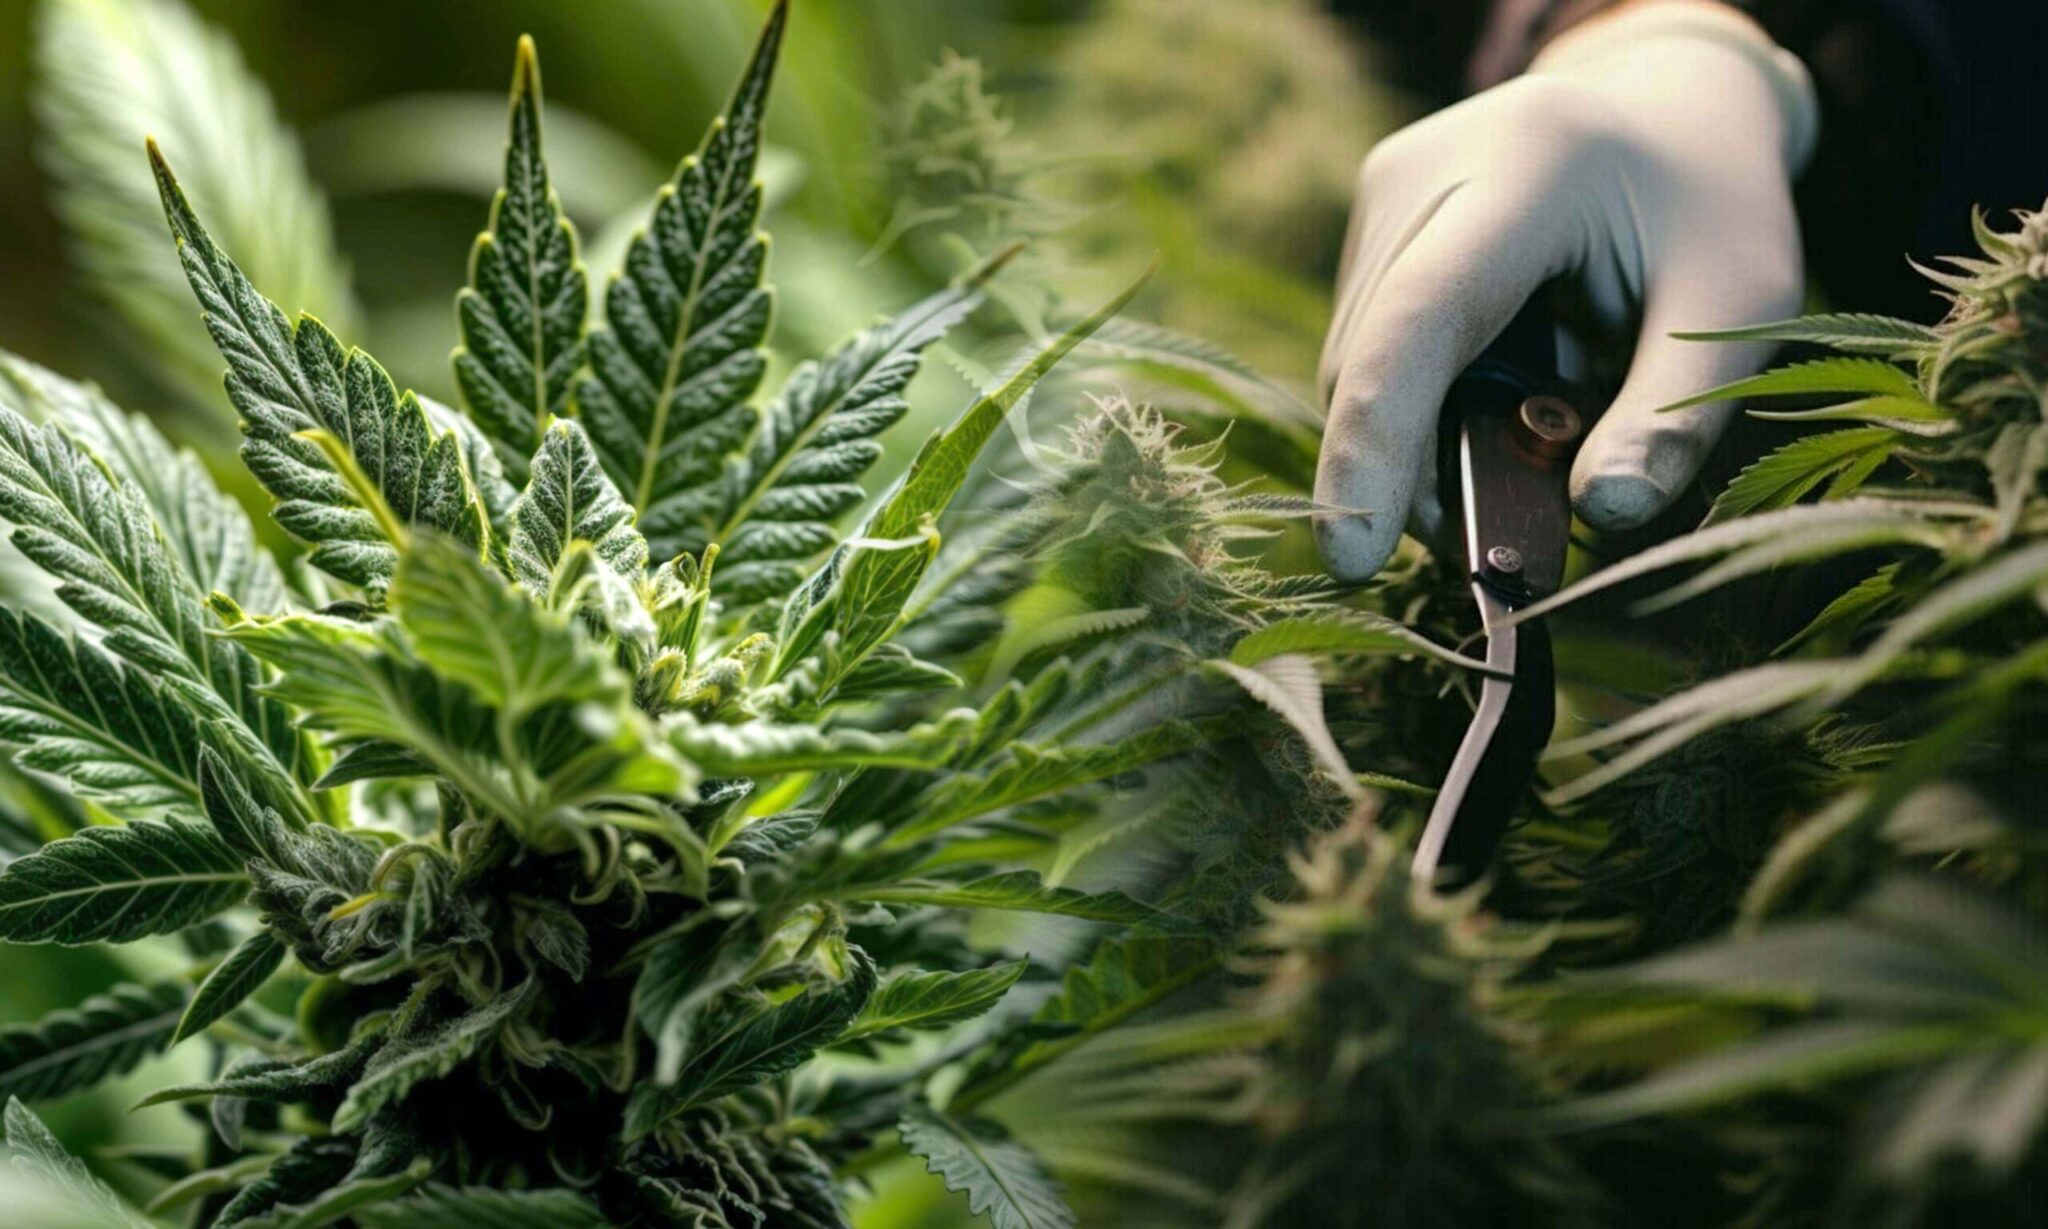
  • Harvesting and Curing
    Knowing when to harvest your plants is essential. Follow guidelines for harvesting, trimming, and curing to ensure that your 90s weed retains its flavor and potency.
  • Continuous Learning
    Cultivating cannabis is a skill that can be honed over time. Be prepared to learn from each grow cycle and make adjustments as needed. Online forums, grow guides, and local grow communities can be valuable resources.


Growing 90s weed strains can be a rewarding experience, allowing you to savor the flavors and effects of a bygone era. It’s a journey that connects you to the past while embracing the advancements of the present.

90s Weed in Pop Culture

The influence of 90s weed culture can still be seen in pop culture today. From movies like “Dazed and Confused” to songs by artists like Cypress Hill, the 90s left an indelible mark on the way we perceive and celebrate cannabis. Let’s explore some of the ways 90s weed continues to shape our cultural landscape:

Movies

  • “Dazed and Confused”: This cult classic directed by Richard Linklater captures the essence of the 70s but resonated strongly with 90s audiences. The film’s portrayal of high school students enjoying their last day of school while experimenting with cannabis became an iconic representation of youthful rebellion and camaraderie.
  • “Half Baked”: Released in 1998, this stoner comedy starring Dave Chappelle became a cornerstone of 90s weed culture. Its zany humor and memorable catchphrases (“I’m on weed!”) continue to be celebrated by cannabis enthusiasts.


Music

  • Cypress Hill: This hip-hop group from Los Angeles became synonymous with cannabis culture in the 90s. Songs like “Hits from the Bong” and “Dr. Greenthumb” celebrated the joys of cannabis consumption and contributed to the normalization of weed in music.
  • Sublime: The band Sublime incorporated elements of reggae, punk, and ska into their music, often accompanied by lyrics referencing cannabis. Tracks like “Smoke Two Joints” and “What I Got” remain anthems for those who enjoy cannabis.


Art and Fashion

Artistic Expression: Cannabis-inspired art and fashion were prevalent in the 90s. From psychedelic posters to clothing adorned with cannabis leaves, the plant became a recurring motif in the visual arts. This artistic expression continues to thrive today, with cannabis-inspired art gaining recognition and value.

Cannabis References in Lyrics

Ongoing Influence: Even contemporary artists continue to reference 90s weed culture in their lyrics. Whether it’s a nod to classic strains or a mention of iconic 90s stoner movies, these references serve as a bridge between past and present cannabis enthusiasts.

Conclusion

In conclusion, the 90s were a magical time for cannabis enthusiasts, and their love for the plant continues to endure. The strains that defined that era may have mellowed with time, but their legacy lives on. Whether you’re a seasoned stoner or a curious newcomer, exploring 90s weed strains is a journey worth taking. It’s an opportunity to connect with a rich cultural history and experience the simplicity and camaraderie of a bygone era.

As cannabis continues to evolve and gain acceptance worldwide, it’s essential to appreciate the roots from which it sprang. The 90s were a pivotal period in the journey toward cannabis normalization, and the influence of that era can still be felt today. So, roll up a joint, put on some Nirvana, and transport yourself back to the days of grunge and good vibes. As you do, remember that cannabis, like the memories it invokes, remains a timeless and cherished part of our culture.

Frequently Asked Questions

1. Can I still find 90s weed strains today?
Absolutely! While they may not be as common as modern strains, dedicated growers and seed banks are preserving these classics. Look for heirloom or landrace strains for an authentic 90s experience.

2. How does 90s weed compare to modern strains in terms of potency?
90s weed tends to have lower THC levels compared to modern strains, which are often much more potent. It’s a matter of personal preference and tolerance.

3. What were some other popular 90s weed strains besides the ones mentioned in the article?
Some other notable 90s weed strains include “Blueberry,” “White Widow,” and “AK-47,” each with its own unique characteristics and fan base.

4. Did people smoke weed differently in the 90s compared to today?
In some ways, yes. Rolling joints and using homemade smoking devices were more common in the 90s. Today, there are various consumption methods, including vaporizers, edibles, and concentrates.

5. Has the flavor of 90s weed changed over the years?
The flavor of 90s weed was distinctive with earthy and sometimes spicy notes. Modern strains often have a wider range of flavors due to selective breeding and genetic manipulation. The diversity of flavors in modern cannabis is a testament to the ongoing evolution of the plant.

Cannabis Topping vs. Fimming: What Is The Difference?


The precision and care are paramount for achieving healthy and bountiful yields. Among the various cultivation techniques, two popular methods have gained prominence: cannabis topping vs. fimming. Both are employed to enhance plant growth and maximize yields, but they differ in their approaches and outcomes. In this comprehensive guide, we’ll delve deeper into the nuances of cannabis topping vs. fimming, their advantages, disadvantages, and when to use each method for optimal results.

Understanding Cannabis Topping

cannabis topping vs fimming

What is Cannabis Topping?

Cannabis topping is a pruning technique that involves strategically cutting off the top part of the main stem or the dominant shoot of a cannabis plant. The primary objective is to encourage the plant to divert its energy and resources towards the growth of multiple branches and secondary shoots. This action results in a bushier and more productive plant overall.

The Process of Topping

To successfully top a cannabis plant, it’s essential to follow a few key steps:

  1. Timing is Crucial: Wait until the plant has developed a few sets of true leaves and is at least a few weeks old. Topping too early can stress the plant.
  2. Locate the Dominant Stem: Identify the main stem or the tallest shoot, as this is the part you will be cutting.
  3. Precise Cutting: Using clean scissors or pruning shears, carefully cut the main stem just above the desired node, which is usually situated below a set of leaves.
  4. Stimulating Growth: This pruning action stimulates the plant to grow two new shoots from the node where you made the cut, effectively creating a “Y” shape in the growth pattern.


Advantages of Topping

  • Increased Bushiness: One of the most notable advantages of topping weed plants is that it encourages lateral growth. This lateral branching creates a bushier plant, which can be highly beneficial, especially in indoor setups with limited space.
  • Improved Light Distribution: Bushier plants allow for better light distribution throughout the canopy. This optimization of light exposure is vital for the process of photosynthesis and ensures that all parts of the plant receive adequate light.
  • Enhanced Yield Potential: With more branches and potential bud sites, topping plants can lead to significantly higher yields during the flowering stage. This makes it a popular choice among experienced growers aiming for maximum harvests.


Disadvantages of Topping

  • Slower Recovery: After cannabis topping, the plant needs time to recover and redirect its energy towards the new growth. This may result in a slight delay in flowering compared to unpruned plants.
  • Increased Maintenance: Bushier plants may require more attention and pruning to prevent overcrowding and ensure proper air circulation. It’s essential to stay vigilant to avoid potential issues like mold or mildew.


The Art of Fimming

cannabis topping vs fimming

What is Fimming?

Fimming, an abbreviation for “F**k, I Missed,” is a pruning technique that takes a less aggressive approach compared to cannabis fimming. With fimming weed palnts, you’ll be pinching off the top growth of the main stem or dominant shoot, but you’ll leave a small portion behind. This subtle modification encourages the development of multiple shoot tips and contributes to a bushier growth pattern.

The Process of Fimming

Fim Cannabis requires a delicate touch, and the process can be broken down into the following steps:

  1. Locate the Tip: Begin by identifying the tip of the main stem or dominant shoot, which is the part you’ll be modifying.
  2. Precise Pruning: Instead of cutting off the tip entirely, pinch or snip off approximately 75% of it, leaving a small portion behind. This remaining portion will go on to develop into multiple new shoot tips.


Advantages of Fimming

  • Extensive Branching: Fimming takes the concept of lateral growth to the next level. It encourages even more lateral branching than cannabis topping, resulting in a plant that resembles a lush bush.
  • Reduced Stress: Fimming plants is considered less stressful for the plant compared to topping. The smaller cut and the retention of some growth at the tip enable faster recovery.
  • Ideal for Limited Spaces: Fim Cannabis is an excellent choice for growers with confined vertical spaces. It helps maintain a compact and manageable plant size while still maximizing yield potential.


Disadvantages of Fimming

  • Less Predictable: While fimming can lead to extensive branching, it’s somewhat less predictable than cannabis fimming vs. topping. The outcomes may vary from plant to plant, making it essential to monitor the response of each individual.
  • Strain Variability: Some cannabis strains respond more favorably to cannabis topping than fimming, while others thrive with fimming. Understanding your specific strain’s characteristics can help you choose the right technique.


When to Choose Topping or Fimming

Making the Right Decision

Selecting the appropriate pruning technique, whether it’s topping vs. fimming, involves careful consideration of several factors:

  1. Strain Selection: Different cannabis strains may respond better to one technique over the other. Researching the characteristics of your chosen strain can provide valuable insights into the best approach.
  2. Grow Space: Assess your available cultivation space. If you have limited vertical space, fimming may be the more practical choice, as it maintains a compact plant structure.
  3. Experience Level: Consider your level of experience as a grower. Fimming is generally considered more forgiving and suitable for beginners, while topping vs. fimming requires a bit more precision and experience.
  4. Cultivation Goals: Define your cultivation goals. Are you looking to maximize yields, manage plant size, or experiment with different techniques? Your objectives will influence your choice.


Conclusion

In cannabis cultivation, the decision between cannabis topping vs. fimming should align with your specific needs and circumstances. Topping encourages lateral growth and is well-suited for maximizing yields in spacious grow areas. In contrast, fimming is a more forgiving method that thrives in compact spaces. Always remember to consider your strain’s characteristics and your level of experience when determining which technique to employ.

FAQs

1. Is topping or fimming better for increasing yields?
Both cannabis topping and fimming can enhance yields, but topping is often favored for achieving larger yields in more spacious grow environments.

2. Can I use both topping and fimming on the same plant?
Yes, some growers employ a combination of both techniques to strike a balance between a bushy structure and increased bud sites.

3. How long does it take for a plant to recover after topping or fimming?
Recovery times can vary but generally range from a few days to a couple of weeks. Keep a close eye on your plants during this critical period.

4. Are there strains that don’t respond well to topping or fimming?
Yes, some strains may not exhibit favorable responses to these techniques, so researching your strain’s specific traits beforehand is advisable.

5. Can I use these techniques in outdoor cultivation?
Absolutely, both cannabis topping and fimming can be applied to outdoor cannabis plants to enhance growth and yield, provided you consider the unique conditions of outdoor cultivation.

Autoflower Not Flowering After 8 Weeks: Troubleshooting Guide


Autoflowering cannabis strains have gained immense popularity among growers for their ease of cultivation and quick harvest times. However, it’s not uncommon for growers to encounter challenges, particularly when their autoflowers do not begin flowering as anticipated after 8 weeks. In this detailed guide, we will delve into common issues related to autoflowering plants not flowering on schedule and provide practical solutions to address autoflower not flowering after 8 weeks and ensure a successful harvest.

Understanding Autoflowering Cannabis

Before diving into troubleshooting, it’s essential to understand the unique characteristics of autoflowering cannabis. Unlike photoperiod strains, autoflowers transition from the vegetative stage to the flowering stage automatically, regardless of changes in light cycles. They typically have a shorter growth cycle, which is why many cultivators prefer them. However, this automatic transition can occasionally lead to unexpected delays in flowering, and that’s what we’ll address in this article.

Autoflowers usually have a predetermined flowering window, but external factors can influence this timeframe. Factors such as genetics, light, nutrients, and environmental conditions all play a crucial role in determining when your autoflowers will start flowering. By comprehending these factors and their impact, you’ll be better equipped to troubleshoot and optimize your cultivation.

Why Is My Autoflower Not Flowering – Troubleshooting Causes

Week 5 Unexpected Hiccups

autoflower not flowering after 8 weeks

Facing issues earlier in the growth cycle for your week 5 autoflower not flowering? Let’s address them head-on:

  • Disease and Pest Management: Vigilance is key in identifying and addressing disease or pest infestations promptly. Early intervention can save your plants from significant damage.
  • Watering Precision: Accurate watering is crucial for autoflowers not flowering. Overwatering or underwatering can stress your autoflowers and impact overall health. Establish a consistent watering routine based on the specific needs of your plants.
  • Optimal Lighting: Ensure that your light source is appropriate for the size of your growing area. Inadequate light can hinder growth and flowering. Consider upgrading your lighting setup if needed.


Week 6 No Signs of Flowering

autoflower not flowering after 8 weeks

Arriving at week 6 without any visible signs of flowering for your autoflower not flowering after 6 weeks can be disheartening for growers.

However, it’s essential to remain patient and consider the following factors:

  • Genetics: Autoflower strains vary in their flowering times. Some naturally take longer to initiate flowering, so consult the specific strain’s characteristics to determine if this is the case.
  • Light Intensity and Duration: Adequate lighting is crucial during the vegetative stage. Ensure your plants receive 18-20 hours of light daily to encourage healthy growth before flowering.
  • Nutrient Management: Over or underfeeding can significantly impact flowering. It’s essential to maintain a balanced nutrient regimen tailored to the needs of autoflowers.


Week 7 Still No Buds

autoflower not flowering after 8 weeks

If you reach week 7 without any signs of buds for your autoflower week 7 no buds, it’s time to take proactive steps to address the delay:

  • Environmental Stressors: High temperatures or excessive humidity levels can stall flowering. Maintain optimal conditions within the range of 70-85°F (21-29°C) and manage humidity levels accordingly.
  • Root Health: Check for signs of root-bound plants. If your autoflowers have outgrown their pots, transplant them to provide more space for root expansion, which is essential for flowering.
  • Light Control: Ensure complete darkness during the 12-hour dark period. Even slight light leaks during this phase can disrupt the flowering process.


Week 8 Pistils, but No Buds

autoflower not flowering after 8 weeks

Encountering pistils without developing buds for your autoflower pistils but no buds can be perplexing. To address this issue:

  • Pollination Concerns: If male plants are present nearby, they may have pollinated your female autoflowers, which can hinder bud development. Remove any male plants promptly.
  • Nutrient Imbalance: Incorrect pH levels in your growing medium can lead to nutrient lockout, affecting bud formation. Regularly monitor and adjust the pH to maintain optimal nutrient absorption.
  • Extended Patience: While most autoflowers start flowering within a specific timeframe, some may take longer due to genetic variations or environmental stressors. Be patient and give them up to 12 weeks if necessary.


Conclusion

Cultivating autoflowering cannabis can be both rewarding and challenging. When your autoflowers are not flowering as expected after 8 weeks, it’s essential to remain patient and methodically address potential issues. By carefully managing genetics that is why always choose Crop King Seeds, also manage the light, nutrients, and environmental conditions, you can increase the likelihood of a successful harvest. Remember that every cannabis plant is unique, and fine-tuning your cultivation techniques is key to achieving the best results. Happy growing!

FAQs

Q: Can I force my autoflowers to flower?
A: No, autoflowers will naturally transition to the flowering stage based on their genetic programming, typically within 2-4 weeks from germination.

Q: Is it normal for autoflowers to take longer to flower than stated in their genetics?
A: Yes, variations in environmental factors and stress can occasionally extend the flowering time beyond what is specified in the strain’s genetics.

Q: Should I prune my autoflowers to encourage flowering?
A: It’s advisable to limit pruning with autoflowers to avoid unnecessary stress. Minor defoliation may be performed, but extensive pruning is not recommended.

Q: What is the ideal pH level for autoflowers during flowering?
A: Maintain a pH level between 6.0 and 6.5 in your growing medium during the flowering stage to optimize nutrient absorption.

Q: Can I use bloom boosters to speed up flowering?
A: While bloom boosters can enhance flowering, they won’t drastically shorten the flowering time. Use them as directed for optimal results.

Q: Should I change the light cycle to 12/12 to induce flowering in autoflowers?
A: No, autoflowers do not require a change in light cycle. They will transition to flowering automatically, regardless of the light duration.

How Often To Foliar Feed Cannabis


Enhancing plant growth and ensuring optimal nutrient uptake are essential goals for every gardener or farmer. One effective technique to achieve these objectives is foliar feeding. But the question arises: how often to foliar feed cannabis for the best results? In this comprehensive guide, we will guide you into the careful way to cannabis foliar feed, providing expert insights and practical tips to help you maximize your plant’s potential.

Understanding Foliar Feeding

How Often To Foliar Feed

Understanding how often to foliar feed cannabis is easier when you know why it works. Plants have tiny openings called stomata on the bottom of their leaves. These openings help with breathing and let in water and nutrients when we spray the leaves. Instead of going through the roots, the nutrients go straight to the leaves. This method has benefits like making the plant take in nutrients quickly and use them better.

The Importance of Macronutrients and Micronutrients

Plants need a lot of macronutrients like nitrogen, phosphorus, and potassium to grow well. They also need smaller amounts of micronutrients like iron, zinc, and manganese. When you spray the leaves with nutrients, it’s important to have the right balance of both kinds. If a plant doesn’t get enough of any nutrient, it can’t grow properly and might have health problems.

Factors Influencing Foliar Feeding Frequency

The number of times you spray leaves with nutrients depends on different things like what kind of plant it is, how old it is, the weather, and what nutrients it needs. Usually, young plants or ones that are growing fast need to be sprayed more often to help them get all the nutrients they need. But older plants might not need to be sprayed as much because they’re not growing as fast and just need to maintain themselves.

Determining the Ideal Frequency

How Often To Foliar Feed

To figure out how often to spray leaves with nutrients, you need to watch the plants closely and try different things to see what works best. Start by testing the soil to see what nutrients are there and if anything’s missing. Then, keep a close eye on how the plants are growing and what their leaves look like. If they’re not getting enough of a certain nutrient, or if they’re getting too much of something, you might need to change how often you spray or what kind of nutrients you use. The goal is to make sure the plants have everything they need to grow well and have healthy leaves.

Guidelines for Foliar Feeding Frequency

1. Young Seedlings and Transplants

When plants are just starting to grow from seeds or are recently transplanted, they are more likely to lack certain nutrients, which can slow down their growth. To help them grow strong roots and leaves, it’s a good idea to spray them with a mix of balanced fertilizer and water every 7 to 10 days. Watch how they’re doing closely, and if they seem to be growing well, you can stick with that schedule. But if they’re not growing as fast as you’d like, you might need to spray them more often. Adjust the spraying schedule based on how the plants are doing and how quickly they’re growing.

2. Vegetative Stage

When plants are in the vegetative stage, they grow quickly and need a lot of nutrients to help their leaves grow big and strong. For plants like tomatoes and peppers that you grow every year, spraying them with a fertilizer that’s rich in nitrogen every 10 to 14 days can help their leaves get bigger and make the plants stronger overall. Keep an eye on the color and size of the leaves, and if they look healthy and are growing well, you can stick with that schedule. But if they start to look pale or small, you might need to spray them more often. Adjust how often you spray based on how the leaves look and how fast the plants are growing.

3. Flowering and Fruit Set

As plants start making flowers and fruits, they need different kinds of nutrients to help them grow. At this time, you might not need to spray them with fertilizer as often because they’re not growing leaves as much. Instead, focus on making sure they have the right balance of nutrients. Spray them with a balanced fertilizer every 14 to 21 days, making sure there’s enough phosphorus and potassium to help the flowers and fruits grow well. Keep an eye on how the plants are doing, and if the flowers and fruits look healthy, you can stick with that schedule. But if they’re not growing as well as you’d like, you might need to spray them more often. Adjust how often you spray based on how the flowers and fruits are developing.

4. Perennial Plants

Perennial plants like fruit trees and ornamental shrubs have specific needs for nutrients that change with the seasons as they grow and rest. In the early spring, it’s a good idea to spray these plants with a balanced fertilizer to help them grow new leaves and flowers. But as they start to go dormant in the fall, you don’t need to spray them with fertilizer as often. This helps prevent them from growing too much late in the season, which can be damaged by frost. Adjust how often you spray based on the time of year and what stage of growth the plants are in.

Expert Tips for Maximizing Foliar Feeding Benefits

1. Timing Is Key

To help plants absorb nutrients better and reduce stress on them, it’s best to spray them with foliar sprays either early in the morning or late in the afternoon. This way, they’re not dealing with the heat of the day, which can make their leaves burn and cause the sprayed solution to evaporate quickly. By spraying at these times, you give the plants the best chance to take in the nutrients they need without causing them harm.

2. Use High-Quality Products

To get the most out of foliar spraying without harming the leaves, it’s wise to use top-notch fertilizers made for this purpose. These fertilizers are designed to be sprayed on leaves and are less likely to cause damage. When choosing a product, opt for ones with chelated micronutrients. These are easier for plants to use and absorb effectively. It’s all about giving your plants the best nutrients in a way that’s safe and efficient.

3. Rotate Nutrient Sources

To keep your plants healthy and prevent them from lacking certain nutrients, switch between different kinds of fertilizers during the growing season. Try using both synthetic and organic options. Organic choices like compost tea or fish emulsion can add nutrients to the soil and help it stay healthy. By mixing things up, you give your plants a variety of nutrients they need to grow well.

4. Monitor Plant Response

Keep an eye on your plants and check them often for any signs that they might not be getting enough or too much of certain nutrients. Look out for things like leaves turning yellow, the plants not growing as much as they should, or the tips of the leaves getting burnt. If you notice any of these signs, change how often you spray them with nutrients or try a different mix to see if it helps. The goal is to make sure your plants have everything they need to be healthy and strong.

FAQs

Q: Can foliar feeding replace traditional soil fertilization methods?
A: No, foliar feeding supplements soil fertilization but cannot replace it entirely. While it provides a quick nutrient boost directly to the leaves, soil fertilization is essential for overall plant growth and development.

Q: Is foliar feeding suitable for all types of plants?
A: Foliar feeding benefits a wide range of plants, but leaf structure and sensitivity can affect its effectiveness and safety. Some plants, especially those with hairy or waxy leaves, may be less receptive or prone to leaf burn.

Q: Can foliar feeding harm plants if overdone?
A: Yes, excessive foliar feeding or using the wrong products can harm plants by causing nutrient imbalances, leaf burn, or toxicity. Following recommended application rates, diluting fertilizers, and avoiding spraying during hot, sunny conditions can minimize risks.

Q: How soon can I expect to see results from foliar feeding?
A: Results from foliar feeding vary depending on factors like plant type and environmental conditions. While some improvements may be visible within days, long-term benefits like increased yield may require consistent foliar feeding over weeks or months.

Q: Can I make my own foliar fertilizer at home?
A: Yes, homemade foliar fertilizers can be made using simple ingredients like compost or organic fertilizers. However, it’s crucial to research recipes carefully, follow proper dilution ratios, and test on a small area of plants before widespread use to ensure effectiveness and compatibility.