500 NEW MARIJUANA SEEDS RELEASED

A Guide to Sexing Marijuana Plants

Sexing a marijuana plant is to know the gender of your plants as they enter the flowering stage. Knowing which of your plants is male or female is important to the overall yield of your grow room.

How can you sex your cannabis plants? Let us answer this question by looking at the identifying traits of a plants gender and explain the significance of male, female, and hermaphrodite plants.

Determining the Sex of Marijuana Plants

It is important to note that every regular and autoflower Cannabis Seeds have a chance to grow into a male or female plant. The plant’s gender will become apparent when it enters the flowering cycle. At this time, their sex organs will grow and gain the characteristics of either a male or female plant.

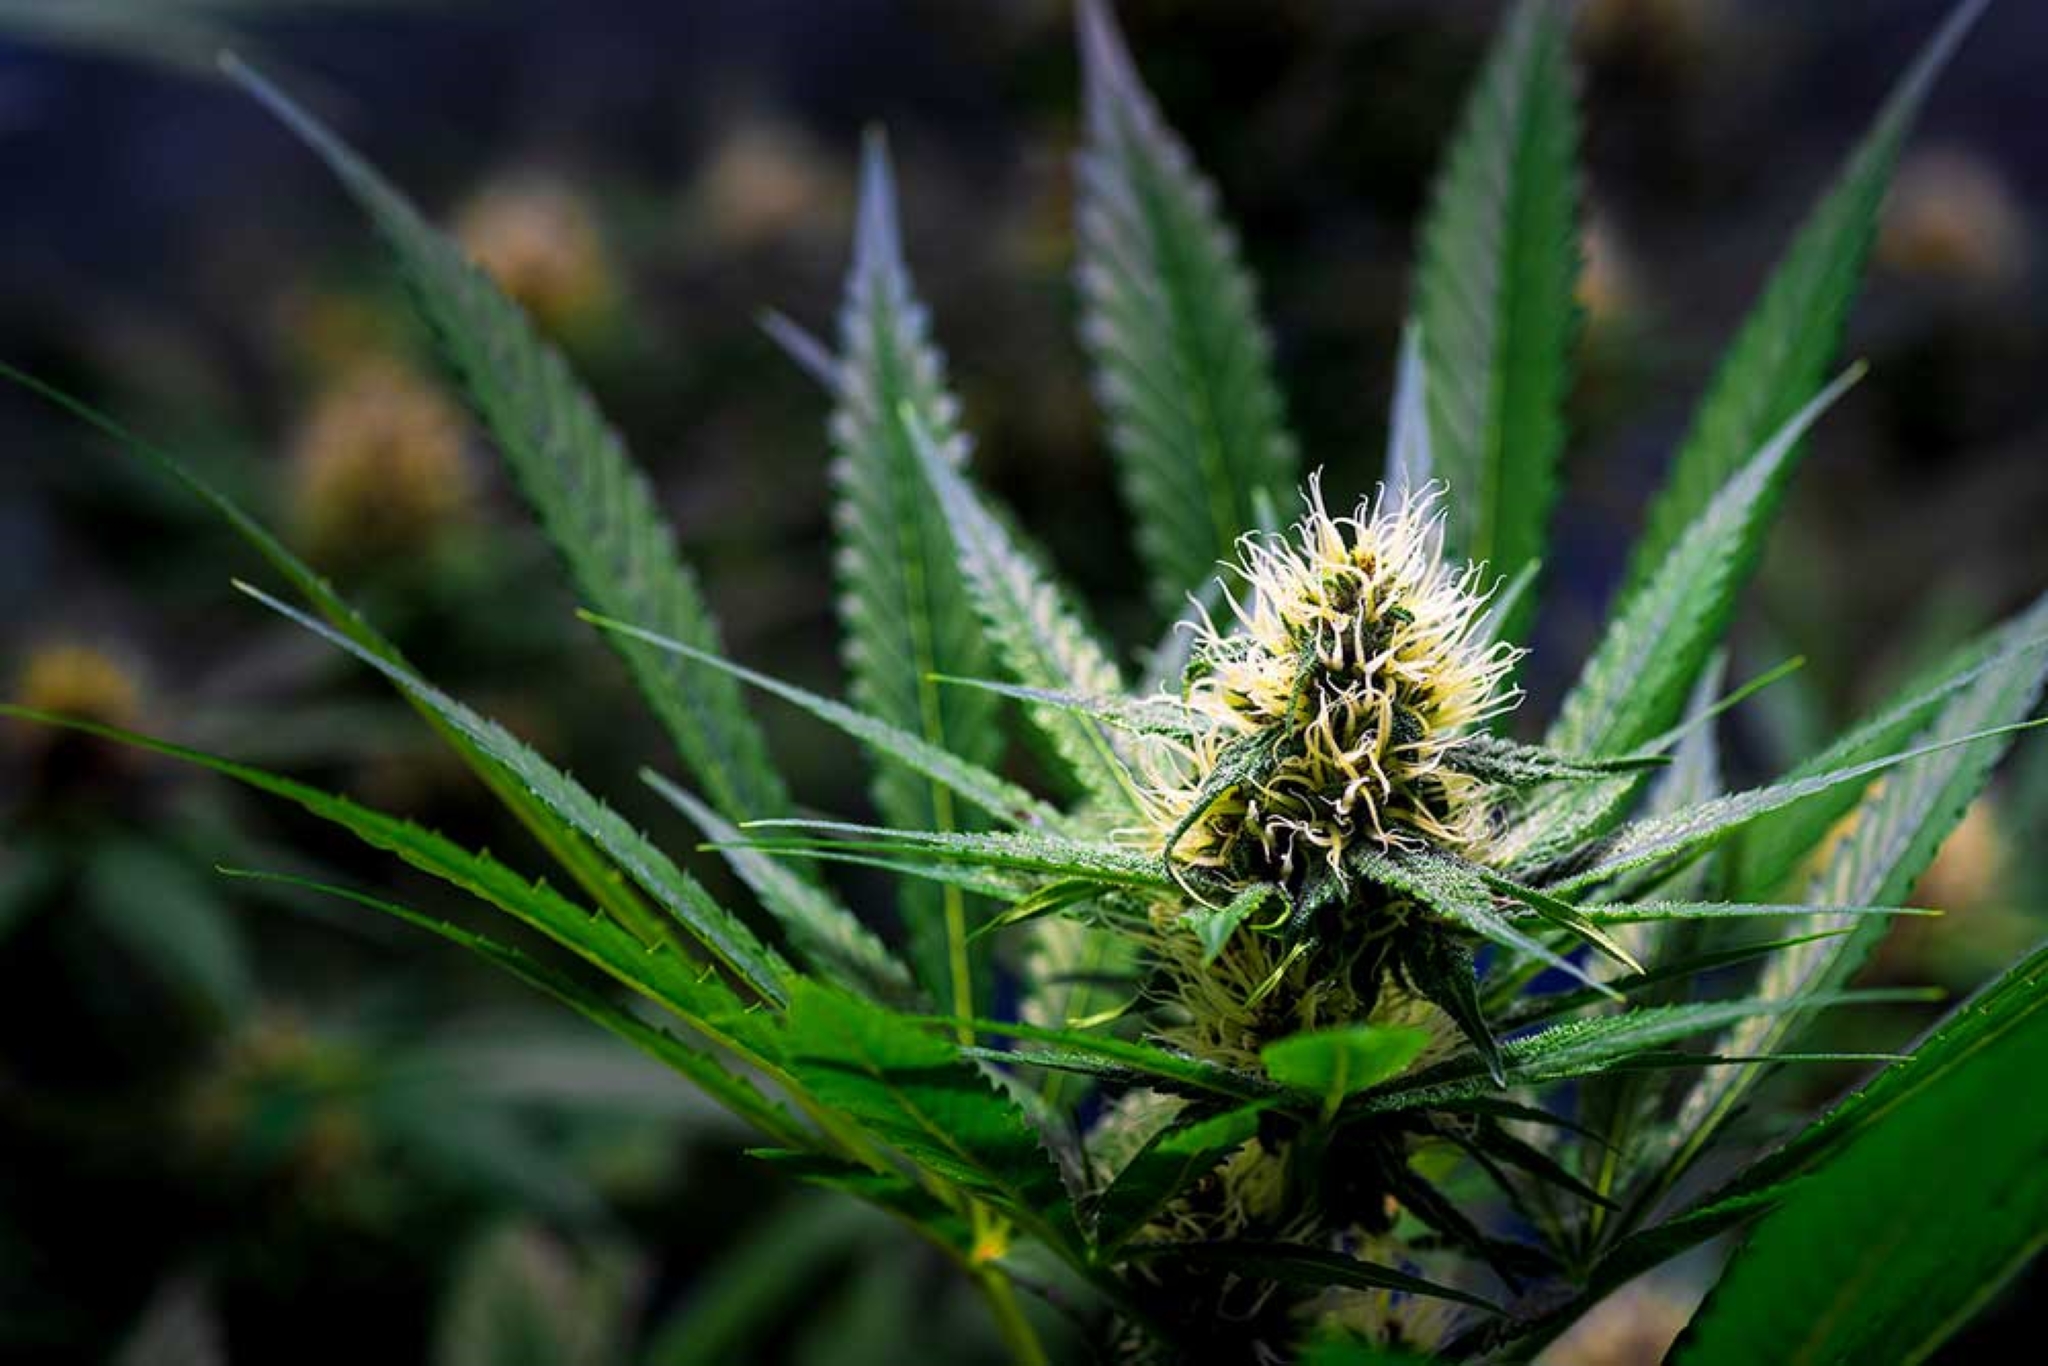
The key word when it comes to spotting a female plant is hair. This plant will grow buds that have a pair of white hair or pistils sprouting from the top. In addition, the pistils and upper part of the bud will have tiny hair sprouting around it.

On the other hand, male plants will grow bulbous pollen sacs. The shape of these sacs is the same as the ones with the buds. However, these buds will only appear to grow big over time and not have a pair of pistils coming out at the top. The sex organs will also have no small hair surrounding the top like the female sex organ.

You may encounter a plant that will have both male and female sex organs. This type of plant is a hermaphrodite and is a common phenomenon among cannabis plants. For all intents and purposes, most herm plants are treated as male plants. What is interesting to note is the shape of a hermaphrodite’s male organ, which looks elongated instead of being round. This is why breeders call the flowers bananas.

Other Methods of Sexing Marijuana Plants

While waiting for your plants to develop its sex organs is the tried and true way of identifying their gender, some breeders find signs of a plant’s gender throughout its growth cycle. One method is to check on the growth pattern of the plants.

Male cannabis plants usually grow taller than female plants and have a thicker central stalk. The thick stalk trait is to provide more support to the top of male plants. In addition, males usually have fewer branches and leaves than female plants. Meanwhile, female plants have thin central stalks and complex branches full of numerous leaves.

Some breeders found a way to identify a seed’s sex during the germination period. If the taproot shoots out of the sides of a seed, it may turn into a male plant. Should the seed grow its taproot from its top or bottom, it may grow to a female plant.

Take note that the two methods in identifying a plant’s sex are not accurate. Do not take out a plant from your garden right away if it has a thick central stalk than other plants or its taproot sprouted from the side. The plant may still turn to a female one when it enters the flowering stage. What you can do instead is to mark the plants that have early characteristics of male plants. When your plants enter the flowering period, you can give the marked plants a close check for any production of pollen sacs on their branch joints.

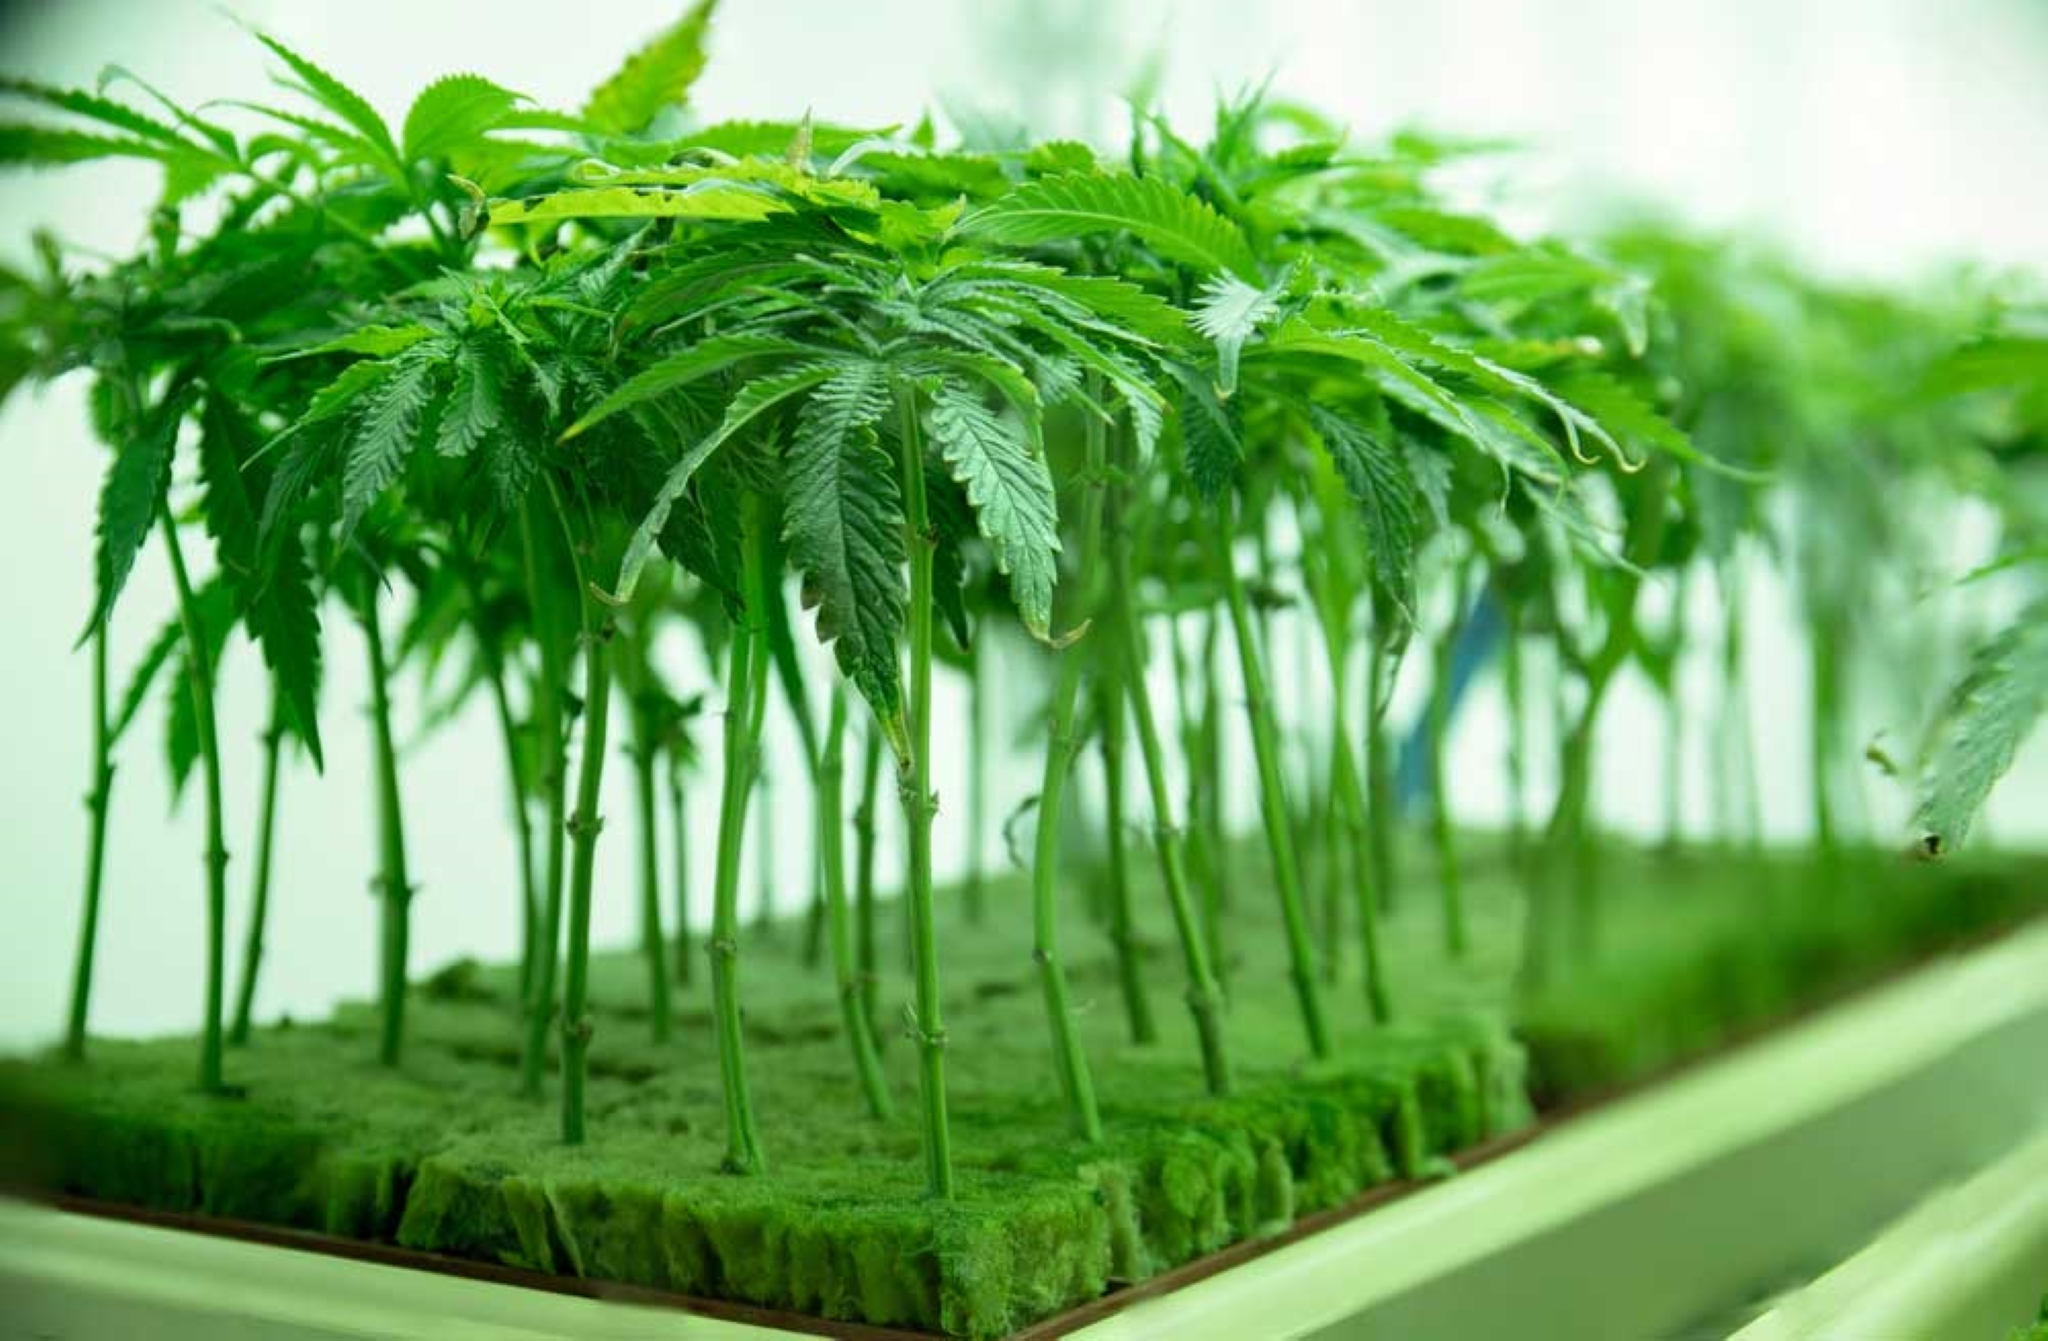
A sure-fire method is to create clones from the plant and allow it to go through the vegetative phase in a short time. This method involves cutting a sizable part of your plant and allow it to grow in a medium. When the clone grows into a plant in a few days, expose it to a 12/12 daylight to nighttime schedule. This will force the plant to enter the flowering phase and show its gender earlier than the mother plant.

The method works because clones have the same traits and genetics as the mother. This also includes the gender of the mother plant. In order to perform this test, you will need a separate indoor grow area with a grow lamp. This will let you expose only the clones to the 12/12 lighting schedule. It is also important to label the clones and the mothers to avoid any confusion once the clone shows its sex organs.

Understanding the Difference Between the Three Genders

The main difference between the three types of the plant comes down to the bud producers and pollen makers. Female plants are your former type of plant while males and hermaphrodites make up the latter. If you are only looking to cultivate cannabis plants for their high-inducing buds, you will only want to have female plants within your garden.

You might be asking if the pollen sac of male plants are consumable or can still be smoked. To answer your question, the sac is consumable. However, it will not have the same psychoactive effect or potency as the buds from female plants. Only female plants produce a significant amount of cannabinoid that is equal to their strain. Cannabinoids such as THC and CBN are responsible for a marijuana weed’s effect. Unfortunately, male plants do not produce the same amount of cannabinoids as its female counterpart.

Hermaphrodites are slightly complicated in a way that it can still produce the same type of bud as its female counterpart. This is only possible if there are a few male flowers and more female buds surrounding the plant. Should this be the case, you can extract the male bananas with a tweezer coated in rubbing alcohol. Upon cutting the organ, spray the flowering area with water to remove the pollen. Continue monitoring the plant for any male organs to sprout out of it. If a herm plant happens to have too many bananas and few buds, consider discarding it or harvest its pollen in a separate room.

Concerns with Male and Herm Plants Growing with Female Plants

As soon as you find any male or herm plants in the garden, you will want to discard or place the plants in a room that is away from the rest of your female plants. Allowing even one male or herm plant in your grow space can lead to unwanted fertilization of the female ones. Pollinated female plants will stop building up its buds with various cannabinoids. Instead, it will focus all of its energy on producing seeds within its buds.

Unless you are looking forward to creating a batch of seed for a specific strain, you will want to separate the females from pollen producing plants right away. This is not to say that it is not worth your while to make your own seed from your favorite strain. However, there is an efficient way of producing seeds and buds at the same time. It is important to note that a single female plant can give you more than 20 seeds when pollinated. Simply allowing male plants to pollinate all of your bud-producing females will be a waste of your time and effort.

Growing and Producing Feminized Seeds

You have no control over the gender of a regular seed, including autoflowering ones. They will grow into a male or female plant regardless of the type of nutrient you feed them or how you germinate the seeds. If you want to nearly all of the seeds to turn female, you can move the odds to your favor by cultivating feminized seeds instead of regular ones.  Feminized seeds have the genetic coding to grow into a female plant because it has two mothers.

While feminized seeds are available in most seed banks, you will often find fem seeds for popular strains. Fortunately, you can make your own batch of feminized seeds for your favorite strains. To do this, you need to chemically force a female plant to become a hermaphrodite.

Before attempting to turn a plant into a herm, you need a separate grow room to cultivate the designated plant that will produce the pollen. Accidental pollinations are not the only reason to separate a designated herm plant from the rest of your female plants. The reason is more on your safety as well as the health of anyone who will smoke your marijuana strain. This is due to our use of colloidal silver to make our herm plant.

Colloidal silver is small particles of silver floating around a solution of water. It is important to note that the substance is not toxic since people drink them as a nutrient supplement. However, marijuana strains that are exposed to colloidal silver become unsafe. On the other hand, the pollen from a herm plant that will go through the chemical process will be safe to use on other female plants.

When the designated female plant enters the flowering phase, spray the flowering site of the plant once a day with colloidal silver. Make sure to pick a bottle that has at least 30 PPM of silver. Keep spraying the plant for a period of two to three weeks. You will soon see the plant grow pollen sac on its flowering site. Continue applying the substance until the sac looks like it is full of pollen.

Collect the pollen and store it in a sealable bag. Allow the sac to dry so you can easily free the pollen from its confine. Place another designated female plant to produce the seeds in a separate growth room. Apply the pollen to the calyx of the plant with either a paintbrush or cotton bud. You should see the calyx bulge in size over time. In six weeks after pollinating the calyx, the seeds should be ready for harvest.

Natural Creation of Hermaphrodite Plants

Another method of producing a herm plant without the use of colloidal silver is through the Rodelization process. The method is simple since it involves allowing the female plant to flower beyond the peak harvest point. This triggers the female plant’s natural instinct to protect the next generation by growing its own pollen sacs in order to pollinate its buds.

When the pollen sac of the female plant appears to be ready to crack open, collect it with a sealable bag and store it for future female plants. Because this method involves the creation of pollen, it is advisable to have the designated female plant to flower in a separate room to avoid accidental fertilization.

The main issue with the Rodelization process is how the seeds it produces may become regular ones. Female plants that grow male characteristics tend to provide a gene that makes its offspring grow male traits. In addition, female plants may not grow pollen sacs as it continues to flower after the peak harvest point. Even if they do produce pollen, the amount you get is significantly less than herm plants that went through the colloidal silver treatment.

Keeping the Plants from Turning into Hermaphrodites

Apart from genetics, female plants can turn into hermaphrodites if they are under severe stress due to environmental factors. This includes exposing the plant to an excessive amount of heat, which can occur during summer or placing HID lamps too close to the plants.

Physical damages can also stress out female plants to turn into a herm. This type of damages includes over pruning the plant or taking a large cutting for cloning purposes. Seedlings are also easy to stress out when transferring them from two different containers. Doing so can aggravate the roots of young plants.

Failing to water the plant regularly or preventing the medium from drying can also lead to stress. Lack of water can stunt the growth development of the plant and make it think that it is in danger.

Pests are another factor of hermaphroditism because they can aggravate the plant’s structure. In addition, use of potent pesticides on the plant to control an infestation of insect can also have the same negative effect.

Overall, you can avoid growing hermaphrodites by practicing proper cultivation ethics. This includes providing the plants with proper air ventilation or circulation to keep it cool in any environment. Another is to sanitize its surrounding to lower the chances of a pest infestation.

You now know the best way to sexing marijuana plants as well as differentiate between the three genders. Separate the male and hermaphrodite plants from the rest of your growing garden to prevent any of your buds to turn into seeds. If you want to produce your own seeds, cultivate the male or hermaphrodite plant in a sealed room to prevent any pollen from reaching your female plants.

Air Circulation and Exhaust Tutorial for Your Marijuana Grow Room

Marijuana plants emit an odor especially when these are flowering. The smell of the plant when the buds are there will fill the air with the aromatherapy. The aromas emitted by the cannabis plant might sometimes be overwhelming. It’s a good thing to take the time to study this air circulation and exhaust tutorial for your marijuana grow room as that is one of the ways to ensure the optimal growth and development of cannabis plants.

Plants Need Air

We need to breathe to live and marijuana plants also need air. And enclosed room without open windows or door like those of storage rooms can be stuffy. If a plant is left is an enclosed room, it may survive but it will not thrive. Air is vital to a plants growth, as vital as the air that we breathe.

A marijuana plant has strong aromas. The smell will fill the air of a grow room. If the area is enclosed, the aroma will linger in the air. If you enter it to nurture the plant, it the smell might be overpowering.

It just makes sense to ensure that there is proper air circulation for an indoor area, even if it is just an ordinary room that you use for your home like the kitchen. It is good for you who needs to breath in the oxygen air. It is good for the plant that needs to ‘breathe’ the carbon dioxide in the air. The air that we breathe is made up of 21 percent oxygen. The other 78% is nitrogen. Then there is a small amount of carbon dioxide which is also known as CO2 and other gases.

A grow room requires a ventilation system. This is just as vital as having lights and providing the weed with nutrients. Proper ventilation will maintain the necessary atmospheric conditions – CO2 levels, temperature, and humidity – of the indoor garden. All of these factors contribute to the growth and development of the cannabis plant. When these factors are correct, the plant will have the optimal conditions for accelerated growth.

Plants Love Fresh Air

Many cannabis plants growing in the wild such as the Afghan weed strains that are found at the mountainous region of the Afghanistan-Pakistan border. These plants, like many other weed strains, thrive when there is fresh air.

That kind of fresh mountain air might seem difficult to achieve when one lives in the city that has polluted air. Yet, the wonderful thing about having a grow room is that it is possible to control many factors such as the air circulation through the air quality might not seem right because of the pollution.

Polluted Air

Note that polluted air does have a larger amount of carbon dioxide as in the city, it is typically the fuel that burns from vehicles that contribute to the CO2 levels. This is not to say that polluted air is a good thing but it is not bad for the marijuana plants because these ‘breathe’ carbon dioxide.

Advantages of Proper Air Circulation and Exhaust

When you create the right atmospheric conditions in your grow room, the plants will reward you with a bountiful and beautiful harvest. To nurture a plant that is silent and undemanding required gardening skills like irrigation and defoliation. To care for it by giving it the basic needs such as light and air can make a plant thrive. You don’t want your cultivated cannabis to not do well as it does take a lot of time and effort plus expense to grow a marijuana plant.

If you are ready to set up your grow room to achieve the optimal conditions, you must be ready to spend a little or tackle the tasks by doing it yourself using innovative materials.

Accelerated Growth

When a plant is given the right growing conditions, it will prosper and get to grow at an accelerated rate. The symphony of nature that you create in the grow room to include the ventilation will aid the cannabis strains to grow vigorously. If there is no or limited air circulation, the carbon dioxide in the room is low and that will prevent the plant from growing properly and prospering.

Larger yields

If you have proper ventilation, a plant can give larger yields. When the harvest per plant is larger, it can save you from cultivating another plant. For example, your chosen indica plant yields an average of 500 grams. If the yield can be increased by just a bit, such an additional 100 grams, if you have 4 marijuana plants, you have an extra 400 grams.

Better Yields

When a plant experiences accelerated growth, the buds will be better as these can become bigger and achieve uniformity in size.  It is not just ventilation that will make those potent buds achieve maximum potential, it is the harmony of your nurturing care such as defoliation and the other conditions in the grow room. Keep in mind that a quality harvest is a goal – and that means that the buds are nearly the same size and shape, have a healthy color, and other factors that indicate good crop productions.

Humidity and Temperature Control

There is water vapor in the grow room and that has to be dispersed. The air circulation will do the task of dispersing that water vapor. It also works to get rid of hot spots in the area as the heat will be distributed evenly. Aside from the air circulation bringing in the supply of fresh air, it also aids in controlling the humidity. Dispersing and diluting what is in the air is what ventilation does.

Prevention of Common Plant Diseases

There are ideal growing conditions for marijuana plants. If the area is too humid, a plant will be susceptible to mold and mildew, just like what happens in a bathroom.

Prevention of Pests

Stagnant air will make those awful fungus gnats, spider mites, and other creepy crawlies want to turn the grow room into an insect kingdom. If the topsoil is damp, the insects will like to breed on it. When there is good air circulation, the topsoil will be dry and it will discourage the insects to use it as a breeding ground.

Stronger Plants

When the growing conditions are right, a plant will be stronger – yet there is a direct effect to the plant that good air circulation provides The light breeze created in the grow room will make a plant sway slightly. This will strengthen the plant, especially the stem, as it bends, The effect of the wind stress outdoors can be damaging but without wind, it is unnatural. A plant naturally sways because of the wind and the ideal grow room will provide controlled wind stress.

Different Kinds of Ventilation

All grow rooms have walls but there might be differences in these walls. There has to be a door and this might be screened. There may be windows, existing exhaust fans, and air conditioning. And, what if your grow room is an aquarium or cabinet?

There are calculations that can be made to get the required amount of fans necessary in an enclosed space. That is for advanced setups, like those who do commercial marijuana crop production indoors.

The various kinds of ventilation options can aid you in your study of what to do and make it less costly to place air circulation and exhaust in your marijuana grow room.

Mechanical

Fans bring air in and out of a certain space. There is the exhaust which is just going out, also known as the passive system. There is the balanced that has both air supply and exhaust fans.

Natural

A room is designed in such a way that there is no need for fans for proper air circulation for normal use. Yet note, that the enclosed space of a grow room might require more ventilation than what is available as there are elements in the air that are not ideal for the marijuana plants. These elements include the water vapor that’ll add to the humidity level and the odor which might be unpleasant for you.

But, if the space has that light and breezy air, you might also have to add fans to use when it is not that way or secure the area to cover the openings when the wind is too strong and the weather conditions are not good for the plants like when it is too cold.

Mixed mode

This is also known as a hybrid. This is the kind of ventilation that has both mechanical and natural.

When You Just Need the Basics

If you have a grow room and are dead serious in creating the ideal growing conditions, you would require a sophisticated setup. Advanced growers and those who do commercial cultivation would have to budget for this expense.

Yet, as a home cultivar that wants to provide the best care possible, great growing conditions can be achieved with just the basic setup.

What you will need are exhaust fans and oscillating fans.

An Exhaust Fan is Also Known as an Extractor Fan

It works to blow out the air. When the air goes out, it takes along odors and water vapor, among other things. The exhaust fan serves to make the air circulate which does affect the room temperature such as getting rid of the heat. An enclosed area can be a hot box or super cold. There is another kind of fan that also works in sync with an exhaust fan. This kind is known as ducting fans. These can be placed in the ducting that’ll serve to channel out the air from the enclosed area.

An Oscillating Fan is that Common Electric Fan

There are different types such as a stand fan, desktop fan, and a ceiling fan. These come in various sizes and the intensity of the wind it can create also varies. There are oscillating fans that are stationary in function, meaning that it will just blow air one way, while there is one which has the fan part turning to the left and right to blow air in the direction it is facing.

Systems: Passive Air Intake and Active Air Intake

In a passive manner, all that is required is an exhaust fan. There is no air intake fan that will bring in the outside air. The way that the outside air will enter would either be through a duct or an intake hole, such as a small window, or small holes created in the wall. To make this passive system work, the air intake opening should be larger than the duct or exhaust hole. It is possible to create a number of intake holes for there to be enough suction like placing air intake openings on the different sides of the grow room.

The active intake is another option that is typically used for large sized enclosed areas. To apply this system, all that is needed is to place an air intake fan. That makes one fan blow in the air while the other one blows it out. The size of d air intake fan does not have to be much larger than the exhaust fan when creating this system.

Air Change

When ambient air is brought into an enclosed space intentionally, be it by natural or mechanical means, it will change the indoor air quality. This displacing and diluting of what is known as the indoor pollutants is done for more reasons than air circulation. It can provide dehumidification and thermal comfort.

When You Have Air Conditioners

If there is an air conditioning system such as that of centralized air conditioners or those stand-alone ones, there might be a need for an exhaust fan to aid in the air circulation so that the indoor air pollutants will go out.

It is possible to place a small split-type of aircon to use for air intake and that would also address the temperature control.

An aircon is the most common and easiest way to control grow rooms atmospheric conditions. It can get rid of the excess heat and even maintain the desired temperatures for optimal growth. It can also address the humidity control.

Design before You Create Ventilation

Fans and air conditioners cost money. You have to plan what to do before you start buying any appliance. The first thing to consider is where to place the appliances or how to work it out with the existing air openings. Then, you might have to take into consideration the electrical supply needed to run the fans such as sockets. Plan it well so you won’t waste your time and money.

You can do research online to find out what kind of oscillating and exhaust fans are available. You can also make an assessment of the room and use what you have. You can also ask an architect or other professionals to aid you in planning the air circulation and exhaust system. Make your dream marijuana grow room come true by investing your time and money wisely by planning.

Beginner’s Guide to Grow Tent Setup for Cannabis

Grow tents are always essential when cultivating cannabis indoors. The market is now full of almost unlimited options to choose from. Such options can easily lead you to confusion. This guide will help you on how to use grow tents.

Why Should You Use Grow Tents?

Grow tents let the home cannabis growers have a confined space that will protect the growing plants. Also, you do not need to remodel your property or construct anything to accommodate your grow.

Likewise, tents streamline the whole growing process. That’s because they are easy to set up. They also give support to hang fans, lights, and any other equipment. They promote ventilation, too.

Aside from buying grow tents, you should also think about the requisites. Prepare the needed materials first for hassle-free setup.

What are the Basic Requirements in Setting up Grow Tents?

Though some grow tents have extra features that are making them stand out, all models work in the same manner. Grow tents are transportable frames that have a sturdy reflective fabric. It works as a cover.

Basically, that is what you should expect from grow tents. However, manufacturers aim to give extra features designed to help growers in cultivating weed indoors.

For a good setup, you should consider these things:

Energy Efficiency

Grow tents need LED grow lights. The lights will stimulate the warmth to accumulate inside. Thus, you must also install some ventilation fans that can help regulate the temperature.

These two energy-consuming features are commonly available in different grow tents. When you buy them, make sure you consider the price of energy needed for your proposed setup. That’s how you can plan things accordingly.

Pest Control

Unfortunately, there are pests that can breed even inside the grow tents. When you want to cultivate veggies and fruits which are more susceptible to pests, think about intercropping. It is an organic pest control technique that can help you keep your crops safe from pests. You can also try any other safe and eco-friendly pest control techniques.

Essential Lighting

Grow tents often allow growers to customize the volume of light that you can put in them. You should do some research and find out more regarding the best light conditions for your plants. From there, you can start doing some experiments to find the exact amount of light which will ensure the ideal conditions in your grow tents.

Temperature

Aside from lighting, the temperature is also a crucial condition in grow tents. It needs ventilation and continuous monitoring. Most plants need the temperature between 70 and 80 degrees Fahrenheit. It can be up to 85 degrees Fahrenheit but more than that is dangerous.

Most plants like a higher temperature and will thrive well under a slightly warmer condition. The temperature should be consistent. Be sure the daytime temperature is always in the consistent range. Also, the off-lighting temperature should stay between 10 to 15 degrees Fahrenheit. Consistency is the main key here.

Carbon Dioxide

The carbon dioxide level has a direct connection with the plants’ growth rate. By getting the right amount of carbon dioxide needed, plants will grow faster. However, increased carbon dioxide can cause the temperature to escalate. It is a critical issue that you should address as soon as possible.

Choosing the Best Grow Tents

The main key when choosing the right grow tents for your needs will depend on what type of plant you want to grow. Your tents’ size is among the most important things to consider.

If they are too big, you will be wasting your money on most things, such as electricity for fans, lights, pumps, and so on. If the tents are too small, space will be overcrowded that causes the plants to compete for water and nutrients. It may affect a lot their potential to grow.

Remember, the form will always follow function when choosing grow tents for cannabis. You don’t need to buy grow tents with too many ventilation holes or the ones that are bigger than your needs.

Steps to Follow in Setting up Grow Tents

Once everything is ready, you can start setting up your grow tents by following these steps:

Step #1. Assemble Your Tools.

Here, you will need the following:

  • Wire cutters (you can also use pliers that can cut cables.)
  • Flathead screwdriver
  • Scissors or a box cutter
  • Tape quantifier

Also, don’t forget your personal needs. You may bring a fan or your favorite thirst quencher.

Step #2. Building Your Grow Tents

Your first job is to construct your grow tents. You may ask for help from someone if you can’t do it alone. You should get your stands up in 30 minutes. Grow tents may have two or three length sticks. Split your vertical rods into two bits.

Look for the provided instructions in the package or on the web. That will include building the base and forming one wall at a time. You must put up your grow tents in the open space in the meantime using grow-mates.

Also, make sure you have:

  • A lighting program and a cord
  • Carbon filter with a pre-filter
  • Inline fan
  • Notch light hangers (two for each machine)
  • Two duct clamps
  • Timer
  • Ducting

Step #4. Set up the Ventilation System.

Setting up the ventilation system is a straightforward process. There are several standard settings. However, you should hang the filter and fan out of the grow tents. It can be the ideal solution for small to midsized carbon filters.

This will increase the growing footprint. Also, it will bring the air inside the tents through the filter, letting the air move faster. It will help in eliminating unpleasant odors while allowing fresh and clean air to penetrate the tents.

When carbon filters are too huge, and you can’t hang them in the tents’ ceiling, you should set them on the floor within your tents. The only potential problem here will be their ability to draw more warmth to your crops when they are busy. In fact, they occupy much space.

Putting the strainer and buff outside the tent is the least ideal solution. It can conserve space, but it can cause some drawbacks. One of these is the fan can cause more noise due to its position.

To set up the ventilation system, get the pre-filter and slip it on your carbon filter. Fasten it by using the extra elastic rings. Perform it based on your preferred installation technique from the 4th step. Follow the succeeding steps provided for installation A, B, and C.

Measure 5A (Hanging Inside the Tents)

With the elastic nylon straps in the kit, hang the inline lover by using the elongated end. Point it to where the kayak exhaust hole is. Make sure the lover is in the center to keep it balanced.

Use the extra nylon straps in your grow kayak set. Hang on your carbon filter by using the flange pointing to where the inline enthusiast is. Make sure as well that the enthusiast is in the center to keep it balanced.

Gauge the distance from the head of your filter lip to the head of your inline enthusiast lip. Cut this ducting period using the cable and box cutters.

Fasten one end of the ducting you cut to the enthusiast’s lip with a clamp. Secure the other tip of the ducting in the carbon filter lip. No more bolt needed.

Run the remaining part of the ducting from your preferred rotor hole. Attach the other tip at the end of your vertical enthusiast by using a strand. Run the fan’s electric wire from the nearest tent wire hole behind the crate.

Measure 5B (Placed Inside the Grow Tents)

Put the carbon filter on the ground at your preferred location. Next, put the inline fan aside from the filter. Use the tapered tip pointed outside in doing this.

Make sure the enthusiast’s lip is within the filter lip. Fasten it using one to two packs of transparent ducting tape. You need to buy it.

Twist the ducting to the enthusiast’s lip and fasten it using the ducting clap. Let the ducting run from your preferred expansion tent emitting opening. Also, allow the lover cable to run from the nearest wire hole behind the crate.

Measure 5C (Putting It Apart from the Grow Tents)

Put the gathered carbon filter on the floor in your preferred location out of the grow tents. Place the inline fan and filter by using the tapered tip pointed down.

Secure the enthusiast using one to two transparent tape packs. The kit doesn’t include it.

Change the ducting in the enthusiast by using the casing clamp. Let the ducting run to the grow tents venting hole.

Step #6. Hang Your Lighting System

Hanging up the lights in the grow tents is easy. The only problem is how to keep the cords out of the way off the floor.

By having 2 ratchet hangers, hook a crossbar close to the top of the cage along with the pins connected to the ratchet connectors in those hangers.

Put the pins attached to the string ends of these ratchets to equal lengths. Place the hook in one of the hanger mounts of the light system.

Run the mild system power wire from the nearest tent wire hole behind your grow tents. You can also adjust the lighting’s elevation by tapping both the rachets and hangers.

Some Tips for Lighting Your Grow Tents

Change the way your light elevates is crucial while your plants grow. Make sure you check the given recommendations for your lights. Damages can occur when you are not careful. In case you are not sure of what you’re about to do, don’t hesitate to seek help. Don’t splash the water in the lighting gear like the ballasts.

You must conduct new HID bulbs for 12 hours or longer in their first start-up. This will boost the lifespan of the bulbs. When changing the bulbs in the HID lights, do not touch the glass with your bare hands. Also, don’t do it when your hands are oily as it may cause harm to the bulb. Wear some gloves to prevent it.

Step #7. Install a Fan or Light Timer

Change the mild system wire in one facade of the timer. If you want to install a timer for the enthusiast as well, plug it in a fan electric wire in the timer’s opposite side. Otherwise, just plug it to a power supply. Follow the instructions for using a timer in setting up occasions.

Assessing the Problems

Before you turn the lights and fan on, make sure you double check the electric connections and any dangling straps or hooks. Inspect everything in an hour to see how it changes the ecological things from your grow tents.

Make sure the airflow is enough. Likewise, ensure the lights are not outrageously sexy. It is a good idea to make sure there are no light leaks.

Feel free to ask for help from a friend or someone in your house. It’s normal to see some pinholes of light leaks out of the grow tents. After all those things, you can start planting your crops.

Maintaining Your Grow Tents

While you grow cannabis, you should also pay attention to your grow tents. Cleaning them regularly is a simple way to maintain them. Do this especially before you begin planting new plants. Wipe the surfaces using hydrogen peroxide or bleach. This will eliminate the lingering diseases or germs in the grow tents. Make sure you thoroughly scrub the pots and even the components that you plan to use in the next growing season.

Conclusion

Setting up grow tents for cultivating cannabis indoors is now more common. It is a brilliant option for growers who want more control over the environmental factors to ensure growth and increased yield.

Grow tents are invaluable assets. However, you must set them up correctly to make sure they run at their best. Follow the provided tips and steps above to ensure your success in growing cannabis indoors by using tents.

Build your Own Grow Cabinet for Cannabis – A Guide

Grow cabinets are miniature greenhouses for your cannabis plants. They can be as simple as a wooden cabinet with a light fixture. Others cabinets have a dedicated ventilation system and humidity control setting for optimum growth.

What can you get out of growing cabinets for cultivating your Cannabis Seeds indoors and is it worth building one? We will answer these questions as well as show you how you can make your own cannabis grow box.

Considerations before Building a Grow Box

Before building a grow box, you need to know what kind of cannabis plants you plan on cultivating. This includes the size of the strains you want to breed. Sativa plants tend to grow taller than indica or even autoflowering plants, which means that your grow box will need plenty of space to accommodate sativa strains.

Lighting is the second important criteria to plan for the grow box. Plants require light to produce energy. Non-autoflowering cannabis plants also rely on the lighting schedule to determine when to enter the next phase of its growth cycle.

The fixtures will depend on how much you plan on investing for your grow box. Fluorescent lamps do the job in lighting your plants without producing too much heat. LED lamps are the best type of fixtures that give off a wide range of spectrum that is beneficial to your cannabis plants. However, LED lamps are significantly more expensive than fluorescent ones.

Another factor to consider is the dankness or odor of a specific cannabis plant you plan on growing. This is an important factor if you do not want to alarm anyone outside of your house that you are growing marijuana indoors. To conceal the smell, the grow box will need a ventilation system with a filter.

On the topic of ventilation, your cannabis plants can benefit from a good amount of air circulation within the grow box. Plants need a steady supply of carbon dioxide and oxygen to perform its biological functions such as turning sugar into energy.

Humidity levels will also be an important criterion to consider when building your grow box. Too much water vapor within the box can create a perfect environment for mold and funguses to thrive. On the other hand, low humidity levels will make the plant conserve water by closing its stomata, which can negatively affect its growth.

You can control the humidity level of the grow cabinet with an efficient duct system. The increased airflow within the cabinet can lower the humidity level.

Building a grow cabinet

If you have the size of the cannabis plant you want to cultivate, you can start making your own grow cabinet. Here are the steps to take in making one.

  1. Form the base cabinet frame

Make sure to pick a sturdy material when making the cabinet frame. The most common of which are wood, which is easy to form together. You can save time and money by recycling old wooden cabinets in your own home or in yard sales. Even dressers can be deconstructed and reformed into a grow cabinet.

The space within the cabinet frame should be large enough to accommodate the plant you want to cultivate and other equipment. When breeding sativa plants that can grow up to 12 feet, for example, the inside of your grow cabinet should 16 to 18 feet high. This should be enough space to fit the plant, light fixture, and fan.

  1. Cover the interior with reflective sheets

Line the inside of your grows cabinet with reflective sheets. These sheets will bounce the light from the fixture to allow for even exposure to nearly all of the parts of your plant. Reflective sheets are very common in most department stores. Reflective sheets are also available as emergency sleeping blankets.

Another alternative is to paint the inner walls of your cabinet with white paint. The paint can also reflect the light around the interior space and is economical than reflective sheets. On the other hand, you need to make sure that every inch of the wall has a good amount of paint coat to reflect the light.

  1. Cut openings for the air vents.

For an efficient ventilation system, create an intake opening at the bottom part of the cabinet while the exhaust port is at the top. This creates an updraft movement that makes it easier for the air to move in and out of the cabinet.

For better air circulation within your grow cabinet, the intake hole at the bottom of your cabinet should be twice as large as the exhaust hole. For example, the exhaust hole should have a 25 square inch wide while the intake port is 50 square inches wide. The large intake hole can optimize the air circulation within the cabinet.

Attach a screen filter on the intake hole. This will keep pests and pollens from entering the cabinet. Both of which can ruin your yields if any are within reach of your plants.

  1. Attach a duct system with a carbon filter

This step will be essential if you are going to cultivate cannabis plants with strong odors and do not want to rouse suspicious within your living space. Install a ducting system that comes with a carbon filter and exhaust fan. If there is still space within your cabinet, you can attach the carbon filter. Air will go through the filter and move outside through the duct system.

An alternative setup is to place the carbon filter at the other end of the duct system or outside of your grow cabinet. The fan will take in the air within the cabinet and force it out of the carbon filter to clean it off nearly any odor. Make sure to secure exhaust opening with the other end of the duct system to prevent odor leaks.

Apart from odor control, the duct system can also help regulate the temperature within the cabinet. This will help keep your plants from overheating when it gets too hot during the day. The duct system will also be essential if you are planning to use light fixtures that produce plenty of heat.

  1. Install your grow lights

As mentioned above, lighting will be an important factor for your cannabis plants. If you decide on using fluorescent or LED bulbs, you do not have to worry about the heat coming from the fixtures. Connect the light fixtures at the top of the cabinet’s interior space to have the light shine down on the plant.

If you decide on using high-pressure sodium (HPS) or metal halide (MH) grow lights, you will need to consider the amount of heat they produce. You will need to install additional fans to keep down the temperature to a safe range for your plants. These fans can be a simple as the ones used for computers. The duct system with air duct system can efficiently transport hot air out of the cabinet and draw in cool air.

The reason why breeders utilize HID lamp is its red to orange light hue, which is useful for plants that are in the flowering stage. On the other hand, MH lamps emit a blue hue that can help in the development of the plant’s growth during the vegetative phase.  Unfortunately, each of the lamps requires its fixture since both are not compatible with one another.

If you are growing regular seeds that rely on the photoperiod schedule require, It is a good idea to connect your lamps to a timer. Photoperiod plants require a light schedule of 18 hours daytime and 6 hours night time throughout its vegetative phase. When it is ready to enter the flowering phase, you will need to switch the light schedule to 12 hours of day and night. With a timer, you can accurately set the right amount of daylight to your plants and avoid premature flowering due to the lack of daylight hours.

  1. Make a potholder floor

As the name suggests, the potholder floor will secure your cannabis container in place while cultivating it within the cabinet. Use a wooden panel for the floor and cut it to fit the inner space of the cabinet. Cut out several series of holes where you will fit the planters to the floor. Attach two wooden slots near the edges of the floor. These will provide space for the bottom of the pots.

  1. Attach a thermometer and hygrometer

It is important to know the temperature and humidity of your grow cabinet at all times. You can achieve this by attaching a decent thermometer and hygrometer to the inner space of the cabinet. A good type of measuring device will give you the reading through an LCD or digital screen, which are easier to read.

The readings from the measuring device will tell you if you need to increase the airflow to bring down the humidity level or if you need to use a humidifier if the level is too low. Fortunately, there are many compact humidifiers that can bring up the humidity within your cabinet when needed.

Reasons for Building your Own Grow Cabinet

The main reason for making your own grow cabinet is control over what goes into it. You can customize the size of the growing space within the cabinet to accommodate most type of cannabis strains. You also have full control of the intake and exhaust ports that can fit with the surrounding space within your own.

Another reason for building a grow cabinet is to have full control over the budget. You can source your materials from various sources such as used cabinets or reclaimed wood, which are inexpensive than fresh lumber from hardware stores. Even the component of your grow cabinet can be made of repurposed ones such as computer fans and light fixtures.

On the other hand, you have the freedom to use the best component to create an efficiently grow cabinet. This includes the use of LED light fixtures, high-end ventilation systems with odor filters, and AC equipment for temperature control. You can also experiment with different configurations to make a unique grow cabinet for specific cannabis strains or with the use of various grow lights.

Reasons for Buying a Grow Cabinet

While we have made a case as to why it is better to make your own cabinet instead of buying a pre-made one, it is still important to look at the reasons to buy a grow cabinet. The most important of which is saving time and effort. Buying a grow cabinet lets you skip several days of working on a miniature garden to cultivate your cannabis plants. This is a major factor for you if you have a limited amount of free time for DIY projects and would rather invest it in producing marijuana buds. Building a grow cabinets requires plenty of time to plan its construction and researching the different components you want to add.

DIY cabinets need to go through various trial and error to determine if there are any hitches during its construction. This includes testing the efficiency of the air current within the cabinet and close any leaks. If you do not feel confident with the build of your cabinet, you may end up giving your plants a subpar environment to grow.

On the other hand, pre-built grow cabinets have a near guarantee of working when it arrives at your front porch. These take out the guesswork in creating an optimum enclosed environment for cannabis plants. High-end grow boxes utilizes built-in fans to create a steady air circulation within the grow space and give you control on the surrounding temperature. Others have a separate compartment for germinating your seeds that share the same air circulation as the main compartment where your cannabis plants can grow. You can even find grow cabinets for hydroponic cultivation.

You now know the basics on how you can create your own grow cabinet at home to cultivate cannabis plants in any space within your house. The decision in building or buying your own cabinet comes down to your preference in what you want out of your mini grow space. If you aim for full control of the budget and component of your cabinet, building one is the best option for you. On the other hand, the pre-made cabinet will let you skip the time and effort to constructing one so you can cultivate your Cannabis Seeds immediately.

Cannabis Defoliation Guide: How to Increase Yields by Removing Leaves

If you want to prune a marijuana plant or trim it as you discovered that defoliation can increase yields, this is the defoliation guide to use. You do need to know the right way to do it as there is a possibility of having a cannabis plant that will experience lower yields because defoliation was done the wrong way.

When you study instructionals on how to grow a marijuana plant, you will often get advice about defoliating it, and there might be that veil of mystery on how to do this gardening technique. It isn’t a mystery and you can get to harvest the maximum amount possible from your cultivated cannabis plant when you defoliate the right way.

Leaves Won’t Get You High

Removing leaves even if these don’t contain THC might cause you hesitation, especially if you are not an experienced gardener. It is the buds that will be loaded with resin that must remain untouched. Aside from the buds, all the other marijuana plant parts including the leaves, cannot get you high. Yet, if you notice that the weed strain that you are cultivating has a profusion of leaves, it is time to give it a good prune.

What is Defoliation?

This is the premature removal of a grass part like leaves by cutting. Marijuana is grass but it is not defoliated to be mown like the lawn grass at a golf course. Marijuana is grass but it is not the kind to be defoliated by animals like goats kut to chew. Any kind of grass can be defoliated yet when it comes to cannabis, it means that the leaves are to be removed, pruned, or trimmed.

Is Pruning the Same as Defoliating?

It can be said that pruning a cannabis plant is the same as defoliating it but technically speaking, it is not the same. Pruning plants included cutting branches and you do not cut marijuana plant branches. It is only the sub-shots and some leaves that are “pruned”. But, let us not get too technical as it is highly acceptable to use the words prune and trim when one is defoliating a cannabis plant.

Is Defoliating a Marijuana Plant a Good Idea?

The impact of doing this technique can be either positive or negative. Properly done, the results will aid in making the plant prosper and has many benefits. The factors that affect the proper management of this technique include how many leaves are removed, how often defoliation is done, and the time intervals.

The cannabis defoliation is a gardening technique that is just like fertilizing and watering a plant – it can be done right or wrong way. There is overwatering and those that make the plant struggle to survive because of drought-like conditions. Defoliation takes a bit of skill and it is not to be done to make the plant lose more leaves that it should.

Can Defoliation Bring About Increased Yields?

The marijuana plant when defoliated should retain its ability to continue to grow. The plant material to be removed, which are some of the leaves, should be just the right about for the plant to continue to function. If there is a massive amount of leaves removed, the photosynthesis function of the plant and other related functions goes on a decline. Keep in mind that leaves are needed for photosynthesis.  

Defoliating Isn’t for All Cannabis Plants

To remove leaves from some marijuana plants isn’t necessary. There are autoflowering cannabis plants that do not need light for the buds to flower. There are marijuana plants that do not have a lot of leaves. There are the ones that like sativa types that grow in the great outdoors that get the full benefit of the sun as it is exposed to it from sunrise to sunset.

Defoliating Marijuana Plants

Any marijuana plant in any kind of growing medium – be it soil or hydroponically grown – can be defoliated. You will need a pair of gardening scissors. You can also use ordinary scissors, just make sure that it is is the right size as small scissors might make the leaf removal more tasking. Also, make sure that the scissors are sharp enough to make a clean and precise cut.

If there is a yellow leaf or those that do not look healthy, such as broken ones, it is time to remove it. This will not just reduce the leaf density but will get rid of a leaf that will take in nutrients and energy, making the plant spend its energy on an unnecessary leaf. There are people who pull the leaves off with their hands. This can be done to sickly yellow leaves and dried ones easily but for healthy leaves, it is better to cut so that branch won’t be moved when a leaf is pulled.

Control your Cutting

There are some who do massive defoliation leaving the marijuana plant nearly bare. There are those who remove a few fan leaves. Take note that once a leaf is removed, it will not grow back. Removal of 20 to 90 percent of the total leaves can be done yet take it easy and choose to get rid of less instead of more. You can start defoliating by trimming off those big fan leaves.

Defoliating ideally should be done only 3 times, max during the different stages. You can’t go snipping away when you feel like it. It is a plant that needs nurturing care – at the right time. Yet, there are some marijuana growers who are experts at defoliating and do so on a continuous basis by removing leaves every seven to ten days and when they regrow.

Vegetative Stage

When the marijuana plant is about 25 centimeters in height, the biggest leaves can be removed. By doing this the plant has enough leaves to continue with the necessary photosynthesis and nutrient processing for growth. There are some who prefer to defoliate when the plant is at the blooming stage as young plants can suffer from the stress of leaf removal but since defoliating is a training technique, the plant will be trained for future defoliation. Getting rid of the bigger leaves during the vegetative stage also greatly aids in pest-control and preventing mildew.

Defoliation may slow down the growth of the roots so the plant requires to have the correct nutrient intake. It is not risky if only a few big leaves are removed yet if the nutrient available from the growing medium is low, the plant will experience some difficulty in recovering. Yet, have no fear as many weed strains are vigorous growers and it will recover fast and regain its dense foliage.

Flowering Stage

The marijuana plant will be defoliated twice during the flowering stage. During the first week, when a lot of the pistils have appeared, it is time to get those scissors ready. All the big leaves should be removed, leaving only the smaller ones. You will be amazed to see how the leaves will regrow after three days and how dense the foliage will be after a week or so.

During the third week of flowering, as the plants have recovered from the last leaf removal technique, repeat the process of removing the larger leaves. The results that you wish to obtain by removing the larger leaves it to ensure the light reaches the lower part of the plant. Ideally. When you defoliate, there will be no shadows cast by the higher leaves on the lower plant parts. Make sure not to cut leaves that are very near those precious buds unless leaf density is very high.

Watch those Buds Grow

During the flowering stage, you will notice how those wonderful, resin loaded buds swell and grow. Especially after the last defoliation, these buds will become much bigger, fast. As the buds grow bigger, the yield increases.

Imagine your chosen marijuana plant getting bigger buds. If the weed strain has big buds already, it will become bigger. If the plant is low-yielding, this will have a better harvest. Remember the computation? If you gain a few grams per bud, then you will have an overall better harvest without having to cultivate another marijuana plant. This is especially needed when there is a limit to the number of marijuana plants that can be grown. And, even if you just have one plant or a whole marijuana farm, defoliating is the technique to use to have a better crop.

Advantages of Defoliating Cannabis Plants

There are benefits from doing this technique to cannabis plants aside from increasing the harvest amount. The yields would be better yet there are other plus factors that make this gardening technique something that you should do. The advantages include:

Increasing Yield Without Having to Add More Plants

If the buds harvest increases by 25 percent, that means a lot. A typical harvest might be an ounce per indica plant so that would bring it up to 1.25 ounces. If you have 4 cultivars, then instead of harvesting four ounces, you will get 5 ounces. It’s like having one additional marijuana plant.

Cannabis Buds Harvest Uniformity

Nowadays, having good marijuana crop production includes the appearance, shape, and size of the buds. Buds can look similar in appearance. There are times that the harvest would have different sized buds due to the fact that the smaller ones lacked light exposure as the leaves covered the light source.

Management of the Plant Structure

Though plants have their natural height and shape, by applying the defoliation technique, you can make the changes required to get the desired height and shape. Typically, an even canopy is sought for when doing this technique and that can be achieved when one has this gardening skill.

Preventing Pests and Other Plant Problems

Hidden among the leaves might be insects that can be harmful to the marijuana plant. Getting rid of some of the leaves aids in having less hiding spaces for insects such as mites. It would also make it easier to get rid of those insects with the use of your hands or other organic methods. It also reduces the ill effects of humidity and enhances air circulation.

Ensuring Proper Light Exposure

The top leaves will prevent the light from reaching the buds located at the lower branches. When a cannabis plant is grown outdoors, the light exposure can also be limited by the leaves, even if the light source which is the sun, moves. When cannabis is grown indoors, the light source doesn’t move, so this technique is vital, especially if the weed strain requires the changing of light cycles to flower.

Reducing Lighting Equipment

Changing of lights is required for photoperiod weed stains. Even if the cannabis plant is autoflowering, it still needs light. If the plant is defoliated, it can reduce the number of bulbs required to light up a growing area.

Ensuring a Healthier Plant

When the plant does not have to nourish more leaves, it will harness their energy to bringing the nutrients to the other plant parts, such as the buds. And, since the light source is better for the lower part of the plant, plus the other benefits such as having fewer problems with air circulation, the defoliation technique will result in a stronger and healthier marijuana plant.

Not for all Grow Rooms and Weed Strains

Defoliation isn’t for all grow rooms and weed strains. Doing this gardening technique the wrong way will endanger the marijuana plant, might make it die, or decrease the yield. A plant has to thrive, not just survive, for a great harvest to be obtained. A sickly plant will not benefit from being defoliated because it will only cause it stress when the leaves are removed. It will not aid in making a plant feel cooler when the weather conditions are too hot or because it has a nutrient deficiency. Defoliate plants that are in good condition to make these be in top condition.

Indoors and Outdoor Marijuana Plants

Defoliation can be done to both indoors and outdoor cannabis plants. There are times that defoliation will not show a significant increase in the yield of outdoor plants. Defoliation is proven to work to generously increase the yield of weed that is grown indoors. For cannabis growers who want to maximize indoor crop production, defoliating is essential.

A Growth Technique

This is a growth technique that is done by removing leaves from a plant to vary the vegetative process. It is an old farming technique does to crop plants such as tomatoes and cotton. It is also done for specialty plant growing such bonsai plants. For weed, defoliation has to be done during certain growth stages to get a crop that has is of better quality and quantity. Take note that this is an aggressive technique.

Make the most of out this gardening technique of how to increase yields by removing leaves for your marijuana plants to be healthier, stronger, and to have a more bountiful and beautiful harvest.

Cannabis Flowering Stage Timeline – 12/12 to Harvest

Cannabis farmers are looking forward to the final process of growing their plants – the flowering stage. If you are still discovering how to produce the best qualities of marijuana, this guide is what you are looking for. In this page, you will learn how to take good care of your plants and obtain an abundant yield in each plant.

Flowering stage is quite different from the vegging phase in terms of growing period, care, and nutrition. Once the plant switches from vegetation period to the flowering phase, expect a slow growth among the plants. This is where you see the development of buds in preparation for producing flowers. It is a sign that you should start treating them differently. It is all about being more oriented in proper nutrition and light schedule changes.

Best Time To Harvest Your Cannabis Plants

As the third week of September approaches, cannabis growers are closely inspecting the crops for harvest. As a marijuana farmer, you cannot harvest the plants too late or too early. Doing so can affect the smell and taste of the finished product. Moreover, you must also consider the psychoactive effects and THC levels of the plants before the harvest time.

For your guidance, you can refer to the details provided below. These are considered as the tools used in distinguishing the perfect time to reap the fruit of your labor.

  1. Flowering Time – Take note that the guidelines for flowering time serve as harvesting guidelines as well. However, you should also know that these are not accurate all the time. You usually obtain guidelines for Sativa, Indica and even hybrid strains. Those guidelines for individual guidelines are more accurate.

Indica dominant strains usually take 7 to 9 weeks. Sativa-dominant marijuana strains may require 10 to 12 weeks of waiting before harvesting. Lastly, hybrid-dominant strains take between 7 and 10 weeks before it becomes fully grown.

Furthermore, those timelines that come in weeks are often regarded as an ideal match for light-dep and indoor growing conditions. On the other hand, time-of-year estimates become more accurate when it comes to full-sun cannabis growers.

  1. Hairs/Pistils – The hairs or pistils can be found among female marijuana plants. These are a location on the plant sex organs. Pistils come in white colors which appear during the flowering cycle. As the female cannabis nearly ends its cycle, it gradually turns red or brown.

For most strains, you can determine that the plants are in their highest THC levels when their pistils turn 60 to 70 percent red or brown. Checking the pistil condition can help you estimate when to harvest the crop. Here’s a quick guide to check on the pistils of the plants:

  • Mostly white pistils: too early for harvest;
  • Less than 50% red or brown; early and not yet ripe;
  • More than 60% red or brown: an ideal time to harvest and has a very high THC level; and
  • 90% red or brown: over ripe, completely ready for harvest yet loses flavor or potency.
  1. Trichomes – The life cycle of the trichomes resembles the type of marijuana plant where it exists. As the cannabis ripens and matures, you will notice a change of color in the trichome’s head from clear or transparent to fully amber. Once your plant approached the harvest date, the pistils turn mostly brown.

Checking the trichomes of your plants using a handheld microscope can give you a rough estimate of when they are at the optimum ripeness. You will also see that the trichome head develops clear liquid in it. Over time, this liquid changes into amber and become milky white.

  • Clear Trichomes: The plant is not yet ripe.
  • Most parts are white trichomes: Perfect time for harvest.
  • Amber Trichomes: Overripe and THC content reduces.

Marijuana Plants Flowering Stages

After the vegetative stage, here comes the cannabis flowering stage. This is the last stage in the growing cycle of your crops. For the marijuana growers, this is the most exciting part. It takes only patience of growing and a few months of waiting to get the best results.

Unfortunately, the flowering stage is less forgiving, unlike the vegetative stage. If you want to obtain maximum yield and outstanding quality of the plants, there is no room for mistakes. At this point, you should realize the significance of your personal knowledge. This way, you can save time and energy by doing the right things.

  1. Entering the Flowering Stage

In some cases, your plants may not encounter entering a flowering period unless you grow autoflowering varieties of strains. However, you can also switch the light cycle into equal darkness and light cycle (or 12/12).

For some growers, they even go beyond keeping the plants in darkness. As soon as the plants realize that it is already winter seasons, they enter the flowering period.

On the other hand, outdoor growing means that this process starts automatically. However, the plants should not be exposed to an extreme environment. For instance, if you start planting the cannabis seed in early weeks of spring, it will continue through summer. Hence, you can expect its flowering stage in the fall. But again, it always depends on the variety of strain.

Take note that the flowering stage of outdoor and indoor cannabis plants is triggered once they are deprived of light.

  1. Knowing the Sex of the Plant Organs

In changing your plant’s light schedule, it is crucial to assure that there is no light entering the tent or room if you intend to grow indoors. A slight disruption leads to messing up the plant development. Thus, it can cause hermaphroditism or worse, no buds at all!

In the first weeks of cannabis flowering period, the plants usually grow vigorously and double in size quickly. If you did not train your plants, see to it that you get overhead to prevent the canopy from touching your grow lights. In addition, this is the best time to identify the sex of the marijuana plants.

In fact, it is so easy to know the difference between a female and a male organ among plants. Male cannabis plants do not grow bud. In fact, their pollen sacks will make the whole crop burst to pollinate female plants.

For female cannabis, you will notice the growth of pistils. The male counterparts grow some pollen sacks. So, you need to get rid of these plants as soon as possible. Pistils can be described as the elongated hair-like and tiny leaves. Pollen sacks are like balls. Your plants can grow both, a condition which is called hermaphroditism. If this happens, remove such plant immediately.

Check out the additional information provided below for more details on the flowering phase timeline of your cannabis plants.

  • Weeks 1 to 3 (The Stretch Phase)

As mentioned earlier, the first stage is the early flowering or “stretch phase” of a plant. It is the time you should be read since other plants have a tendency to grow extremely tall. Otherwise, you need to begin with training your cannabis plants. You can count on LST methods to prevent hurting the plants in this delicate phase.

  • Weeks 4 to 8

The week three of marijuana flowering stage gives you some signs like slow growth and production of small buds. In this process, the main focus of the plant is to gain energy to develop buds. Thus, do not worry if you notice discoloration and loss of leaves rapidly. You should be able to diagnose deficiencies and find the best remedy for it.

As a cannabis grower, you should know that too many nutrients burn your cannabis plants. It characterizes the production of yellowish, wilting and falling leaves. You can opt for organic solutions if possible.

As the stage approaches weeks 7 to 8, the buds turn ripe and fat. This is also the part where you measure the temperature of the grow room and pH level to prevent bud problems like foxtailing. Foxtailing refers to the condition when the buds grow out on the other side of an older bud. Avoid touching or training your plant in this case unless it is close enough to grow lights. All you need to do is to tie it down gently.

  • Late Flowering Stage

In this stage, your plants are beyond eight weeks and you are certainly one step away from harvest period. You will begin seeing the buds overpowering the cannabis stench and covering the kolas. Now, it is your responsibility to make sure that everything comes according to plan until the harvest season. Be very cautious of major discoloration or any deficiencies.

Some Tips To Ponder on Flowering Stage for Cannabis

After acquiring basic to advanced information on cannabis flowering stage, it is time to learn about some tips from professional growers.

  • Cut dead branches and leaves only. In the first place, you might be tempted to cut out bigger branches and leaves. However, you should not forget that your cannabis plants need much health and power at the moment. You can bend your plants. Then, tie each of them down to develop a horizontal shape.
  • Leave the newly developed flowers. Do not taste them.
  • Maintain humidity at 70 percent. If you switch to a flowering light cycle, make sure you will not go back. Avoid exposing your cannabis plants to light particularly during the dark phase. This common error in flowering stage of marijuana growing has a great impact on the yield. If possible, grab a timer. This way, you will not forget when to turn the lights off or on.
  • Uninterrupted darkness is a secret to a successful flowering stage of plants. The darkness should be definite and not even a minute of light touching your plants at night.
  • Utilize a carbon-filtered air ventilation system. In some circumstances, plants develop a marijuana scent immediately. This implies that you need to provide the plant with an airflow system (carbon-filtered). This system is highly essential in maintaining and generating fresh air inside the grow room. This is the phase when Carbon Dioxide becomes a crucial element for the overall health and growth of the marijuana plants.
  • During the weeks four to six, the flowers seek more supplies of potassium and phosphorus. These are both vital for perfect bud development. They support the fruiting and flowering phases of the plants.
  • Do not overfeed the plants with nutrients. If so, the tip of your plant leaves will look like burned and dried.
  • Manage and support heavy buds for consistent light exposure. Consider holding the buds up close to the light if these are very heavy for the plant.
  • Some expert growers usually trim the leaves (defoliation). They do this to help their plants stay focused on producing buds. Make sure there is a sufficient amount of healthy leaves in the plants. Leaves serve as fuel to the plant system and bud development.
  • Your plants may love strong grow lights. However, you cannot get them spoiled by exposing them to high heat and light. If you are growing in a tent, the lights should be high enough (12 to 36 inches above the plant canopy). If you are using a higher wattage lamp such as 1000 Watts, you should place it at the top end portion. Meanwhile, a lower wattage lamp (around 250 Watts) must be at the lower end portion.
  • Watch your plants closely. As other pros say, “treat your plants like a lady”. Provide everything they need in order to bloom flowers abundantly. In some instances, your cannabis plants might turn yellowish. Do not get bothered if it happens as it is sometimes a part of the process. At week 8 to 10, your cannabis should be ready to harvest.

Perhaps, you have a lot of questions in mind about this cannabis flowering stage guideline. You must read and understand all the details provided in this article first. Then, you can ask some questions to experienced growers regarding more specific topics. Always research first before trying to grow strains with different varieties.

Cannabutter Brownies Recipe – Easy and Potent

What do you do with extra cannabis-infused butter? Aside from using this tasty and potent butter on dishes, you can actually use cannabutter to bake all kinds of bread and pastries including special pot brownies.

This is a weed brownie recipe that will make tasty and strong cannabutter brownies. Cannabutter has been around to spice up edibles but it is more commonly used to bake brownies with a zing.  Do you want your brownies to have a smooth yet potent high or do you like being taken to the moon and back? The key to making very strong weed brownies is to add as much cannabutter as you can.

Not only will you be able to get the most potent brownies but also the most delicious. Cannabutter is naturally a bit bitter but it can be enhanced with the type of chocolate recipe for brownies you will use. Chocolate will hide the bitterness in weed butter but won’t affect the potency of the cannabutter.

Also, water is added to the mixture to also filter out any other bad-tasting ingredient. Those who have tried cannabutter in brownies swear that this is one of the best they have ever had. Cannabutter is also better tasting than regular butter too and has the recreational and therapeutic effects that you won’t get from your usual brand.

The Easiest Cannabis Brownie Recipe

Ready-to-bake brownies or even no-bake brownies are now available in most supermarkets making it easier even for a five-year-old to make brownies. This recipe uses a commercially prepared brownie mix so everything else is already taken care of. All you need to do is to find the most potent cannabis butter you can find and add this to this recipe. Here is a very short list of all the things you need:

  • Brownie mix (commercially-prepared)
  • 1 cup (8 oz., or 2 sticks) of  cannabutter

Instructions

1. Prepare Your Oven

Heat your oven up to 350 degrees Fahrenheit.

2. Prepare the Commercially-available Brownie Mix Batter

Read the instructions found at the back of your brownie mix and follow this well. The mix will be ready to use but usually, it will indicate that you need to use oil. You will substitute oil with cannabutter.

How much cannabutter you will need to substitute a few tablespoons of oil?  You substitute a tablespoon of cannabutter for a tablespoon of oil. Simply melt the cannabutter in a small pan and once the butter is ready, take only the amount you need.

But as what we explained here, you can use more cannabutter if you want a more potent brownie. In this case, add cannabutter only a small amount at a time so your recipe won’t end up too greasy or too runny.

3. Line the Baking Pan with Cannabutter

Take any remaining butter and use this to line the pan. This will make it easier for the cooked brownie to slide right out from the pan after you are done.

4. Pour the Brownie Mix in the Pan

After lining the pan with butter, pour the brownie mixture in. Tap the pan slightly with a spatula to let the mixture settle evenly at the bottom. Doing so will also help remove any air pockets that may have developed as you poured the mixture from the bowl to the pan.

5. Bake Your Cannabutter Brownies

Place the pan in the middle portion of the oven. Bake according to the directions on the brownie box. Test the brownie if it’s ready using a toothpick.

6. Cool the Newly-baked Brownies

When your brownies are ready, remove these from the oven and place it on the counter. Let it stand for at least 20 minutes.

7. Cut the Brownies into Smaller Pieces

With a sharp knife, cut the brownies accordingly. This way, you will be able to dose on cannabutter brownies better.

Another Cannabis Brownie Recipe

This time we will make a brownie mix from scratch. If you want to make your own brownie mix and use fresh ingredients then this is the recipe for you. Take note that you can enjoy your brownies as is or you can make it festive and add frosting. Brownies with frosting mean that you will get a more potent variety since you will also be using cannabutter to make the frosting.

What You Will Need

  • 1 cup of cannabutter
  • 1 cup white sugar
  • 2 medium-sized eggs 
  • 1 teaspoon vanilla extract 
  • 1/3 cup unsweetened cocoa powder 
  • ½  cup all-purpose flour
  • ¼ teaspoon baking powder 
  • ¼  teaspoon salt 

Optional Frosting

  • 3 tablespoons softened cannabutter or regular butter
  • 3 tablespoons unsweetened cocoa powder
  • 1 tablespoon of honey 
  • 1 teaspoon vanilla extract
  • 1 cup confectioners’ sugar

Instructions

1. Prepare your oven

Preheat your oven to 350 degrees Fahrenheit.

2. Soften Cannabutter in a Small Saucepan

Melted cannabutter will substitute for oil.

3. Combine Eggs, Vanilla, and Sugar in the Saucepan

Combine eggs, sugar, and vanilla in the saucepan where you melted the cannabutter. Use a spatula to blend everything while the saucepan is still over low heat. Remove from heat when the cannabutter has completely melted. Wait till the mixture has warmed a bit and stir in the sugar, eggs, and 1 teaspoon of vanilla.

4. Mix all Ingredients in a Large Bowl

Place all the ingredients in a large mixing bowl. Use a spatula to combine the ingredients completely.

5. Grease an 8-inch Square Pan

Use a small amount of cannabutter to line a square pan. Spread the butter carefully. This will prevent the brownies from sticking to the sides of the pan so you can just slide it out of the pan as well.

6. Bake the Brownies

Bake the brownies inside preheated oven for 25 to 30 minutes. Bake this until all the sides start to pull away from the edge of the pain. Check if the center of the brownies is ready using a toothpick. 

How to Make the Frosting

1. Mix all the ingredients to make the frosting

Mix 3 tablespoons of softened canna butter, a dash of honey, a teaspoon of vanilla and 1 cup of confectioners’ sugar.

A spatula or a hand mixer should be used to mix all the ingredients. You need to mix this thoroughly to create a smooth, icing-like consistency.

2. Apply the Frosting on the Brownies

Use a spatula or a knife to apply the frosting on top and on the sides of the brownies.

Lighter Cannabis Brownie Recipe

If you don’t want fudge-like brownies and you want your brownies to have a softer, cake-like consistency, then this recipe for a lighter brownie recipe is for you. And when it comes to a fluffy, light cake, only tempting Devil’s Food cake mix will do. This cake recipe is available from the local supermarket and stores so you won’t have to look far.

What You Will Need

  • 1 pack of Devil’s Food Cake
  • 1 cup of cannabutter
  • ¾ cup evaporated milk
  • ½ cup chopped nuts, marshmallows or chocolate chips

Instructions

1. Prepare Your Oven

Preheat your oven to 350 degrees Fahrenheit.

2. Soften the Cannabutter

You will use cannabutter instead of oil in this recipe. Melt the cannabutter in a small pan under low heat.

3. Mix all the Brownies Ingredients

Combine milk, cake mixture and nuts/chocolate in a mixing bowl and use a spatula to mix everything together until you achieve a smooth consistency.

4. Line Your Baking Pan with Cannabutter

Spread the cannabutter in an ungreased 13″ x 9″ baking pan. Cannabutter will prevent the cake batter from sticking on the side of the pan and will also allow the baked brownies to slide out when it’s done.

5. Bake the Brownies in the Oven

Bake the brownies for about 10-15 minutes, or until the edges of the brownies start to pull away from the sides. The center should be set; you can test this using a toothpick.

6. Cool the Brownies

Place the brownies on the counter and let it cook for 15 to 20 minutes.

7. Cut the Brownies Accordingly when these are Cool

When the brownies are cool cut these according to your desired shape using a sharp knife. Doing so makes it easy to dose on your cannabutter brownies.  

How to Dose on Cannabis Brownies and Other Edibles

Dosing is a part of making cannabis edibles like brownies. You want to make a brownie that has enough kick to use recreationally and medicinally. Dosing prevents dangerous side effects as well.  

This is also important to determine the amount of cannabis material for every serving especially if you want to market your product. To do this, you need to employ a more efficient way to dose your cannabis edible.

Usually, it starts with how potent your cannabutter is which depends on the type of material used to make the butter (whether sativa or indica, the amount of THC or CBD in the strain). Every small detail matters especially if you are making a batch of medicinal brownies.

Consider that you used cannabutter with 100 mg potency and you used an entire block of this butter on the brownie mix. A block of cannabutter will yield twice the yield of the brownie mix in the first recipe.  Therefore it would be safe to say that you will be making a pan of brownies with 100 mg THC. Once the brownies are down, cut these in 10 pieces. You will be able to approximate that each piece will be at least 10 mg each.

What is the ideal dose of cannabis brownie? To get the ideal dose for cannabutter brownies, you can use cannabutter dosing calculators which are available online. Wake + Bake offer a handy online calculator for cannabis dosing. With this online calculator, you can dose your brownies and all kinds of marijuana-infused edibles.

How Long Before Cannabis Edibles Take Effect

An edible like a brownie can take 2-3 hours to take effect. There are a number of factors that can help you make an estimate as to when to expect the edible’s effects. If you have eaten a meal before consuming brownies it could take time to take effect.

When to take your next dose? You can always eat more edibles after you have experienced the effects of the initial dose.

How do you make sure that you are making a potent edible? Make sure that your raw material has the best quality. Therefore, if you want to bake potent brownies, you must learn how to make good quality cannabutter first.

Remember the Following When Making Cannabutter Brownies

Alternative to Cannabutter

Cannabutter is a basic ingredient in baking the best brownies but what happens if you don’t have any butter handy? While cannabutter is the ideal ingredient for baking and other creamy recipes, you may also use canna-oil.

Canna oil is oil that is manufactured from fresh cannabis added to canola, olive, coconut or other types of oil. If a recipe requires vegetable oil and you have cannabutter then you can use this. Just take the amount and use the equivalent amount in softened butter.

Butter is interchangeable with oil even in regular baking and cooking recipes. You simply have to follow instructions well and be prepared for food that has a richer smell, aroma, and taste than regular butter or oil when use cannabutter or canna-oil.

In Making Cannabis Brownies, Can You Sprinkle Dried Herbs in the Mixture?

If you are wondering if you want to take a short cut and make cannabis brownies by sprinkling herbs in the mixture, the answer is a big no. You cannot just sprinkle dried cannabis herbs in the batter in hopes that your brownies will be potent.

This will only lead to a bitter tasting brownie and not the kind of creamy and sweet brownie that you expect to get. The only way to make potent brownies is to use cannabutter or canna oil when you make the batter. Dried herbs will change the texture of the brownies too.

What About the Effects?

If you are new to eating cannabis edibles then you must start with a low dose. This is also true if you are new to taking a strain or you are new to consuming cannabis altogether. When eating cannabis edibles, you must always remember to be patient.

Patient goes a long way considering that the effects of cannabis can take a long time to take effect. Cannabis edibles coming from states that have received legalization have mandated dosage limits. In Colorado, the mandated dosage for commercial edibles is 10 milligrams of THC per serving.

The effects will depend on the type of strain used to make the edible and how the edible was manufactured. If you are eating brownies made of indica-dominant flower then you should expect a relaxing effect.

If you are eating an edible made from sativa then you can expect an energizing effect. It pays to know the different effects so you won’t have to worry about any side effect.  

How to Make Cannabutter

Your cannabutter’s quality and potency will all depend on the type of strain you will use to make it. Use a fine quality, potent strain then you will get cannabutter worthy of being used for baking and creating amazing types of food. Use low quality cannabis then your butter will just be as good as regular butter used for spreads and salads.

Where can you find good quality cannabis to make cannabutter? Purchase dry marijuana from reputable dealers or suppliers. Ask help from your budtender to find out what strain will work best when making cannabutter.

It is possible that your final product won’t taste and smell the same as the regular taste and smell of cannabis. This is because there are a lot of factors that can affect the characteristic of the end product. First of all, the type of butter you used can totally alter the taste of cannabis. There are so many types of butter: buttermilk, salted, organic, etc. and each of these has their own taste and smell.

Another thing that can alter the final taste and aroma of weed used in cannabutter are the ingredients used in baking and cooking. Chocolate, for instance, is available in different types as well. There are sweet, bitter, milk chocolates and chocolates laced with wine. These again can affect the final taste and aroma of the cannabis as well as the batch of brownies you will make.  

About Decarboxylation

To make marijuana-infused butter you need to apply heat to your flowers. Heat will activate the THC. This is known as decarboxylation which simply means to decarb heat in 240 degrees or higher temperatures. The chopped cannabis buds and even plant matter will be exposed to high heat using a regular oven.

The material is scattered on a baking sheet and then baked for 40 minutes. You must turn the dried cannabis a couple of times to ensure that these are cooked evenly. The cannabis plant material will soon become dry and crumbly when held. Remove from the oven and leave it on the counter to cool before use.

Making the Butter

  1. Boil a quart of water in a saucepan. You can vary the amount of water if you wish. As mentioned, water improves the taste and dilutes the cannabutter. Just make sure that marijuana is floating 1 ½ to 2 inches from the bottom of the pot before you start boiling the water.
  2. While the water is boiling, add the butter and let this melt. Mostly, around 4 sticks of butter for every ounce of marijuana are used. This translates to a half ounce of weed for 2 sticks of butter. But of course, you may change this if you want a more potent cannabutter. If you are using a very light strain, you can enhance the effects, flavor, and aroma of the butter by adding more weed.
  3. After the butter has completely melted, add the dried marijuana. Reduce heat before adding the cannabis. This way you are preserving the potency of your cannabutter. The dried marijuana should be stirred well so that these may fold into the melted butter evenly.
  4. Place the mixture in a low simmer and leave this to cook for three hours. This is cooking in very low heat to still preserve the potency of cannabis.
  5. The butter is ready when the top of the mix becomes shiny and thick.

Straining Your Cannabutter

  1. As the butter cooks prepare the bowl which will be used to hold the finished cannabutter product. Use a heatproof bowl or a container with a cover made of plastic to protect the cannabutter,
  2. Place a double layer of cheesecloth on top of the bowl and use an elastic or rubber band to secure the cloth over the bowl.  
  3. Strain the marijuana butter by passing the mixture through the cheesecloth. This material will be able to hold any plant material and impurity that wants to pass through.  
  4. After passing all the mixture through the cheesecloth, remove the elastic and pick up the material. Hold it from all four sides so you can squeeze all the remaining cannabutter from the mixture. Repeat this process as many times as you wish to get purer cannabutter.  
  5. When you are satisfied with the result let it cool for about an hour.
  6. Place the finished product in the fridge until the butter has become solid. This only means that the THC and other cannabinoids have attached to the butter. Leave this in the fridge at least overnight.
  7. Use a knife to pass around the edge of the container to remove the butter from the bowl or container. Lift the butter out and place it upside down on a plate. Remove the underside which is usually made of the cooking water. After doing this, you now have pure cannabutter that you can use for cooking and baking and on bread and other buttery treats.

Common Marijuana Plant Problems that You Should Know

Like any other agricultural product, growing cannabis also involve common problems that every grower should be aware of. Yes, cannabis growers, most especially first-timers, face difficulties growing marijuana because of nutrient issues, overwatering or underwatering, pests, and other issues.

It’s a good thing that marijuana plants are resilient, with innate capability to withstand harsh environments or invaders. When you’re faced with common cannabis plant problems, don’t panic. Assess the signs and make an analysis of what’s happening to your marijuana plants so you can take the appropriate course of actions. Let’s learn the most common marijuana plant problems now!

1. Watering Issues

Overwatering and underwatering are commonly experienced by novice cannabis growers. Watering issues may cause multiple symptoms. They can even cause stunted growth. The contributing factors to successful cannabis grow include adequate lighting, airflow, nutrients, and humidity. However, water is one of the crucial aspects to keep your marijuana plants happy, healthy, and strong.

Let’s check the signs of overwatering and underwatering so you’ll know when to act accordingly.

Overwatering Marijuana Plants

You might be worrying that your marijuana plants need a constant supply of water. However, it’s a pitfall that most novice usually falls into. Marijuana plants use their roots to breath air aside from uptaking water. So if the root system of your cannabis plants is constantly getting swamped, they’ll likely drown.

Signs of Overwatering

  • Drooping leaves
  • Leaves tend to curl and become firm (because they’re full of water)
  • A slow rate of growth or completely stopped (because of lack of oxygen to the root system)

How to Fix Overwatering

  • Water less often.
  • Check soil moisture. Wait for the topmost layer of the soil to look dry. You can also feel the soil or do a chopstick method to ensure that the soil is dry before you water again. Another test to test soil moisture is to put your index finger deep into the soil up to your knuckle. If it’s dry, you need to water your plants. Investing in a reliable moisture meter is also a good idea for accurate reading.
  • Each cannabis plant should have adequate drainage. Make sure that the water doesn’t build up too much in the bottom section of the containers or pots. Excess water should drain out of the pots enough to leave the soil moist for the root system but not waterlogged.

Underwatering Marijuana Plants

As the opposite of overwatering, underwatering occurs when you simply are unable to meet your cannabis plant’s demands. If your plants don’t get adequate water, their root system will start to dry up, leading to stunted growth and reduced yield.

Signs of Underwatering

  • Cannabis plants look lifeless and weak
  • Leaves wilt and look fragile
  • Leaves feel papery and brittle
  • Crispy soil or dry growing medium

How to Fix Underwatering

  • When the soil’s top inch has dried out, water you cannabis plants. Don’t leave it any longer or delay watering because it can lead to major problems, like nutrient deficiencies, leading to death.
  • Make sure that you use the correct sizes of pots at different stages of your cannabis plants’ growth and development. For instance, gro small seedlings in small pots to make sure they uptake enough water.
  • Check soil moisture before watering your cannabis plants.
  • Check water quality by testing the pH. It should be 7, which is the neutral water pH. Too high or too low pH can cause problems because the pH dictates how well your plants can absorb nutrients.
  • Use reverse osmosis filters to remove 95 to 99% of dissolved salts present in the water

2. Nutrient Burn

Novice growers usually encounter nutrient burn in growing cannabis plants. It is often a result of overzealous feeding of marijuana plants. It usually occurs when there’s a too much hydroponic solution that is applied, wherein the roots take more nutrients than what the cannabis plant can use. Nutrient burn also happens when the plants are cultivated in fresh compost manure as well as other plant mediums with too high nutrient levels.  Remember that cannabis plants don’t really need plenty of nutrients in all stages of development. Nutrient burn is caused by feeding cannabis plants with a too strong nutrient mix or fertilizing too frequently.

Signs of Nutrient Burn

  • Leaves appear brown
  • Leaves look crispy
  • Stunted growth
  • Burning starts at the tip of the leaves

How to Fix Nutrient Burn

  • Hold off feeding nutrients to your cannabis plants for a week or two when you begin to see the tell-tale signs of nutrient burn. It will allow flushing out a high quantity of nutrients.
  • Monitor water pH which reflects the capability of the root system to absorb nutrients.

3. Nitrogen Toxicity

Nitrogen toxicity may result in feeding your cannabis plants too much nitrogen. Nitrogen is a macronutrient that marijuana plants use to grow and survive. Most nutrient bottles have three numbers that are listed next to each other, like N-P-K ratios. They symbolize the three main macronutrients including Nitrogen, Phosphorus, and Potassium.

Signs of Nitrogen Toxicity

  • Leaves curl downwards
  • Leaves turn dark green

How to Fix Nitrogen Toxicity

  • Reduce the amount of nitrogen that is mixed into your nutrient feedings.

4. Powdery Mildew

White powdery mildew is usually a result of too high humidity in the grow room, accompanied with low or absence of airflow. It is one of the common fungi infestations you’ll encounter as a marijuana grower. In the long run, the powdery substance continues to spread to the other parts of the plants and produce more mildew like eating up your marijuana plants.

Signs of Powdery Mildew

  • White powdery substance on the leaves and other plant parts

How to Fix Powdery Mildew

  • You can kill the mildew by misting it with a mildew-eliminating spray.
  • Lower the humidity and increase the airflow in the indoor grow room to stop the mildew from coming back.

5. Bud Rot

Bud rot is caused by levels of high humidity accompanied by low airflow. It can also be caused by overwatering, which results in rotting of cannabis buds. The rotting starts from the inside, slowly turning brown and moldy.

Signs of Bud Rot

  • Buds turn brown and look moldy.
  • Eventually, the whole cannabis bud is ruined.

How to Fix Bud Rot

  • Increase the airflow in the grow room by using oscillating fans and ensure proper venting.
  • Lower the humidity in your indoor grow space.
  • Cut off all the infected buds.
  • After the infected buds are removed, pay close attention to other buds to ensure they’re not infected. Practice proper handwashing and good hygiene to avoid spreading the bud rot.

6. Fungus Gnats

Sciarid flies or fungus gnats are small flying insects with a 3 and 5mm size. These are small and dark-colored flies that usually appear and spread on the lower parts of cannabis plants. It also happens in the substrate. Fungus gnats feed on sugars, decomposing organic material, and molasses. High humidity and low light intensity make your cannabis plants susceptible to fungus gnats. Warm temperatures also predispose your plants to this condition.

Fungus gnats are common guests in indoor crops and greenhouses. Hydroponic systems are highly sensitive to sciarid flies. Organic substrates with excessive moisture make an excellent habitat for fungus gnats.

Female sciarid flies lay around 50 to 200 eggs in the substrate and hatch after 48 to 72 hours in favorable conditions. For the next 2 to 3 weeks, there are four different stages of development that larvae pass through. The propagation is fast enough, which highly depends on the environmental conditions.

Signs of Fungus Gnats

  • Stunted growth of cannabis plants
  • Fungal infection

How to Fix Fungus Gnats

  • Maintain moderate humidity in the grow room.
  • Avoid overwatering your cannabis plants.
  • Keep the top layer of the substrate dry to reduce the presence of insects.
  • Cover the substrate with mulch like vermiculite so adult females won’t lay eggs on the substrate top layer.
  • Apply neem flour to combat pests by pouring it on the substrate until it forms a thin layer to act as a seal.
  • Chemical insecticides are considered your least option because of health and environmental concerns.

7. Heat Stress

Heat stress also occurs when a cannabis plant is placed too close or directly to the heat lamp. Heat stress also refers to a form of stress on cannabis plants as a result of too high temperature in your grow room. The ideal temperature in the grow room should be close o 75 degrees Fahrenheit at all time. However, it reaches below 80 degrees Fahrenheit, the cannabis plant starts to slow down.

Signs of Heat Stress

  • As the temperature gets hotter, the fan leaves fingers will start to fold up or taco longways.
  • Yellowing or browning of the edges of the leaves that are closest to the light source.
  • Spots noticeable to the parts nearest to the heat source.

How to Fix Heat Stress

  • Heat stress is the easiest cannabis problem to solve. Lower the room temperature to the appropriate levels.
  • Reduce heat by adding a small fan that blows across the tops of your cannabis plants.
  • Adjust the heat lamp placement to eliminate the problem.
  • Vent out the hot air with the use of an exhaust fan to prevent heat stress and also treat its existence.

8. Fusarium

Fusarium is a genus of filamentous fungi living in the soil and may affect your cannabis plants. Most species are considered saprophytes, feeding on the debris of other soil organisms. Fusarium eventually develops as parasites, producing mycotoxins that can also affect humans causing skin infections. The colonization of fusarium takes place at the level of the soil, through the shallow roots or the stem, which moves all parts of the cannabis plant via the vascular bundles.

Signs of Fusarium

  • Rotting and lignificación of the stem base
  • Nutritional deficiency as manifested yellowing leaves
  • Root rot
  • Brown vascular bundles when the stem is cut
  • The Fusarium fungus blocks the vessels as a result of colonizing the xylematic tissues of cannabis plants. Because of the blockage, the leaves turn yellow and wilt.
  • Eventually, other parts of the plant are also affected, causing necrosis and in worst case cause death of the cannabis plant.

How to Fix Fusarium

  • Get rid of affected plants
  • Strict hygiene to prevent the problem from happening again

9. Aphids

Aphids affect marijuana growers around the world. Aphids are a common garden pest with detrimental effects on cannabis plants. They are small sap-sucking insects which are destructive on cultivated plants. Aphids vary in size from 1 to 10 mm. It can be green, white, red, or black in color with two whip-like antennae and tube-like structures referred to as cornicles.

In early spring, winged female aphids hatch, giving birth to female nymphs. Only within a few weeks, young aphids are born. The number of aphids rises dramatically in a relatively short period of time. Aphids develop as males and females, mating to produce overwintering eggs by the end of summer.

Signs of Aphids

  • You’ll see aphids on the stems and leaves of cannabis plants. The green varieties are harder to spot.
  • Aphids suck sap from cannabis plants and leave a thick and sticky substance referred to as honeydew, that promotes the growth of sooty and black mold.
  • The leaves curl, wilt or turn yellow.
  • Stunted plant growth.

How to Fix Aphids

  • Get rid of aphids by cleaning and pruning any infected areas.
  • Use the water-vinegar solution to kill remaining insects.
  • Introduce predatory insects like ladybugs.
  • Use essential oils.
  • Use organic insecticides.

10. Incorrect pH

Growing cannabis plants with the wrong pH level is a common reason why people experience cannabis plant issues. To prevent health problems, mix nutrients and water at the right pH. Remember that the pH level affects the absorption of nutrients by your cannabis plants. Invest in a reliable pH meter to ensure the water and soil has a neutral pH which is 7.

Conclusion

Growing cannabis is a tricky process, and there are so many things that can go wrong. Too little or too much water, heat, or fertilizer, mildew, mites, viruses, mold, issues with ozone exposure, fluctuations in pH, and nutrient deficiencies can jeopardize your yield and the quality of the final product. Keep these quick fixes in mind and research intensively if ever you encounter any of these common marijuana plant problems.

DIY Stealth Grow Box for Marijuana Guide

Indoor marijuana cultivation is regarded as the more popular choice among many cannabis growers today and yesterday. That is true even though marijuana use has become more popular and accepted in society today. More people in today’s society prefer indoor cannabis growing over outdoor. And there are good reasons why.

First of all, you can control the ideal growing conditions of a cannabis strain when they are grown indoors rather than outdoors, where you are a slave to whatever nature gives you. Second, indoor growing is a lot safer for your plants because they are not exposed to as many harmful elements. And third, cultivating indoors is stealthier.

Even though cannabis is becoming more popularly accepted by society and by laws, people will still prefer stealth growing over cultivating these plants out in the open. In that sense, any stealth indoor grower needs a good tool to use such as a grow box.

What is a Grow Box?

A grow box, as the name itself already implies, houses marijuana plants as they grow. They are made to protect the cannabis plants and to allow them to grow in a safe environment. These grow boxes are usually sold commercially as kits or as a whole but some growers actually construct their own ones right in their own homes.

These boxes are usually light and odor proof and have everything you need to produce healthy cannabis plants. This includes grow lights, ventilation, fans, temperature monitoring, and even hydroponics system.

Grow boxes are preferred over grow tents by a lot of cannabis growers even though they technically function the same way. The reason for such is that grow boxes are solid and rigid. In that sense, they provide more protection than grow tents because of their hard-walled structure and environment.

Depending on the size of your grow box, these containers can house several cannabis plants and are great for anyone looking to save up on indoor space. Imagine yourself purchasing a one-bedroom apartment for five to eight of your marijuana plants.

Why Use a Grow Box?

Now that you already know what a grow box is, there are several reasons for you to choose a grow box over any other types of housing structures such as growth tents. These are the advantage of using a grow box for your indoor cannabis operation:

1. They are Hard and Durable

One of the best reasons why you should choose a grow box over a grow tent or any other housing structure is that they are hard and durable. While the durability depends on the material you used for your DIY grow box or on where you purchased an entire grow box kit, you can be assured that the structure stays solid and rigid.

In comparison, grow tents are made out of fabric that is far from being as hard and as solid as the materials that make a good quality grow box. This means that your grow box will not only stand the test of time but will also be able to survive whatever the elements or a fortuitous even throws at it.

2. No Need to Assemble

The problem with grow tents is that you need to assemble them and figure out how to put everything together. You no longer have to worry about what part goes where and where the wires and the different fixtures need to go to. If assembling things is not your specialty, this can be a difficult task for you to do.

But, if you use a grow box, there is little to no assembly required. Your DIY grow box might have already been constructed out of an old used cabinet. In that sense, you no longer have to assemble the entire structure. You probably only need to put a few things together to complete the entire grow box. That is not the same as grow tents, which need to be constructed from top to bottom.

3. They Last Longer

Because they are not made out of fabric and are constructed out of durable materials, these grow boxes last for quite a long time. If you have a DIY grow box that was made out of good hardwood or was constructed from a cabinet, you can be assured that it will last just as long as your cabinet at home would. It will not be subject to as much wear and tear as the fabric that grow tents are made out of.

What this means for you is that you will be able to save up on expenses in the long run. One grow box will last for a very long time and will ensure that you do not have to purchase a new one every so often if the older ones get run down.

4. Better Fans and Ventilation

When you buy a grow box, they usually come with built-in fans. Most of these fans are made to be a lot quieter compared to the ones you see in grow tents. In that sense, they are generally better. And when it comes to ventilation, since grow boxes are solid, the exhaust windows work better and do not bend out of shape unlike grow tents.

5. They are Stealthier

Grow boxes are not as conspicuous as you might think they are. They look like any normal everyday box that can be found in most homes. Some look like mini refrigerators while others look like your regular filing cabinet. And, if you made your grow box out of a drawer, it will most likely look like an ordinary drawer as well.

On the other hand, a grow tent really does not look like it belongs in an ordinary household. It generally stands out and will attract unwanted attention. So, if your goal is to make your indoor cannabis operation as inconspicuous as possible, your best choice is a good stealthy grow box that you can make out of ordinary materials you can find at home.

Why Go for a DIY Grow Box?

By now, you probably are already convinced that going for a grow box is your best choice when it comes to growing your own cannabis plants at home. And, in that regard, you can either go for a commercially sold grow box or you can actually build your own one by yourself. Here are the reasons why we believe you should opt for a DIY grow box:

1. You Build it According to the Size You Want it to Be

Commercially sold grow boxes come in pre-made sizes that can fit all sorts of different types of cannabis strains. There are some that are made to be small for casual intermediate growers that are just starting out. And there are bigger grow boxes made for those who want to grow more cannabis plants.

While that normally is not a big problem, the issue here is that these sizes do not come in the exact dimensions you want them to be. You may want a grow box that is made exactly to your specifications due to different reasons such as the dimensions of the available space you have set for the grow box or the size of the cannabis plants you are planning to grow. That said, a DIY grow box might be the best for you in this case.

2. You Can Choose Whatever Components Your Grow Box Has

Pre-made grow boxes usually come with components such as exhaust fans, hydroponics system, temperature and moisture level monitoring systems, and grow lights. However, there are boxes that have more components than what you actually need. Or, in any other case, you may have components that are better than the ones in the pre-made commercially sold grow boxes. In such cases, it is better for you to go for a DIY grow box because you can control and choose the components you want to add

3. It is More Affordable for Starters

Commercially sold grow boxes are not the most affordable tools that a beginner grower can afford. It can be pretty heavy on the budget to start out with pre-made grow boxes especially if they come complete with all sorts of expensive components that beginner growers might not want to use yet. That said, building a grow box from scratch can be an affordable endeavor for beginners because you control the parts, materials, and components you want to build the box out of.

4. You Can Recycle or Repurpose Household Items

If you have that old filing cabinet or a drawer that are still in good shape, you may not want to throw them away just yet. Instead, you can repurpose those things and even recycle some other household items to build your own grow box. Since grow boxes are technically made to look like cabinets or drawers, why not use cabinets or drawers to build one instead? That way, you are hitting two birds with one stone because you do not have to start the structure from scratch and you also repurpose an item that is still very much usable.

Building Your Own Grow Box

1. The Most Important Components

  • Grow light – provides the light and the heat necessary in an enclosed grow box
  • Intake and exhaust fans – Fills the grow box with air and filters out the excess heat and also the stench out from your grow box
  • Pots and soil – your plants will grow in the pots and the soil
  • Others – humidity and temperature control systems and hydroponics systems are not essential but they can be really helpful if you are a more advanced type of cannabis grower

2. Size

The size of your grow box depends on how many plants you are planning to grow. For example, a grow box with a width and depth of about 3 x 3 is already enough to house nine cannabis plants. Of course, the bigger the box, the more plants you can grow. The ideal grow box should always be at least 62 inches high because some cannabis strains tend to grow tall enough.

If you have a cabinet that you think is already big enough to fit those dimensions, then you can simply use that instead of building from scratch. But, if you want to pick out the materials and create a grow box that fits specific dimensions, then it might be better for you to build one from the ground up. However, make sure that your grow box looks like an ordinary cabinet on the outside if you want to make sure it is as stealthy as possible.

3. Setting Up

Setting up a good grow box is actually easy as long as you have the components ready. Make sure that the lights are situated above. The distance between the lights and the grow box depends on the type of lights you use or the size of the lights. A standard 600W light might need to be about a foot and a half above the plants to make sure they do not get light burn. You can use a reflector to make sure that the lights go straight to the plants without dispersing all over the grow box.

Of course, the pots should be placed at the bottom of the grow box. You can build a catch basin below the pots so that you can easily collect the excess water from the plants without making a mess.

There should be an intake fan close to the plants so that they get enough air to thrive well inside an enclosed space. An exhaust fan should be placed near the heat source (the light) so that excess heat immediately gets filtered out of the grow box. The intake fan should be bigger than your exhaust fan so that not all of the air gets ventilated out of the grow box. Cut out holes big enough to contain both the intake fan and the exhaust fan.

The ballast for your lighting system should be placed outside the grow box so that you can easily turn them on or off without opening the entire box. Of course, both the lighting system and the fans should be connected to a power source outside the box.

There you have it. That is the basic structure of a standard stealthy grow box. As you move up in experience and as your budget increase, you can add more components to your grow box or you can build an even bigger one.

Growing Cannabis from Seeds Vs from Clones

After choosing your cannabis strains and secure space to where you will be growing your plants, you will have to proceed with the actual work and occupy the allotted space with your chosen marijuana plants. There is countless joy in flourishing your own choice of the cannabis plant.  Sustaining the plants would require diligence and endurance. A common enthusiasm can greatly bloom into a genuine dedication.

There are two available methods to begin the planting of the cannabis – using seeds or using clones. Perhaps you are asking yourself now, “How can I best start the growing of my plant?”

It is good to know that only the female cannabis is able to generate buds. The male cannabis does not generate buds and the existence of the male cannabis during the cycle of flowering can only lead to fertilized female cannabis which gives seeds. Hence, you will not like to put the male cannabis in your garden except if you intend to do the breeding.

Comparing Cannabis Seeds versus from Clones

Now if you have been contemplating in trying to grow cannabis plants for the first time, then you might have taken the initial step to transform a genuine cannabis aficionado. Being a first-time planter and grower, you are expected to make one primary decision before beginning your newfound endeavor. How do you want to do your plant growing – would you go for seeds or are you going to use clones? At this point in time, you might have not been aware that there are actually two methods for growing cannabis plants. Just like any other multiple selections out there, each has their good and bad sides. Thus, selecting for the best choice can relatively correspond between triumph and defeat. Here is some information that aims to discuss each strategy and probably this information will finally guide you on which method to use.

Growing Cannabis using Clones

Clone is done by cutting a portion of a mature cannabis plant so that it can be replanted, and eventually bear buds. You may think that growing a cannabis plant using clone is an easy task to do, but in reality, growing using clone can be more complicated compared to growing with seeds.

All plants are characteristically extremely exposed to various diseases like an infestation of bugs or fungus. When we say clone, it refers to the definite genetic image of a mother plant where the clone is taken from. Thus, if the mother plant had issues on health, there is a great chance for the cutting to suffer the same health issues. Normally, growers who are just starting to explore with this kind of endeavor do not have the knowledge yet on how to handle issues such as these, hence the plant can most likely die.

The state of the clone can present other hindrances. A newly cut clone requires plenty of affection and care, and if it is first replanted, the clone can be greatly receptive. A commencing duration of transplant jolt is to be anticipated. During this period, the clone will really need a very particular quantity of nutrients and light to nourish it throughout this stage. Failure of a transplant is very prevalent. New growers may encounter difficulty in keeping the young clones in good condition.

Another main issue in growing cannabis plant with clones is that they may be difficult to search. You will have to acquire a connection to a mother plant that is mature and then get the license of having it cut. In this particular case, how can you be sure of what kind of cannabis strain you will be using? You will remain clueless about this thing unless you finally put yourself ready for test it. Although there are clones that are available online, this option is a relatively dangerous option of purchasing plants. Shipping the clones can be dreadful for them, thus you are expected to receive the clone but in a weak state. Plants that are sold commercially are occasionally administered with fungicides or pesticides, and clones taken from these kinds of plants will most likely take in the same elements too.

The only concrete advantage of cloning for new growers is the fact that the plant is heretofore beyond ahead in progress that those Cannabis Seeds. Further, you can also look forward to definite yield earlier. If you do not see time as an issue, then this should not bother you at all. It commonly compresses the complete cycle of growing by around one month. Moreover, a lot of people attest their fun encounter while learning to grow cannabis plant starting its primitive stages.

Advantage of Clones:

  1. Consistent – Clone is the only method to keep a particular strain. This explains the numerous strains which are designated as ‘clone only’.

Disadvantages of Clones:

  1. Endurance – Put in mind that cannabis is known to be an annual plant. By illustrating it, the plant finishes the complete life cycle starting from the fertilization to generating of seeds within a year, and then eventually dies. Therefore, clones are characteristically unnatural. There is an extreme discussion whether the clones would eventually depreciate their endurance over a certain period of time, however, one thing is very certain – the health of the clone is very significant in keeping endurance.
  2. Access – Getting access to clones can be extremely hard if you are residing in a legal state. It will be critical to source the clones from a reputable garden to guarantee you obtain the kind of strain that you want. Moreover, a lot of restricted genetics are firmly held by particular grow circles.
  3. Pathogens – Another explanation why it is significant to acquire the clones from a reputable source is the danger of presenting the clones with occurring diseases and pests. This is enormously happening – as a matter of fact, the sharing of a clone is the top triggering factor of mold and pests among cannabis gardens.

Growing Marijuana in Coco Coir – A Comprehensive Guide

Growing your cannabis in coco coir is a great budding trend and an alternative to growing medium. Coco coir is an excellent growing medium for your marijuana plants. If you’re looking for the great benefits of hydro for faster growth and higher yield with the experience of soil cultivation, coco coir is your best option.  If you’re a novice grower, you’ll find coco coir cultivation easy to learn.

However, the coco coir most cannabis growers use comes in dehydrated bricks without instructions. That’s why you need a comprehensive guide to ensure you use coco coir correctly to obtain the best results. At the end of this guide, you’ll be able to start adding coco coir in your cannabis garden confidently. Are you ready to learn about coco coir cannabis cultivation? Let’s get started!

What is Coco Coir?

Yes, you’re right if you believe that coco coir comes from coconut husks. The fibers from the coconut husk are processed and recycled. Coconuts are mostly grown in Sri Lanka, India, and the Philippines. Coco coir is sold like soil in 50L sacks from grow shops, and readily available in coco bricks which are tightly compressed.

Coco coir is a fantastic growing medium for marijuana plants both outdoors and indoors. In fact, it started replacing peat moss in potting mixes. The pH level of coco coir is comparable to unfertilized soil (6.5 to 7.0). You can use it as a growing medium or mix it with soil to loosen the soil and resolve compaction. Coco coir makes a superb soil mix. You can mix it with 30% of airy amendments, like perlite. The environment is suitable for marijuana roots to survive because the coco coir provides the nutrients they need through the water.

Reasons Why You Should Use Coco Coir

1. Mimics Soil Cultivation

When growing cannabis in coco coir, you can treat it like you’re growing in soil. Because coco coir is considered a soilless growing medium, you’ll feel like actually growing your marijuana plants in soil. You can keep your cannabis plants in regular pots, and you just simply need to water your plants with nutrient water.

2. Nourishes the Root System

One major advantage of using coco coir is its capability to hold moisture and nutrients effectively. The root system of your cannabis plants can benefit from the lighter texture of coco coir because it holds more oxygen.

3. Prevents Underwatering

Say goodbye to underwatering with coco coir! Even if you’re out for a few days, your cannabis plants can survive with a coco coir medium. The coco fibers can hold more water than soil.

4. Environment-friendly

In the past, coco husk was only discarded and even burned in the landfills. Only a few gardeners utilize coco husks for agriculture purposes. Luckily, we are now more open-minded, resourceful, and concerned about our planet. Coco coir is slowly broken down and you can use it more than once. Coco coir is highly sustainable, unlike peat moss. You don’t have to replace coco coir every grow.

5. Doesn’t Attract Pests

Coco coir, unlike other growing medium, doesn’t attract pests that can affect your plants negatively. Growing marijuana in coco coir is less likely attacked by bugs or pests. 

6. Cannabis Plants Grow Fast

Growing directly through hydroponics can be complicated, most especially for a new grower. If you’re not comfortable using a hydroponic medium, you can still obtain the benefits of hydroponics with coco coir. As compared to growing cannabis in the soil, your plants will grow faster with coco coir. The reason is that nutrients are provided readily in the root system, making them more accessible. It only means that the roots do not have to look for nutrients, so it saves their energy and uses it to grow to be healthier and bushier.

Tips When Growing Marijuana in Coco Coir

1. Provide nutrients from the start. As an inert growing medium, coco coir has no inherent nutritional value. That’s why you need to provide nutrients throughout the grow. Monitoring pH is also a must because the pH level dictates the capability of the root system to absorb nutrients.

2. Use a Cal-Mag Supplement. Marijuana plants that are grown in coco coir need more calcium as compared to soil and other growing mediums. That is why a standard “Cal-Mag” supplement is highly recommended to ensure that your cannabis plants will get all the calcium and magnesium they need. Magnesium aids in the proper absorption of calcium.

3. It’s important to re-hydrate coco coir first because it comes in dry bricks. Pre-made mixes are also available with coco coir, which are specifically formulated for cannabis plants.

4. Mixing the coco coir with perlite is a good idea. It provides a sufficient amount of air and water for cannabis roots. It drains well so overwatering is avoided.

5. Iron is a micronutrient that is missing in coco coir, and iron deficiency may reduce your final harvest. Starting with coco specific nutrients is important so you won’t need to troubleshoot later.

6. Use less fertilizer because coco coir holds fertilizer effectively too.

What You’ll Need in This Tutorial

2 650 grams coco coir bricks

8 quarts bag of perlite (found in garden stores)

5-gallon bucket

10-gallon fabric container

Drain

Water

Preparation

You can run your fingernails on a bar of soap. The layer of soap will prevent the coco coir from getting stuck under your fingernails. It will save time and effort to clean your nails once you’re finished.

Step-by-Step Guide to Rehydrate Coco Coir

1. Gather all the materials you need and place them near your sink or tub.

2. The inside of the 5-gallon bucket should be lined with a fabric container, all the way to the top. It’s good to have enough extra so you can easily grab the top and lift it up later.

3. Add the first coco coir brick to the fabric container in the bucket.

4. The bucket is now filled with water until half full.

5. Before soaking the coco coir, adding a Cal-Mag supplement is beneficial to provide nourishment to the roots system. Supplementing the coco coir now will save you time and avoid issues later on.

6. Make sure that the water pH is 6.0 before soaking. You can use a pH meter to ensure an accurate result. It will ensure that your coco coir has the right pH range from the start. Remember that the pH level will reflect the capability of the roots to absorb nutrients and oxygen.

7. Wait until the coco coir is fully hydrated (about 8 to 10 minutes). There shouldn’t be hard parts left. To check, stick your hand on the coco coir. Make sure that the coco coir is soft all the way. You can use your hands to mix the slurry around and break up quickly if you are in a hurry. Some growers prefer to soak their coco coir longer, most especially if they are using pH-ed water. Also, they do it if the coco coir has been supplemented with Cal-Mag. It gives the coco coir more time to absorb the nutrients.

8. Pull the liner up and let the water drain. Allow the excess water to drain first, then place the fabric liner with the slurry on the ground or tub to allow the water to drain slowly.

9. Pour the half bag of perlite (8-quart) on top of the coco coir.

10. Now, it’s time to mix in the perlite with hands. Slowly mix everything. Also, check around the side because you will often find straight coco coir or pockets of perlite in this area. Stick your hands inside and mix everything until it looks even.

11. Fill the containers with cannabis potting mix. A single batch makes approximately 5 gallons of cannabis potting mix. It may appear soaking wet, but it will eventually dry in the fabric containers once you let a fan blow over them in the grow tent.

12. Repeat the steps for the second coco coir brick and the remaining half of the perlite bag.

13. You’re set! You can fill the rest of the fabric containers and solo cups for your marijuana seedlings. Cutting holes into the bottom of the solo cups will allow water to drain after you have watered your cannabis plants. Test it to ensure the water runs through the cup freely.

Step-by-Step Guide to Growing Marijuana in Coco Coir

It is now time to start growing since you already have your potting mix ready. Whenever you are using liquid nutrients, you need to test the pH so the roots of your cannabis plants will easily absorb nutrients. Invest in a reliable pH test kit. Give a full strength Cal-Mag in addition to your nutrients for two weeks at the start of your grow.

1. Germinate the Cannabis Seeds in Rapid Rooters for the best germination rate. Avoid soaking the coco coir in the solo cups. You can also plant the Cannabis Seeds directly in your ready coco coir.

2. When your marijuana seedlings grow their first set of serrated or real leaves, you can water them with nutrients (normal seedling strength). You can also add a Cal-Mag. Water the seedlings until you get 20% runoff from the bottom of the container or solo cups.

3. Maintain your cannabis seedlings. You can choose to plant directly your cannabis seedlings in their final container or solo cups. The seedlings should get plenty of light. However, make sure that the light is not too hot for your cannabis seedlings. To test, place your hands directly where your marijuana seedlings are and then wait for 10 seconds. If it feels too hot, it’s the same with your plants.

4. When watering your cannabis plants, continue to give water until 10 to 30% extra water runs out of the bottom. Do not water until the top inch starts to feel dry to touch. Make sure that the water should drain freely. If not, you need to fix it right away. Make a room for new seedlings by digging small holes in the coco containers. Use a butter knife and slide it carefully around the solo cups’ edges.

5. Once the seedlings have 3 sets of leaves, you need to transplant them to bigger containers if you started with solo cups.

6. Maintain your vegetative marijuana plants until they’re half your final desired size. You can start training during this stage. Make sure to wait for a few days after transplantation so the plants won’t get stressed before training. If you’re growing auto-flowering cannabis plants from seed, do not use any training techniques besides low-stress training or LST.

7. Watch out for nitrogen deficiency. It is characterized by yellowing of the lower leaves starting from the bottom upwards. Your cannabis plants need a higher amount of nutrients. The yellow leaves won’t turn green again, so don’t expect it to happen when treating nutrient deficiency.

8. Once your plants reach half your desired size, switch them to the flowering phase. Autoflowering plants will automatically switch to the flowering stage after 3 weeks, which lasts until the plant is about reaches the half your desired final size.

9. When switching to the flowering phase, change the light schedule to 12 hours of light and 12 hours of uninterrupted darkness. You don’t have to do anything with autoflowering plants.

10. Maintain the flowering plants until they’re ready to harvest. Control humidity and temperature. Watch your cannabis plants closely to expose all bud sites to adequate light.

11. Harvest the cannabis buds when they are ready.

Coco coir generally drains better, keeping the roots oxygenated as compared to standard peat-based mediums. From the start, a light nutrient solution should be applied similarly to a hydro crop. The pH should be 6.0 to ensure proper coco coir nutrient absorption for the root system of your cannabis plants. You can add 30% perlite to the mix for the best results. You can use premixed coco coir which is available in online grow stores. One way to ensure a successful coco coir cultivation is to buy a high-quality coco coir brick. Enjoy growing your cannabis in coco coir today!

How Long Does It Take to Grow Weed?

Possibly the most common question that most first-time cannabis growers ask is “How long does it take to grow weed?” This is indeed very common for anyone anticipating his first harvest! Whether you are planning to grow weed for recreation or cultivating medical cannabis for a particular medical condition, you need to know how long you need to grow any strain. Understanding the life span of a strain will help you provide the ideal growing condition that you must provide to your precious cannabis plants.

How Long Will Weed Grow?

Different cannabis strains, different growing times. As there are many different strains of weed, each one of this is unique and has different growing requirements. Some types of weed like regular cannabis may take around 10 to 12 weeks to flower and hence around 12 or more weeks till the buds are ready for harvest. According to Wikipedia under cannabis cultivation, the flowering phase could even take up to 22 weeks in pure indica strains while pure sativas have shorter flowering times.

Autoflowering cannabis plants, on the other hand, will flower in just 7 to 9 weeks or even less. This means that your buds will be ripe and ready for harvest in 8 or more weeks. This quick flowering times and improved harvest times makes auto cannabis plants more popular compared to its regular counterparts.

When it comes to the type of strain, some strains will be ready for harvest in just 9 weeks while there are some strains ready for harvest in about 12 or more weeks. These fast-growing strains are therefore more preferred by people who grow cannabis as a business opportunity.

And of course, the manner in which cannabis grows also makes a difference. Growers agree that when you grow cannabis indoors, you will be able to monitor your plants’ growth better and you will be able to manipulate its growth and development. This could enhance growth and make cannabis growing rate faster. Meanwhile, outdoor growing can take time because you are leaving everything to nature. Consider that there are times when there is no rain and the climate becomes dry; any kind of change in the environment can directly or indirectly affect the rate of growth of your cannabis plants.  

This is why if you want to grow cannabis faster or at least grow healthier plants; you must follow an indoor growing system.

Growing Cannabis Indoors

If you live in a place where growing cannabis is not legal then there is no reason to grow your crops outdoors and risk being reported. You really need to grow cannabis indoors.

Indoor growing is just like being a God. You will provide everything that your plants would need from food to sunlight and doing so, improves your plants’ chances of survival. Indoor growing makes it easier and a lot faster to grow cannabis.

Growing your cannabis indoors will let protect your plants and take good care of these from seedling to harvesting. You will be able to check on their well-being and be able to handle various cannabis plant conditions like under watering and nutrient deficiencies at once.

It’s hard work but even experts agree that it is really worth it.  Those that have grown or cultivated cannabis before say that it is really quite easy to grow weed even when you are at home. This is because the cannabis plant is very resilient and can be grown indoors or outdoors, even in any climate.

What You Need to Grow Cannabis Indoors

  • Cannabis Seeds
  • Grow lights (LED or HPS lamps)
  • 2 small fans (USB fans)
  • Grow tent or a grow cabinet
  • Pots and growing medium (soil, coco coir, etc.)
  • Carbon filters
  • Fertilizer

You can buy these individually or you can purchase a complete set. All of these are available in an online marijuana growing site or you can find these from local cannabis growing supplies store.

Indoor Growing Using Grow Cabinets or Tent

Grow tents and grow cabinets may be commercially made or homemade. If you are a first-time grower it’s smart to rely on ready-made growing cabinets that already has everything you need to start growing indoors.

Grow tents that you can buy online have complete equipment such as lighting, fans, pots, and reflective material so you can immediately grow cannabis at home. Inside a grow tent, you will be able to start growing your plants from the seedling stage to harvest time. This could take anywhere from three weeks to four weeks depending on the strain you are growing.

If the growing environment is right and you have viable seeds, it could take around a week for seeds to sprout and about two to three weeks when our seedlings are ready to be transplanted to the growing medium.

Characteristics of a Good Growing Tent

A good growing tent must keep the light in so with efficient reflective panels on the inside panels of the cabinet. This must have a good door to prevent light from escaping. An efficient grow tent must be able to keep the strong smell in with an exhaust system removing the smell. Finally, growing tents should be easy to set up. This must have a locking mechanism to keep your plants safe especially when harvest time nears.

Equipment You Need to Grow Your Weed Fast Indoors

All About Your Grow Lights

Indoors, your plants will be completely dependent on indoor lighting to grow and make more yields. As a general rule, the better your lights are, the more your plants will grow and give you more yields. And when it comes to the best grow lights for your plants, the most popular currently are HID lamps, CMH lamps and LED grow lamps.

But despite these different types, many growers still prefer LED lamps. This is the most updated type of grow lights because it is energy efficient. You can purchase LED bulbs in different wattages yet the only downside to this is that this is the most expensive type of lighting.

Growers agree that what you spend on bulbs can be earned from the savings you’ll get in the future. It would take time to change the bulbs too so you will again save money from this. There are about two different kinds of LED light bulbs: cheap and expensive ones. Cheap bulbs may have dim and inefficient lighting and can grow only small buds. Having inefficient lighting will only slow down plant growth.

Meanwhile, top quality and expensive bulbs will provide radiant and good continuous lighting to your plants. This can produce the best harvest and even improve growing times.  

Giving Your Plants the Best Ventilation

To grow healthy cannabis plants faster, your plants need fresh air. You need to maintain the ideal humidity inside your grow tent or grow space because poor ventilation may result in the growth of molds, pests, and mildew.

One of the most common types of mold is powdery mildew. This can plague cannabis gardens, slow down plant growth and even completely ruin harvests. It is quite difficult to spot this because these can affect plant leaves from the underside. Most growers discover this when it’s too late making their buds useless. To prevent this you must maintain the ideal humidity levels inside and indoor growing area.  

Getting the Best Growing Mix for Faster Growth

There are different kinds of pot for growing cannabis but the most common nowadays is a fabric pot. These pots are recommended by cannabis growers because this will let excess water drain from the soil mix and the roots of your plants. Fabric pots also allow oxygen to reach the roots better and this can also help plants grow quicker than usual.  

When looking for the right soil mix, select a sandy clayey type of soil because this soil is great in absorbing more water and nutrients to benefit your plants. This kind of soil will also let excess nutrients and water drain from the roots of the plants.

Use Only the Best Viable Cannabis Seeds

After considering and buying your growing lights and fans, you must now consider the Cannabis Seeds that you will grow. The key to growing good and healthy plants is to buy good quality seeds. Rely on reputable online or local seedbanks.

And although there are bag seeds or seeds with unknown origins, it is not recommended to grow these. Bag seeds are less likely to grow well simply because you don’t really know what you need to do. Different strains have different needs; always keep this in mind.

How to Germinate Your Seeds

The most important question at this stage is how many seeds do you need to grow? The answer depends on the size of your growing area and whether you are using regular Cannabis Seeds or autoflowering seeds.

If you are growing regular Cannabis Seeds, you might get 50% females and 50% males. You must sow more seeds to be able to compensate for the possible male plants that may grow. You will remove males later so make sure to grow more plants as possible.

If you are cultivating feminized Cannabis Seeds then you have more control over the number of plans you will grow. It is recommended that you sow 12 seeds for a growing area that can fit 10 plants. The only thing you may need to keep watch at this time are seeds that are non-viable. So as much as possible, grow as many seeds as you can in case you get more duds or non-viable seeds.

Jiffy Pellets for Faster Germination Rates

One factor that affects the speed of growth of most cannabis plants is the seed’s germination rate. Basically, older seeds take a long time to germinate (may take longer than a week!) while younger or fresher seeds may only take two to five days.

To make germination easier use Jiffy pellets. These are easy to use and are more preferred than other growing mediums. The first step is to soak these pellets overnight in water so that these will absorb more water and double their size.

In the morning remove the pellets in water and then drain these until you get a damp pellet. Get one pellet and place one seed inside. Usually, there is a small hole or slot in the middle of the pellet where you just pop the seed in.

The pellet contains all the nutrients that a seedling needs to grow therefore you don’t need to feed seedlings any fertilizer at this time.  

Time to Place Seedlings in the Grow Cabinet or Tent

Your seeds will sprout at around 5 days inside the grow pellet. Once you are done placing every seed inside a Jiffy pellet, place these inside the grow tent or cabinet. Power on the grow lights and place these over the pellets for 18 hrs.

Power off your lights for about 6 hrs. to give your plants nighttime environment. Cannabis plants naturally need darkness because roots grow in the dark. You can use a timer to automatically power on and off the grow lights.

Roots will soon sprout from the pellets and new leaves will escape from the pellet. These are signs that the plants are now ready to be placed in their new home. A larger and more spacious container.

Transplanting seedlings to a larger container is very stressful to the young plant. This is why there is no need to remove the seeds from inside the pellet. Just pop the entire plant/pellet in the soil. Dig a small hole in the middle of the soil, about two to three inches deep. This is where you will place the pellet.

Place more soil to cover the seedling and compress this lighting using your hands. Place this underneath strong grow lights. Water your newly transplanted seedlings at least once to two times a week. As much as possible, water only when the soil is dry; never when the soil is wet or damp to avoid mold and mildew growth. There should be water draining from the holes under the pot. This means that excess water has been removed from the soil.  

Determining the Time it Takes for Weed to Grow in Different Stages

The Cannabis Vegetative Stage “5th day to 4th week”

There are two stages of a cannabis plant’s life: the vegetative or growing phase and the flowering phase. During the vegetative stage, the plants veg out or grow taller and wider and this according to the type of strain you are growing.

During the vegetative stage, you must maintain a specific growing schedule. Follow 18 hours light and 6 hours darkness for 3.5 weeks. A 24 hour light schedule is also recommended but this can be very costly. So instead of a 24 hour light schedule, start with an 18/6 schedule to ease energy costs.

The Cannabis Flowering Stage “3.5 to 4th week”

The flowering stage is exactly what it is. It is the time when cannabis plants (male and female plants) show off their flowers. It will take around 3.5 weeks for your plants to finish growing and after this, it will cease growing and concentrate all its energy to make buds.

So at this time, you can switch from an 18/6 light/dark schedule to a 12/ 12 schedule. At this time, flowers will start to show. The first buds will appear about 4 weeks when your plants are under 12/12 light/dark schedule.

Both males and female plants will create buds but these are quite different from each other especially in appearance. Females will grow buds with whitish hairs sticking out from them. Male plants, on the other hand, will grow balls and sacs that have pollen inside.

At this point, it is very dangerous to leave male plants in your growing area because males will pollinate the female plants. When you remove male plants your females will now be able to grow unfertilized marijuana buds that we all know and love.  

Fertilizer for Cannabis for Faster Plant Growth

There are fertilizer mixes especially made for cannabis plants. These are ready-made products which can be used either for the vegetative phase or flowering phase. You must use the right fertilizer on your plants to avoid any nutritional problems.

Should you use commercially-prepared mixes or a homemade plant food mix? If you are new to feeding your plants, a commercially-prepared product will reduce costly feeding mistakes. You can buy these in most online or local garden supplies stores.

Get Faster Harvests and Better Yields with Autoflowering Feminized Marijuana

Expert growers say that if you want to simplify the growing process for weed, you need to invest in top quality autoflowering seeds. These seeds are simply seeds that were created to flower without changing the plant’s light cycles.  With this kind of seed, you can grow cannabis without worrying about male plants.

Getting to Know Autoflowering Cannabis Seeds

Autoflowering Cannabis Seeds are seeds that can speed up the growth of your plants. Autos will flower in just 7 to 9 weeks. At this rate, you can have your plants ready for harvest earlier.

Auto seeds will also flower no matter what light schedule you put your plants in. Most growers and breeders say that autoflowering cannabis is the best for novice growers because these are very easy to grow. And whether you are growing recreational or medicinal reasons, it is definitely easier to grow autoflowering Cannabis Seeds than regular seeds.

The Origin of Autoflowering Cannabis

Autoflowering seeds were initially spotted in the near-frozen parts of northern Eurasia. This is a harsh place to grow cannabis however cannabis plants are very robust. Cannabis stains are mixed with a strain called Cannabis ruderalis.

This plant does not wait for warm weather which sativa and indica strains need to grow flowers. These plants will flower according to its own internal growth schedule and this is not the amount of light that it gets every day.  

Why Use Autoflowering Feminized Cannabis Seeds?

Autoflowering seeds have a very short life span and therefore grow faster than other strains. You can even grow two outdoor crops in a year as long as you provide the best growing environment for your plants.

If you are growing autoflowering cannabis indoors, plants will fully mature as quick as 9 to 10 weeks. And depending on the strain, you may even get auto plants that are resilient to many types of diseases, mold, and mildew.

Anyone new to growing cannabis can start cultivating their first crops with autoflowering seeds. Not only will you be able to harvest early but you will be free from common worries of growing marijuana plants.

Giving Your Autoflowering Cannabis Plants the Right Amount of Light

Autoflowering plants have higher cannabinoid content without the need to expose your plants to intense lighting. Regular marijuana strains will require strict monitoring of the light intensity and light periods as well as dark periods. Cannabis seeds use light to create flowers because these seeds are based on the amount of light that the plants receive.  

With autoflowering seeds, it’s a different story. These plants will complete their life cycle without the need to place these under alternating 12 hours of light and 12 hours of darkness. Autoflowering plants will even be able to handle light pollution and therefore is a good option for growers who live in places with short summers.

The Ideal Light for Faster Better yields for Auto Plants

Is there a kind of growing light for cultivating autoflowering seeds? It is recommended that you use a strong lighting option like HPS or LED lamps. These produce intense and even lighting that will be able to improve growth and yields.

HPS is high-intensity lighting that is very bright and very hot. This is very effective in supporting faster and healthier plant growth but can leave a hole in your pocket. On the other hand, LED lighting will provide intense light without high electricity bills. LED bulbs also last longer or will burn longer compared to other lamps, therefore, it will take a long time before you need to replace this.    

Cultivating Fast-growing auto Cannabis Plants

Autoflowering seeds are perfect for novice users. The common factors that affect regular growth of sativa and indica plants are avoided when you grow autoflowering feminized seeds. With autos, there is no need to provide good lighting so that your plants will flower plus there is no need to grow more plants and remove male plants.

When it comes to the ideal growing environment, autoflowering Cannabis Seeds require an environment between 75 and 86 degrees. Marijuana plants can grow in warmer or colder temperatures, however, as the climate becomes warmer, it is more likely the plant will grow faster and reach its full growth size.  Why do cannabis plants grow well in warmer climates? Because warm air contains more water vapor which is perfect for your plants. Reducing humidity will help you control mold growth as well. If you grow cannabis plants in a growing room or cabinet you can check on your plants regularly and monitor these constantly as well. You must also consider reducing the temperature ten degrees at “night” or when your plants are at the dark period. Never reduce more than ten degrees because this can harm your plant and result in smaller plants and very little yields.

Simple and Easy Growing

Aside from these factors, autoflowering Cannabis Seeds are really simple to grow. You just have to ensure that your plants get a lot of light, water and maintain the ideal growing temperature. As your plants reach the end of the growth cycle, you need to prepare it the same way that you prepare regular plants.

Feeding your autoflowering plants fertilizer mixes is sometimes not recommended. These plants are already in such stress to flower at a particular time and any mistake in feeding could be drastic to your plants.

As much as possible test your soil first or test pH of the soil that you intend to use to grow your plants. Feed your plants the correct nutrients according to the stage of development of your plants. During the growing stage, your plants require more nitrogen to develop healthier and more leaves, stems and thicker roots. But during the flowering stage, fertilizer should have higher potassium and phosphorous to boost yields and have lower nitrogen content. Your plants will now grow flowers so these won’t need nitrogen anymore.

Just like regular plants, it is recommended that you use commercially-prepared nutrients or fertilizer to prevent very costly mistakes. You may also want to use nutrients ideal for autoflowering plants only so be sure to specify this when shopping for the right nutrient mix.

How to Purchase Autoflowering Cannabis Seeds

You need to make sure that the autoflowering seeds that you buy from a local or online seed bank are really what they are. So to be sure and to avoid any worries, buy only from reputable seed banks. This way, you will be confident that you are buying healthy viable seeds that will grow into healthy, high-yielding autoflowering plants.