500 NEW MARIJUANA SEEDS RELEASED

Understanding Fusarium Wilt in Cannabis Plants

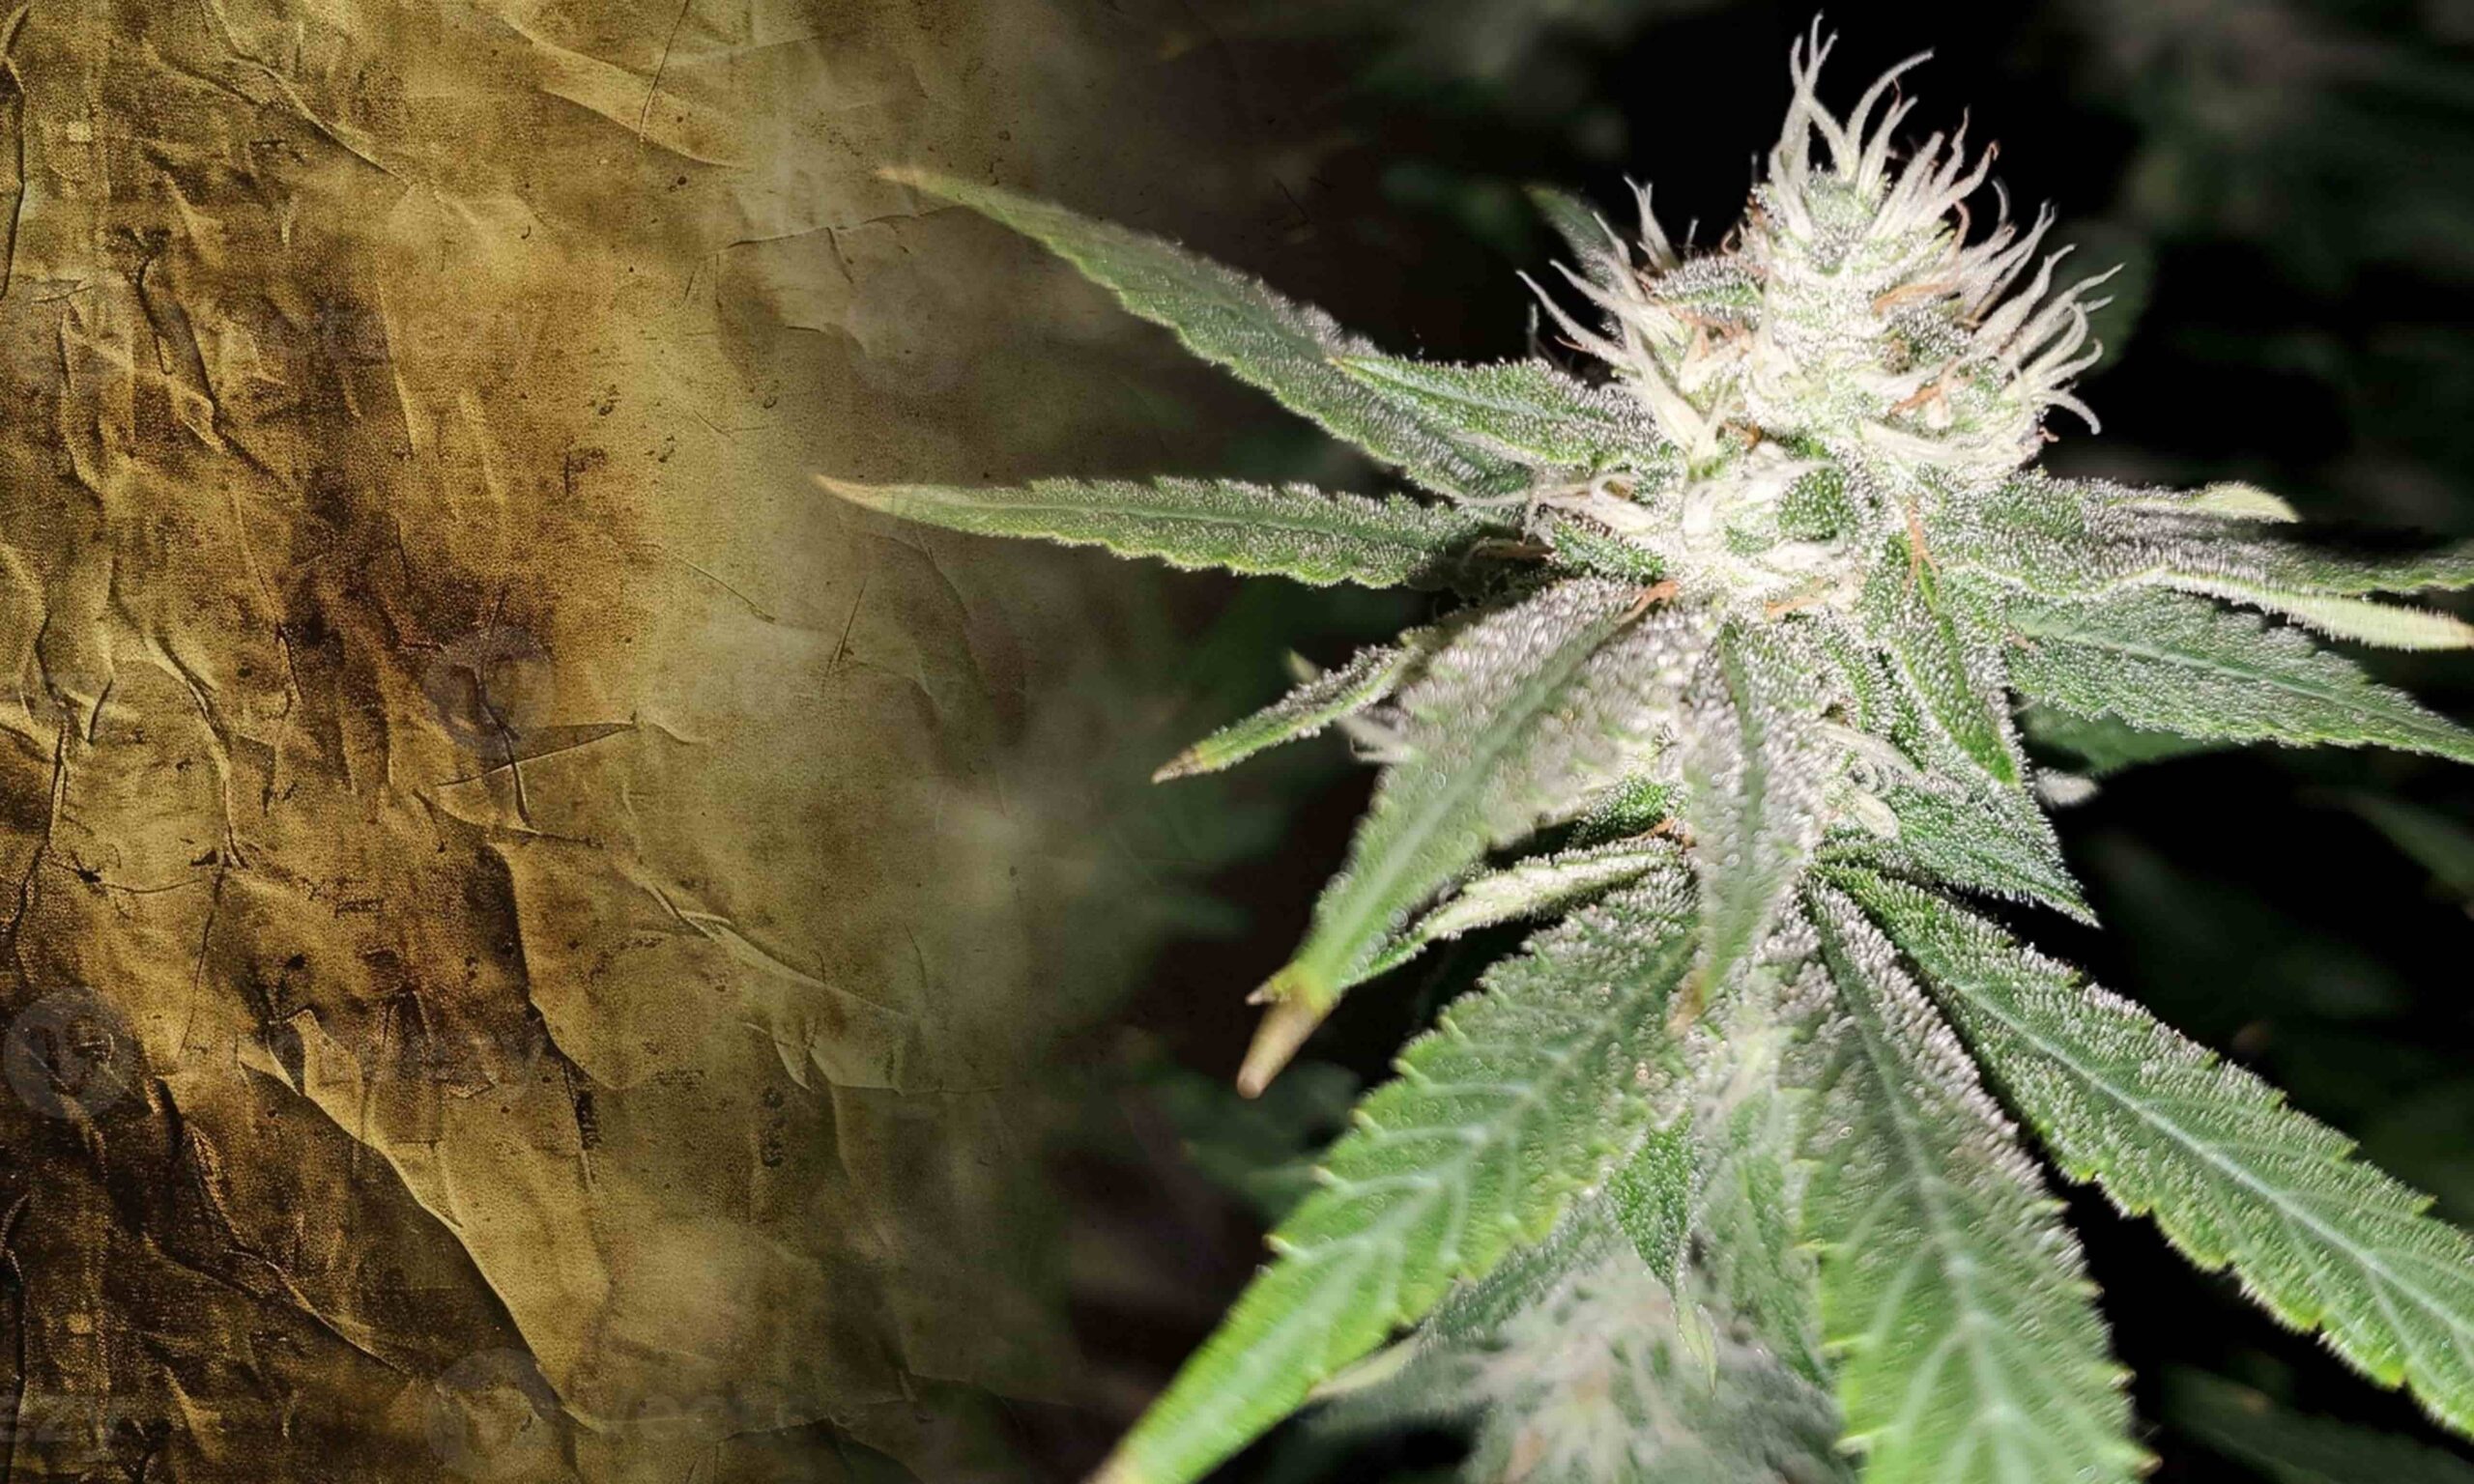
Fusarium wilt cannabis represents a significant threat to cannabis cultivation, necessitating a comprehensive understanding of its intricacies. In this extensive guide, we delve deeper into the nuances of fusarium wilt, encompassing its etiology, manifestations, preventive measures, and management strategies.

Fusarium, commonly referred to as fusarium wilt, is a fungal pathogen notorious for its detrimental impact on cannabis and other plant species. Originating from fusarium fungi, this pathogen affects plants and manifests in human beings, leading to dermatomycosis and onychomycosis, underscoring its clinical significance.

Origins and Spread

The historical inception of fusarium dates back to the 1930s-40s in the USSR, where it was initially observed in wheat infections. Subsequently, its virulence led to its weaponization, highlighting the severity of its impact. Within cannabis cultivation, fusarium predominantly targets roots and stems, inducing symptoms such as growth inhibition, wilting, and eventual plant demise.

Characteristics of Fusarium Wilt

Fusarium exhibits distinctive characteristics, thriving in substrates rich in decomposing organic matter: certain strains, notably Fusarium Oxysporum sp., Vasinfectum, and Fusarium Oxysporum Sp. Cannabis poses a substantial threat to cannabis plants due to their aggressiveness. Moreover, the pathogen’s ability to disseminate rapidly via water, wind, and nematodes exacerbates its potency.

Variants of Fusarium Wilt in Cannabis

Fusarium wilt manifests in various forms within cannabis plants, each with its unique pathological features:

  • Vascular Wilting: Attributed to Fusarium Oxysporum strains, this variant primarily targets the bark of plant stems, leading to vascular damage and distinctive brown staining.
  • Root Rot: Instigated by Fusarium solani, this form induces generalized plant wilting, characterized by gradual leaf drooping and subsequent abscission.
  • Stem Affliction: Considered akin to plant cancer, this variant, caused by different species of Fusarium, results in dark staining and viscous brown liquid exudation.


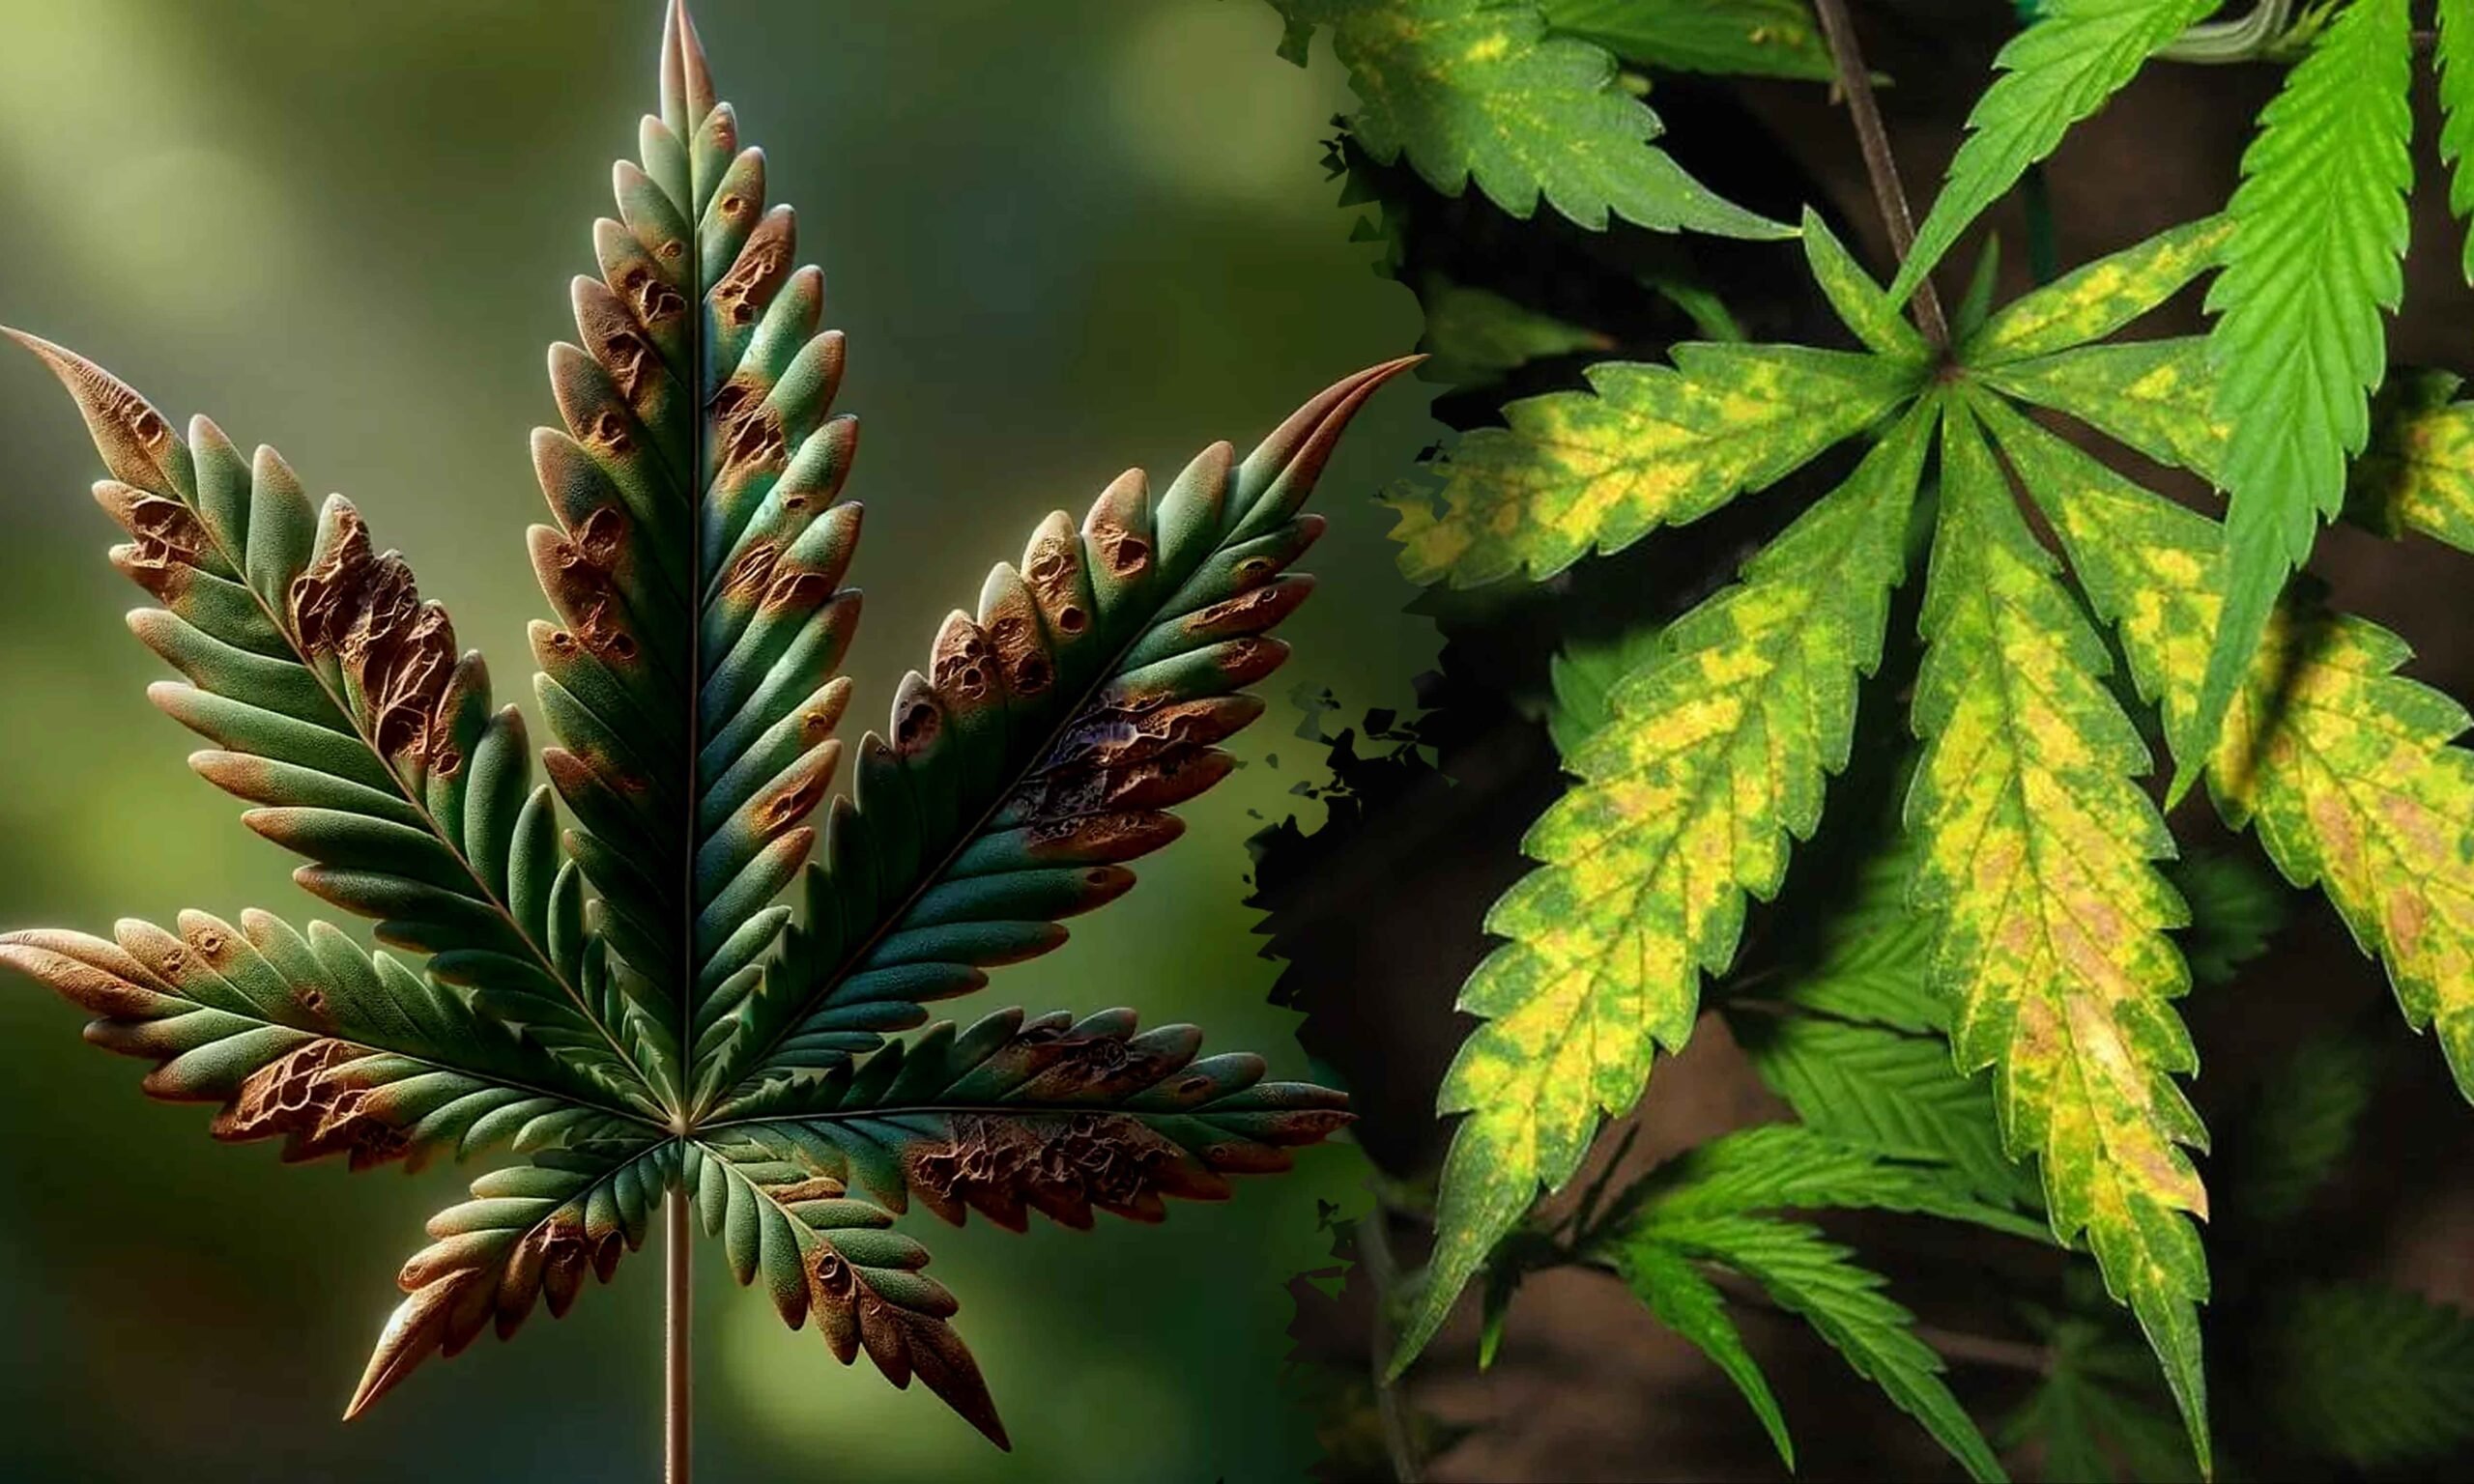
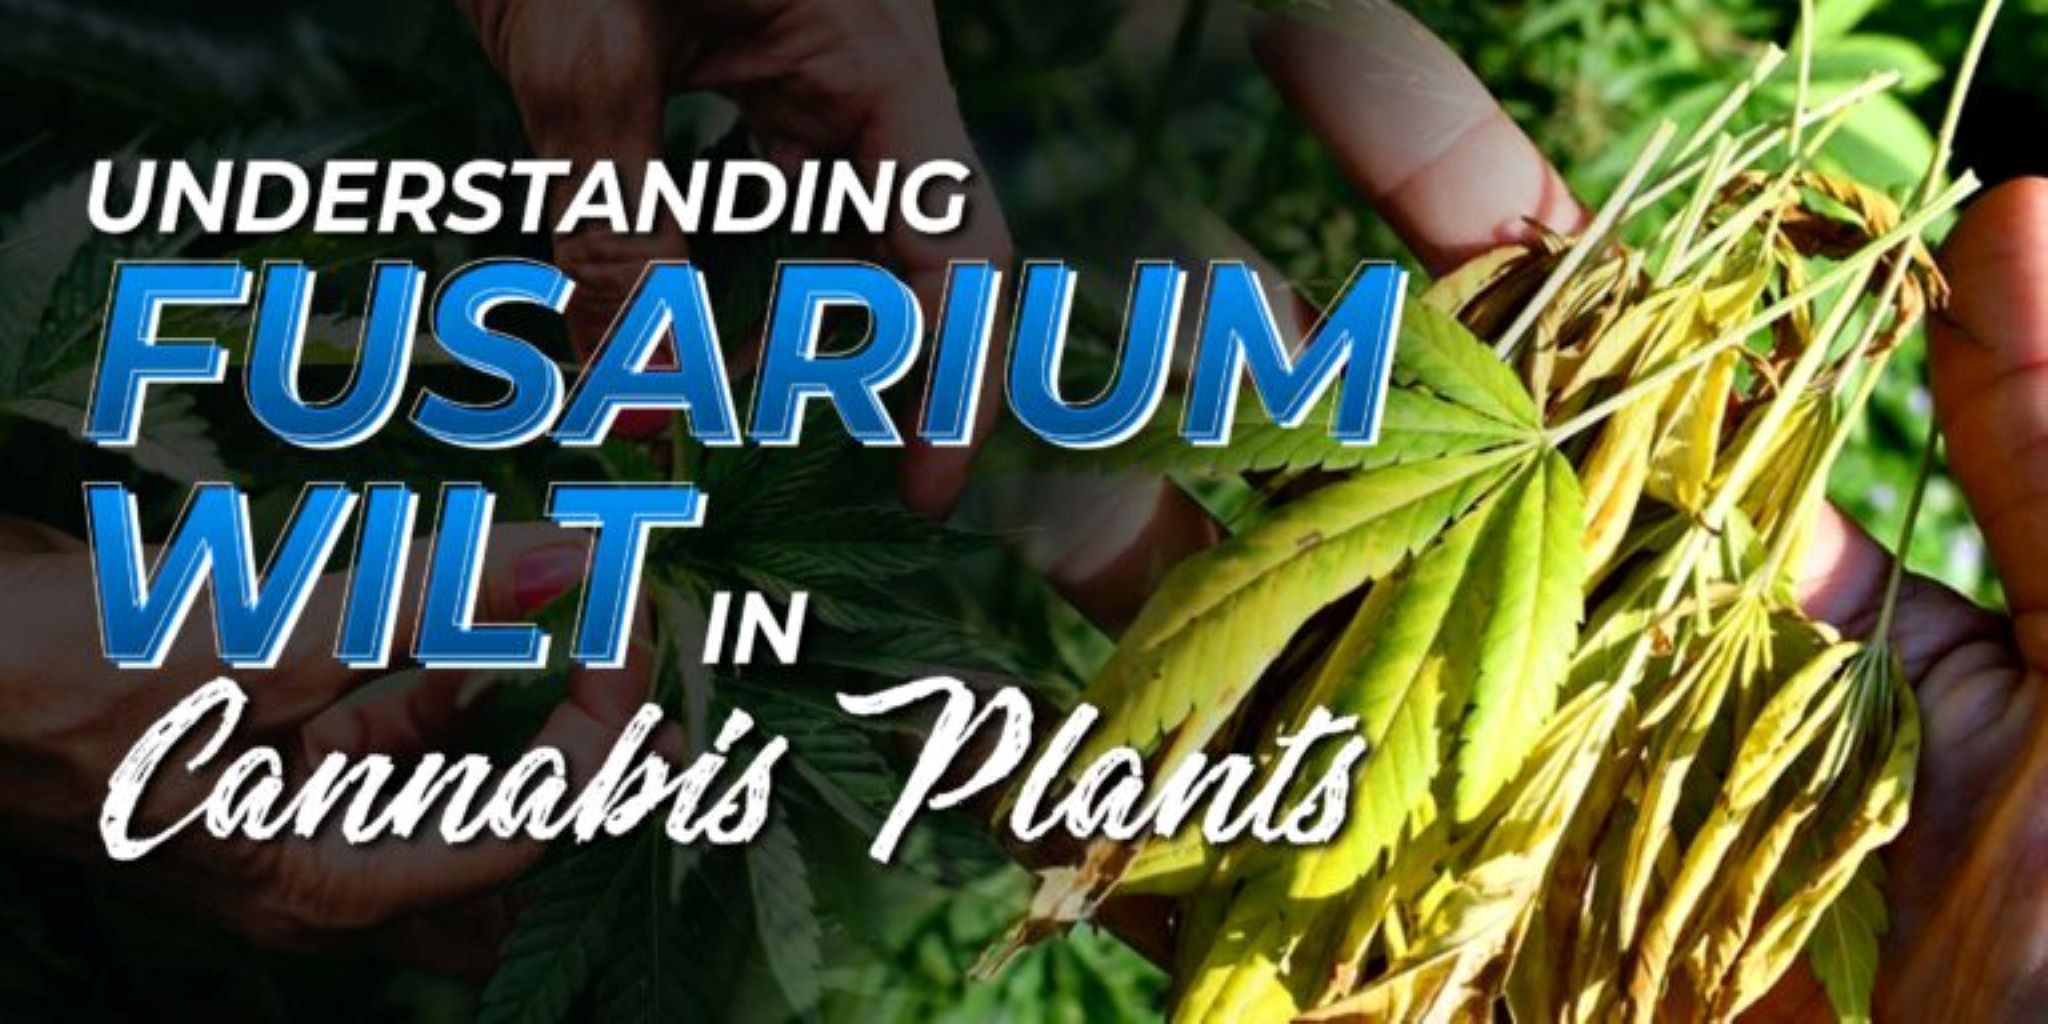
Identifying Fusarium in Cannabis

Early detection of fusarium infection is imperative for effective management. Common indicators include leaf discoloration, stem staining, and root necrosis. Advanced stages may manifest as severe stem necrosis and pronounced wilting, necessitating prompt intervention to mitigate further spread.

Understanding Fusarium’s Life Cycle

Fusarium’s life cycle encompasses diverse spore types, including micro macronidia, and chlamydospores, each exhibiting varying degrees of resilience and longevity. Optimal conditions for proliferation are facilitated by temperatures ranging from 10 to 30°C, with indoor cultivation settings providing an ideal breeding ground.

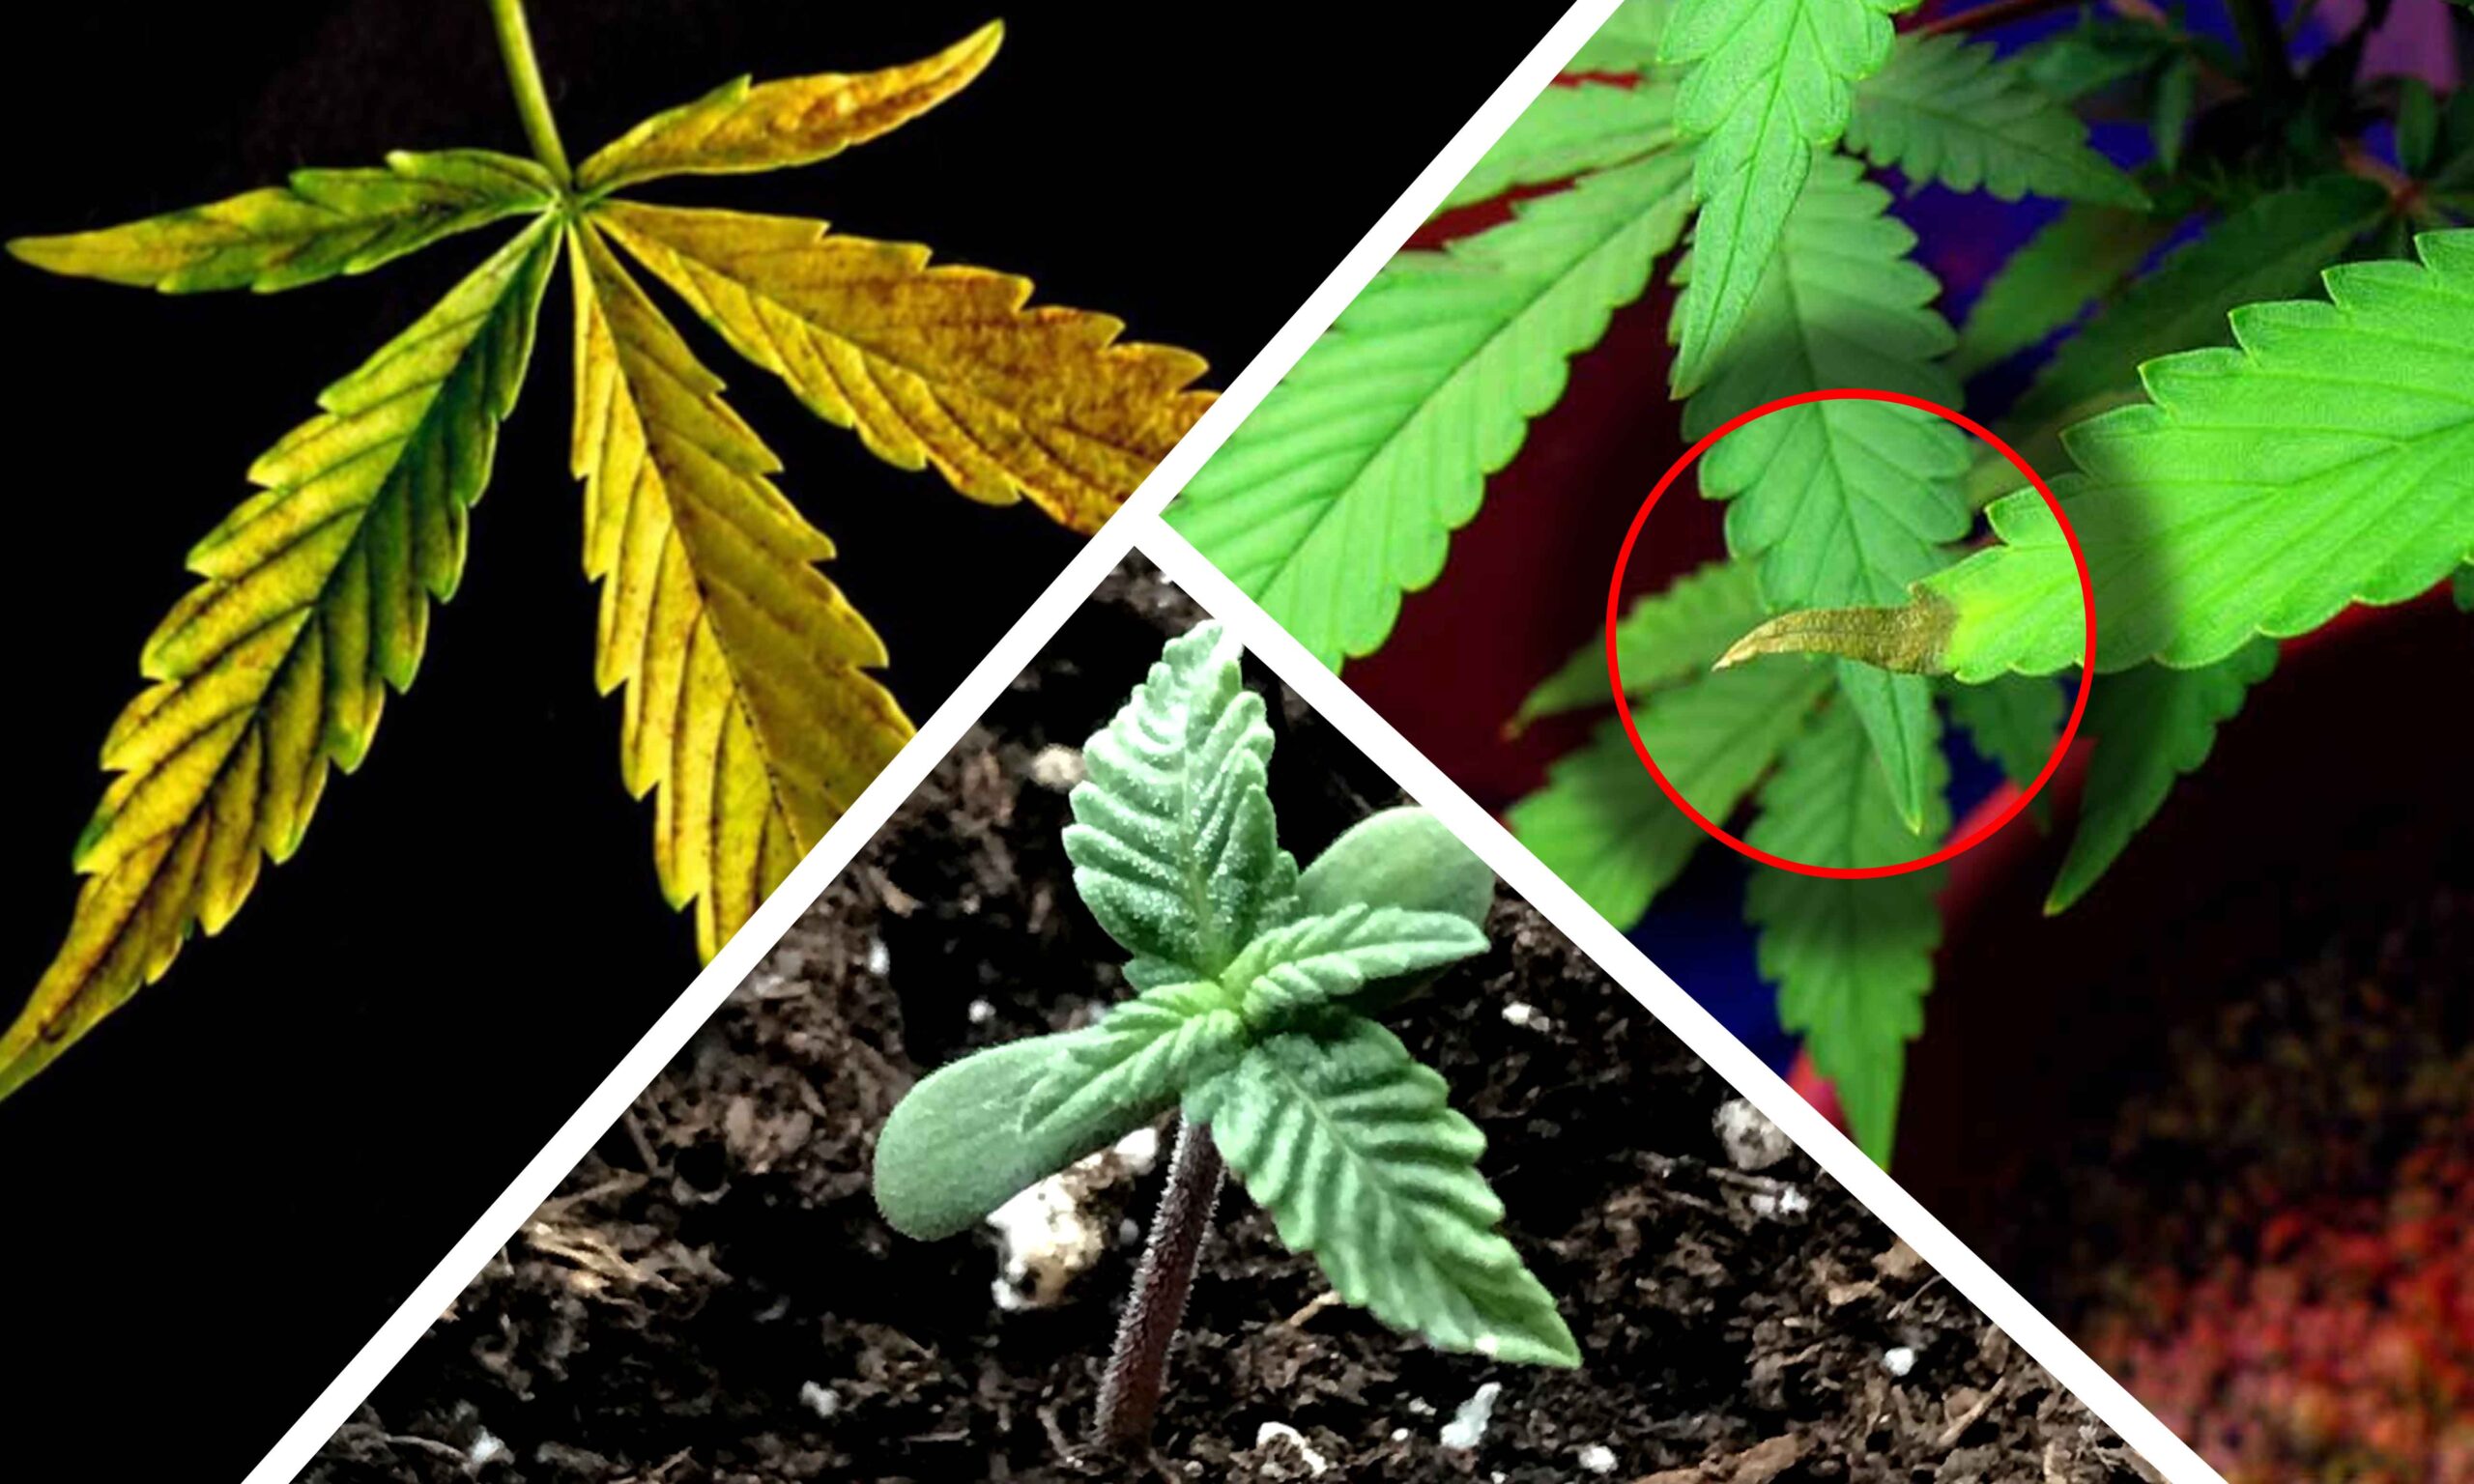
Impacts of Fusarium Damage

Fusarium-induced damage encompasses a spectrum of physiological disruptions, including root rot, chlorosis, and stem necrosis, ultimately culminating in plant mortality. Once infected, affected plants exhibit irreversible symptoms, necessitating stringent preventive measures to mitigate its spread.

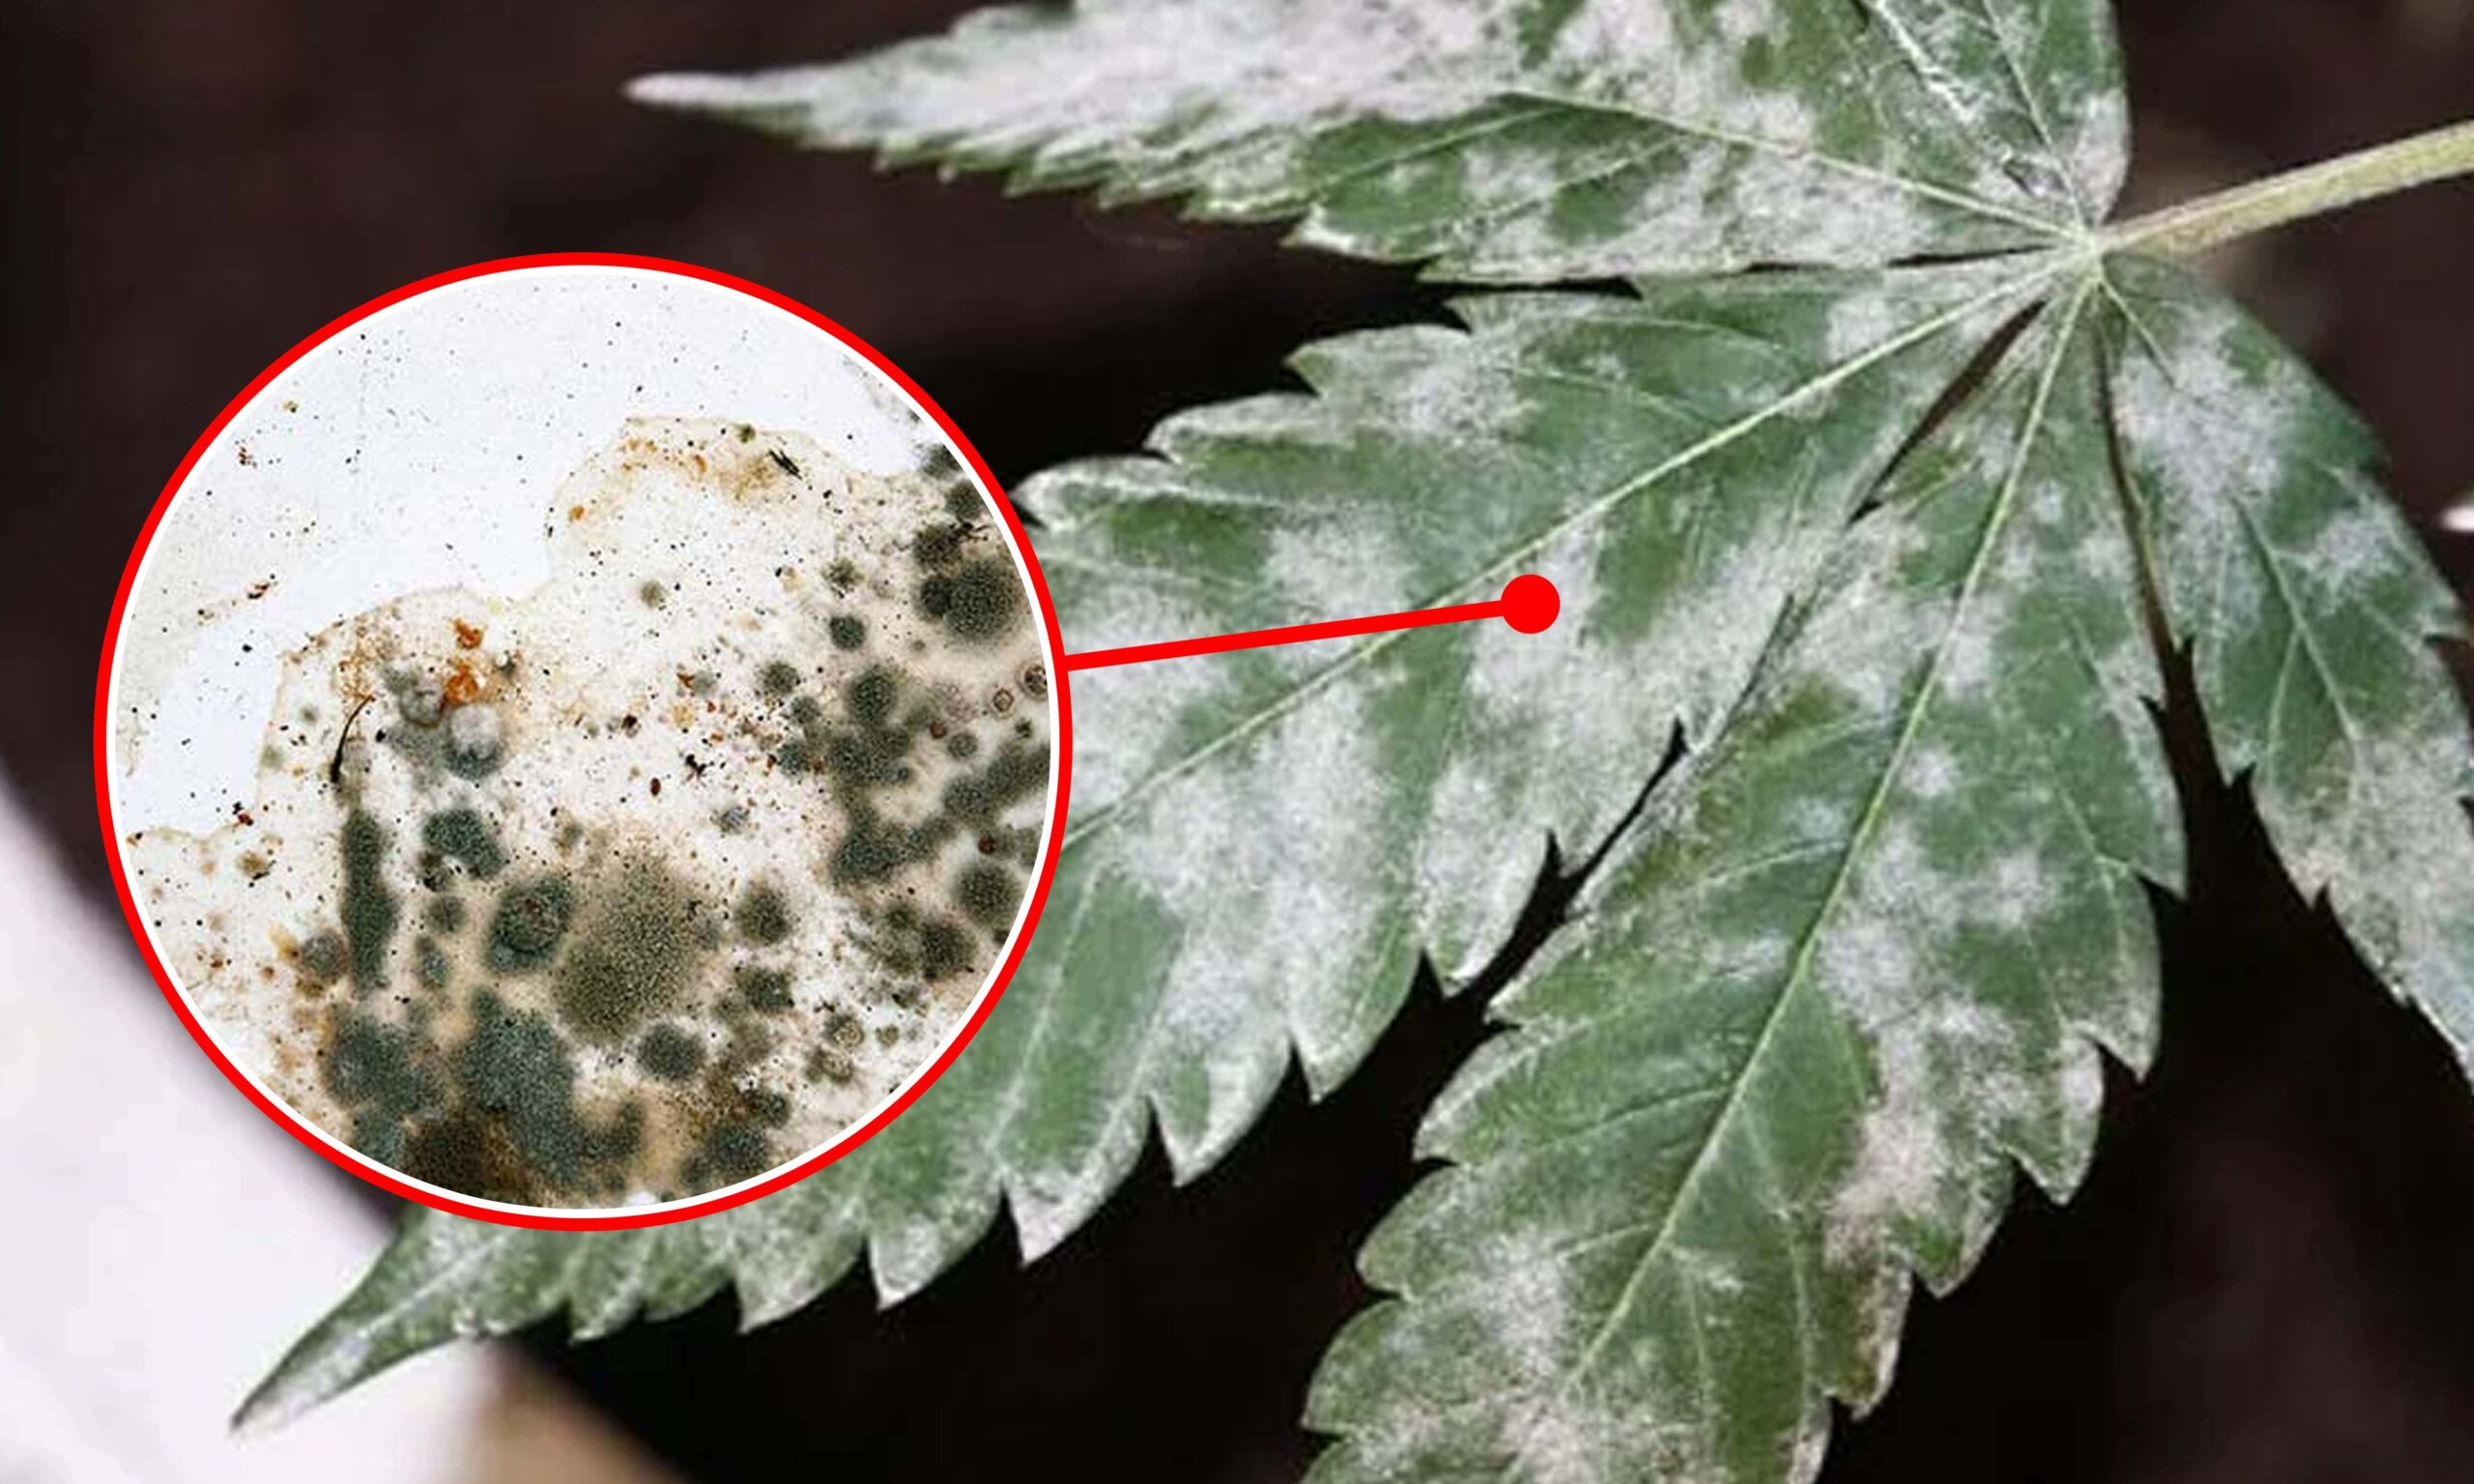
Prevention and Management Strategies

Effective prevention of fusarium wilt entails the implementation of meticulous sanitation practices, encompassing substrate sterilization, personal hygiene, and the judicious use of organic antagonists such as Trichoderma. Additionally, incorporating stress-alleviating products and natural enemies of fusarium further bolsters plant resilience against infections.

Harnessing Trichoderma: Fusarium’s Nemesis

Trichoderma emerges as a formidable ally in combating fusarium wilt, exerting multifaceted effects ranging from substrate competition to antibiotic production and root stimulation. Its eco-friendly nature and compatibility with organic cultivation methods underscore its indispensability in cannabis cultivation.

Conclusion

In summary, a comprehensive understanding of fusarium wilt is essential for safeguarding cannabis crops against its deleterious effects. By adopting proactive preventive measures and leveraging biological controls such as Trichoderma, growers can mitigate the risk of fusarium infestation and ensure optimal yields.

FAQs

Q: Can fusarium wilt spread from one plant to another?
A: Yes, fusarium wilt can spread from infected plants to healthy ones through soil, water, and contaminated gardening tools.

Q: How can I prevent fusarium wilt in my cannabis plants?
A: To prevent fusarium wilt, maintain clean growing environments, avoid overwatering, use disease-resistant plant varieties, and employ beneficial microorganisms like Trichoderma.

Q: Can I use chemical fungicides to treat fusarium wilt?
A: Chemical fungicides may not be effective against fusarium wilt and can harm beneficial soil microbes. Instead, opt for organic alternatives like Trichoderma and cultural practices to manage the disease.

Q: Can fusarium wilt affect indoor and outdoor cannabis growth?
A: Yes, fusarium wilt can affect cannabis plants in indoor, outdoor, and greenhouse environments, as it thrives in various growing conditions and substrates.

Q: Are there any early warning signs of fusarium wilt in cannabis plants?
A: Yes, early signs of fusarium wilt include wilting leaves, discoloration, and dark staining on stems or roots. Promptly address these symptoms to prevent further spread of the disease.

Strains From The 80s: A Nostalgic Journey

1980s were a time of profound cultural transformation, marked by iconic fashion, music, and movies. Alongside these trends, a unique facet of ’80s culture that often goes overlooked is the world of cannabis. In this in-depth exploration, we’ll embark on a journey back in time to delve even deeper into the weed strains from the 80s. We’ll shed light on what weed looked like, tasted like, and how it was consumed during this era. Additionally, we’ll discuss the cultural impact and the evolution of the weed scene throughout this iconic decade.

The 80s Weed Scene

A Walk Down Memory Lane

The ’80s brought us more than just neon legwarmers and big hair; it was also a significant period for cannabis enthusiasts. The weed scene in the ’80s was a kaleidoscope of variety, with various strains emerging and gaining popularity. It’s essential to understand the backdrop of this era, with its socio-political changes and shifting attitudes toward recreational drug use, which influenced the weed culture significantly.

Iconic Strains

1. Acapulco Gold

Strains From The 80s

One of the most legendary weed from the 80s was Acapulco Gold. This strain was named after the famous resort city in Mexico, and it gained notoriety for its striking golden hue. Beyond its appearance, Acapulco Gold was celebrated for its unique flavor profile, combining earthy and fruity notes. Its effects were equally captivating, providing users with a euphoric and creative high. Acapulco Gold became a staple of ’80s cannabis culture, synonymous with the era’s laid-back vibes.

2. Thai Sticks

Strains From The 80s

Another iconic ’80s strain was Thai Sticks, originating from Southeast Asia. These were large, seedless buds skewered on sticks, often smuggled into the United States. Thai Sticks were renowned for their exotic appeal, both in terms of appearance and flavor. The buds were tightly packed and coated with a layer of potent Thai cannabis oil. When smoked, these sticks unleashed a complex flavor profile, characterized by sweet, spicy, and herbal notes. The high was equally exceptional, offering a cerebral and uplifting experience. Thai Sticks were a symbol of the ’80s underground cannabis culture, coveted by enthusiasts seeking a taste of the exotic.

3. Maui Wowie

Strains From The 80s

Hailing from the Hawaiian islands, Maui Wowie was a tropical paradise in a joint. Its pineapple flavor and energizing effects made it a top choice for those seeking a creative boost. Maui Wowie was celebrated not only for its taste but also for its distinctive appearance. The buds had a bright green color and were often flecked with orange hairs, mirroring the vibrant landscapes of Hawaii. The high from Maui Wowie was known for its clarity and motivation, making it a perfect companion for ’80s adventures.

Culture of Weed in the 80s

Rolling Joints and Parties

Rolling joints was an art form in the ’80s, and ’80s parties were incomplete without these hand-rolled delights. The act of rolling a joint was a social ritual, bringing people together in a shared experience of crafting the perfect smoke. The joints themselves were often larger than what we see today, reflecting the spirit of abundance and freedom that characterized the era.

The Stoner Stereotype

The ’80s saw the emergence of the stereotypical stoner, often depicted in movies and TV shows as laid-back individuals with a penchant for tie-dye shirts and munchies. While not entirely accurate, this image remains a part of pop culture. It’s essential to recognize that the ’80s stoner stereotype was a reflection of the broader counterculture movement, which embraced alternative lifestyles and challenged conventional norms.

Evolution of 1980s Weed

Potency and Purity

Weed in the ’80s was potent but lacked the refinement we see today. Growers focused on cultivating strains with high THC content, but the growing methods were less sophisticated. The cultivation practices of the ’80s often involved outdoor cultivation, with minimal control over environmental factors. This resulted in variations in potency and quality from one batch to another.

Smoking Tools

Bongs, pipes, and vaporizers were not as prevalent as they are today. Most ’80s smokers stuck to traditional methods like rolling joints or using simple pipes. While some enthusiasts experimented with homemade bongs and water pipes, the culture of sophisticated smoking accessories that we see today had yet to fully emerge.

What Did Weed Look Like in the 80s?

Earthy Colors

The aesthetics of weed in the ’80s were distinctly earthy. Buds were often green with hints of brown and orange, a far cry from the vibrant strains we see today. The color palette of ’80s weed was a reflection of the outdoor cultivation methods prevalent during the era. These strains had a rustic charm, evoking a sense of connection to the natural world.

Packaging

Weed was typically sold in small plastic bags or wrapped in aluminum foil, a far cry from the sleek packaging seen in legal dispensaries today. Packaging in the ’80s was functional, designed primarily to keep the product fresh and discreet. Branding and marketing, as we know them today, were not a significant part of the ’80s weed experience.

Conclusion

The ’80s were a fascinating era for weed enthusiasts, marked by iconic strains and a unique culture. While the weed scene has evolved significantly since then, the memories of those legendary ’80s strains continue to inspire modern cannabis enthusiasts. Exploring the cannabis landscape of the ’80s provides valuable insights into the evolution of cannabis culture and its enduring impact on today’s weed scene.

FAQs

1. Were ’80s weed strains as potent as modern strains?
The potency of ’80s weed strains was respectable, but modern cultivation techniques have led to even higher THC levels in some strains. The ’80s strains had their own unique charm and effects that are cherished by enthusiasts.

2. Were there any famous celebrity stoners in the ’80s?
Yes, several celebrities in the ’80s openly embraced cannabis, including Cheech and Chong, Willie Nelson, and Snoop Dogg. They played a significant role in shaping the image of cannabis culture during that era.

3. Did weed have the same legal status in the ’80s as it does today?
Cannabis was still largely illegal in most parts of the world during the ’80s, but attitudes were gradually shifting towards legalization. The legal landscape has evolved considerably since then, with many regions now allowing for medical and recreational use.

4. How did people typically consume weed in the ’80s?
Rolling joints and using simple pipes were the most common methods of consumption in the ’80s. Smoking was a communal activity, often shared among friends at gatherings and parties.

5. Are any ’80s weed strains still available today?
While some strains have become rare, a few classic ’80s strains can still be found in select dispensaries, catering to nostalgic cannabis enthusiasts. These strains are a testament to the enduring appeal of ’80s weed culture.

How To Grow Bonsai Weed

In the deep history of cannabis cultivation, there exists a captivating and creative practice that combines the art of cultivation with the beauty of nature: bonsai. Bonsai, which originated in Japan, involves the cultivation of miniature trees in pots or containers. While bonsai is traditionally associated with trees like pines and maples, there is a rising trend that has cannabis enthusiasts and botanists alike intrigued – the art of bonsai weed.

Understanding the Bonsai Concept

What is Bonsai?

Bonsai, in its essence, is the art of cultivating miniature trees. It is an ancient practice rooted in Japanese culture, known for its meticulous care, patience, and artistic expression. Bonsai translates to “tray planting,” and it encapsulates the essence of bringing the beauty of nature into a compact and carefully crafted form. The history of bonsai dates back over a thousand years, with its roots firmly embedded in Chinese and Japanese traditions. It symbolizes a deep connection with the natural world, capturing the essence of a mature tree in a diminutive form.

Bonsai Philosophy

The philosophy behind bonsai emphasizes harmony, balance, and the representation of nature in miniature form. It’s a blend of horticulture and artistry, where each tree tells a unique story. Practitioners of bonsai strive to create living works of art that reflect the tranquility of nature. The choice of pot, the arrangement of branches, and the shaping of the tree all contribute to the overall aesthetics and emotional resonance of the bonsai. Bonsai artists often find inspiration in the landscapes they observe, seeking to replicate the rugged beauty of ancient trees clinging to cliffs or the elegance of a solitary tree in a field.

Bonsai Styles

Bonsai offers various styles, each with its own character and appeal. These styles include:

  1. Formal Upright (Chokkan): The tree grows straight and upright, reflecting stability and strength.
  2. Informal Upright (Moyogi): This style allows for a more natural and flowing appearance, with subtle curves in the trunk.
  3. Slanting (Shakan): The tree has a noticeable slant, suggesting exposure to strong winds or other environmental factors.
  4. Cascade (Kengai): In this style, the tree cascades downward like a waterfall, creating a sense of drama and movement.
  5. Semi-Cascade (Han-Kengai): Similar to the cascade style but with a less pronounced downward flow.


Bonsai Meets Cannabis

The Bonsai Weed Revolution

In recent years, the cannabis community has embraced the art of bonsai to create captivating and compact cannabis plants. These miniature marvels not only showcase the plant’s beauty but also provide practical benefits for growers. Bonsai weed, also known as cannabis bonsai, has gained popularity for its blend of horticultural expertise and artistic expression.

Benefits of Bonsai Cannabis

  • Control: Bonsai cannabis allows growers to have precise control over the plant’s growth, ensuring it remains small and manageable. By carefully trimming and shaping the cannabis plant, you can achieve a compact size that suits your space and preferences.
  • Stealthy Growth: The discreet nature of bonsai marijuana plant makes it a perfect choice for growers with limited space or those who want to keep their cultivation efforts under the radar. These miniature plants can be easily concealed on a windowsill or balcony, away from prying eyes.
  • Aesthetic Appeal: Bonsai cannabis plants are a sight to behold, with their intricate branches and lush foliage. They add a touch of natural beauty to any environment, whether it’s your living room or a dedicated grow space.


How to Create Your Bonsai Cannabis Masterpiece

Selecting the Right Strain

Begin by choosing a cannabis strain suitable for bonsai cultivation. Indica-dominant strains are often preferred due to their compact growth patterns. However, some sativa strains with manageable heights can also be used. Consider factors like the plant’s growth characteristics, size, and overall appearance when making your selection.

Pot and Soil

Select a small pot with excellent drainage. Bonsai cannabis plants require pots that are proportional to their size, providing just enough
space for their roots to grow. Well-draining soil is essential to prevent waterlogged roots and ensure proper aeration.

Pruning and Training

Regular pruning and training are essential to maintain the desired shape and size of your bonsai cannabis plant. Use techniques like topping (removing the apical bud to encourage lateral growth), LST (Low-Stress Training) to bend and shape branches, and defoliation to thin out excess foliage. These practices will help create a well-balanced and visually appealing bonsai.

Light and Nutrients

Provide adequate light and nutrients to ensure vigorous growth. Bonsai cannabis plants thrive under full-spectrum LED grow lights, which can be adjusted to the ideal height above the plant. Use a balanced and gentle fertilizer suitable for cannabis during the growing season. Monitor the plant’s nutrient needs closely to prevent overfeeding.

Tips for Success

Patience is Key

Bonsai cannabis requires time and patience. It may take several months or even years to achieve the desired miniature look. Be prepared for a long-term commitment to the art of cultivation.

Precision Matters

Be precise in your pruning and training efforts. Each cut and bend should contribute to the overall aesthetics of your bonsai cannabis plant. Take your time to study the plant’s growth patterns and adapt your techniques accordingly.

Regular Maintenance

Consistent care is crucial for the health of your bonsai cannabis. Water the plant when the top inch of soil feels dry, but avoid overwatering. Inspect the plant regularly for signs of pests or diseases and address any issues promptly. Keep the environment clean and well-ventilated to promote healthy growth.

Conclusion

Incorporating cannabis into the world of bonsai is a testament to the versatility and adaptability of this remarkable plant. Whether you’re a cannabis enthusiast or a horticultural artist, creating a bonsai cannabis plant can be a rewarding and visually stunning endeavor. It combines the ancient art of bonsai with the contemporary fascination with cannabis, resulting in miniature masterpieces that captivate the senses.

If you’re ready to embark on your own bonsai cannabis journey, remember to be patient, precise, and dedicated to the art form. With time and care, you can craft a miniature cannabis masterpiece that’s both aesthetically pleasing and functional, bringing the beauty of nature and the allure of cannabis into harmony.

Frequently Asked Questions (FAQs)

1. Is it legal to grow bonsai cannabis plants?
Yes, but it depends on your location. Check your local laws and regulations regarding cannabis cultivation. Always adhere to legal guidelines.

2. Can I use any cannabis strain for bonsai cultivation?
While you can use various strains, indica-dominant varieties are often preferred for their compact growth. Select a strain that suits your space and preferences.

3. How long does it take to create a bonsai cannabis plant?
It can take several months to years, depending on your goals and the plant’s growth rate. Bonsai is a long-term endeavor that requires dedication and patience.

4. Do bonsai cannabis plants produce usable buds?
Yes, bonsai cannabis plants can produce small quantities of usable buds, but they are primarily cultivated for their aesthetics. Don’t expect high yields; focus on the artistry.

5. Is bonsai cannabis suitable for beginners?
Bonsai cannabis requires some horticultural skill, so it’s best suited for intermediate to advanced growers. Beginners can start with simpler horticultural projects before venturing into bonsai.

How to Measure Cannabis Soil pH Levels for Optimal Growth

For growers looking to get better yields and healthier cannabis plants, it’s important to understand and control the cannabis soil pH levels. pH is a measure of how acidic or alkaline your soil is, and it affects how well your plants can use nutrients and how well the helpful microorganisms in your soil can thrive. When the weed soil pH is just right, your cannabis plants can absorb nutrients effectively, leading to strong growth and good harvests. This guide will show you how to check the soil pH for cannabis, including different methods, tools you can use, and how often you should test your soil. By learning how to manage soil pH, you’ll set yourself up for a successful and rewarding growing experience.

Understanding pH for Cannabis in Soil

Understanding pH for Cannabis in Soil

The pH level of soil affects how well plants can use nutrients and maintain a balance of water inside their cells. Osmosis, which is the movement of water across cell membranes driven by differences in concentration (like nutrients, salts, and pH), is important here. When pH levels are off, it can change how nutrients are available to plants, which then affects the balance of water inside plant cells. If the pH is too high or too low, some nutrients become harder for plants to access, which can affect how much water and nutrients the plant can take in, and ultimately, how healthy it is. pH also affects proteins in cell membranes, like aquaporins, which are needed for water transport. This shows how pH is closely tied to how plants regulate water balance. So, controlling pH in the growing medium is crucial for plants to grow their best.

Soil pH for Cannabis: What Does It Do?

Soil pH for Cannabis What Does It Do

The pH scale goes from 0 to 14, with 7 being neutral. Anything below 7 is acidic, and anything above is alkaline (or basic). For instance, tap water is usually pH neutral, ranging from 6.5 to 9.5. Soil pH is crucial for your cannabis plants to access and use nutrients in the soil. For soil-based cannabis growing, the ideal pH is slightly acidic, between 6.0 and 7.0. In hydroponic or soilless growing, the best pH range is 5.5 to 6.5.

Keeping pH within these ranges helps cannabis plants maintain water pressure in their cells, which keeps them upright and allows them to open and close their stomata (small pores on leaves) to absorb macro and micronutrients effectively. If the pH goes outside these ranges, nutrient availability can be affected, making them less accessible to the plants. This can lead to nutrient deficiencies, stunted growth, poor plant health, and lower yields.

Techniques for Measuring pH Levels in Cannabis Soil

Soil pH can fluctuate, so it’s important to monitor it regularly. Some fluctuations are normal and won’t harm your plants, but if the pH gets too high or too low, your plants can suffer. Luckily, there are several ways to measure the pH in your cannabis soil. Each method has its pros and cons, and the best choice depends on your budget, how accurate you need to be, and what you prefer.

pH Test Strips

The litmus paper method is a simple and affordable way to test soil pH. You insert a strip of specially treated paper into a mix of soil and water. The paper changes color based on the pH level, and you match this color to a chart to estimate the pH value. While pH test strips are budget-friendly, they’re not as accurate as more advanced methods.

pH Meters

A pH meter gives you a precise, digital measurement of soil pH. It has a probe that you insert directly into the soil or a soil-water mix. While pH meters are pricier than pH strips, they’re more accurate and convenient, so many growers prefer them. Some pH meters even have extra features like backlit displays and waterproofing, which make them easier to use.

Soil pH Testing Kits

Soil pH testing kits offer a more thorough way to measure pH. They usually include a pH-reactive solution and a color chart. When you mix the solution with a soil sample, it changes color based on the soil’s pH. You then compare this color change to the chart to estimate the soil’s pH level. These kits are generally more accurate than pH strips and less expensive than pH meters.

Correcting pH Imbalances

After you’ve measured the pH, you can correct imbalances. There are different pH adjusters available depending on whether the pH is too low or too high.

If pH Is Too High

Sulfur: Adding elemental sulfur to the soil is a common way to lower pH levels. When sulfur is mixed into the soil, it slowly turns into sulfuric acid, which helps make the soil more acidic.

Peat Moss and Organic Matter: Mixing peat moss or organic matter into the soil can lower pH levels. These materials are naturally acidic and can help adjust the soil to a more suitable pH range for cannabis.

pH-Adjusting Fertilizers: Certain fertilizers are made to lower soil pH. You can find products with ammonium-based nitrogen, which releases acidic ammonium ions as the plant uses the nitrogen.

If pH Is Too Low

Agricultural Lime: Agricultural lime, also called garden lime, dolomite lime, or calcium carbonate, is commonly used to raise soil pH. It works by neutralizing acidity, releasing calcium, and reducing the concentration of hydrogen ions in the soil.

Wood Ash: Wood ash can raise pH levels naturally because it contains potassium and other alkaline compounds. However, it should be used carefully because too much can create a nutrient imbalance.

Baking Soda: Baking soda is alkaline and can help reduce slightly acidic soil.
pH-Adjusting Fertilizers: Some fertilizers are made to increase soil pH. You can find products with nitrate-based nitrogen, which releases basic nitrate ions as the plant uses the nitrogen.

When to Test Your Soil’s pH

Consistently monitoring soil pH is vital for successful cannabis growing. It’s usually recommended to check soil pH at least once a week. If your plants show signs of nutrient deficiency or other problems, you might need to test more often.
Remember, activities like watering, fertilizing, and natural processes can change soil pH. Regular testing helps you catch these changes early so you can fix them before your plants are harmed.

Conclusion

Knowing how to measure and control soil pH is crucial for successful cannabis growing. With the right techniques and equipment, you can maintain the ideal pH for your plants, leading to healthier growth and better yields. Regular pH testing helps you catch any issues early, so you can fix them before your plants are harmed. With the right knowledge and tools, you can manage your cannabis soil’s pH levels confidently, ensuring a thriving, productive crop.

FAQs

Q: How often should I water my cannabis plants?

A: Water your cannabis plants when the top inch of soil feels dry to the touch. Overwatering can lead to root rot, so it’s important to let the soil dry out between waterings.

Q: Can I use regular tap water to water my cannabis plants?

A: Yes, you can use tap water, but it’s important to check the pH of the water first. Cannabis plants prefer slightly acidic water, so if your tap water is too alkaline, you may need to adjust the pH.

Q: How can I prevent mold from growing on my cannabis plants?

A: To prevent mold, ensure good air circulation around your plants and avoid overcrowding them. Also, make sure to remove any dead or decaying plant matter from the soil.

Q: What is the best temperature for growing cannabis plants?

A: Cannabis plants thrive in temperatures between 70-85°F (21-29°C) during the day and slightly cooler temperatures at night. Avoid extreme temperature fluctuations, as this can stress the plants.

Q: How can I tell if my cannabis plants are ready to harvest?

A: Look for signs like the development of resin glands on the flowers and the changing color of the pistils (hairs). You can also use a magnifying glass to examine the trichomes (tiny crystals) on the flowers. When they turn cloudy or amber, it’s time to harvest.

Grow Room Too Cold: What To Do?


In indoor gardening, maintaining an optimal temperature within your grow tent is crucial for the health and productivity of your plants that is why grow room too cold is not acceptable. Cold temperatures can impede growth and even lead to irreversible damage. Here, we present a guide on how to effectively manage and mitigate cold temperatures within your grow tent, ensuring optimal conditions for plant growth and vitality.

Ventilation from a Lung Room

Indoor gardeners often overlook the significance of proper ventilation in maintaining stable grow tent temperatures. Ventilating your grow tent from a lung room, such as a crawlspace, attic, or another interior space, provides a consistent source of air that is typically warmer than outdoor air during colder seasons. By drawing air from a lung room, growers can moderate the temperature inside the tent, creating a more favorable environment for plant growth. Additionally, utilizing a duct system to facilitate airflow can further optimize temperature control, allowing growers to adjust the intake of warmer air as needed to counteract cold spells.

Fan Speed Control

Achieving the right balance of airflow within the grow tent is essential for temperature regulation. Intake and exhaust fans play a critical role in circulating air and maintaining optimal conditions for plant growth. However, excessive airflow can lead to temperature fluctuations, particularly during colder periods. By dimming intake and exhaust fans with a fan speed controller, growers can fine-tune airflow to achieve the desired temperature range without compromising air exchange. It’s important to note that while thermostat control may seem like a convenient solution, it can inadvertently disrupt airflow patterns and hinder CO2 and humidity levels. Therefore, manual adjustment using a fan speed controller offers greater flexibility in temperature management, ensuring consistent conditions for plant health and vitality.

De-glassing HID Lights

High-intensity discharge (HID) lights are a popular choice among indoor growers due to their efficiency and effectiveness in promoting plant growth. However, these lights can also contribute to heat buildup within the grow tent, especially when used in conjunction with air-cooling systems. De-glassing the hoods of HID lights is a simple yet effective strategy for dissipating excess heat and optimizing light distribution. By removing the glass coverings, growers allow for better heat dissipation, reducing the risk of overheating and creating a more uniform light spread. Additionally, de-glassing can increase the available light intensity by 10-15%, providing plants with the necessary energy for robust growth and development.

Air Diffuser Creation

Maintaining uniform airflow within the grow tent is crucial for preventing temperature differentials that can stress or damage plants. One effective method for achieving this is by creating an air diffuser to distribute incoming air more evenly. A DIY air diffuser can be easily constructed using flexible ducting, which is readily available at hardware stores. By running a length of ducting around the perimeter of the grow tent and cutting small slits at regular intervals, growers can ensure that air is dispersed evenly throughout the space, minimizing the risk of temperature shocks to plants near the intake vent. This simple yet practical solution promotes consistent growth conditions, allowing plants to thrive in an optimal environment.

Additional Lighting

While conventional wisdom may suggest using space heaters to combat cold temperatures in the grow tent, this approach can be both inefficient and potentially hazardous. Instead, growers can leverage the power of additional lighting to not only provide supplemental light but also generate heat. High-intensity discharge (HID) or T5 fixtures are ideal for this purpose, as they emit both light and heat, effectively raising the temperature within the grow tent. By strategically placing additional light fixtures, growers can create a balanced lighting environment that promotes healthy plant growth while mitigating the effects of cold temperatures. This dual-purpose solution not only optimizes grow tent conditions but also reduces energy consumption and minimizes safety risks associated with space heaters.

In conclusion, proactive temperature management is essential for maximizing indoor gardening success. By implementing the strategies outlined above, growers can effectively regulate grow tent temperatures, creating an optimal environment for robust plant growth and development. From ventilation to lighting optimization, each technique plays a crucial role in maintaining stable conditions within the grow tent, ensuring that plants thrive regardless of external temperature fluctuations. By prioritizing temperature control and adopting innovative solutions, indoor gardeners can achieve superior results and cultivate healthy, vibrant plants year-round.

FAQs

Q: Can I use a regular household fan to regulate the temperature in my grow tent?
A: While a household fan can help with air circulation, it may not effectively regulate temperature. It’s best to use fans specifically designed for grow tents, as they are equipped to handle the unique environment and airflow requirements.

Q: Will adding more plants to my grow tent help raise the temperature?
A: Adding more plants may slightly increase the temperature due to their collective respiration, but it’s not a reliable method for significant temperature control. It’s better to focus on implementing targeted temperature management strategies like ventilation and lighting adjustments.

Q: Can I use a portable heater to warm up my grow tent during cold weather?
A: Portable heaters can be risky in a grow tent due to safety concerns such as fire hazards and uneven heat distribution. It’s recommended to avoid using space heaters and instead opt for lighting fixtures that emit both light and heat or other temperature control methods outlined in the article.

Q: How often should I adjust the fan speed in my grow tent?
A: The frequency of fan speed adjustments depends on factors like ambient temperature, humidity levels, and plant growth stage. Monitor the temperature regularly and adjust the fan speed as needed to maintain optimal conditions for plant growth.

Q: Is it necessary to use a thermostat to control the temperature in my grow tent?
A: While thermostats can automate temperature control, they may not always provide the most effective solution, especially in grow tent environments where maintaining optimal CO2 and humidity levels is crucial. Manual adjustment using a fan speed controller offers greater flexibility and control over airflow and temperature regulation.

The Secrets to Crafting the Perfect Cannafudge


Welcome to the delightful world of cannafudge crafting, where sweetness meets sophistication, and cannabis infusion adds a unique twist to traditional fudge recipes. Whether you’re a seasoned baker or a novice enthusiast, this guide will take you on a flavorful journey, unveiling the secrets to creating the perfect cannafudge every time.

Getting Started – Ingredients and Equipment

Key Ingredients for Cannafudge Bliss

Crafting the perfect cannafudge begins with selecting the finest ingredients. Here’s what you’ll need:

  • Cannabis-infused butter: The star ingredient that adds a touch of magic to your fudge.
  • Chocolate: Opt for high-quality chocolate to achieve a rich and decadent flavor.
  • Sweetened condensed milk: Provides the creamy texture that makes fudge irresistible.
  • Vanilla extract: Enhances the overall flavor profile with its aromatic essence.
  • Optional add-ins: Get creative with nuts, dried fruits, or sea salt to customize your fudge.


Essential Equipment

Ensure you have the following tools on hand:

  • Heavy-bottomed saucepan: Ideal for melting ingredients evenly without burning.
  • Whisk or spatula: Essential for stirring and combining ingredients smoothly.
  • Baking dish or pan: Choose a suitable size for shaping and setting your fudge.
  • Parchment paper: Prevents the fudge from sticking to the pan, allowing for easy removal.


Mastering the Art – Step-by-Step Guide with Proportions

Preparing the Cannabis-Infused Butter

Start by infusing butter with cannabis using your preferred method. A common ratio is 1 ounce of cannabis to 1 pound of butter. Decarboxylate the cannabis by baking it in the oven at 240°F for 30-40 minutes. Then, combine the decarbed cannabis with melted butter in a saucepan over low heat. Simmer for 2-3 hours, stirring occasionally.

Melting the Chocolate

For every 12 ounces of chocolate, you’ll need about 1 cup of cannabis-infused butter. Melt the chocolate in a heavy-bottomed saucepan over low heat, stirring continuously until smooth.

Combining Ingredients

Once the chocolate is melted, add in 1 can (14 ounces) of sweetened condensed milk and the prepared cannabis-infused butter. Stir gently until all ingredients are thoroughly combined.

Adding Flavor Enhancements

For every batch of fudge, add 1 teaspoon of vanilla extract for a delightful aroma. If desired, incorporate optional add-ins such as 1/2 cup of chopped nuts or dried fruits.

Pouring and Setting

Transfer the fudge mixture into a prepared baking dish lined with parchment paper, spreading it evenly with a spatula. Allow the fudge to cool and set in the refrigerator for at least two hours or until firm.

Savoring the Sweet Rewards – Serving and Storage

Once set, remove the fudge from the refrigerator and slice it into decadent squares or bars. Serve chilled for a refreshing treat, or let it come to room temperature for a softer texture.

Store any leftover cannafudge in an airtight container in the refrigerator for up to two weeks, ensuring each delightful bite retains its freshness.

FAQs (Frequently Asked Questions)

1. How potent is cannafudge compared to other edibles?
Cannafudge potency can vary depending on factors such as the potency of your cannabis-infused butter and the amount used in the recipe. It’s advisable to start with a small serving and wait to gauge its effects before consuming more.

2. Can I use store-bought cannabis butter for this recipe?
While you can use store-bought cannabis butter, homemade infusion allows for greater control over potency and flavor. Experiment with different strains and infusion methods to tailor your cannabutter to suit your preferences.

3. Is cannafudge suitable for individuals with dietary restrictions?
Cannafudge can be adapted to suit various dietary preferences, including vegan and gluten-free diets. Simply substitute ingredients as needed, ensuring they align with your dietary requirements.

4. How long does it take for cannafudge to set?
Typically, cannafudge takes around two to three hours to set in the refrigerator. However, this may vary depending on factors such as temperature and humidity. For best results, allow ample time for the fudge to firm up before slicing and serving.

5. Can I freeze cannafudge for later consumption?
Yes, cannafudge can be frozen for extended storage. Wrap individual pieces tightly in plastic wrap or aluminum foil before placing them in an airtight container or freezer bag. Thaw the fudge in the refrigerator overnight before serving.

6. Are there any alternatives to chocolate for making cannafudge?
While chocolate is the traditional base for fudge, you can experiment with alternative ingredients such as white chocolate, peanut butter, or caramel for unique flavor variations.

What to Do with Grounded Weed Stems


You’ve finished trimming your weed, but what about those leftover stems? Don’t throw them away! These seemingly useless bits can actually be repurposed in creative and practical ways, saving you money and helping the environment. Let’s explore what to do with grounded weed stems.

What To Do With Your Weed Stems

Grounded weed stems can be transformed into a variety of useful products and substances, which is great for sustainability and resourcefulness. Let’s look at some interesting ways to repurpose them.

Crafting Homemade CBD Oil

You can tap into the therapeutic benefits of grounded weed stems by creating your own CBD oil. While the buds have more cannabinoids, the stems also contain valuable compounds. Simmer the stems in a carrier oil, such as olive or coconut oil, on low heat to extract cannabinoids. This creates a powerful homemade remedy for different health issues.

Creating Fiber for Textiles

Weed stems have fibrous material that’s perfect for making textiles. Extract fibers from the stems, then spin them into yarn or weave them into fabric. This eco-friendly method reduces the need for traditional textiles, supporting sustainability in fashion. Plus, using weed stem fibers can make textiles more durable and give them a special texture.

Making Tea With Weed Stems

To make a soothing cannabis tea, steep grounded weed stems in hot water. While it’s not as strong as traditional edibles, cannabis tea offers a gentle, relaxing effect. Enhance the flavor by adding honey or lemon. Additionally, cannabis tea can help with symptoms like anxiety, insomnia, and chronic pain, making it a popular alternative therapy.

Enhancing Compost Piles

Grounded weed stems can enhance compost piles by providing carbon, which helps in the decomposition process. To speed up decomposition, chop the stems into smaller pieces and add them to your compost along with other organic materials. The nutrient-rich compost can then be used to nourish your garden or indoor plants. Additionally, the carbon in weed stems helps balance nitrogen-rich materials in the compost, creating ideal conditions for microbes and nutrient cycling.

Crafting Decorative Art

Grounded weed stems can enrich compost piles by providing carbon, which aids in decomposition. To quicken this process, chop the stems into smaller pieces and add them to your compost along with other organic materials. The resulting compost, rich in nutrients, can be used to nourish your garden or indoor plants. Moreover, the carbon in weed stems helps balance nitrogen-rich materials in the compost, creating optimal conditions for microbial activity and nutrient cycling.

Producing Biofuel

You can turn grounded weed stems into biofuel using a process called pyrolysis. This involves heating organic materials without oxygen, resulting in biochar, a carbon-rich substance that can be used for fuel. Biofuel made from weed stems provides a renewable option to fossil fuels, helping to reduce carbon emissions. Additionally, producing biofuel from weed stems can support energy independence and lessen the environmental impact of conventional fuel sources.

Infusing Bath Products

Enhance your self-care routine by adding grounded weed stems to your homemade bath products. Mix them into bath bombs, salts, or oils to enjoy their therapeutic benefits. The cannabinoids and aromatic compounds released during bathing can help you relax and relieve muscle tension. Moreover, the natural exfoliating properties of weed stems can promote skin renewal and improve skin texture, making your bath products even more effective.

Crafting Pet Toys

Get creative and make eco-friendly toys for your furry friends using grounded weed stems. Use the stems to create chew toys or weave them into structures for cats to climb and play on. This not only entertains your pets but also reduces waste and supports sustainability. Making pet toys from weed stems ensures they are non-toxic, reducing the risk of ingestion-related injuries or health issues for your animals.

Baking Edibles

Get creative and make eco-friendly toys for your furry friends using grounded weed stems. Use the stems to create chew toys or weave them into structures for cats to climb and play on. This not only entertains your pets but also reduces waste and supports sustainability. Making pet toys from weed stems ensures they are non-toxic, reducing the risk of ingestion-related injuries or health issues for your animals.

Supporting Local Wildlife

Repurpose grounded weed stems to create habitats for local wildlife, like birds or insects. Bundle the stems together to make shelters or nesting material, offering refuge for creatures in your area. This helps foster biodiversity and preserves natural ecosystems. Supporting local wildlife populations can also help maintain ecological balance and ecosystem resilience, benefiting both wildlife and human communities.

Crafting Paper Products

Utilize the fibrous nature of grounded weed stems to create eco-friendly paper products. Turn the stems into pulp, then mold and dry them into paper sheets. This sustainable process reduces the need for traditional wood pulp, helping to conserve forests and minimize environmental impact. Additionally, paper made from weed stems has a unique texture and visual appeal, adding aesthetic value to stationery, packaging, and other paper goods.

Creating Natural Dyes

Extract vibrant pigments from grounded weed stems to create natural dyes for fabrics and crafts. Boil the stems in water to release their color compounds, then strain the liquid and use it to dye textiles or artwork. This chemical-free dyeing method offers a sustainable alternative to synthetic dyes, minimizing environmental pollution. Additionally, natural dyes derived from weed stems produce rich, earthy hues that reflect the beauty of nature, adding depth and character to handmade textiles and artworks.

Incorporating into Skincare Products

Harness the antioxidant and anti-inflammatory properties of grounded weed stems by adding them to skincare products. Mix them into homemade creams, lotions, or balms to promote skin health and soothe irritation. The natural compounds in the stems offer a gentle yet effective solution for various skin concerns. Moreover, skincare products enriched with weed stem extracts provide hydration, nourishment, and protection for the skin, enhancing overall complexion and vitality.

Conclusion

In conclusion, grounded weed stems have a wide range of potential uses beyond their initial role in cannabis cultivation. Whether you’re making homemade CBD oil, creating eco-friendly textiles, or producing biofuel, the possibilities are vast. By repurposing these seemingly insignificant leftovers, you can reduce waste and open up new opportunities for creativity and sustainability.

Frequently Asked Questions (FAQs)

Q: Can grounded weed stems be smoked?
A: While smoking grounded weed stems is not recommended due to their harsh taste and minimal cannabinoid content, they can be used to flavor other cannabis products or infused into edibles.

Q: Are there any risks associated with using grounded weed stems?
A: While grounded weed stems are generally safe to use, it’s essential to ensure they are free from mold or contaminants. Proper storage in a dry, airtight container can help prevent degradation and maintain freshness.

Q: Can grounded weed stems be composted along with other organic waste?
A: Yes, grounded weed stems are excellent additions to compost piles, contributing carbon and aiding in the decomposition process. Chop them into smaller pieces to accelerate breakdown and promote nutrient cycling.

Q: What is the best method for extracting cannabinoids from grounded weed stems?
A: Simmering grounded weed stems in a carrier oil over low heat is an effective method for extracting cannabinoids. This allows the cannabinoids to dissolve into the oil, creating a potent infusion suitable for various applications.

Q: Can grounded weed stems be recycled?
A: While traditional recycling programs may not accept grounded weed stems, they can be repurposed in various creative ways, such as crafting, composting, or producing biofuel.

Q: How should grounded weed stems be stored to maintain freshness?
A: To preserve the quality of grounded weed stems, store them in a cool, dark place away from moisture and direct sunlight. Airtight containers or vacuum-sealed bags help prevent degradation and maintain potency.

Best Things to Do When You’re High

Feeling high can be an exhilarating experience, but it’s essential to make the most of it by engaging in activities that enhance the sensation and promote relaxation. Whether you’re chilling alone or with friends, here’s a guide to the best things to do when you’re high, ensuring a memorable and enjoyable experience.

Exploring Nature’s Wonders

Connecting with the Great Outdoors

Immerse yourself in the beauty of nature when you’re high. Take a leisurely stroll through a local park or hike a scenic trail. The fresh air and captivating scenery can heighten your senses and induce a profound sense of tranquility. Connecting with nature not only allows you to appreciate the world around you but also provides an opportunity for introspection and self-reflection.

Stargazing Under the Night Sky

Find a secluded spot away from city lights and gaze up at the starlit sky. The vastness of the cosmos can evoke a sense of awe and wonder, creating a mesmerizing experience that enhances your high. Take this opportunity to marvel at the beauty of the universe and contemplate the mysteries of existence. Stargazing can be a humbling and awe-inspiring activity that deepens your connection to the cosmos and expands your perspective on life.

Getting Creative

Channeling Your Inner Artist

Unleash your creativity by engaging in artistic pursuits such as painting, drawing, or crafting. Let your imagination run wild as you express yourself through various mediums, allowing your high to fuel your artistic endeavors. Creating art can be a therapeutic and cathartic experience, providing an outlet for self-expression and emotional release. Whether you’re a seasoned artist or a novice, tapping into your creative side while high can lead to surprising and inspiring results.

Jamming to Music

Create a playlist of your favorite tunes or discover new music genres to explore. Let the rhythm and melody wash over you, heightening your sensory experience and deepening your connection to the music. Music has a unique ability to evoke emotions and memories, making it the perfect accompaniment to a high. Whether you’re listening to upbeat tunes that make you want to dance or soulful melodies that stir your soul, music can enhance your mood and elevate your experience.

Indulging in Culinary Delights

Exploring Gourmet Munchies

Elevate your snacking experience by preparing delicious and indulgent treats. Experiment with flavors and textures, from savory snacks to sweet desserts, tantalizing your taste buds with culinary delights. Cooking while high can be a fun and rewarding experience, allowing you to unleash your creativity in the kitchen. Whether you’re whipping up a batch of homemade cookies or experimenting with exotic spices, the act of cooking can be a sensory delight that engages all of your senses.

Cooking a Feast

Take your culinary skills to the next level by cooking a gourmet meal from scratch. Get creative in the kitchen, experimenting with ingredients and flavors to create a masterpiece that satisfies both your hunger and your high. Cooking can be a therapeutic and meditative activity, allowing you to focus your mind and express yourself through food. Whether you’re cooking for yourself or hosting a dinner party with friends, preparing a delicious meal can be a rewarding experience that brings joy and satisfaction.

Relaxing and Unwinding

Meditation and Mindfulness

Embrace a state of mindfulness by practicing meditation or yoga. Center yourself in the present moment, allowing your high to enhance your awareness and deepen your relaxation. Meditation can be a powerful tool for reducing stress and anxiety, promoting inner peace and tranquility. Whether you’re practicing mindfulness meditation, guided imagery, or deep breathing exercises, taking time to quiet your mind and focus on the present moment can help you feel more grounded and centered.

Enjoying a Soothing Bath

Indulge in a luxurious bath infused with essential oils or bath bombs. Let the warm water envelop you as you soak away the stresses of the day, allowing your high to melt away any tension in your body. Bathing can be a therapeutic and rejuvenating experience, providing a sense of relaxation and renewal. Whether you’re soaking in a tub filled with lavender-scented bubbles or enjoying a hot shower with eucalyptus steam, taking time to pamper yourself can help you feel refreshed and revitalized.

Connecting with Others

Engaging in Meaningful Conversations

Share your thoughts and feelings with friends or loved ones, engaging in deep and meaningful conversations. Allow your high to foster connection and intimacy as you bond over shared experiences and ideas. Connecting with others on a deeper level can enhance your sense of belonging and fulfillment, enriching your high experience. Whether you’re discussing philosophical concepts, sharing personal stories, or simply enjoying each other’s company, meaningful conversations can deepen your connections and strengthen your relationships.

Playing Games and Activities

Organize a game night with friends or enjoy playful activities that spark joy and laughter. Whether it’s board games, card games, or outdoor sports, let your high enhance your enjoyment and camaraderie. Playing games and engaging in activities with others can be a fun and lighthearted way to bond and create lasting memories. Whether you’re competing against each other or working together as a team, the spirit of friendly competition and camaraderie can make your high experience even more enjoyable.

Conclusion

Exploring the best things to do when you’re high can elevate your experience and make it more enjoyable and fulfilling. Whether you prefer connecting with nature, unleashing your creativity, indulging in culinary delights, or simply relaxing with friends, there are countless ways to enhance your high and create lasting memories. Remember to consume substances responsibly and prioritize your safety and well-being above all else.

FAQs (Frequently Asked Questions)

Q: Can I drive while high?
A: It’s never safe to operate a vehicle under the influence of drugs or alcohol. Always designate a sober driver or use alternative transportation methods.

Q: How long does being high last?
A: The duration of being high can vary depending on factors such as the method of consumption and individual tolerance levels. Generally, the effects may last anywhere from a few hours to several hours.

Q: Is it safe to mix different substances while high?
A: Mixing drugs or alcohol can increase the risk of adverse effects and potential harm to your health. It’s essential to use substances responsibly and avoid combining them to minimize risks.

Q: What should I do if I feel anxious or paranoid while high?
A: If you experience feelings of anxiety or paranoia while high, try practicing relaxation techniques such as deep breathing or grounding exercises. It’s also helpful to change your environment or engage in calming activities to alleviate discomfort.

Q: Can I overdose on cannabis?
A: While it’s rare to overdose on cannabis in the traditional sense, consuming large amounts can lead to unpleasant side effects such as nausea, dizziness, and paranoia. It’s crucial to consume cannabis responsibly and in moderation.

Q: How can I sober up quickly if I need to?
A: If you need to sober up quickly, the best course of action is to wait it out in a safe and comfortable environment. Drinking water, eating a light snack, and engaging in calming activities can help alleviate the effects of being high over time.

How Deep Should Cannabis Seeds Be Planted?


Starting with planting cannabis seeds might seem simple, but how deep should cannabis seeds be planted for them to grow well. In this detailed guide, we explore the important question: How deep should a seed be planted? We’ll cover the best depth and give you expert tips to make sure your seeds sprout successfully and grow into healthy plants.

How Deep To Plant Pot Seeds?

Getting the planting depth right is key for cannabis seeds to sprout well. If they’re too shallow or planting seeds too deep, they might not grow right or get strong roots. Generally, it’s best to plant cannabis seeds about ¼ to ½ inch (0.6 to 1.3 centimeters) deep in soil that’s loose and drains well. Let’s explore why this depth works well.

Factors Influencing Planting Depth

The perfect depth for planting cannabis seeds depends on different things like what kind of soil you have, how wet it is, and what the environment’s like. Knowing about these factors is really important for getting lots of seeds to sprout and making sure your plants grow strong and healthy.

Soil Type and Texture

The kind of soil you have is super important for figuring out how deep to plant cannabis seeds. If your soil is sandy, it drains fast, so you might need to plant seeds a bit deeper to keep them moist. But if it’s heavy clay, you should plant them more shallow so they don’t get too wet and run out of oxygen.

Moisture Levels

Getting the moisture right is key for seeds to sprout. Planting them at the right depth helps them get enough moisture to grow but not too much, which can make them rot or get fungus

Environmental Conditions

The temperature and humidity around where you plant seeds matter too. If it’s too cold or too wet, seeds planted deep might have a hard time sprouting. But if it’s really hot and dry, seeds planted too shallow might dry out before they can grow roots.

Expert Tips for Planting Cannabis Seeds

1. Prepare the Planting Site
Before planting cannabis seeds, prepare the planting site by thoroughly tilling the soil and removing any debris or weeds that could interfere with seedling growth.

2. Choose the Right Container
Whether planting seeds directly in the ground or in containers, selecting the right planting vessel is crucial. Ensure that containers have adequate drainage to prevent waterlogging and promote healthy root development.

3. Plant at the Optimal Depth
Refer to the specific recommendations provided by the seed supplier or breeder regarding the optimal planting depth for the cannabis variety being cultivated. In general, cannabis seeds are typically planted at a depth of ¼ to ½ inch (6 to 13 millimeters) in loose, well-draining soil.

4. Maintain Consistent Moisture
After planting, keep the soil consistently moist but not waterlogged. Avoid overwatering, as this can lead to damping-off disease and other issues that can compromise seedling health.

5. Provide Adequate Light
Once seeds have germinated and seedlings have emerged, ensure they receive adequate light for healthy growth. If growing indoors, consider using supplemental lighting to provide the necessary intensity and spectrum for robust plant development.

6. Monitor Temperature and Humidity
Regularly monitor temperature and humidity levels in the growing environment to ensure optimal conditions for seedling growth and development. Provide adequate ventilation to prevent excessive humidity buildup, which can increase the risk of fungal diseases.

Conclusion

Getting the planting depth just right is super important for cannabis seeds to sprout and grow well. When growers know what affects planting depth and follow expert advice, they can make sure their cannabis plants grow strong and healthy from start to finish.

FAQs (Frequently Asked Questions)

Q: What is the recommended planting depth for cannabis seeds?
A: The recommended planting depth for cannabis seeds is typically ¼ to ½ inch (6 to 13 millimeters) in loose, well-draining soil.

Q: How can I tell if I’ve planted cannabis seeds too deep?
A: If cannabis seeds are planted too deep, they may struggle to sprout, resulting in delayed germination or failed seedlings. Shallow planting can also cause issues, such as drying out or being easily dislodged by environmental factors.

Q: Should I cover cannabis seeds after planting?
A: Yes, it’s essential to cover cannabis seeds lightly with soil after planting to provide them with the darkness they need to germinate successfully. However, be careful not to bury seeds too deeply, as this can hinder their ability to sprout.

Q: Can I plant cannabis seeds directly in the ground?
A: Yes, cannabis seeds can be planted directly in the ground if the soil is well-draining and has been adequately prepared. Ensure that the planting site receives ample sunlight and has sufficient moisture to support seed germination and seedling growth.

Q: How long does it take for cannabis seeds to germinate?
A: The germination time for cannabis seeds can vary depending on factors such as temperature, moisture levels, and seed quality. In optimal conditions, cannabis seeds typically germinate within 3 to 7 days.

Q: What should I do if my cannabis seeds fail to germinate?
A: If cannabis seeds fail to germinate within a reasonable timeframe, check environmental conditions such as temperature and moisture levels. Adjust these factors as needed and consider using fresh, high-quality seeds if germination issues persist.

Compost Tea for Cannabis Flowering Stage


In the realm of cultivating cannabis, maximizing growth during the flowering stage is a top priority for growers. While various methods are available, one natural and effective approach gaining popularity is the use of compost tea. This article delves into the intricacies of compost tea application, its benefits, and how it can elevate your cannabis cultivation game.

The Power of Compost Tea

Compost tea is a nutrient-rich liquid fertilizer derived from compost steeped in water. This organic concoction teems with beneficial microorganisms, enzymes, and nutrients vital for plant health. When applied to cannabis plants during the flowering stage, compost tea acts as a potent elixir, fostering robust growth, improved nutrient uptake, and enhanced resistance to pests and diseases.

Understanding the Flowering Stage

The flowering stage is a pivotal phase in the cannabis growth cycle, marked by the development of buds rich in cannabinoids and terpenes. During this period, cannabis plants require specific nutrients and care to support vigorous bud formation and maximize yield. Compost tea serves as a natural supplement, providing the essential elements needed for optimal flowering.

Benefits of Using Compost Tea

  • Enhanced Nutrient Absorption: The diverse microbial community present in compost tea aids in breaking down organic matter, making nutrients more accessible to plants. This enhanced nutrient absorption leads to healthier, more robust plants with increased yield potential.
  • Improved Soil Health: Regular application of compost tea promotes soil biodiversity, enriches soil structure, and enhances moisture retention. Healthy soil is the foundation of a successful cannabis garden, providing plants with the necessary support and resources for optimal growth.
  • Natural Pest and Disease Control: Beneficial microbes present in compost tea help suppress harmful pathogens, reducing the risk of pest infestations and diseases. By enhancing the plant’s natural defenses, compost tea provides a proactive approach to pest and disease management, minimizing the need for harsh chemical interventions.
  • Environmentally Friendly: Compost tea is eco-friendly and sustainable, aligning with organic cultivation practices and minimizing environmental impact. By utilizing natural ingredients and biological processes, growers can cultivate cannabis in harmony with the environment, promoting biodiversity and soil health for future generations.

Application Methods

  • Soil Drench: Prepare compost tea by steeping compost in water for 24-48 hours, then strain and dilute before applying directly to the soil around the base of cannabis plants. This method ensures direct delivery of nutrients to the root zone, where they are readily absorbed by the plant’s root system.
  • Foliar Spray: Dilute compost tea and spray directly onto the foliage of cannabis plants during the early morning or late afternoon to avoid leaf burn. Foliar application allows for rapid nutrient uptake through the leaves, providing an additional nutrient boost during the flowering stage.
  • Root Drench: Apply compost tea directly to the root zone of cannabis plants to promote healthy root development and nutrient absorption. This method is especially beneficial for plants experiencing nutrient deficiencies or stress, providing targeted support where it is needed most.

Conclusion

Incorporating compost tea into your cannabis cultivation regimen during the flowering stage can yield bountiful rewards. By harnessing the power of nature’s nutrients, you can nurture healthier plants, improve yields, and contribute to a more sustainable growing environment. Embrace the natural approach with compost tea and watch your cannabis garden thrive.

FAQs (Frequently Asked Questions)

1. How often should I apply compost tea during the flowering stage?
Compost tea can be applied every 1-2 weeks during the flowering stage for optimal results. However, frequency may vary depending on environmental conditions, soil composition, and plant health.

2. Can I use homemade compost for making compost tea?
Yes, homemade compost is ideal for creating compost tea, ensuring a rich microbial diversity tailored to your specific growing conditions. However, it’s essential to use well-aged compost free from contaminants and pathogens to avoid potential issues.

3. Is compost tea suitable for all types of cannabis strains?
Yes, compost tea is suitable for all cannabis strains and can be customized to meet the unique nutrient requirements of different varieties. Whether you’re growing indicas, sativas, or hybrids, compost tea can provide the essential nutrients needed for healthy growth and flowering.

4. Does compost tea have a strong odor?
Compost tea may have a slight earthy odor due to the fermentation process but typically dissipates quickly after application. However, if the compost used is of poor quality or contains contaminants, it may produce unpleasant odors. Proper aeration and filtration during the brewing process can help mitigate any potential odor issues.

5. Can compost tea be used in hydroponic systems?
While compost tea is primarily designed for soil application, it can be adapted for use in hydroponic systems with proper filtration and dilution. However, it’s essential to monitor nutrient levels closely and avoid overfeeding, as hydroponic systems are more sensitive to nutrient imbalances.

6. Are there any risks of overusing compost tea?
Excessive application of compost tea can lead to nutrient imbalances or microbial overgrowth, so it’s essential to follow recommended dosage guidelines. Additionally, using compost tea made from uncomposted or contaminated materials can introduce harmful pathogens or toxins to your plants, leading to health issues or decreased yields.

How to Treat Nutrient Burn


Nutrient burn is a common issue among plant enthusiasts, often resulting from over-fertilization or improper nutrient application. It manifests through various symptoms such as leaf discoloration, wilting, and stunted growth. However, with the right approach, it’s entirely manageable. In this detailed guide, we’ll explore proven methods to treat nutrient burn and revive your plants to their former glory.

Understanding Nutrient Burn

How to Treat Nutrient Burn

Nutrient burn occurs when plants receive an excess of nutrients, leading to chemical imbalances within their systems. This overabundance disrupts normal metabolic functions, resulting in visible damage. Symptoms may include yellowing or browning of leaves, leaf tip burn, and overall diminished vitality.

To effectively address nutrient burn, it’s crucial to identify the underlying causes and implement targeted solutions.

Identifying Symptoms of Nutrient Burn

How to Treat Nutrient Burn

Recognizing the signs of nutrient burn is the first step in addressing the issue. Common symptoms include:

  • Leaf Discoloration: Yellowing, browning, or darkening of leaves.
  • Leaf Tip Burn: Browning or necrosis starting from the tips of leaves.
  • Stunted Growth: Lack of new growth or reduced overall plant vigor.

Nutrient burn can also manifest differently depending on the type of plant and the specific nutrients involved. Some plants may exhibit symptoms more prominently than others, making it essential to closely monitor your plants’ health.

Understanding Nutrient Imbalances

Nutrient burn often indicates an imbalance in essential macronutrients such as nitrogen (N), phosphorus (P), and potassium (K), as well as micronutrients like iron, magnesium, and calcium. These nutrients play crucial roles in plant growth and development, and an excess or deficiency can disrupt metabolic processes.

Nitrogen, for example, is essential for leafy green growth but can cause burn symptoms when overapplied. Phosphorus is vital for root development and flowering but can lead to toxicity if levels are too high. Potassium helps regulate water uptake and enzyme activation but can result in leaf scorch if present in excess.

By understanding the roles of different nutrients and their effects on plant health, you can better diagnose and treat nutrient burn effectively.

How to Treat Nutrient Burn

Addressing nutrient burn requires a multi-faceted approach tailored to the specific needs of your plants. Here’s a step-by-step guide on how to effectively treat nutrient burn:

1. Flush the Soil

Begin by flushing the soil with plain, pH-balanced water. This helps to remove excess salts and nutrients accumulated in the soil, restoring a healthier balance. Ensure thorough watering until runoff is clear.

2. Adjust Nutrient Levels

Review your fertilization regimen and adjust nutrient levels accordingly. Opt for a balanced fertilizer with an N-P-K ratio appropriate for your plant species. Gradually reintroduce nutrients to avoid further stress.

3. Monitor Watering Practices

Evaluate your watering schedule to prevent overhydration, which can exacerbate nutrient burn. Allow the soil to partially dry between watering sessions, ensuring proper drainage to prevent waterlogging.

4. Prune Affected Areas

Trim away damaged foliage to promote new growth and prevent the spread of stress signals throughout the plant. Use sterile pruning tools to minimize the risk of infection.

5. Provide Adequate Lighting

Ensure your plants receive sufficient light exposure suited to their specific requirements. Proper lighting encourages photosynthesis and enhances overall plant resilience.

6. Enhance Air Circulation

Improve air circulation around your plants to reduce humidity levels and minimize the risk of fungal infections. Use fans or natural ventilation to create a conducive growing environment.

7. Implement Foliar Feeding

Supplement soil nutrients with foliar feeding, applying a diluted fertilizer solution directly to the leaves. This facilitates rapid nutrient absorption and supports plant recovery.

8. Utilize Soil Amendments

Incorporate organic soil amendments such as compost or aged manure to improve soil structure and nutrient retention. These natural amendments provide a slow-release source of nutrients, promoting long-term plant health without the risk of burn.

9. Consider pH Adjustment

Monitor soil pH levels and make adjustments as needed to optimize nutrient availability. Most plants prefer slightly acidic to neutral soil conditions, so use pH testing kits to ensure the soil remains within the optimal range.

10. Practice Balanced Feeding

Avoid over-reliance on synthetic fertilizers and instead focus on balanced feeding with organic alternatives. Organic fertilizers release nutrients gradually, reducing the risk of nutrient burn while promoting soil health and microbial activity.

11. Seek Professional Advice

If nutrient burn persists despite your efforts, consider seeking advice from a professional horticulturist or agricultural extension service. They can provide personalized recommendations based on soil tests and plant observations, helping you address underlying issues effectively.

12. Preventative Measures

Once you’ve successfully treated nutrient burn, take preventative measures to avoid recurrence in the future. This includes maintaining proper fertilization practices, monitoring soil health, and regularly inspecting plants for signs of stress or nutrient deficiencies.

13. Continuous Monitoring

Continue to monitor your plants’ health and make adjustments as needed to ensure they remain vibrant and thriving. Regular observation allows you to detect early warning signs of nutrient imbalances or other issues, preventing future problems before they escalate.

Conclusion

In conclusion, nutrient burn is a manageable issue that requires proactive intervention and proper care. By following the outlined steps and implementing targeted solutions, you can effectively treat nutrient burn and restore your plants to optimal health and vitality. Remember to stay vigilant, prioritize plant health, and enjoy the rewarding experience of nurturing thriving greenery.

How to Treat Pathogenic Mold in Weed


Welcome to our complete guide to dealing with harmful pathogenic mold in cannabis. For those who grow cannabis, preventing mold is vital for keeping their harvest safe and top-notch. Mold not only ruins the taste and strength of cannabis but can also make people sick if they use it. In this guide, we’ll explore ways to fight mold in your cannabis plants so you can have a healthy and plentiful crop.

What is Pathogenic Mold

What is Pathogenic Mold


Pathogenic mold, also called toxic mold, encompasses different types of fungi that can grow in both indoor and outdoor environments, such as where cannabis is grown. These molds make mycotoxins, dangerous substances that can harm health if breathed in or eaten. Some common kinds of pathogenic mold in cannabis are Aspergillus, Penicillium, and Fusarium.

Identifying Pathogenic Mold in Weed

Spotting pathogenic mold in weed can be tough since it often looks like fuzzy, discolored spots on the plant or its buds. Also, moldy cannabis might smell musty or earthy. It’s crucial to check your plants often, especially during flowering, to catch mold early and deal with it.

Factors Contributing to Mold Growth

Many factors can make pathogenic mold spread in cannabis crops, such as:

  • High Humidity: When humidity is high, mold can grow easily, especially in indoor growing.
  • Poor Air Circulation: If air doesn’t move well, moisture can stick around, making mold more likely.
  • Improper Drying and Curing: If you don’t dry and cure your cannabis properly after picking, mold spores can grow.
  • Contaminated Growing Medium: If the soil or other stuff you grow your plants in has mold spores, they can infect your cannabis.

Preventive Measures for Mold Control

  • Optimize Ventilation and Airflow: Make sure air moves well in your growing area by using fans and exhaust systems. Good ventilation helps control humidity and stops air from getting stuck, which can help mold grow.
  • Monitor Humidity Levels: Keep an eye on humidity levels in your grow room, aiming for between 40% and 60%. Use dehumidifiers or humidifiers if you need to keep conditions just right for your plants and to keep mold away
  • Practice Proper Sanitation: Keep things clean in your grow space by disinfecting equipment, surfaces, and containers regularly. Get rid of any old plant bits or stuff that mold might like to grow on.
  • Implement Integrated Pest Management (IPM) Strategies: Use integrated pest management to stop pests from wrecking your plants and giving mold a way in. Use things like natural predators, organic bug killers, and other methods to keep your garden healthy.

Effective Treatment Methods for Pathogenic Mold

  • Pruning and Removal of Infected Plant Parts: When you find mold on your plants, get rid of the infected bits right away using clean tools to stop spores from spreading. Cut off any moldy leaves, buds, or stems, and throw them out properly so they don’t infect anything else.
  • Application of Natural Antifungal Agents: You can use natural stuff like neem oil, hydrogen peroxide, or potassium bicarbonate to fight mold on your cannabis plants. These things stop mold from growing without hurting your plants or the environment around them.
  • Adjustment of Environmental Conditions: Change things up in your grow space for a bit to make it harder for mold to grow. Lower humidity and get more air moving to help your plants heal and stop mold from spreading.

Conclusion

Treating pathogenic mold in weed is crucial for keeping cannabis products top-notch and safe. By taking steps to prevent mold, dealing with it quickly when it shows up, and keeping everything clean, growers can protect their crops and have a good harvest. Always make sure your cannabis is safe for consumers and follows the rules when you grow and sell it.

FAQs

Q: Can moldy cannabis be safely consumed after treatment?
A: It is not advisable to consume cannabis that has been contaminated with mold, even after treatment. Mold spores and toxins can persist despite treatment efforts, posing health risks to consumers.

Q: How can I prevent mold recurrence in my cannabis crops?
A: Implementing rigorous sanitation practices, optimizing growing conditions, and regularly inspecting plants for signs of mold are essential for preventing recurrence. Additionally, maintaining proper airflow and humidity levels can help minimize mold risk.

Q: Are there any natural methods for controlling mold in cannabis cultivation?
A: Yes, several natural methods, such as using essential oils, beneficial microbes, and biological fungicides, can help control mold in cannabis cultivation. These methods offer effective alternatives to chemical treatments while promoting environmental sustainability.

Q: Can moldy cannabis be salvaged for extraction purposes?
A: Moldy cannabis should not be used for extraction purposes, as mold spores and toxins can contaminate the final product, posing health hazards to consumers. It is best to discard mold-infested material to ensure product safety.

Q: How does mold exposure affect cannabis plants’ yield and potency?
A: Mold infestations can significantly reduce cannabis plants’ yield and potency by inhibiting growth, compromising nutrient uptake, and producing stress responses. Additionally, mold-contaminated buds may exhibit decreased cannabinoid and terpene content.

Q: What are the legal implications of selling mold-contaminated cannabis products?
A: Selling mold-contaminated cannabis products is illegal in regulated markets, as it poses health risks to consumers and violates quality control standards. Cultivators and dispensaries are subject to regulatory penalties for distributing tainted products.