500 NEW MARIJUANA SEEDS RELEASED

How to Get Female Plants From Your Regular Cannabis

The Cannabis genus originated somewhere in Asia over 12,000 years ago and has ever since spread across all the different continents. Nowadays, these plants have evolved enormously thanks to us, humans. Marijuana breeders have combined different species over the years to create totally new strains of plants.

One of the biggest evolution was the feminization of cannabis plants. This is quite a breakthrough in the complex world of marijuana because only female flowers produce actual psychoactive effects. After years of crossing different plants, breeders have found a way to create plants that have a 99% chance to be a female.

So, how do we create female plants? First, we need to know how to tell the difference between a male and a female cannabis plant.

Male weed

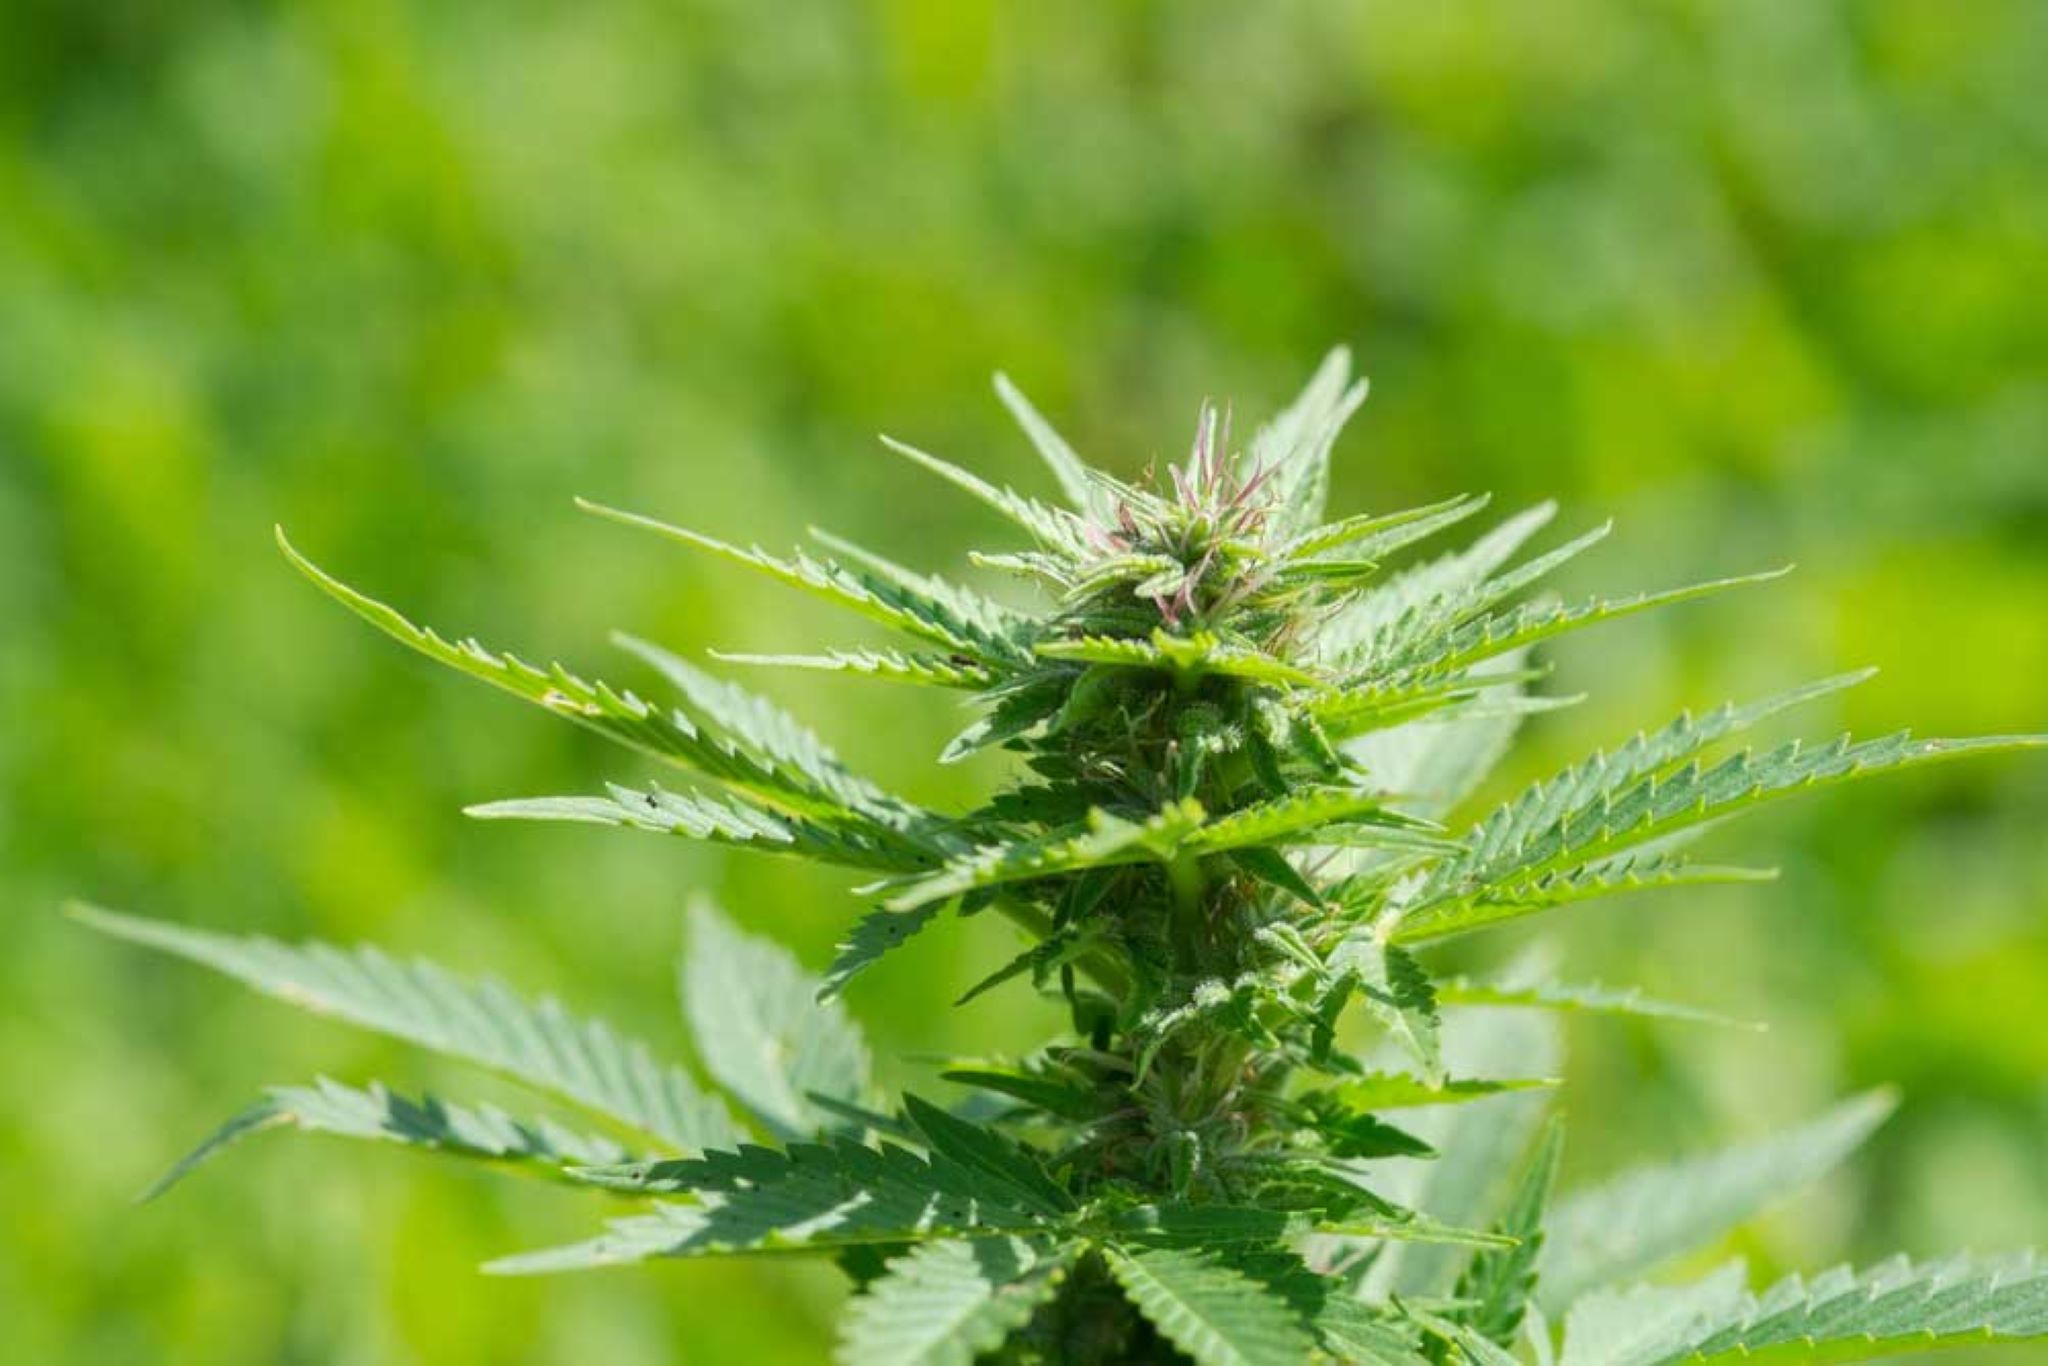
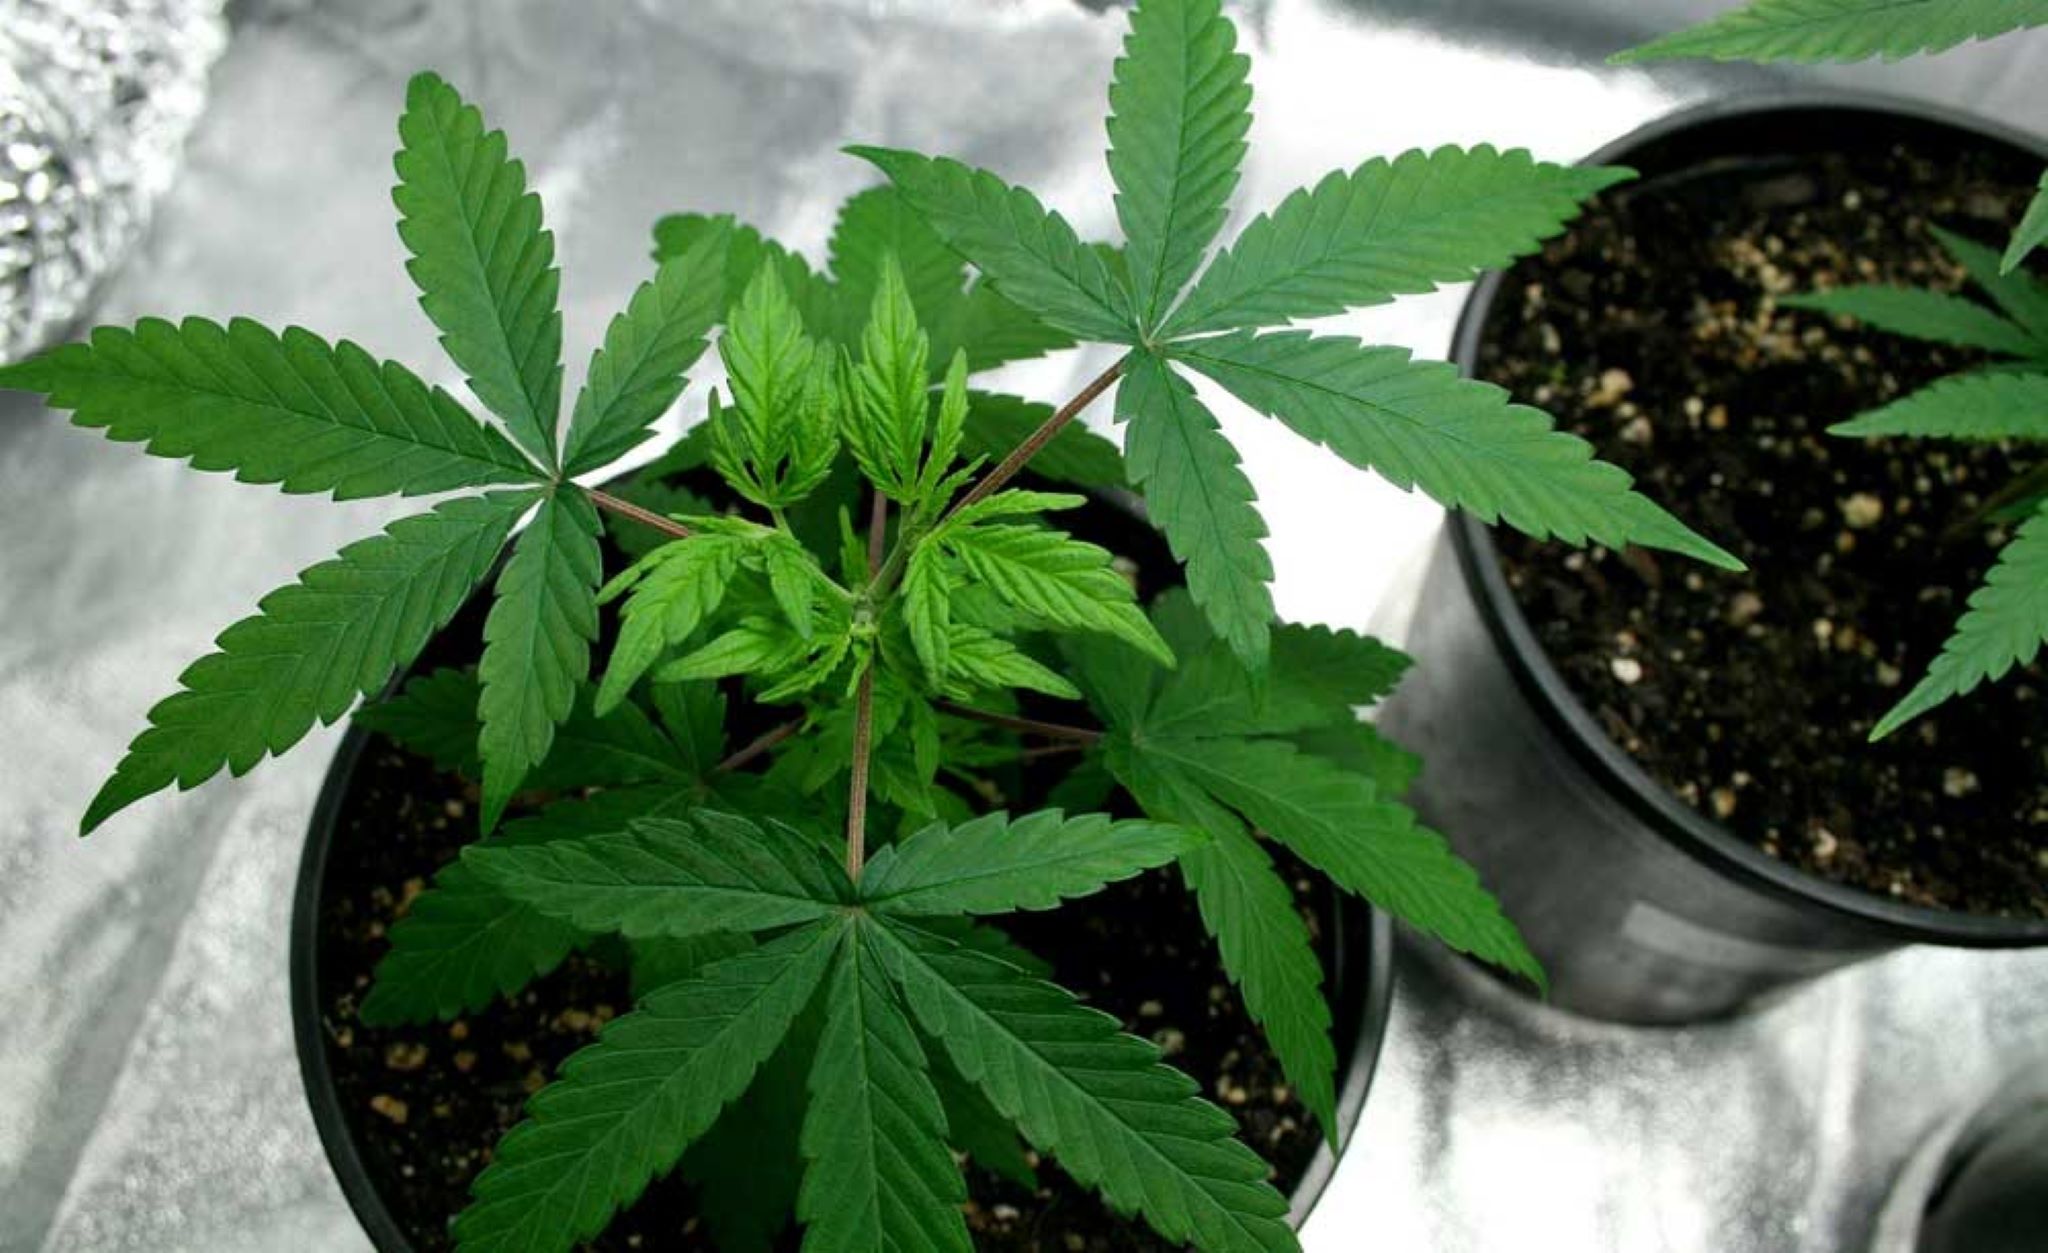
Cannabis plants go through two stages, the vegetative phase, and the flowering phase. In the vegetation stage, it is close to impossible to tell the plant’s gender. Plants spend all their efforts on growing bigger and taller during this stage.

Once the plants switch to its flowering phase, they focus on growing flowers. At this point, we can now tell whether a plant is male or female. Male weed plants have grape-like balls, which look like a cluster of small flowers, that open up to produce pollen. They do not have any pistils on them. If the male is allowed to continue to grow, theses balls or pollen sacs will eventually burst open and let their pollen out.
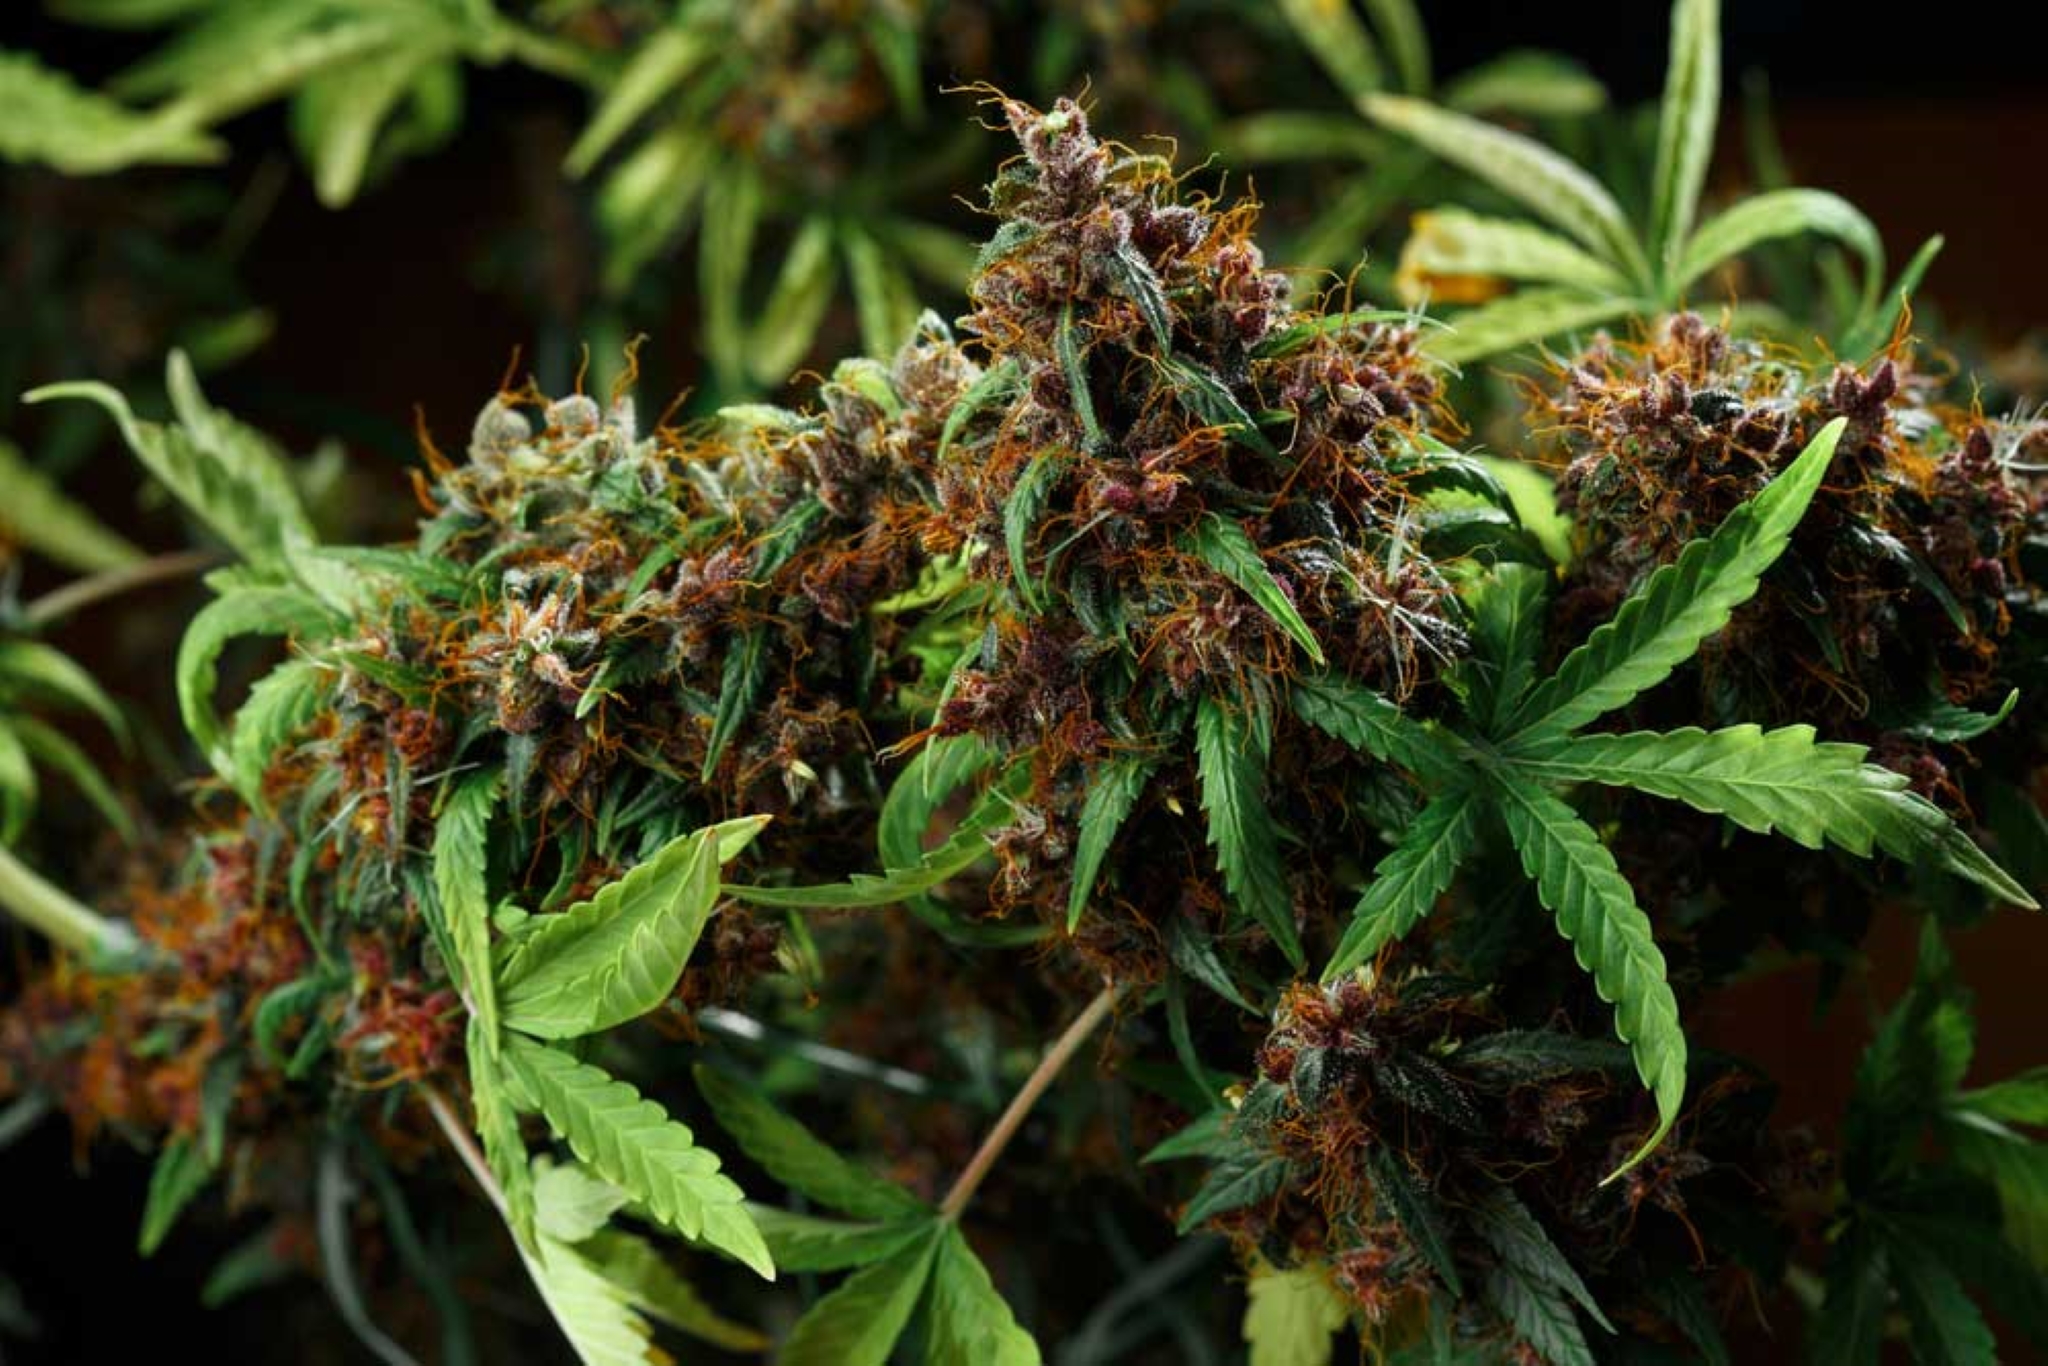
Female weed

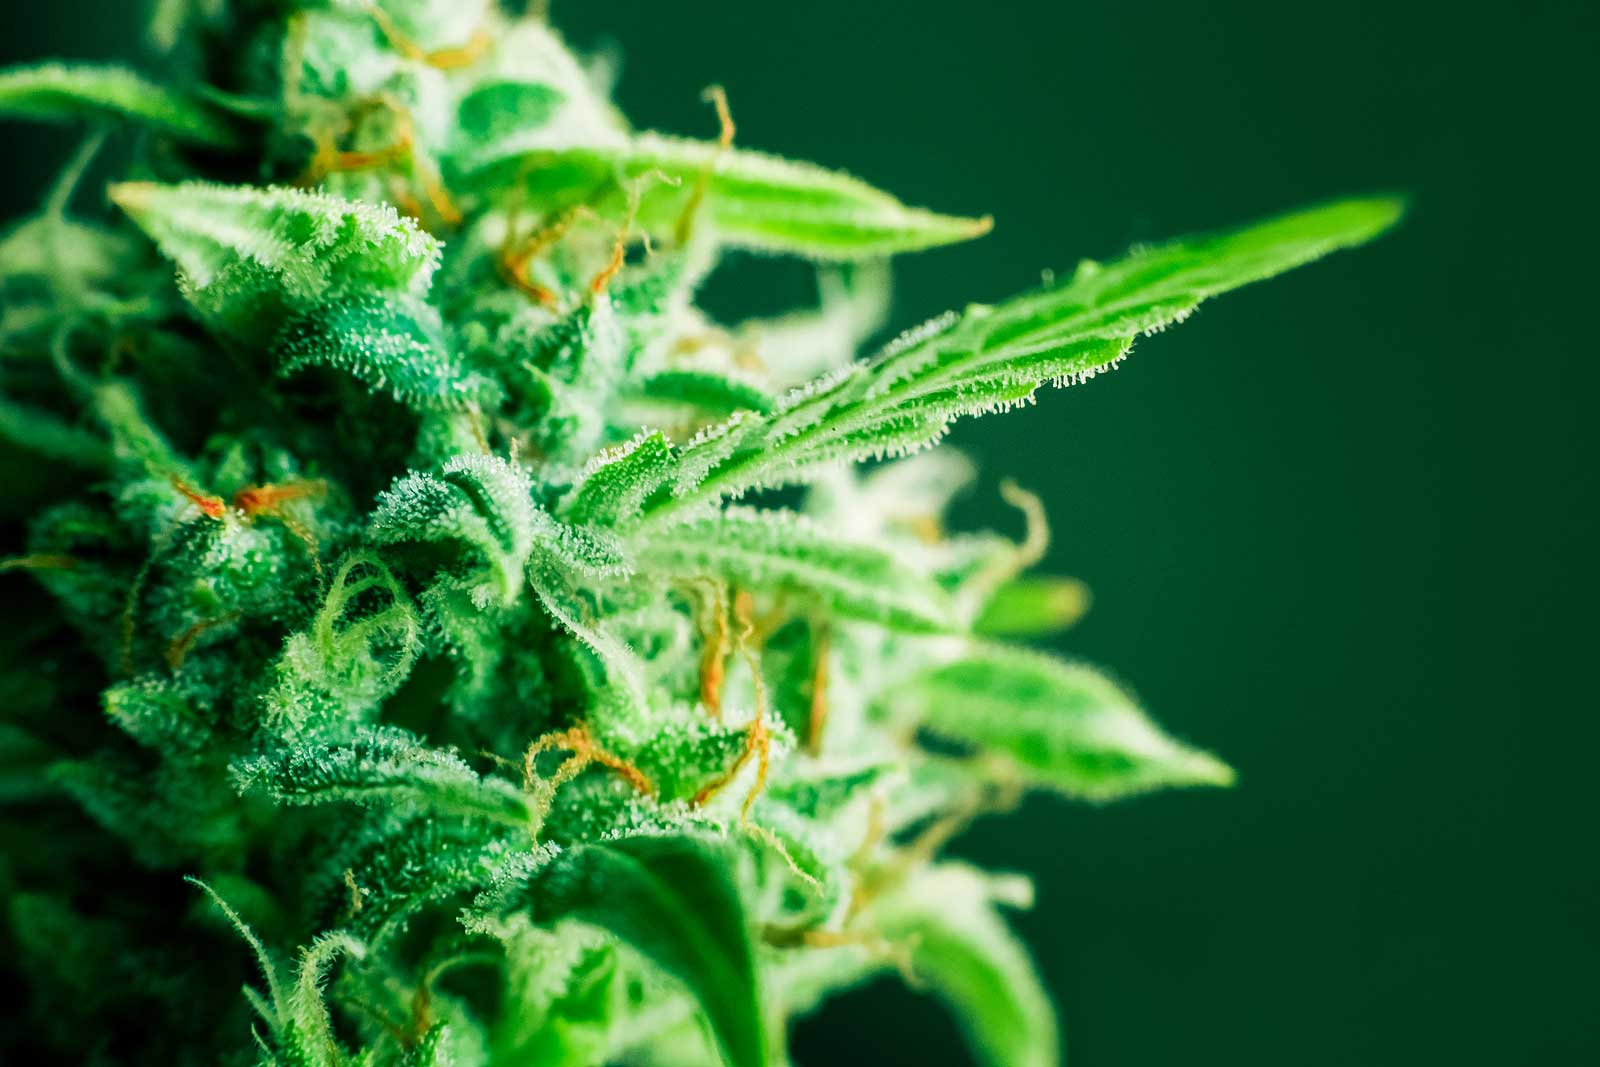
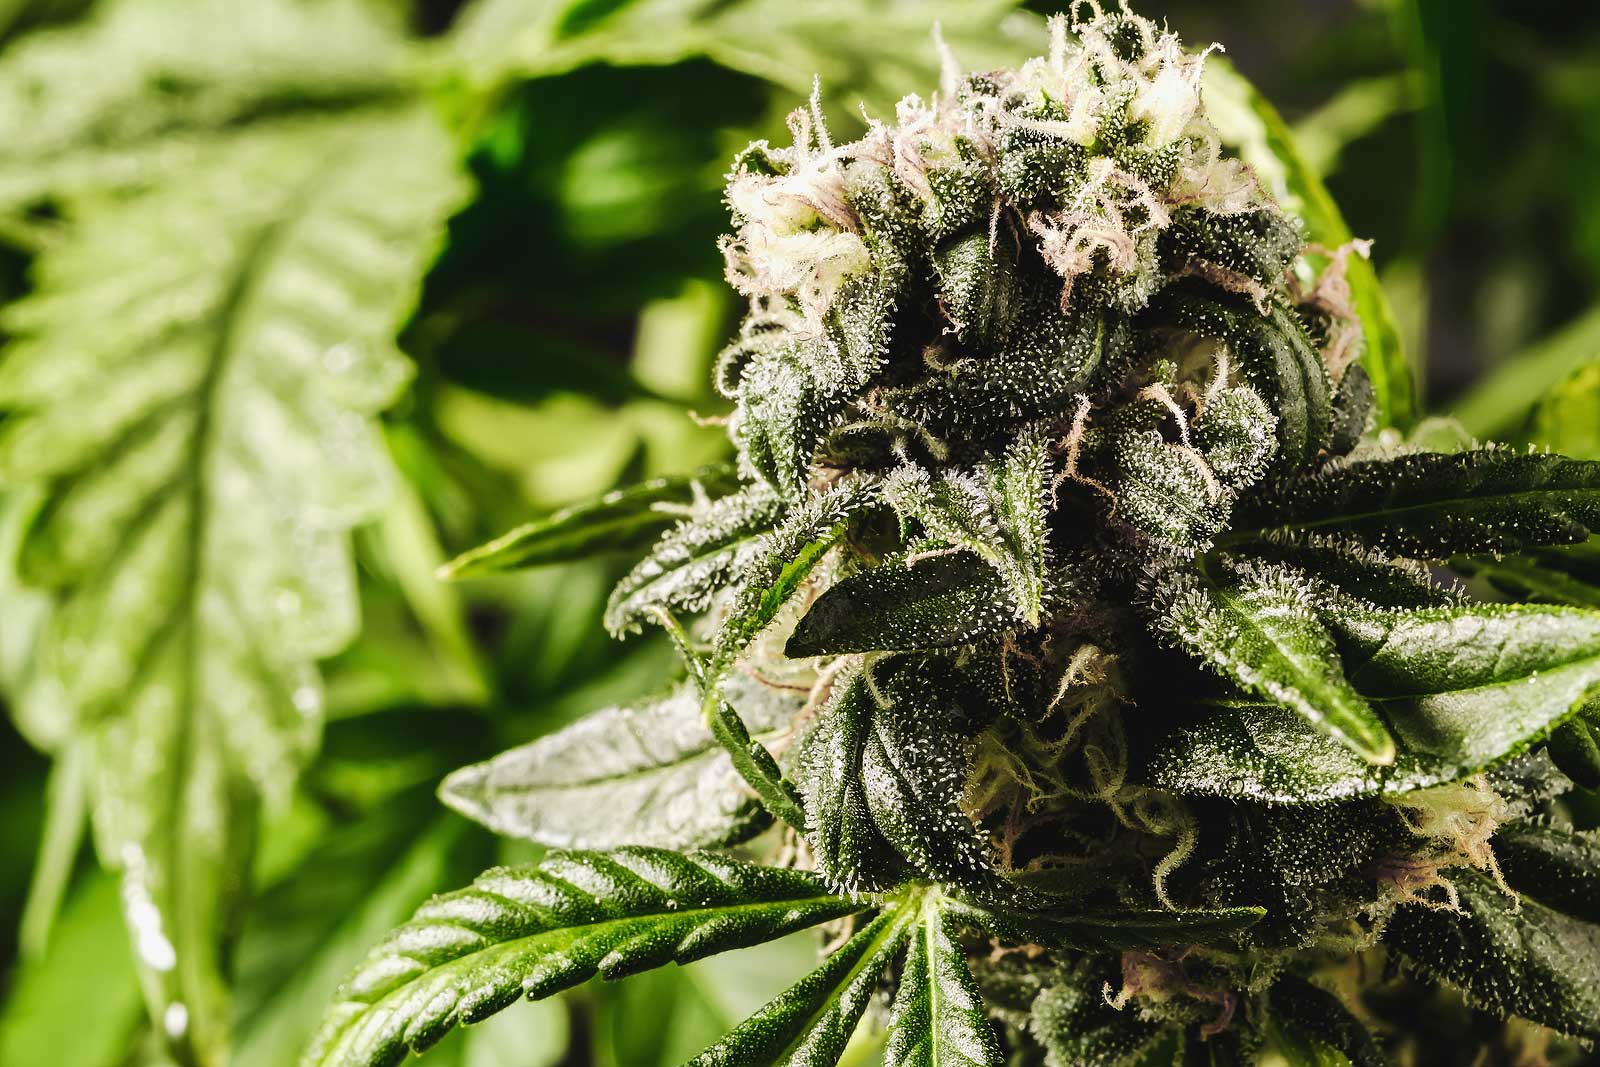
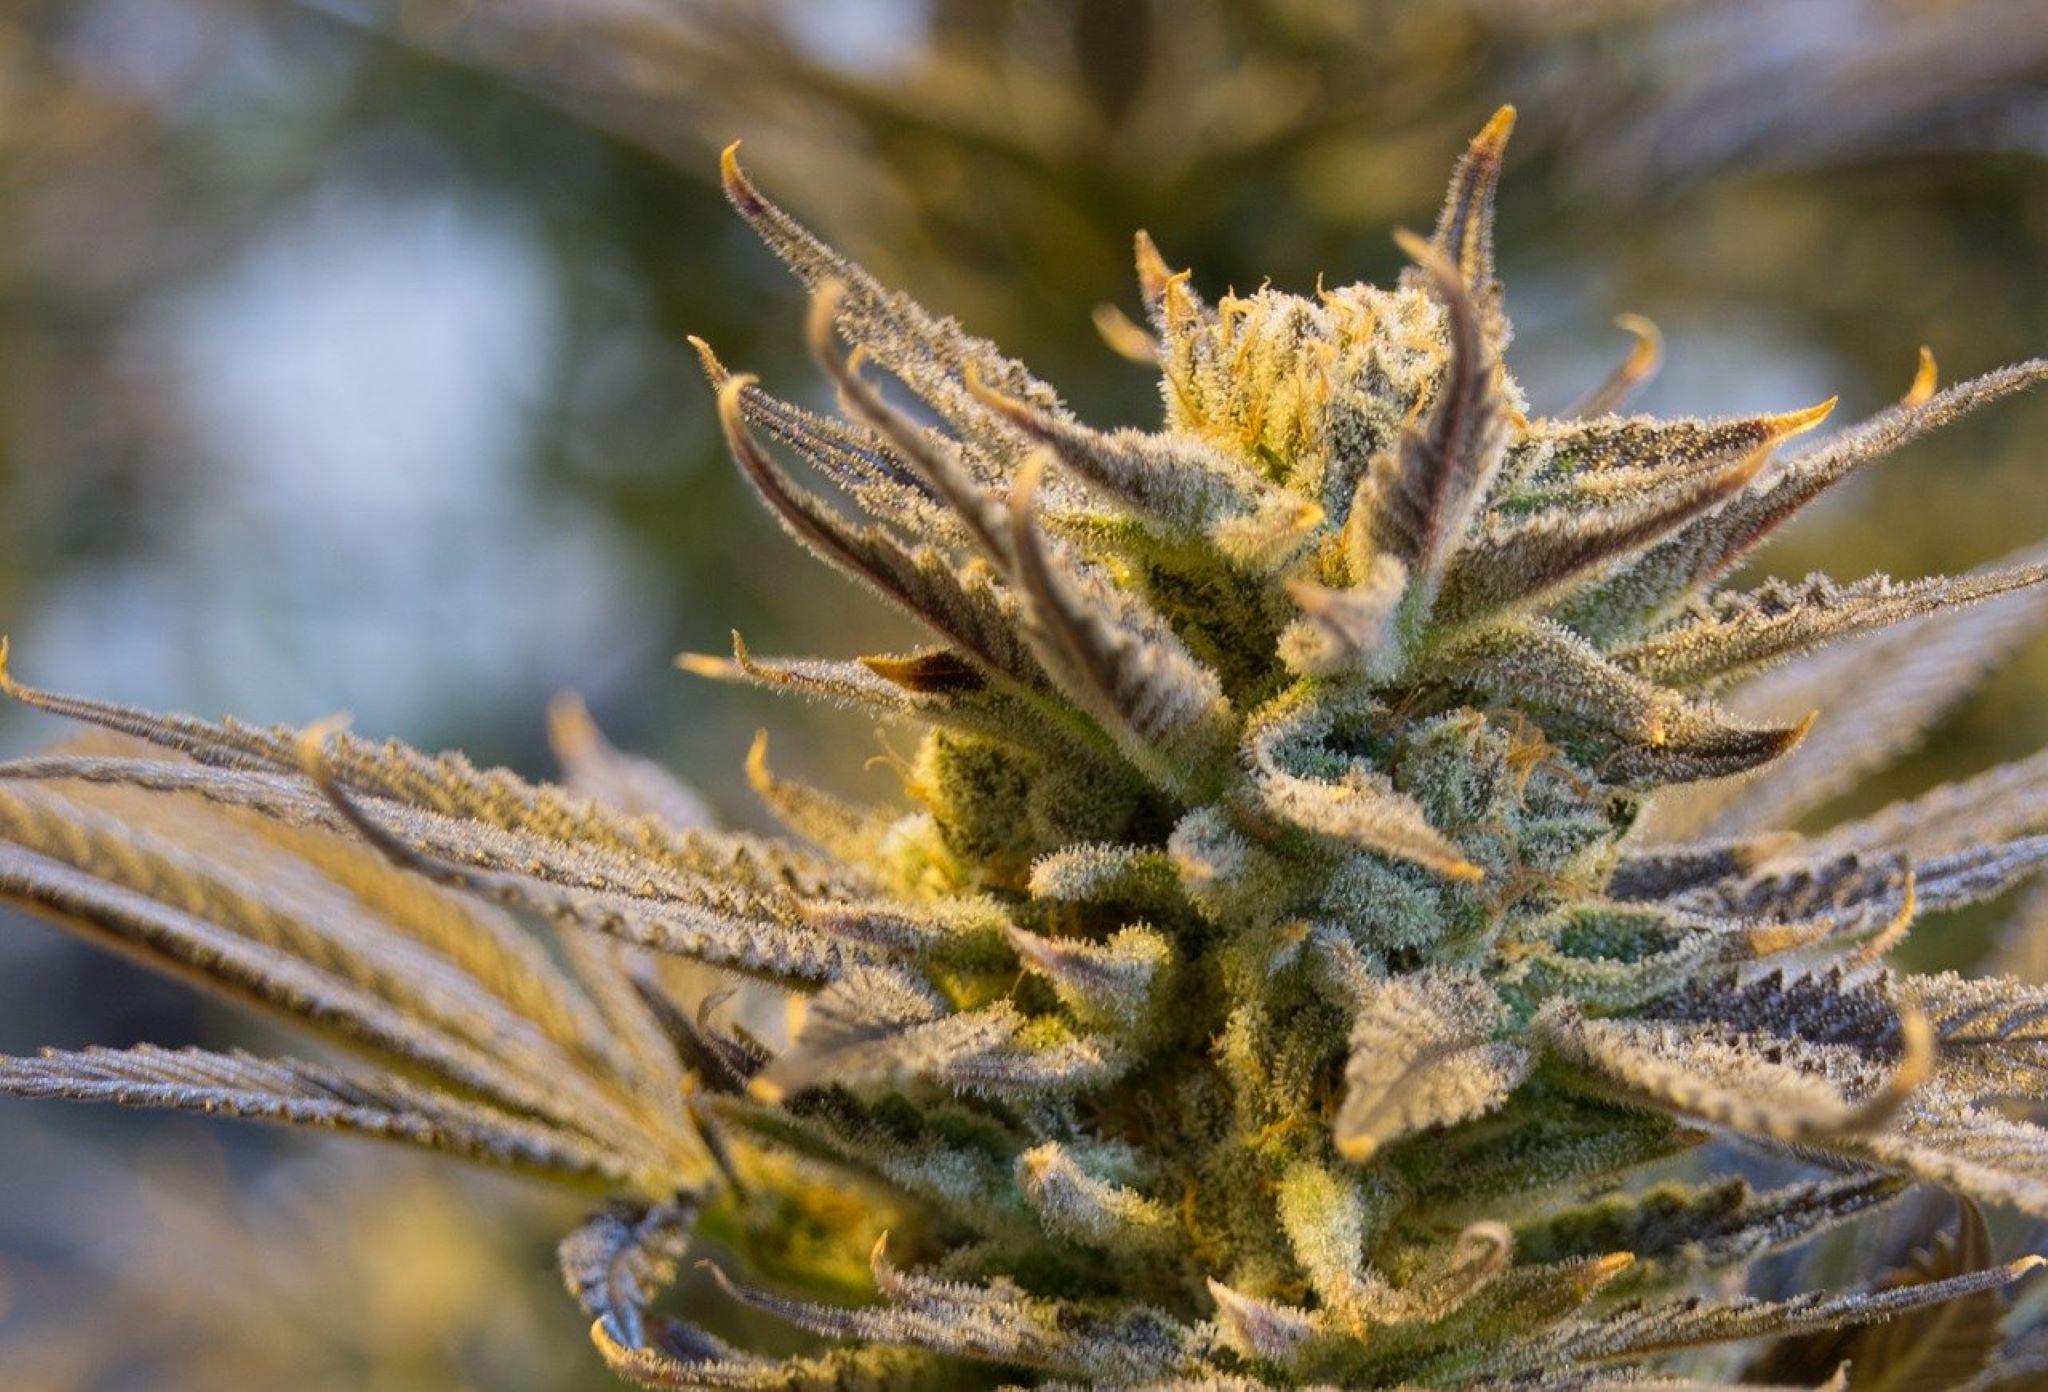
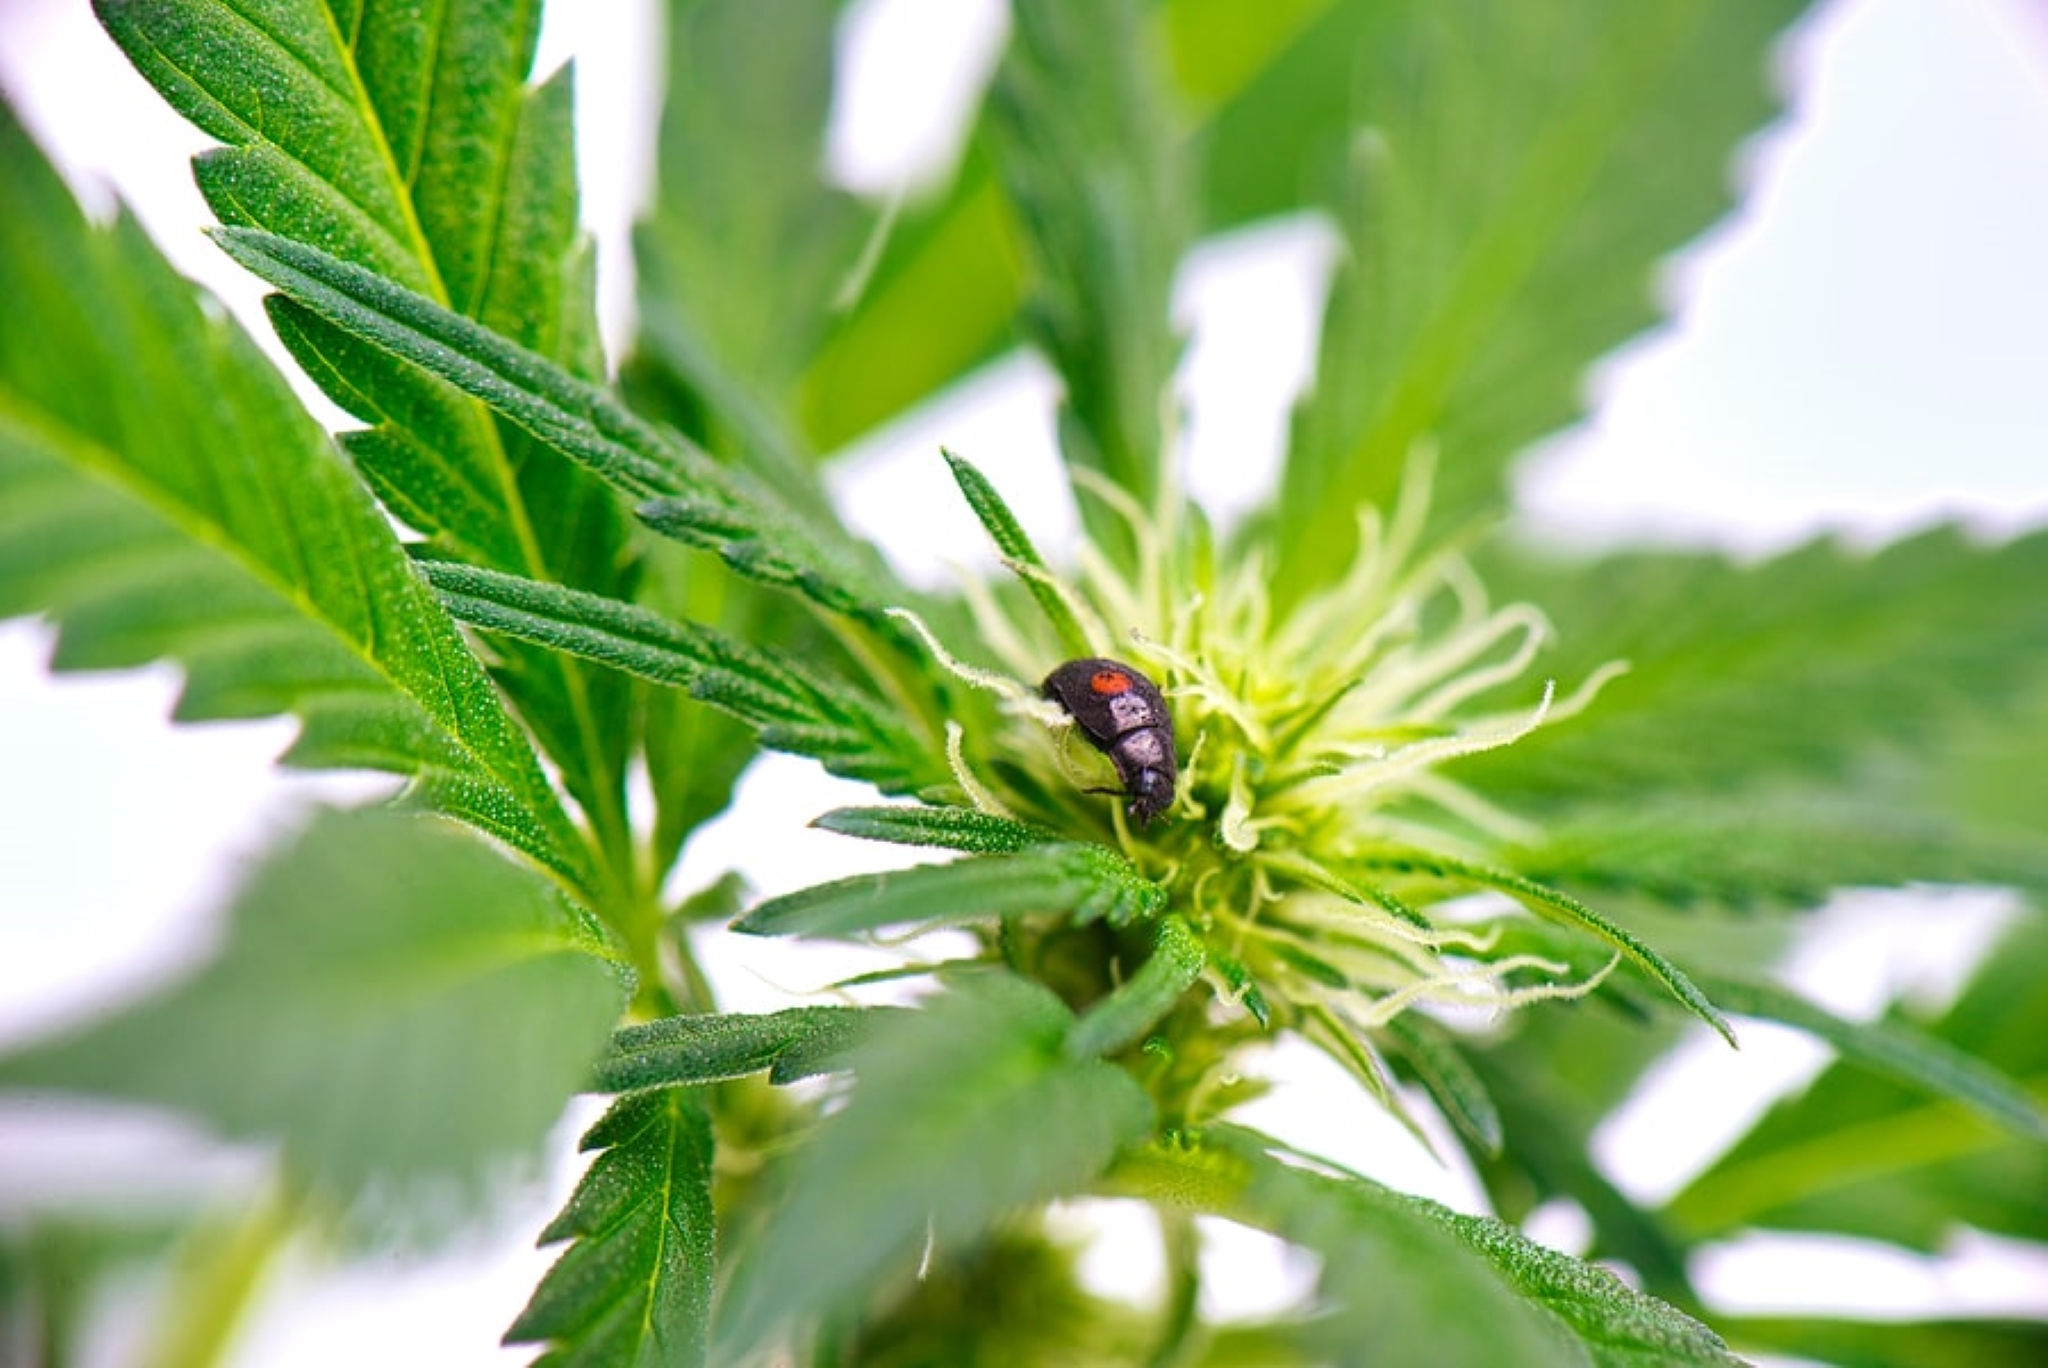
Female plants are easy to recognize, as the first thing you’ll see is at least one or two wispy white hairs or pistils protruding from their calyxes. All cannabis growers are after these female weeds because they produce the buds that contain the most THC concentration and rich cannabinoid profiles. Having a garden of unpollinated females means a continuous supply of psychoactive nuggets.

Now that we have understood the process of identifying a male vs. a female cannabis plant, we need to know how to possibly grow all-female weeds from seeds on every plant, every time.

When growing marijuana from seeds, you will only have lesser chances of getting female seeds as, statistically, regular cannabis produces 75% or more male seeds per crop. In order to increase our chances of getting up to 99% feminized seeds, here are some techniques and tricks of the trade that many experienced breeders swear on.

Stable growing environment

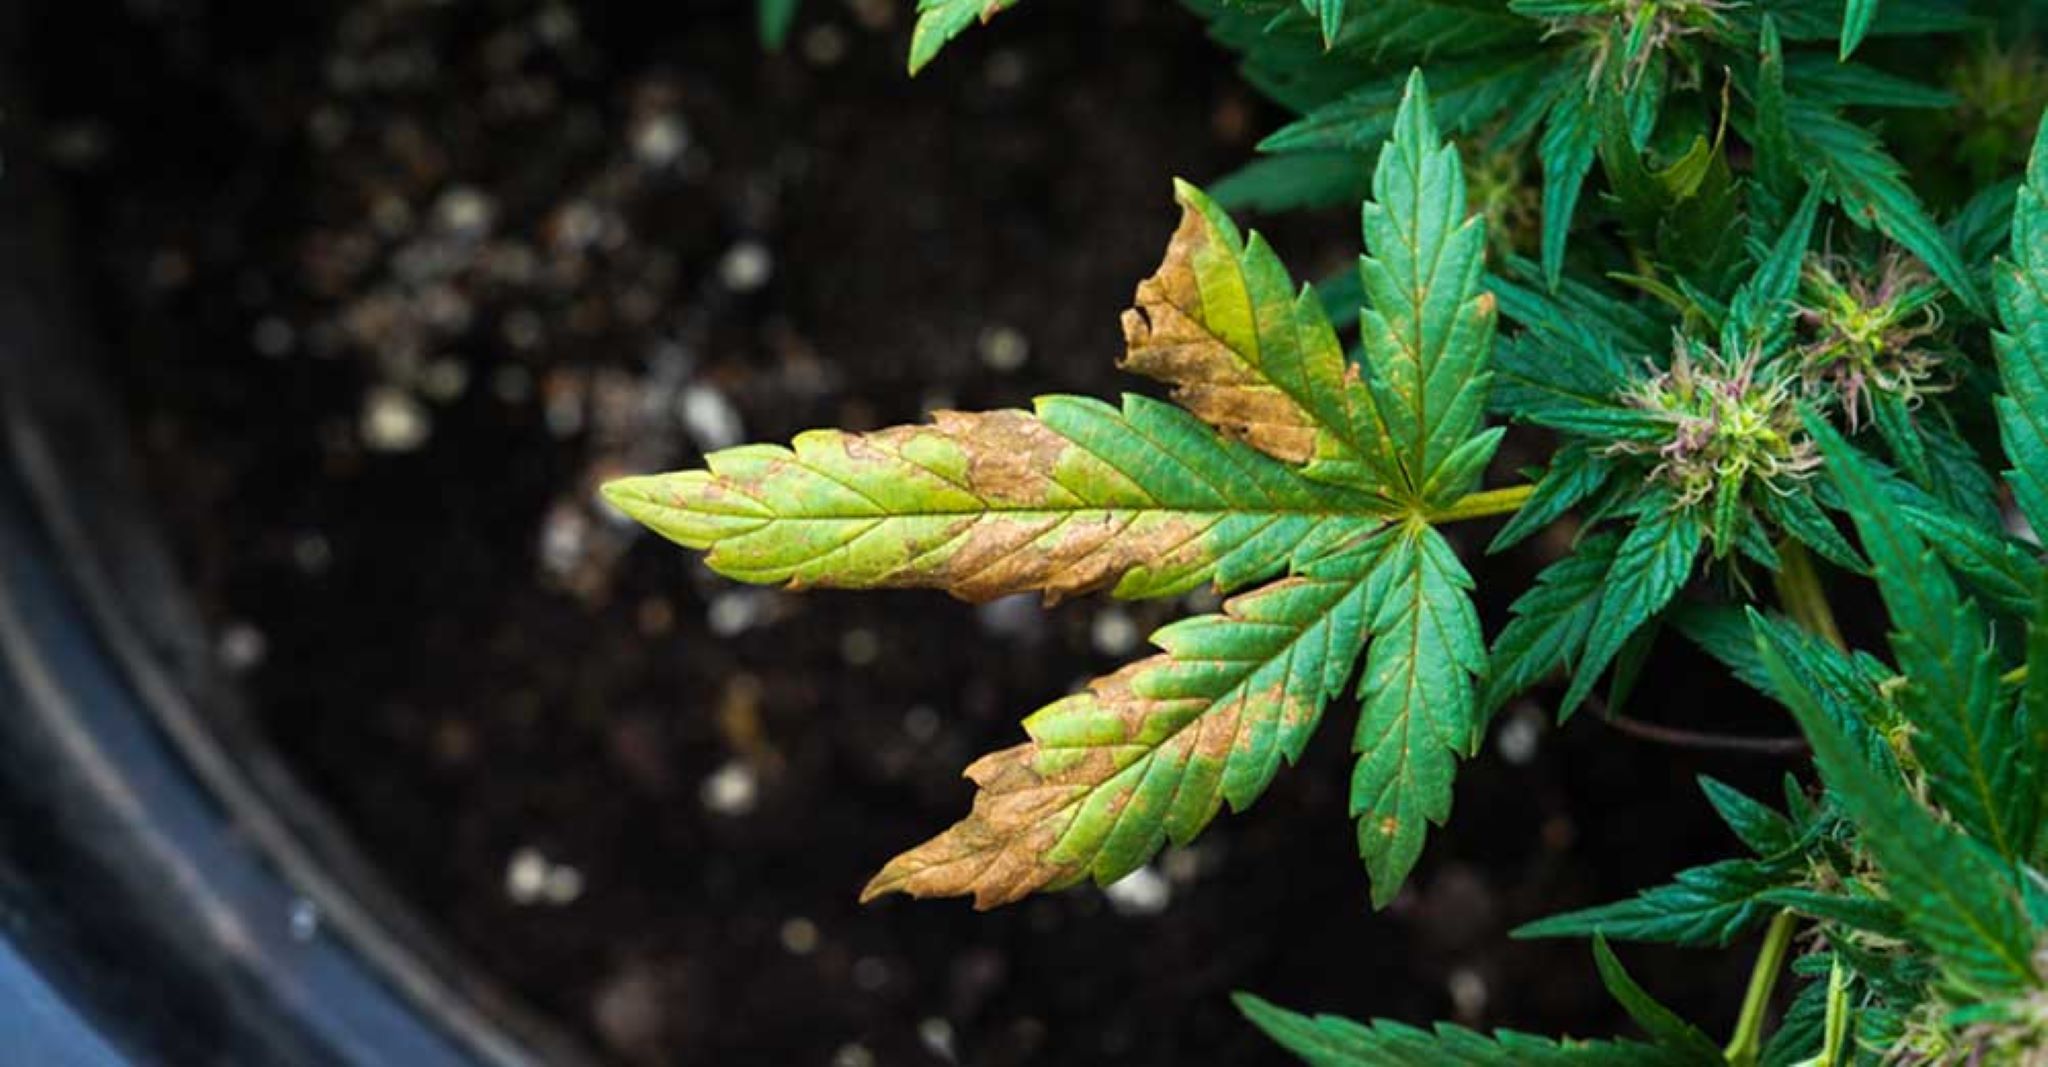
The stability of the growing environment is important to increase the chances of getting a female plant from your crop. Studies have shown that environmental stress tends to produce more males and lesser females. A stable environment covers all the essential requirements needed to grow a marijuana plant. This includes temperatures, humidity, light cycles, and nutrient feedings.

Humidity and Moisture 

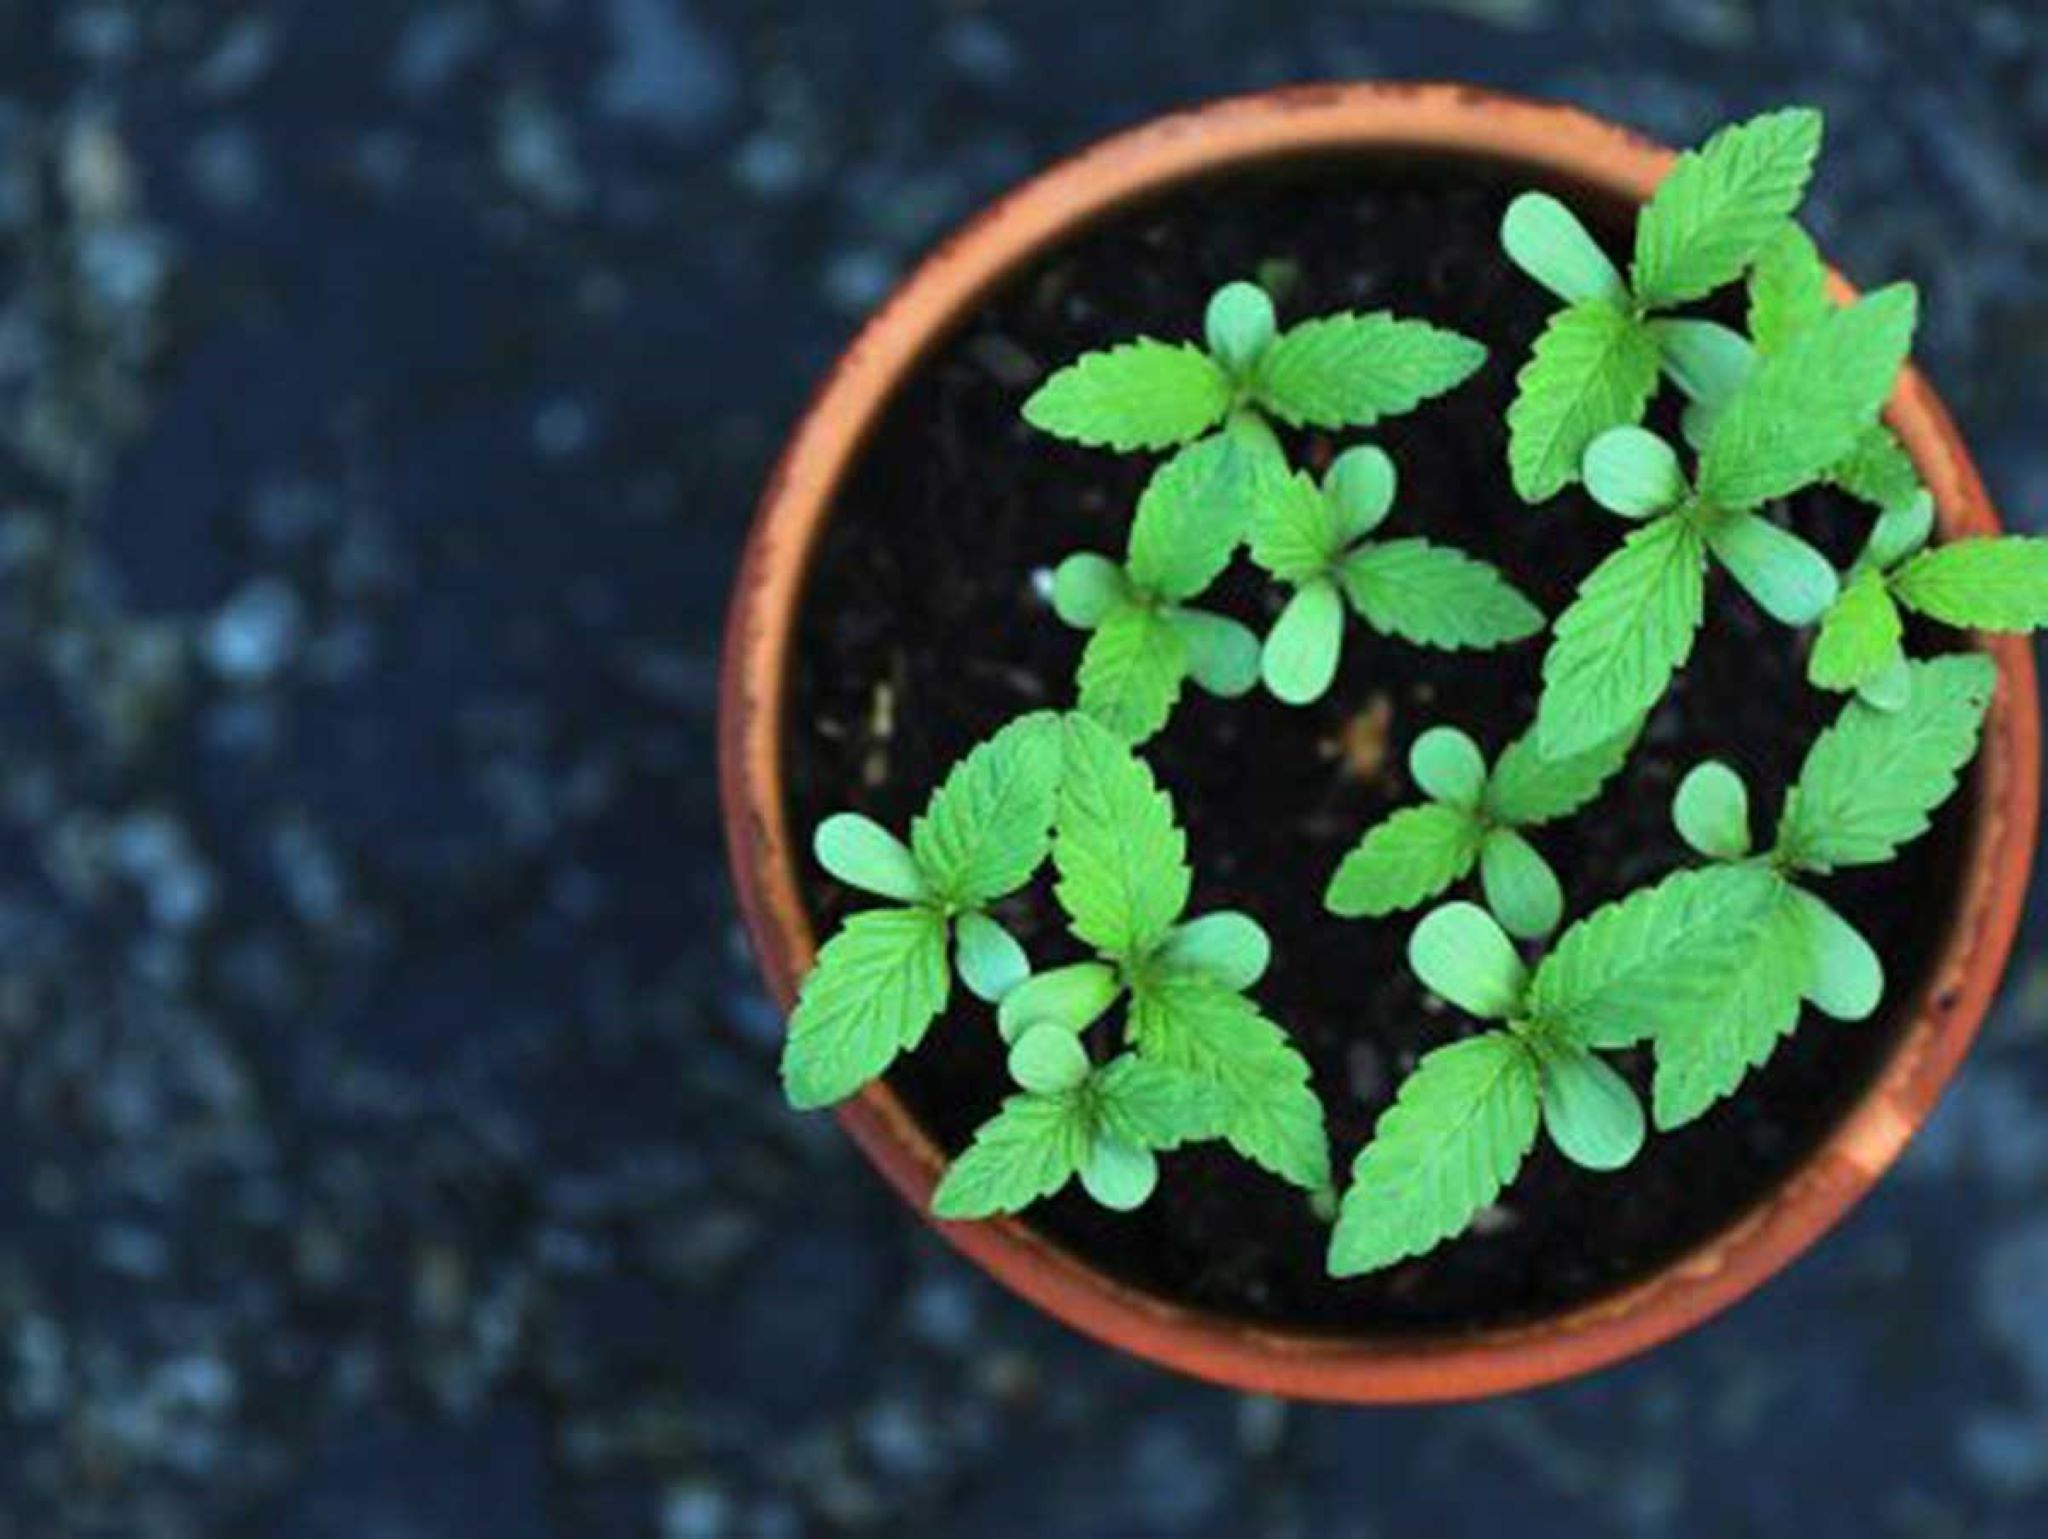
As soon as the seed has its first few pairs of leaves, influencing the settings to have lower temperatures and higher humidity will contribute to an increase in female development. Once these have been set, both temperatures and humidity in air and soil should have as few fluctuations as possible. A humidity level of at least 70% to 80% RH is the ideal level for healthy female plants. This ensures that the growing medium does not dry out too much or becomes too soggy and drenched with water. Either way, the plant will become stressed, and this will encourage more male development.

As the plants grow to become pubescent plants, make sure to adjust the humidity levels to an exact 70% RH. Using the necessary tools like a humidifier or dehumidifier and a hygrometer will ensure that we are able to maintain stable conditions.

Once the plant reaches its flowering stage, adjust the levels gradually to reach 40% to 50% RH. The keyword here is “gradually.” An abrupt change will, needless to say, stress the plants and result in problems for the cannabis flowers.

Lightcycles

Lightcycles should also be maintained at the same length every day and basically should begin and end at the same time. While it is always tempting to expose the plants to more hours of light to encourage faster growth, studies have shown that longer hours of daylights tend to produce more males. On the contrary, fewer hours of daylight will increase the likelihood of females developing.

For your cannabis plants, exposing them to nothing more than a 14-6 day-night photoperiod will maximize the chances of females. Some breeders may opt to increase this to an 18-6 light cycle, and add an extra week of vegetation, as shorter day length slows the growth of the plants. The 18-6 photoperiod is still acceptable as long as they do not go over 18 hours. Otherwise, the likelihood of males increases by as much as 70% to 100%. Patience during the vegetative phase is greatly rewarded.

Blue lights

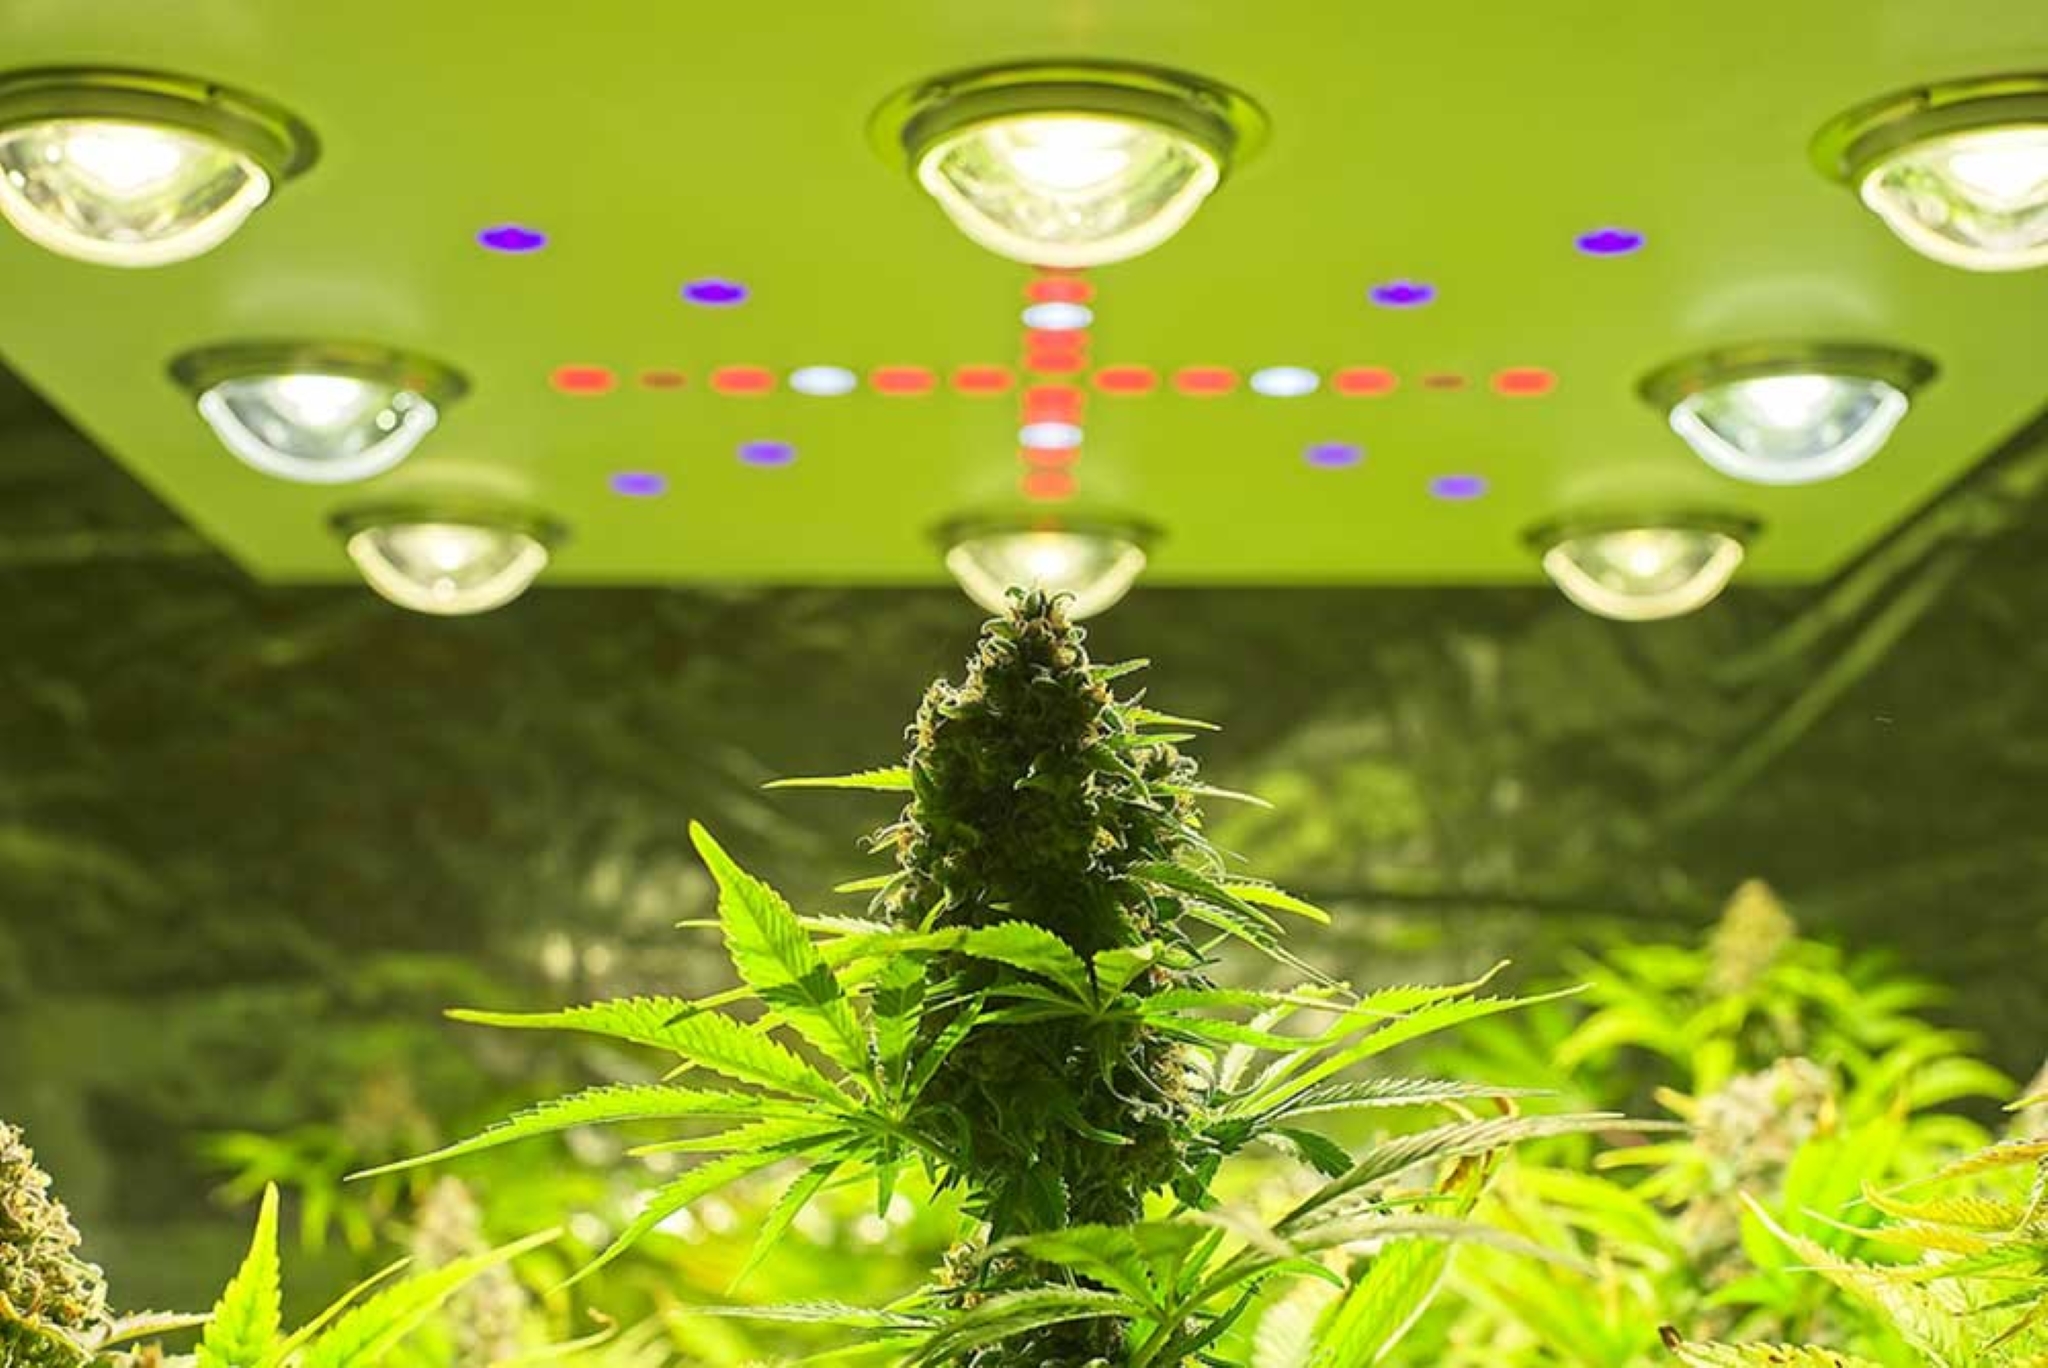
Natural light may appear white to us, but it is actually made up of different colors. And cannabis plants are influenced on how to grow based on the spectrum of light that they receive. Red lights increase the likelihood of male plants, while blue lights encourage female development. Blue lights include white and blue fluorescent lights and metal halide lamps. They are blue based on their spectrum and imitate the natural light we get during spring and summer times more effectively.

Nitrogen and potassium levels

Plants use mineral nutrients, including nitrogen and potassium, to grow. Cannabis breeders develop specific nutrient programs for their plants to influence their plants’ shape, size, potential, and even gender. By increasing nitrogen levels slightly and decreasing potassium, cannabis growers can increase the likelihood of female development. Additionally, nutrient mixes should be exact on every feeding, especially during the vegetative phase, as any sudden spikes or dips in the mixes will cause stress on the cannabis plants.

Conclusion

Following these simple and easy-to-follow tips will maximize female cannabis development, but it does not work every single time. However, surveys have shown that it does work 99% of the time, which is still a pretty good number. The general idea here is to grow regular seeds in a resource-efficient and stress-free way in order to get female weeds all the time.

How to Breed New Strains With Regular Cannabis Seeds

Breeding cannabis has served an important role in cannabis culture, and it has been a part of the horticulture industry for many, many years. The great thing about this is that more and more growers have become more passionate about creating their own cannabis strain.

If you are interested, keep on reading to check out whether breeding is something that is a good match for you.

Why Should You Breed Cannabis?

Producing new hybrid strains come with different amazing advantages that will make the users and growers enjoy something new all around. For many cannabis users, hybrid cannabis strains allow them to enjoy a good mixture of the best things that they like in their two most favorite strains and allowing them to get rid of the negative effects or the things that they dislike from the strains. As the cultivators are able to refine and improve cannabis genetics, you can enjoy better quality cannabis and will feel the overall experience for growing and using cannabis.

Breeding is also perfect for cannabis enthusiasts who feel that they need a little more THC if they are a recreational user, and more CBD, if they are a medicinal cannabis user. The higher the presence of each of these cannabinoids, the more your cannabis will become as potent as it can be. This highlights the effects of the cannabis strain, as well as proving the purpose of why it was developed in the first place

Another reason why you should breed and produce hybrid strains is the positive effects that it can provide to cannabis cultivation. Because these strains possess the great qualities of their parents, the plant has the ability to produce higher amounts of the yield – making the crop top quality. Breeding cannabis strains can also affect and improve different cannabis variables like the size of the buds, the length of the flowering period, resistance against pests and diseases, and the appearance of the plant.

The Steps In Breeding New Cannabis Strains Through The Use of Regular Cannabis Seeds

1. Decide on the strains that you will use.

The very first step in starting this endeavor is looking for the strains that you will use as the parent of your new strain. How can you decide on this? You have to do careful deliberation in making a final decision on the strains that you will select. Make sure that the strains that you will select possess the genetic potential that will meet the specific characteristics that you seek. Usually, breeding uses two strains of cannabis, but you can go as high as 4 strains if that’s what it takes to meet your ideal strain.

2. Identify each of the strains and separate them as needed.

The next part dictates the identification of a male variety of each strain as well as their female variation. Identify the sex of each plant is crucial in the breeding game. Not being able to do this correctly might result in problems with the cannabis grow and the entire breeding process. Remember, in breeding cannabis strains, all forms of pollination should be at the hands of the cultivator and not given to chance. If you are unable to monitor the pollination of the plants, you will never get to identify which plant pollinated another and you will not be able to replicate or present findings in your breeding activities.

3. Begin the pollination of your selected strains.

Once all of the partner cannabis plants are assigned into their designated places, it is time to begin the pollination process. This would entail collecting the pollen from your chosen male plant. This process is fairly easy to complete – you can place plastic bags surrounding the pollen sacs of your plants, wait for them to disperse the pollen, and making sure that you seal these pieces pollen into the plastic containers. Cannabis plant pollen can be stored in your freezer for a few weeks up to 30 days. But, the best practice to observe is to use the pollen upon collection as it would retain the highest quality and potency of the pollen.

How do you know the time to pollinate a female plant? Observe your female plant and wait for the presence of white pistils. Now, once your plant is ready, isolate your female plant in a place where they will be the only ones to receive the pollen of their male counterpart. If you want to ensure that the female plant will be able to get as many pieces of pollen as possible, you can disperse and deliver the pollen through your pollen collection plastic bag, leave it tied in the area of the pistils, and leave them for an hour or two. It would also help to switch of the fans in the grow area to avoid losing the pollen.

4. Observe the proper growing guidelines.

At this point, allow the plant to grow freely and make sure that it receives all the help that it can get. Just like the normal process of growing regular seeds, provide your cannabis hybrid with the proper nutrition, water, and air that it needs to thrive.

5. Harvest your seeds and plant them to check their quality.

Once the parent plants have produced new Cannabis Seeds, it is time to test your new strain development. The only way to do so is to plant these seeds and prepare them for growth. In the buds and seeds that they produce will you find whether or not your breeding attempt was effective.

6. Never underestimate the value of record keeping.

In the production of a brand new strain, records are the most important part. They are your proof on the breeding that you did and all the pertinent information that you have gathered will help you in analysing the cultivation, the things that need to be tested, and what you can improve on to make it the best cannabis strain that it can be.

Final Thoughts

Breeding new cannabis strains is just like growing seeds on your own. The main difference is that this process allows you to create something new through combining strains that you love, and it also asks observation and record-keeping kills from the aspiring cultivator.

Regular Cannabis Cultivation Common Problems and How to Fix Them

Growing regular seeds is an adventure-filled journey. Just like everything in this world, sometimes you cannot help but encounter some problems. It can happen whether you are still new in this endeavor or you have spent years growing your own cannabis stash. What will make a significant difference in fighting to improve your growing journey and studying different ways of resolving common problems that you might encounter?

1. Overwatering Your Cannabis Plant

Have you noticed dropping leaves in your regular cannabis plant? That is a strong sign that you are overwatering your plant. It is exhibited by leaves feeling firm in your hand with the leaves curling down. It can be because of two main reasons: either you are watering your plant too often, or you are watering your plant too much.

How To Fix

To resolve this problem, you must improve monitoring your plant’s watering time. Stop for a while with watering. When you resume, do it slowly so that the plant will not feel overwhelmed. Also, make sure that if your plant is potted, water has a proper way of draining out. A good rule to follow is to wait until about an inch of depth if the soil feels dry to the touch. Use this rule regularly to ensure that you water your plants just enough.

2. Nutrient Burn

Have the leaves of your regular cannabis plant turned yellow?  Does it appear to have yellow tips? These are the usual signs of nutrient burn. This is a problem that arises when you have given your cannabis plant too much nutrient mixtures or if you are feeding the nutrient mixes too often.

The yellow tips that you are noticing are just the beginning of this journey. If the grower fails to resolve this problem, the entire leaf will look brown and crispy, just like how it would if it were burned. Why should you fix this right away? Losing a lot of leaves will result in lesser yields come harvest time.

How To Fix

If you notice nutrient burn in your plant, pause the feeding schedule of your plant for about one to two weeks. Your plant will use this to flush out all of the extra nutrients and return to normal. Moving forward, make sure that you only get a nutrient mix that is high quality and specifically designed for cannabis plants.

3. Calcium Deficiency

When the leaves of your regular cannabis plant start forming brown spots, this means that your plant is suffering from calcium deficiency. What will your plant use calcium for? Calcium provides the plant with structure and helps it against battling stress. 

How To Fix

The first thing to check for problems like this is the pH level of your soil. In normal cases, it must range from 6.2 to 6.5. If the soil is not at this pH level, you should flush it out with water at the correct pH level. Then, you should supply your plant with a nutrient mixture that contains iron, magnesium, and calcium.

4. Heat Stress

If you might notice, a cannabis plant has some large leaves or its primary leaves. When you encounter them curling upward and looking withered, it might be because your plant is undergoing heat stress. Remember, the optimal temperature for a marijuana plant to thrive is between 70 to 75 degrees Fahrenheit during the day and between 50 to 60 degrees Fahrenheit during the night.

How To Fix

The first-aid remedy for problems like this is ensuring that the airflow at your grow room is well and air can circulate throughout the room. The best way to apply this is by installing a small fan in your grow area. Also, it might do your plant good to move its light a little farther.

5. Fungus Gnats

One thing that you will never want for your cannabis plants is to see them being infested by tiny flying insects. Usually, these flying insects are fungus gnats, and they love messing around with plants. They lay their eggs on wet soil, and they can produce about 200 eggs each week. The problems that they bring are that they take away the minerals and the water that is supposed to be your plant – and it may lead to more serious problems.

How To Fix

One of the easiest options to get rid of these insects is through sticky paper traps. If that is not enough, you can make a solution comprising of some tap water, two tablespoons of dishwater, and a cup of apple cider vinegar. Place it near your plant, and you will notice that the fungus gnats will get attracted to the smell, and they will drown in the solution.

6. Light Burn

Cannabis plants love light – but they have their limits, too, and can only take so much. If you start seeing that the cannabis leaves are turning yellow and the leaves are curling upwards, this means that you have exposed your plant into too much light. This can be because the light source is too close to the location of your plant, or it can also mean that the intensity of the light bulb that you are using is too much for the plant.

How To Fix

Light burn offers a very quick solution – move your light further away from your plant or buy a light bulb with lesser intensity for your plant.

7. Nitrogen Deficiency

One of the most common problems in cannabis plants is not having enough nitrogen. It shows up as having leaves that are too light, exhibiting as bright yellow-green. If this is not addressed, you might lose your plant’s potency and the ability to produce large yields.

How To Fix: This can be corrected by adding more nitrogen into your nutrient mix, or increasing the total dose of your NPK mixture.

Final Thoughts

As a cannabis plant grows, it also has its own obstacles to conquer. The key to making sure that your plant stays healthy is to regularly check up on them and always be on the lookout for something different. Try to provide your plant with the best care that it needs, and it will reward you with a generous harvest.

The Key Differences Between Regular and Feminized Cannabis Seeds

With more and more people leaning towards growing new types of Cannabis Seeds like feminized variants, should you really set aside the traditional regular seeds? Is there a significant difference between growing feminized seeds and growing regular ones? In this article, we will look at regular seeds, feminized seeds, and find out what makes them similar, and what makes them different.

First Things First: Cannabis and Reproduction

Before you differentiate these two main types of cannabis, it is important to identify the different sexes of cannabis. A cannabis plant, just like humans, can be born male or female. In some cases, a cannabis plant can also be a hermaphrodite.

Male plants can be characterized by their pollen sacs. These are round or oval-shaped and develop during the flowering stage of the plant. On the other hand, female plants, develop pistils and flowers. These two parts catch the pollen once it is released by the male plants in order to create new seeds. So, in a simple way to look at it, male cannabis plants just have to release pollen, the female plans have to catch it, in order for reproduction to work.

The third type of cannabis plant that rarely occur are hermaphroditic plants. They contain both calyxes and pollen sacs. This usually happens when the cannabis plant encounters stress while it is growing up, making it result into survival mode. For some reason, the plant thinks that it will not experience pollination for the rest of its life, so it tries reproduction with itself. In cases like this, a female plant with pistils and calyxes also develop pollen sacs.

What Are Regular Cannabis Seeds?

Regular Cannabis Seeds are produced by the meeting of a male and a female plant. Just like what was described earlier, regular seeds are born from the meeting of the pollen from a male cannabis plant to a female cannabis plant. All of this happens naturally – without the interference of a grower, chemicals, or technology.

In the same way, if you plant the regular Cannabis Seeds that you acquire from this plant, you will experience something similar as you grow them. If you plan on growing cannabis for flowers, you have to focus on the female plant. If you grow a male plant, relocate them to a different location to avoid pollination.

What Are Feminized Cannabis Seeds?

Feminized Cannabis Seeds are derived from two female cannabis plants, and in return, it only produces female plants 100% of the time. Originally, feminized seeds were designed through subjecting a female cannabis plant to stress – forcing it to produce pollen. When you expose this plant to another female, she will get pollinated and will then result into the production of feminized seeds.

The Key Differences Between Regular and Feminized Cannabis Seeds

1. Though these seeds look fairly the same, they are different in their genetic makeup. Feminized Cannabis Seeds do not have male chromosomes, while regular Cannabis Seeds have the complete genetic makeup that allows them to either be male or female in terms of gender.

2. Regular Cannabis Seeds can be used for breeding, while feminized Cannabis Seeds cannot. It is very helpful for breeders who seek to improve certain characteristics in a cannabis crop. It is also helpful for growers who want to do some experimentation.

3. Regular Cannabis Seeds perform so much better in cloning compared to feminized Cannabis Seeds. Cloning feminized cannabis might not lead to great characteristics once grown.

4. Feminized seeds allow a better consumption of the growing space compared to regular seeds. This is because they give the grower the ability to get the right amount of plants you need at a particular time without having to worry if any males will show up.

Advantages Of Growing Feminized Seeds

1. By growing feminized Cannabis Seeds, you have the ability to make the process easier and quicker. You can eliminate the steps of having to find the sexes of the plants and having to remove them in your grow room.

2. The best part of growing feminized seeds is that it allows the efficiency in your grow space – especially if you are growing indoors with a limited area. As you will surely produce dank buds at any time, you will be able to enjoy a consistent, stable, and bountiful amount of yield.

3. Feminized seeds are strong enough to withstand different types of plant training techniques even at the early stages of growth.

Advantages Of Growing Regular Seeds

1. For many cannabis growers, finding phenotypes is the only reason why they take time on cannabis cultivation. By sticking to regular seeds, the growers are sure that they get the full lineage of the cannabis strains. This assures that you will get a genetically untouched phenotype that is totally unique and have characteristics that you can be sure of every time.

2. Another great thing about growing regular seeds is that you can create your own cannabis strain. This means that you can breed the male and female cannabis plants that you have in your own grow rooms. These will produce a strain that will feature the best characteristics of both of its parents.

3. Growing regular seeds can even give you a chance on a small scale commercial growing. You can organize a small breeding project where the bottom line is to create your own type of cannabis strain that will be enjoyed by the community for years to come. After you have practiced breeding clones and male plants, you will be able to have a strain that you can truly call your own.

4. One of the best parts of growing regular strains is that it allows you to get the old school strains that were never modified to be a part of the selection of feminized strains. If you are a fan of the early days of cannabis and you never want to forget the old school gems, you can find them among traditional regular seed breeders and include them in your next purchase. 

Final Thoughts

Both regular Cannabis Seeds and feminized Cannabis Seeds offer something unique and special to the industry. At the end of the day, it all boils down to what your true purpose in cultivation is. If you are after breeding, you can go for regular seeds. If you are after a shorter growing time, you can go for feminized seeds.

Guide to Autoflower Light Schedule

It is a fact that autoflower can grow and flower without dependence on light. But an ideal autoflower light schedule for growers can optimize health and yield. 

Autoflower seeds can grow with minimal maintenance as it grows fast. They don’t need a lot of space. But you shouldn’t just settle for the sake of growing them. You should know the proper light schedule for high yields. No one would gain from it but you, yourself. Though they’re usually in a short frame, it can keep up with the bigger ones’ harvest.

Types of Suitable Grow Lights for Autoflowers

There are two types of suitable grow lights for autoflowers, and they are LED and HID or high-intensity discharge lights. LEDs are just the recent fad for growing Cannabis indoors as they’re affordable even though they have the advanced capacity. HID is an old standard, but some growers still use them.

Here are some important details that you need to know about each type. 

1. HID (MH, HPS)

This type of light is cheap yet powerful, so it can make Cannabis grow well. There are two kinds of HID bulbs. The first one is MH, which means metal halide and HPS, which stands for high-pressure sodium. 

When it’s with photoperiod strains, MH is used for vegetation and HPS for flowering. A bluish light came out of the MH to optimize the plant’s developing stage. HPS releases a reddish or orange spectrum, and it supports bud growth, so it’s ideal for the flowering stage.

Using HIDs for autoflowers will be in the same way when you grow photoperiod varieties. You need to shift from MH to HPS to develop huge buds. 

When you compare it to LEDs, it’s inexpensive, but it can grow quality buds. However, there are some advantages. It would require two bulbs, and a single piece of LED can get you through the entire life cycle of Cannabis.

The bulbs produce a lot of heat. You need to buy a reflector, and a special power supply called a ballast to complete the lighting system. Even the bulbs are not expensive, additional pieces of equipment will increase your operational cost.

There’s also another kind of HID called LEC. It’s energy-efficient, and it has a spectrum that is similar to the sun rays. Some cultivators think that it’s beneficial to the plants’ development.

2. LEDs

When LED lights were just new in the market, Cannabis growers didn’t take them seriously. Then it came to a point when the effectiveness of these lights was discovered, and the issue with it was the price. They were expensive at first.

When the technology became standardized and evened out, the price was fixed for consumers to afford to buy these lights. It gives more light so it can achieve the same setting as HID. 

LEDs are more expensive than HID; you will realize that using them lowers the operational cost compared when you settle for classic lights. They would only use less energy, so it won’t make your bill hike up. 

There are ‘plug-in and grow’ LEDs, so you won’t need to buy reflectors for things to work out. They’re easy to use too.

Some disadvantages are being outright expensive, and some cheap kinds are all over the market. Then you may be lured to by them as you don’t have any idea. 

But you can get the full-spectrum LEDs as you can use them throughout the growing phase. They remain useful from the moment you plant your seeds until the harvest time. 

Some LEDs feature a switch so you can make changes on the spectrum, which can be from vegetation to flowering. You would need to do it even though you’re growing autoflowers. 

The Setting of Autoflower Light Schedule – Outdoors and Indoors

1. The setting of Light for Outdoor Plantation

Autoflowers are not only suitable for indoor growth but as well as outdoor cultivation. You can even plant them any time outside as they don’t need natural daylight to flower. Set them in your outdoor plantation as long as there’s no presence of frost. 

You can successfully grow autoflowers outdoors. They would flower after 3 to 4 weeks, and the harvesting can be done in a matter of 60 or 70 days. It can make you harvest multiple times in a year.

When you grow autoflowers outdoors, it gives you an advantage to stealth growing or guerrilla gardening because of its short frame. It would help you hide your garden from spectators, and it lessens the chance to be discovered as it can finish in a short period.

When there is efficient lighting indoors, sunlight can also let autoflowers develop well. It won’t only give you a high production but highly potent buds as well.

2. Autoflower Light Schedule in an Indoor Plantation

24-0 Light Schedule

Some Cannabis growers supply light to autoflowers round the clock. They prefer this one as it comes with ease, and it doesn’t need a timer. Most of all, it gives a much better yield.

But the disadvantage of this schedule is that it can consume a lot of energy. When the lights are on all the time uninterrupted, expect a high electric bill.

Somehow, science can back the belief of giving your autoflowers a continuous supply of light. It is the aspect of utilization and absorption of CO2. Some plants cling to the C4 carbon fixation process, which makes them gather CO2 on dark periods to photosynthesize in the light.

But Cannabis is a C3 plant that doesn’t mind about taking a break. It can proceed to photosynthesis even if the lights are on. So this explains why some growers opt for this light schedule.

18 – 6 Light Schedule

Some growers don’t believe in a constant autoflower light schedule. So there’s 18 – 6, which represents 18 hours of light and 6 hours of darkness. 

The philosophy behind this perspective is that plants are exposed to light for a good yield while they take a rest in darkness to maintain healthy growth. Another advantage that won’t be taken by your plant but your pocket as you can save 25% of energy.

It will give the same yield as the 24-0, so why not give your autoflowers a break and save yourself from paying high bills. The only drawback of this schedule has a timer, which isn’t a big deal.

20 – 4 Light Schedule

It’s the middle ground of 24-0 and 18-6 light schedules. Some would add 2 hours of light to assure massive yield. Your electric bill will be a bit higher.

6 – 2 Light Schedule

It’s an uncommon light schedule, but its supporters believe that it can create a controlled environment and stable plants. The 6 – 2 means three sessions of light provision for 6 hours each while the break is done for 2 hours.

The principle of this light schedule is that Cannabis can only process a certain amount of light in a day. After the needed amount of light is fulfilled, the excess is only put to waste. 

The two hours of break are done between every 6 hours so the plants can take a rest and be ready to receive light again. It is during the moments with light that the plants work on developing and enhancing the harvest. 

Its proponents believe that a short period of light will not bring stress to the plants and the cooling system. The time for break allows the room to cool before turning back on the lights. 

But it can stress heating and lights when short light and breaks are frequently applied. This method is under-practiced.

Words for Closing

You need to put more effort into the autoflower light schedule if you want to boost yield. You must not be content with its ability to survive if you want to get a bountiful harvest, just like photoperiod strains. 

Picking the right types of light is a must. Different light schedules are suitable for autoflowers, and you can try each of them to see which one works best, although the common recommendation is 18 – 6.

Top 10 High Yielding Autoflower to Have in Your Garden

In this modern era, people have ways or tricks to compel themselves with easy-to-do things. It’s no different with the Cannabis world. 

There’s a variety of flowers quicker than the usual stuff without the necessity of changing the light cycle. It’s easy to grow, and any beginner can start cultivation with it. It can also withstand any growing condition or environment. 

Though it’s compact, it remains a high yielding autoflower. It could not have happened if Ruderalis stands alone. But breeders got the magnificent idea of crossing them with either Sativa or Indica. 

General Perspective on Autoflowers and Their Yield

In a general perspective, autoflowers are not high in yield as well as potency. Their strength is mainly focused on flowering fast without help from light. Thanks to the genetics of Ruderalis.

Ruderalis is known as a tough plant that can resist cold temperature, and even when it quickly drops. But it has a low THC level. It simply shows that you can’t have it all. 

So master breeders utilized their skills to improve the potency, so they crossed Ruderalis with extremely potent strains. They also did the same thing with the amount of yield. They have associated it with feminized plants for the improvement of both THC and production. 

If you’re an impatient grower, you will seek these amazing strains for sure. With quick flowering time, you will be able to get your hands on high yield. 

Top Ten High Yielding Autoflower

1. Super Critical Auto

Flowering time: 6 to 7 weeks

Yield: 650 grams per square meter

It’s an amazing strain with the genetics of award-winning parents, which are Big Bud, Skunk, and White Widow. It’s an Indica dominant strain that grows fast and yields a massive amount due to its incredible heritage.

It can flower in 7 weeks as it gets tall from 70 to 120 cm. Then the harvest comes in a matter of 2 or 3 weeks. 

Using SOG or Sea of Green method will let you harvest 800 grams per square meter, so that’s why it is the number one high yielding autoflower. When grown outdoors, you can harvest 35 grams per plant.

You will also be impressed with its potency as effects are long-lasting too. It works as a painkiller. You will feel what it can bring without any delay. It will let you feel a body stone, and then it will be sedative. All in all, it’s a relaxing high.

2. Tangie Matic Auto

Flowering time: 9 weeks

Yield: 450 – 670 grams per square meter

With proper tending, you will see that it starts to flower in 9 weeks. It has already reached a height of 80 to 150 cm. It makes Cannabis growers as it gives 450 to 670 grams per square meter when grown indoors. You can also choose to grow it outdoors and get 50 to 350 grams per plant. It can easily be affected by stress so you can pass on training.

It has a high THC that rises to 23%. It’s therapeutic as it can be used for treating depression, anxiety, and stress. It is also used as an appetite stimulator.

It has a fresh scent consisting of tangerine, fruits, herbs, and spices. It adds to its calming effects.

3. Girl Scout Cookies Auto

Flowering Time: 8 to 9 weeks

Yield: 500 to 650 grams per square meter

It came from the infamous Girl Scout Cookies and a Ruderalis. It stretches to 60 or 100 cm as it reaches the flowering period after 8 to 9 weeks. It’s easy to grow as it enjoys regular feeding.

It will give you 500 to 650 grams per square meter when raised indoors. Outdoor plantations will end up with 70 to 300 grams per plant. 

The name gives you a clue on how it tastes. It gives you a cookie smell and taste. It has a sweetness that is filled with chocolate, sugar, and nutmeg. You will not only savor its taste but the effects too.

It hits both mind and body hard. It leans more on the Indica side, but it will turn you into a social butterfly as humor and creativity are intensified. It can also give therapeutic benefits for people who are struggling with neuropathy, PTSD, pain, and muscle spasms.

4. Gorilla Glue Auto

Flowering Time: 8 to 9 weeks

Yield: 400 to 600 grams per square meter

With the word ‘glue’ in its name, this is one of the stickiest strains you can ever encounter. In just a matter of 8 to 9 weeks for the flowering stage, it stretches into 60 to 100 cm. You will get 400 to 600 grams per square meter when you let it grow indoors. 

It grows buds that are huge, compact, tight, and super sticky. You will surely experience the sticky resin getting on your hands, scissors, and gloves.

These sticky buds give off 24% THC. It delivers a high that can make you feel happy and relaxed. So it’s consumed to alleviate pain, PMS, migraines, and stress.

You will get a smell of diesel and pine with lemony notes. The taste is quite similar to the smell as it has a fruity flavor accompanied by pine.

5. Stardawg Auto

Flowering time: 60 days

Yield: 400 to 600 grams per square meter

This strain was made from the combination of Genetics Chemdawg #4 and Tres Dawg. It develops bright green buds that sparkle with crystalized resins pretty quickly after 60 days. 

With the height of 70 to 120 cm, it’s great for stealth growing. Indoor crops will weigh 400 to 600 grams per square meter while the outdoor harvest is 50 to 300 grams per plant. 

It will invite you by getting into your nostrils with a scent that is composed of pine and citrus. You will get an intense lemony scent. It’s a quick-hitter. It stimulates your mind, and it puts you in a state of a stoned body high.

It can treat glaucoma, asthma, epilepsy, nausea, and anxiety. It’s an appetite booster.

6. Crystal Meth Auto

Flowering Time: 8 – 9 weeks

Yield: 400 to 600 grams per square meter

It’s a poly hybrid with the presence of genetics, which came from Early Skunk, Mexican, and Ruderalis. It’s one attractive strain as it displays red, purple, and black foliage with a coating of frosty resins and trichomes.

It will take 8 to 9 weeks to flower, and it will reach the stature of 70 to 120 cm. It will let you harvest 400 to 600 grams per square meter when you grow it indoors. Outdoor plantation gives 50 to 300 grams per plant.

It gives its users a happy, head high with 20% THC. It can provide relief for several health conditions such as depression, stress, asthma, pain, arthritis, PMS, and multiple sclerosis. 

It has a strong nutty aroma with some piney tones. It has an equally appetizing hazelnut taste.

7. Gorilla Glue #4 Auto

Flowering time: 55 – 58 days

Yield: 400 to 600 grams per square meter

It’s one of the best auto strains as it gathered awards. It’s the result of a three-way cross, which was participated by Chem’s Sister, Chocolate Diesel, and Sour Dubble. 

It sways from the typical frame of autoflowers as it reaches the height of 140 to 200 cm. It’s one of the quickest strains to flower as it only needs 55 to 58 days. It can finish after 60 to 75 days, so it is the favorite of impatient growers. 

It gives 400 to 600 grams per square meter from an indoor plantation. The harvest it can give from outdoor cultivation is 50 to 300 grams per plant. 

It’s a potent strain with 23% THC. It will let you get the euphoric ride first; then, it shifts into relaxing body buzz. It is a great remedy for insomnia.

It will tempt you with sweet and spicy aroma accompanied with berry notes. The taste will let you detect chocolate or coffee and diesel in the exhale.

8. Northern Lights x Big Bud Ryder Auto

Flowering time: 10 weeks

Yield: 450 to 600 grams per square meter

You will be able to gather large, dense, and frosty buds, which will start to bloom in 10 weeks. You can collect 450 to 600 grams per square meter from indoor cultivation. Outdoor yield is expected around 70 grams per plant.

The buds contain 22% THC, which lets you experience calming and relaxing body buzz. Therefore, you can use it to treat migraines, chronic pain, and stress.

It tickles your nostrils with its citrus scent while your taste buds feast on mandarin orange and pineapple flavor.

9. Amnesia Gold Auto

Flowering time: 9 to 10 weeks

Yield: 600 grams per square meter

Two Sativa varieties, the famous Amnesia and Lennon, were combined with a Ruderalis to create this hybrid strain. It’s loved by many connoisseurs, so it’s a must-try, especially if you haven’t tried strain with Ruderalis genetics.

The flowering time goes from 9 to 10 weeks, with a height of 60 to 160 cm. Indoor plantations will produce 600 grams per square meter, while outdoor growth can give you 150 grams per plant. 

Its potency is shown in its 19% THC, which gives users a happy head high and a long-lasting psychedelic ride. It’s an appetite enhancer while you get to taste a sweet, citrusy strain.

10. West Coast OG Auto

Flowering time: 8 – 9 weeks

Yield: 500 – 650 grams per square meter

It bears the same genetics with OG Kush plus the Ruderalis traits. Though it is the last strain in the list, it still has an exceptional yield of 500 to 650 grams per square meter when grown indoors. When it flourishes outdoors, it gives 70 to 300 grams per plant.

It’s a chunky plant that stretches up to 90 cm high. It is an Indica variety that releases euphoric and relaxing that can go on for some time. It has medicinal value as it can be used to relieve pain and mental disorders like ADHD, paranoia, and anxiety. 

It has an odor that can easily catch people’s attention. It smells like citrus, coastal scent, and wood. It gives a fruity and citrusy taste.

Afterthoughts

The majority of auto strains are short, so it can be grown indoors as you can easily control the height. Another reason for this choice of growth is that it proves itself as a high yielding autoflower. It produces a higher yield compared to an outdoor plantation.

You can start getting the seeds of the amazing strains on the list from trusted seed banks, like Rocket Seeds. They are the ones that you shouldn’t miss to add in your garden if you want high yield and quick finish.

Identifying the Maximum Autoflower Yield of Your Cannabis

Most Cannabis growers want to learn more about how to have an excellent autoflower yield. Most of them may have talent, but they still need more information. It can be a serious shortcoming when it comes to the cultivation of auto-flowering.

Autoflowering strains are one of the fads in the Cannabis community as they flower in just a matter of a short time. Although they can finish quickly, it can give you a decent yield, which is contrary to the belief of many growers.

To identify the maximum yield of auto-flowering Cannabis, you have to know how things would work for them. It would take 2 to 3 months to wrap things up with this plant, but it won’t happen with just letting them grow.

Ways to Maximize Autoflower Yield of Your Cannabis Plants

1. Beforehand Preparation

It’s critical to plan the plantation when you grow autoflowers. You can think of what growing medium you will use, or you would settle for soil, soilless, hydroponics. You also have to pick the nutrients that your plants need. 

Light systems and ventilation are things that need your attention. It’s all about setting up your grow room. You have to weigh things in advance as the clock ticks.

If you’re clueless about the essential things mentioned above, you are unfortunately not ready to grow autoflower seeds. Other varieties of Cannabis can give you time to prepare after you have sown the seeds, but autoflowers are exemptions.

With autoflowers, the time matters as you soak the seeds in the water. Before you do it, you have to think of the ventilation, lighting, container, medium, space, and grow room.

There’s also a need to look for auto-flowering with the highest quality. Even if you do all the necessary things properly, but what you planted is not for high yields, you will be disappointed with the outcome. 

You can choose from an array of strains that are capable of XXL to L production. Choose the one that can fit the space that you have. 

2. Transplanting Shouldn’t be Considered

Again, autoflowers don’t give you much time; neither they have leeway for some mending. That’s why it’s recommended that autoflowers should be in their final containers.

There can be a shock from transplanting that can stunt the plant’s growth. With autoflowers, a day or two of vegetation matters a lot as it can affect the amount of autoflower yield. 

Never make a mistake of transplanting auto-flowering plants even just once. But if you still want to go for transplanting, see to it that you use a similar medium. When your seedlings are placed in a potting mix of coco coir and compost, they should be transplanted to the same exact mixture.

You have to water the container as the mix should be moist before transplanting occurs. If the soil is too wet or dry, it can hurt the roots.

The roots must start to fill in the container as you can expect that the soil drops in clumps while the roots get stuck with them. It simply asks you to wait for the plant with bound roots before you do transplanting.

You may feel dizzy of many possible complications, so it’s best to grow directly to final containers. You can go on your way to have a good yield with no hassle.

3. Containers that Drain Well Work Best

Containers should be proportioned to the plants’ size. Medium plants would be fine with 5 to 7 gallon-container while the large ones fit more than 11 gallons. 

So it’s important to choose the containers that can also drain well. You have to choose aerated soil for your auto-flowering plants. Fabric pots provide good drainage. 

4. Reduction of Nutrient’s Strength

Beginners would tend to feed their plants with tons of nutrients resulting in nutrient burn. Too much love can kill you. In terms of plants, too much care would damage them and, yes, even end their lives.

You ought to know that photoperiod strains have bigger roots compared to the small ones of the autoflowers. So you have to adjust the nutrients for the latter.

Take this measurement as an example. If the nutrient chart says ‘5ml per liter’, you have to cut it down to a half or a quarter, so it’s either 2.5ml or 1.25 ml. 

But there are ravenous auto strains like Gorilla Glue and Tanie Matic. Don’t go with high doses of nutrients right away. You can experiment and observe first the reaction of the plants. You can start with half-strength then add a bit more based on how the plants react.

5. Being Attentive With the pH Level

pH level contributes to the possible autoflower yield. It’s a vital thing to watch over whichever way you plant your weed. pH level should be checked if your plants are growing through hydroponics, soil, or other growing media. 

Some growers would blame nutrient deficiency with some damages, but it is actually because of pH level. The required level of pH is based on the growing medium and method.

Soil plantation would require the highest level as the pH should be around 6.0 to 7.0. The hydroponic system needs 5.5 to 6.5 pH, which is what autoflowers need too. There are no exact numbers, but the average is from 5.5 to 6.5 pH.

When pH drops below 5.5, the plants will be incapable of absorbing magnesium and calcium, no matter how you feed them with these nutrients. It would be a similar condition when the level goes beyond 7.0. 

The plant won’t be able to recover if the pH level is not correct. If there’s nutrient deficiency, the plant can’t work on developing a high yield. Checking the pH level is a way of maintaining the health of autoflowers.

6. Something With Light Cycle

One of the impressive traits of autoflowers is that it can survive in any condition and environment. They can grow even if they only receive 12 hours of light from seeds to finish time. 

However, autoflowers prosper within 18 hours of light and 6 hours of darkness. Some cultivators give them around the clock light, but it deprives the plants to take a rest just like what humans need. Somehow, you can get a good yield, but it’s much better with 18/6.

Although autoflowers grow with any light cycle, the light source matters as they prefer LEDs and HPS over fluorescent and CFL. LEDs in the full spectrum have the best provision that autoflowers like. 

Better lumens enhance the yield. But if you can’t afford it, CFLs are fine, and they work well during vegetation. 

Some autoflowers grow outdoors, and they receive 12 hours of sunlight in a day. You may be wondering if it’s enough for them. Sunlight is the most powerful light source, and it’s stronger than the man-made light. So growing auto strains is an advantage when you want a favorable autoflower yield.

7. The Right Training Method for Autoflowers

Not all training methods work for autoflowers due to time restriction. The high-stress method only works well with photoperiod strains, but it doesn’t with autoflowers. 

Growers need to apply Low-stress training for autoflowers. It is the method that the stems are being bent so the light can get to the lower part of the plants. It’s suitable for autoflowers as they develop single, huge cola, and the rest of the stems would let popcorn buds grow.

LST is done after topping, which is a way of cutting the main stem’s tip. It is a way of forcing the plant to grow more than one cola. 

FIM can also be done with autoflowers. It is cutting only some parts of the tip and not the whole part.

Autoflowers respond well with either LST, topping, and FIM. But you have to make sure that the plants are healthy enough to handle possible stress. If the auto strain is unhealthy, it’s not good for training as it doesn’t have much time for recovery.

When the three methods are done to your auto-flowering plants, the result will be pretty awesome. You can do it during the third or fourth week as it is time that the strain starts to flower. 

Leave your autoflowers untrained if you’re unsure of its condition, whether it’s healthy or not. Let it flourish by itself or feel sorry if you damage them. 

Final Words

You can let auto strains grow by themselves since they can withstand any condition and environment. They finish faster than the photoperiod, and they are space savers as they grow into compact plants. These are some of the advantages.

Although it only grows into a small plant, it’s still possible to have a high autoflower yield. You only have to practice the tips and advice that were mentioned above. Growers should know the importance of time when they want to achieve a bountiful harvest. 

Much-Needed Autoflower Nutrients that Cannabis Growers Should Know

Autoflowering cannabis is the third type of cannabis that evolved over the last few decades. It was first discovered in the early 1920s by a Russian botanist and is said to be most-likely from Central or Eastern Europe. As the name suggests, these plants automatically begin flowering at a specific age. Unlike traditional cannabis plants that flower depending on their light cycles or the amount of light they receive, these plants have highly accelerated growth rates and do not have a photoperiod sensitivity.

That being said, because autoflowering plants have a significantly different life cycle, they also have different autoflower nutrients requirements for fertilization and higher performance and yield.

Macronutrients needed for autoflowering cannabis plants

Like any other growing plant, cannabis autoflower seeds need a number of different minerals in order to fully develop to happy, healthy plants. They use photosynthesis to produce their food from water and carbon dioxide. Autoflowering cannabis plants use large quantities of three primary macronutrients: Nitrogen (N), Phosphorus (P), and Potassium (K).

Primary Macronutrient: Nitrogen

This nutrient is considered the most important component of any plant growth. In fact, Nitrogen has been used in plant cultivation since prehistoric times. Nitrate (the form of Nitrogen that plants use) forms part of the growth and development of vital plant cells like the cell membranes and the chlorophyll molecules. Nitrogen is a core nutrient that forms the DNA needed in plant survival. Cannabis plants, unlike normal plants, are very efficient in taking up nitrogen. Nitrogen deficiency is a rarity in the world of marijuana cultivation.

Primary Macronutrient: Phosphorus

As the mineral responsible for protein synthesis, energy storage, and nutrient uptake, Phosphorus plays an essential role in the plant’s entire growth process from seedling development to the timely formation of roots and flowers. It is a vital nutrient used to maintain the cannabis strain’s genetic integrity as it gets passed down from one generation to the next. Without adequate levels of this nutrient, your plants will suffer reduced health and stunted growth, both of which can greatly impair your crop quality and yield.

Primary Macronutrient: Potassium

Another nutrient that is crucial to sustaining plant growth and production, Potassium is the final primary macronutrient for plants, including autoflowering cannabis plants. It fulfills key physiological functions, such as the regulation of carbon dioxide, strengthening of the plants, and even retention of water in the plants. During a drought period, this macronutrient helps improve the plant’s strength. This includes the resistance of the cannabis plant’s root system and tissues.

Autoflowering marijuana plants also need other macronutrients to balance the N-P-K inputs and for maximum growth stimulation. Aside from the N-P-K ratio, these plants also require Calcium (Ca), Magnesium (Mg), and Sulfur (S) in relatively abundant amounts but significantly lower doses than N-P-K. 

These three nutrients are called secondary micronutrients. It is important not to be confused with the term “secondary” as the deficiency of any of these nutrients is just as detrimental to the growth of the autoflowering cannabis plants as the lack of the N-P-K macronutrients.

Secondary Macronutrient: Calcium

Calcium is one of the structural autoflower nutrients components that contributes to the integrity of the cannabis plant’s roots, cell walls, and membranes. This nutrient is key because well-developed cell wall structures help strengthen stems and leaves, combat pests and illnesses, and respond to environmental challenges. Deficiency of Calcium among cannabis plants are common and will show as distorted growth in new root tips and yellowing in leaf tips.

Secondary Macronutrient: Magnesium

When it comes to the green coloring of the cannabis plants, Magnesium is the powerhouse behind the process. It is another essential macronutrient that has to be abundantly present in all the phases of the life of the autoflowering cannabis plant because of its role in the chlorophyll molecule. Without this macronutrient, cannabis plants would not be able to capture and utilize energy from the sun.

Secondary Macronutrient: Sulfur

Chances of Sulfur deficiency is very slim when growing cannabis plants in soil. This is because pretty much all soils contain considerable amounts of this macronutrient. When growing your autoflowers in compost or with hydroponic systems, ensure that the needed macronutrient levels are supplied through feedings. Sulfur is another important structural mineral component for autoflowering cannabis plants that assist in the production of important amino acids, proteins, enzymes, and membrane channels. It also helps plants fight off diseases and grow and form healthy seeds.

Micronutrients needed for autoflowering cannabis plants

Important micronutrients that all cannabis autoflowering plants need include Boron, Chlorine, Copper, Iron, Manganese, Molybdenum, and Zinc. The plants will need these nutrients in smaller quantities as compared to macronutrients. But just the same, their roles should not be underestimated as any deficiency in these elements will prove damaging to the overall health of the cannabis plants.

Micronutrient: Boron

Alongside Calcium, Boron is a structural nutrient necessary for the development of cell walls and membranes. This micronutrient is vital during reproduction; otherwise, deficiencies will translate into abnormal growths of the young shoots.

Micronutrient: Chlorine

Chlorine works alongside Potassium with many plant functions, including the absorption of nutrients, helping with photosynthesis, preventing plant diseases, and sustaining plant development. Autoflowering cannabis plants require only very small yet optimal quantities of this micronutrient to remain healthy.

Micronutrient: Copper

This micronutrient is responsible for activating enzymes in plants that are involved in lignin synthesis. It is also crucial in several other chemical reactions, including the process of photosynthesis, plant respiration, and plant metabolism. A cannabis Copper deficiency appears as dark green leaves taking on a blue or purple undertone with white-yellow edges. The leaves may also feel stiff. 

Micronutrient: Iron

Cannabis plants need only small amounts of this micronutrient to produce chlorophyll. A deficiency in this nutrient is usually caused by problems with pH. Without adequate levels of this nutrient, plants will turn to a sickly yellow color instead of a luscious green, while veins remain green.

Micronutrient: Manganese

Manganese is responsible for carrying electrons during the process of photosynthesis. It is also intimately involved in several other functions, including plant respiration, hydrolysis, nitrogen assimilation, root cell development, and energy transference. Any deficiency in this micronutrient is detected on young leaves showing signs of zero growth and slow blooms.

Micronutrient: Molybdenum

Molybdenum deficiency is extremely rare in autoflowering cannabis plants, but if it does hit your crop, it needs to be worked on urgently. Plants take up this micronutrient in the form of molybdate, and it plays a crucial part in the regulation of various plant functions. It is an essential component in the conversion of nitrate for the synthesis of amino acids.

Micronutrient: Zinc

This is the last of the required micronutrients and is usually needed in the smallest quantities. They are used to build enzymes and proteins and directly interact in the creation of the chlorophyll compound. A zinc deficiency is detected as small dots appearing on the edges of the youngest leaves of the autoflowering plant.

Autoflowering cannabis plants require a number of autoflower nutrients – macronutrients and micronutrients – in different amounts. While they may be named under different classifications, all these nutrients are equally necessary to ensure quality cannabis growth, plant development, and amazing harvests. Any signs of deficiencies should be urgently supplied using additional nutrients. Otherwise, your autoflowering cannabis yields will suffer.

Autoflower Grow Cycle: Understanding the Growth of Your Cannabis

Cannabis horticulture is a great endeavor to pursue, especially nowadays, with improved technologies and techniques. Horticulturists have discovered the perfect strategies to maximize the yield that you can get from these plants. For beginners, it is important to make an effort to master the basic processes and be educated about the autoflower grow cycle.

The Basics Of A Cannabis Autoflower Grow Cycle

Just like cultivating any type of plant, growing cannabis plants is both an art and science. There is a distinct system that you should follow in order to properly go through the process of cannabis growth. It can also be seen as an art because growers express their creativity, resourcefulness, and patience in order to complete a life cycle.

Beginners might encounter challenges and trials in this type of adventure – but, giving up after one mistake will lead them to miss the beautiful opportunity of harvesting the fruits of their labors. Similar to other endeavors that people pursue in life, it takes practice, correction, and repetition until you can manage to perfect the harvest of potent and dank buds that will reward all of your hardwork.

Stage 1: Germinating Autoflower Seeds

The life cycle of an autoflowering plant begins once you germinate its seeds. You can start by getting your hands on the seeds of your preferred autoflowering cannabis strain. There are different ways that you can try germinating the seeds. You can check them all out and decide to go for the one that works best for you.

Most cannabis growing experts recommend soaking the seeds in a glass of water within a minimum of 24 hours. Then, you should place the autoflower seeds into a damp paper towel and store them into a ziplock plastic bag. Others place the wet seeds in a plate over a damp paper towel and cover it with another plate. With these methods, you will be able to notice the seed-producing roots, signaling that the seedlings can be transferred to their permanent growing medium.

On the other hand, some growers just prepare the seeds and stick them inside the soil and just wait for them to grow. This can be done as well, and it adds excitement to the growing process.

Stage 2: Beginning Growth As A Seedling

Once the seeds are successfully transferred into their growing medium, usually soil, they will start their upward and downward development. Eventually, after about one day or two, the seed that you planted will emerge upwards. While waiting, make sure that you will be patient, and you will not bother the plant that you have planted. Being tempted to try assisting the seedling will just hinder and halt its growth much further. 

This point of the plant’s growth can be considered the most important – because this will tell you if the seed will develop successfully or not. If you injure the plant or hurt it at this point, there is a great chance that the plant will be unable to recover. During this time, if you are growing indoors, make sure that the plant receives enough light. It would be best to place the plant about 17 to 20 inches above the growing seedling.

Stage 3: Counting The Next Three Weeks

This stage occurs once your autoflowering seed begins developing its first two ‘real’ leaves. In the very first week, your plant will not ask for too much, just watering daily. If you want to sustain them through the use of nutrients, you should not go further than 1/8 of the mature plant recommended value.

It is also important to note that though the plant thrives in being watered, going overboard can drown your plant and kill them. Again, it is important to be patient and stick with the recommendations for watering your plant. Watering should not leave the plant too dry or dripping wet. The preferred situation is just enough to keep the soil moist.

Eventually, you will notice new sets of leaves appearing and the plant starting to develop a stronger stance. This is the point when you can start providing the recommended nutrients – just stick with mild ones so that the plant will not be overwhelmed.

By the third week of the autoflower grow cycle, your plant will also show their sex. If you are planting regular autos, you must distinguish the females from the males. The female plants have pistils, and the males will have sacs containing pollen. If you have a mix of males and females and you only plan to produce buds and not seeds, separate the males from the females so that pollination will not occur. On the other hand, if you are planting feminized seeds, you will not encounter any problem with this.

Stage 4: Growth and Development Stage

At this point, your plant will continue to grow until it reaches its matured size. To control too much height, you can apply different plant training techniques like pruning and FIMing. Make sure that at this stage, the plant receives all the levels of nutrients that it needs. Also, it would do you good to regulate the pH levels, and you can do so by using the proper nutrient mixes.

By the fifth or sixth week of growth, you will start seeing your plant developing beautiful flowers. This would be the perfect time to provide blooming nutrient mixes.

Stage 5: The End of the Autoflower Grow Cycle

By using blooming nutrients, growers will notice the plant developing strong aromas and expressing its beautiful colors. Maintain providing them with these until about the 9th week of growth. Then, you should stop feeding them and start flushing.

Flushing is a process that makes use of water to remove extra nutrients and avoid the unnecessary buildup of chemicals. This will improve the taste and effects of your weed – losing the chemical taste of your buds.

At this point, you are free to begin harvesting your beautiful buds. Remember to use gloves and sterilized scissors to avoid contaminating your precious flowers.

Final Thoughts

The autoflower grow cycle might seem intimidating on the first encounter, but mastering this will be worth it once you have your harvest in your hands. Just remember to dry and cure them properly so you can store them for a long time and make the most of their potency and quality.

Autoflower vs Photoperiod: What is Their Difference?

One of the greatest things about the cannabis industry is that it is constantly evolving. No one has ever imagined how wide, diverse, and developed the entire cannabis community has become. Aside from the usual weed, there are even various ways that you can consume cannabis, depending on how you feel.

But, here is one thing that you should think of if you are planning to explore cannabis growing on your own. In the battle of autoflower vs photoperiod, which one should you go for? You are not the first one to think about it. Enthusiasts, breeders, and growers have been debating on autoflower vs photoperiod for many decades ago.

In this article, you will learn more about these two big groups of cannabis strains.

What Are Photoperiod Cannabis Plants?

One of the first terms you will encounter while studying cannabis is the word ‘photoperiod.’ This word is used to describe the lighting schedules of the plants and how much light they actually need in order to thrive and survive. For example, when 24:0 is used to describe light – this means that the cannabis plant must be exposed to light for 24 hours in one day and 0 hours of dark. A huge chunk of photoperiod cannabis strains grows well with at least 12 hours of light and 12 hours of darkness, just like how it is supposed to happen naturally.

But, there are different types of lighting schedules that growers use. In the vegetative stage, you can expect many experts to suggest going with 18:6, which means 18 hours of light and 6 hours of darkness. This can help that plant develop quickly, but this will not do anything. The flowering stage will be triggered once the grower uses a 12:12 light cycle as the plant will seem to think that the seasons are changing, and it is the right time to bloom.

What Are Autoflowering Cannabis Plants?

Unlike how the changing of light schedules trigger the blooming of photoperiods, the opposite is true for the autoflowers. These types of cannabis strains do not depend on any seasonal change for it to flower; once the plant starts to develop its branches, it will flower on its own – thus the name autoflower.

This means that growers do not have to change, alter, or monitor lighting schedules when they are using autoflower seeds. Whether it starts with a 12:12 lighting cycle from the beginning up until the moment to flower, the autoflowers will ‘automatically’ flower even without any sort of trigger.

But, it can also be noted by growers that autoflowering strains produce higher yields when they are exposed to 18:6 lighting schedules. They will grow fine no matter the light cycle, but longer exposure to light will assure that they will be more generous in their yields.

Autoflower vs Photoperiod: Their Differences

1. Autoflowers are quicker to grow compared to photoperiods.

One main reason why home and commercial growers love autoflowers is that their entire life cycle is short. This makes harvest time to arrive so much quicker. Usually, it will just take about 2 to 3 months to grow an autoflower vs photoperiod strains taking four months to complete a grow cycle. This is a reason why cannabis experts suggest that beginners go with autoflowers. This allows them to have a quick grasp of learning cultivation in a quicker and somewhat easier process.

If you will be given a chance to complete a growing process from seed to cure buds, would you for three months with autoflowers or five months with photoperiods? The choice is yours.

2. Photoperiods are generally larger in height compared to autoflowers.

When photoperiod plants are planted, they take more time to fully develop, which naturally, would mean that they would grow quite larger. Based on common planting experiences, photoperiods that are planted indoors grow up to 5 to 6 feet. When you grow them outdoors, you will be surprised – they can even reach up to 10 feet. But, of course, growers can still control this growth if they practice plant training techniques.

On the other hand, autoflowers are smaller in height. Crediting their faster growth period before it is time to harvest, these autoflowering strains usually grow to a more controllable size of 2 to 3 feet for indoors and up to 5 feet when planted outdoors. If you are a person who would prefer to grow their cannabis supply stealthily, they might lean towards choosing the autoflowering strains.

3. Autoflowering plants are easier to maintain compared to photoperiods.

Photoperiod plants require lots of your time and attention from the moment they require changes in their light cycles. They also require plant training so that their growth can be controlled, and it is very important that you protect them well against light leaks when it lights off.

On the other hand, autoflowers are resilient and hardy plants. Though they come with their growing requirements, they do not need to be checked on as often as photoperiod plants would require. You also don’t have to alter the light schedule – once you set it, that’s it.

4. Photoperiods and autoflowers can be as potent as each other.

Years ago, the main drawback of autoflowers was that they lack potency. The gap between autoflower vs photoperiod used to be wide, but things have changed so much now! In recent years, new autoflowering strains introduced to the market have THC levels that reach as high as 24 percent. With these numbers, you can see that they are all as good as each other.

5. Photoperiod plants produce greater yields compared to autoflowering strains.

Because photoperiods are bigger, they can produce more. If you compare their average yields, photoperiods can produce yields as high as 600 to 700 grams per square meter. It is significantly higher if you compare to the usual 450 to 550 grams per square meter that auto-flowering plants produce. However, there is still a way to get around this. If you consider the length of time you have to wait for photoperiods to complete a grow cycle, it can be said that you have completed two grow cycles of autoflowers by then.

Final Thoughts

Both autoflowering strains and photoperiod strains have their own well-deserved place in the cannabis community. No one can really say, in a general blanket term, that one is better than the other. In the battle of autoflower vs photoperiod, the result lies in what the grower prefers for themselves and what is more appropriate for their needs, experience, and abilities.

Do Feminized Weed Seeds Make Hermies?

If you have been studying ways to grow Cannabis Seeds, especially feminized ones, you might have probably encountered the word “hermie.” You might be shocked and intrigued about why people get frustrated about hermies and the problems that they can cause to cannabis cultivation. But what is a hermie? Hermie is a nickname for a hermaphrodite cannabis plant.

In this article, you will be able to know all about hermies and all the things that growers should be aware of in order to be safe against plants like this.

How Can You Define A Hermaphroditic Cannabis Plant?

Just like animals, plants also have their own genders – it is just not as obvious as to how it works with animals. Reproduction in plants happens when female cannabis plants encounter the pollen that is produced by male cannabis plants. Once this situation is complete, the female cannabis plants will create seeds and produce the next generation of plants. This is why if you are a breeder of a new strain of cannabis, you would definitely enjoy the pollen coming from male plants. But, if you are after dank buds, whether for medical or recreational uses, only female plants will be beneficial for you.

Now, our focus will be on the hermaphroditic cannabis plant. Hermaphrodites are cannabis plants that possess male characteristics and female characteristics at the same time. The hard part about this type of plant is that growers will have to very vigilant and meticulous in order for them to remove the male pollen sacs that they can produce. If you fail to do so, there is a very high probability that the pollen sacs will burst and pollinate the female part of the plant to produce seeds.

Why Does Hermaphroditism Happen To Feminized Marijuana Plants?

Hermaphrodite cannabis plants only come to be because of two reasons.

The first is genetics. To look at it very simply, hermie parent plants are highly likely to produce children with hermie characteristics as well. This is why if you plan on cultivating Cannabis Seeds on your own, make sure that you only purchase from a reputable supplier – especially if you purchase online. Another important thing to check on your research is that there are cannabis strains that are highly susceptible to having hermaphrodite characteristics. One of the most famous strains of this problem is the Thai Sativa. 

The second possible reason that cannabis hermaphroditism happens is stress. If you look at it biologically, a plant turning into a hermie is actually a smart move for survival. Considering the plant’s evolutionary characteristics, this means that the plant does not want to become dependent on another plant or its environment for it to attract pollen. Instead, the plant exhibits an independent behavior and proceeds to pollinate itself. Though this can be seen as a good thing, it also has its cons. Because of this, the plant does not receive new and fresh genetic components. Just like humans and other animals, plants are living things that also resort to drastic measures to survive and avoid dying.

How Can You Help Your Plant Avoid Turning Into A Hermaphrodite

The first thing that you can do to avoid hermaphroditism is to source your raw materials well. The strongest way to avoid this is just to ensure that the feminized Cannabis Seeds that you buy come from a reputable and highly recommend seed bank.

Another great thing that you can do as a cannabis cultivator is to take care of your plant in the best possible way to avoid having a stressful life. For instance, it is very important to learn and understand how lighting cycles work before you even attempt to grow your own cannabis. Lighting is a trigger for plant development, so one mistake will hurt the growth of your plant. Once the cannabis is in the period where it should be in a dark place, make sure that you never interrupt your plant’s beauty sleep.

Additionally, cannabis plants are also very sensitive to changes in temperatures. If the temperatures are too high, the chances of getting a hermaphroditic plant also increase. More than that, you should also watch the temperature of the water that you give to your plant. Unlike humans, who enjoy drinking cold water, a cannabis plant dreads that.

The rule of thumb in situations like this is to look back on how cannabis plants usually live while they are in the wild. The air temperature should be warm, but not too hot, and the same goes for the water temperature – lukewarm is more than enough. That’s what your plant expects you to provide – so that is what you should give them. Remember, stress triggered by lighting and heat are the most common reasons for a cannabis plant to turn into a hermaphrodite. 

Aside from these things, take note that when you feed your plant, you should not leave them gasping or drowning from all the water. You should start to research on the different tips and tricks on how you will know that the water is enough. Study it carefully, which one would work best for you and do that. This rule also applies to nutrients. Plants have their own types of appetite, so you should study the best feeding schedule for your feminized cannabis plants.

There are also organisms that can mess up your plant’s growth, especially if your grow area is located outdoors. You should watch out the surroundings of your plants and observe for the presence of mites, diseases, insects, and other similar things.

In terms of handling your plant, ensure that you will be very gentle. If you plan on applying plant training techniques like pruning or topping, make sure to keep a light hand and not go overboard as this can also give stress to the plant.

Final Thoughts

Every cannabis grower wants to stay away from producing hermies, but that is a possibility that you cannot deny when growing feminized seeds. But, you can avoid all of that by sourcing your cannabis from a reputable seed bank or breeder to lower the odds of growing hermies drastically.

Can You Trust Online Cannabis Seed Banks?

If you are planning to test out your gardening skills and grow your own cannabis plants, you should start by acquiring your goods from a seed bank – whether physical or online. Many cannabis enthusiasts and experts suggest doing transactions online because it is cheaper and more extensive. But, can you trust online cannabis seed banks? How will you know if the company you are dealing with is legit? In this article, we will find out.

Straight To The Point: Can You Trust Online Cannabis Seed Banks?

Are online cannabis seed banks worthy of your trust? Yes – but not all of them. There are a few hundred seed banks in operation online, and there is a good chunk of those companies that will not be able to deliver the type of quality products and services that you reserve. Plus, there are probably a good number of those that are downright scams.

So, how can you be able to trust a seed bank?

Tips and Tricks in Selecting the Best Online Cannabis Seed Bank

1. Research on the seed bank by reading blogs, forums, customer reviews, and other articles.

Even if you have prior experience in purchasing Cannabis Seeds, it is still vital that you are familiar enough with a company before you go ahead with shelling out cash. This is where customer reviews come in. Reviews are very valuable as they can provide you with everything that you need to know. They will be able to provide you with their actual experience about the actual product quality, if the seeds were able to germinate, how the yield ended up being, the user experience, the customer service, and how long the delivery took place.

As we are all aware that cannabis seed banks are not really perfect, reviews will be able to show you what are the common customer complaints, and if there are red flags on the company’s behavior. Reviews will also be able to show if the companies addressed the matter and tried to resolve the problem on hand.

You can also try scrolling through social media and look at the tweets or posts that former, existing, and prospecting customers have said about the seed bank and its performance.

2. Educate yourself on essential details about the strains that you are planning to purchase.

Before you make any significant decisions on the products that you will be ordering, it is essential to have a good grasp of the actual details on the strains. This will help you be more equipped in identifying whether the information on the product is false and if they are not using the correct photos of the plant when it matures. When you are well-researched on the ins and outs of the strain, you will never be tricked into purchasing seeds that are inauthentic and have low quality.

As much as you would want to say that all seed banks are trustworthy, there are some who possess the malicious intent of leading customers on with mistakes in labeling, packaging, pictures, growing requirements, and the like. These facts can be the basis of your doubts if you ever plan to push through with your purchase.

According to experts, the best way to go is to go with a seed bank that shows all the important details in planting – from seed to harvesting to curing them. This shows that they are very committed in terms of helping and assisting their consumers.

3. Review the About Me and FAQ section of the seed bank website.

Before you start your purchase, it would be better if you find at least 3 to 5 seed bank options before you settle with one. Then, you should visit each of their FAQ sections, as this will shed light on how experienced, knowledgeable, and helpful they are to their market. In this section, you will also be able to check their prepared guidelines for placing orders, payment options, delivery, refunds, returns, and other important details.

4. Check if the company’s contact information works.

One of the simplest ways to check the legitimacy of a seed bank is identifying how they well they converse and connect with their customers. Making a business success depends on how well they build connections with their customers – and connections will only be established if they can be contacted by people.

You can start reaching out to them by asking simple inquiries and questions about the products that they offer. Try to observe how long it would take them to get back to you, how respectful they are, and how knowledgeable they are on the matter. Why do you have to verify if their contact details are legit? This is for your safety and security as you journey along. Eventually, you might have some questions about your orders, delivers taking too long, changes in your personal information, or changes in your delivery information.

The best way that a customer service team can be seen is through a live chat option on their website. But not all companies can provide that. You can search for companies with an active email address, contact number, website contact form, and a physical address – those things are more than enough to say that the company is actually legitimate and serious in doing their business.

5. Familiarize yourself with stealth shipping practices.

Online cannabis seed banks must have a good grasp of how international cannabis trading actually works. Because there are still many restrictions depending on the territory, the best practice would be to do stealth shipping. This means that they are familiar with the possible setups that your parcel might encounter while it is still in transit.

Stealthy delivery techniques just mean that they place your order in different packages – those that will not seem susceptible. For Cannabis Seeds, it may be anything from a birthday card, a pen, a flashlight, and other similar things.

Final Thoughts

Finding a trustworthy seed bank can be hard, but this can be accomplished within a few hours of hard work, patience, and diligence. Remember, once you find the perfect seed bank that can satisfy your requirements, you will be able to enjoy a worry-free cultivation experience.