500 NEW MARIJUANA SEEDS RELEASED

How to Make a Gravity Bong

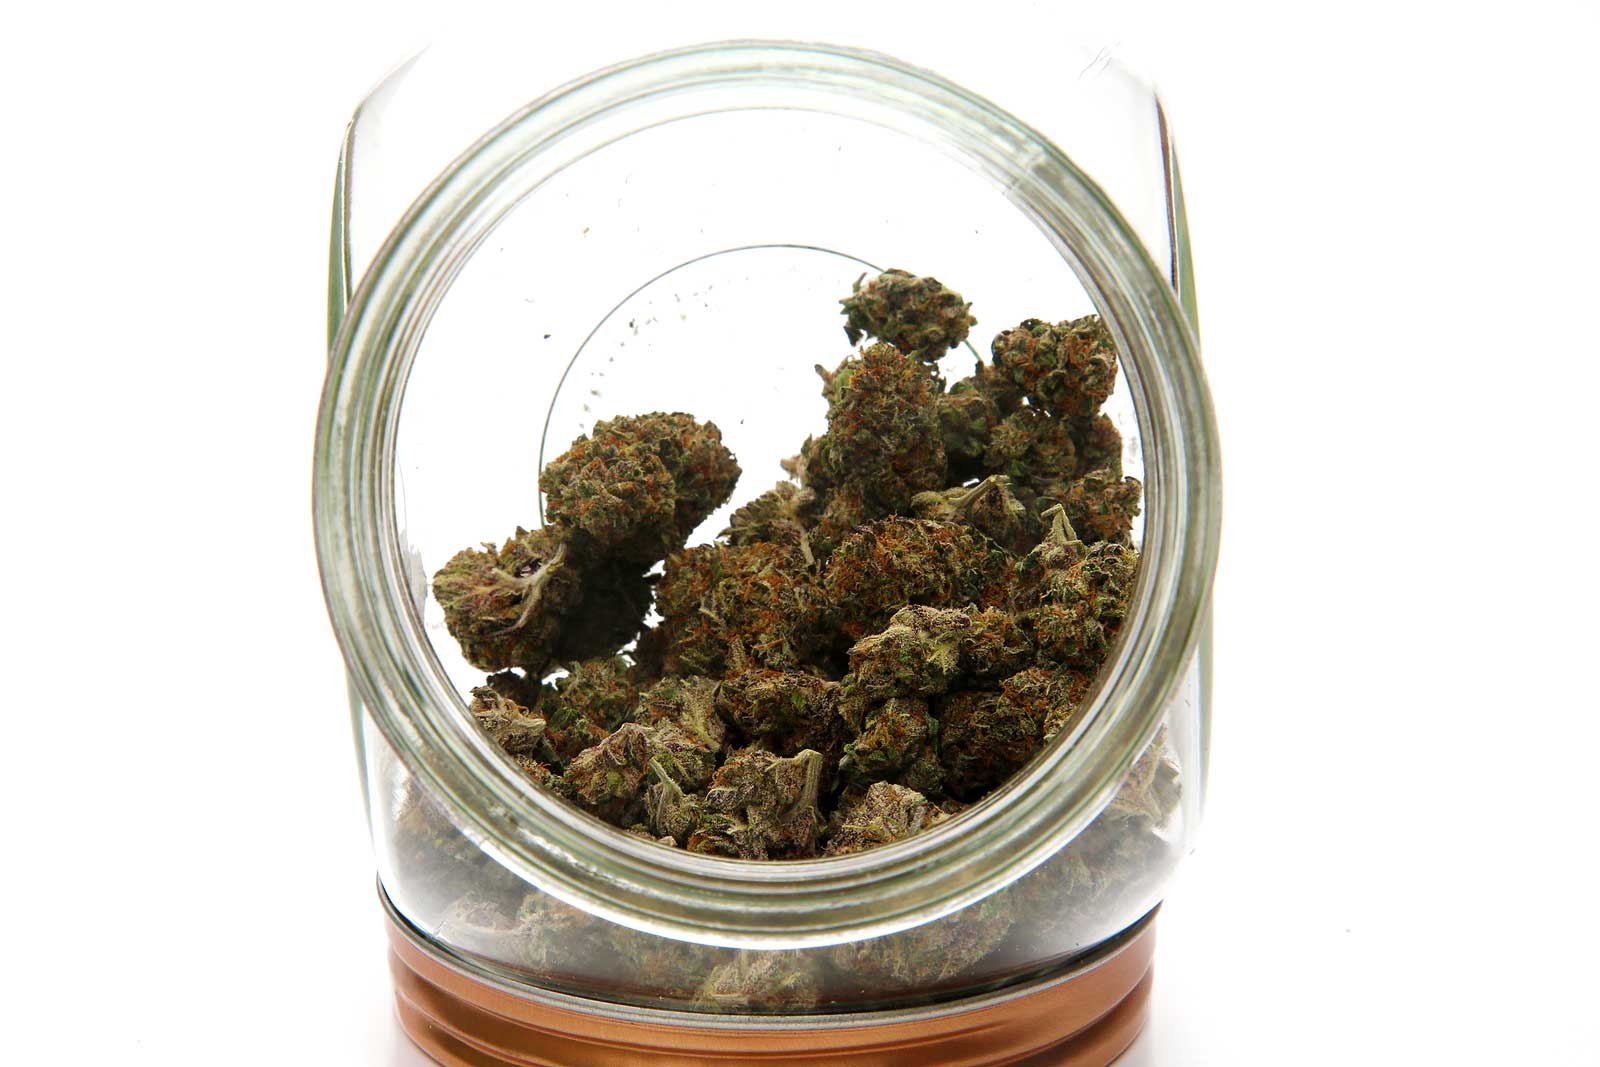
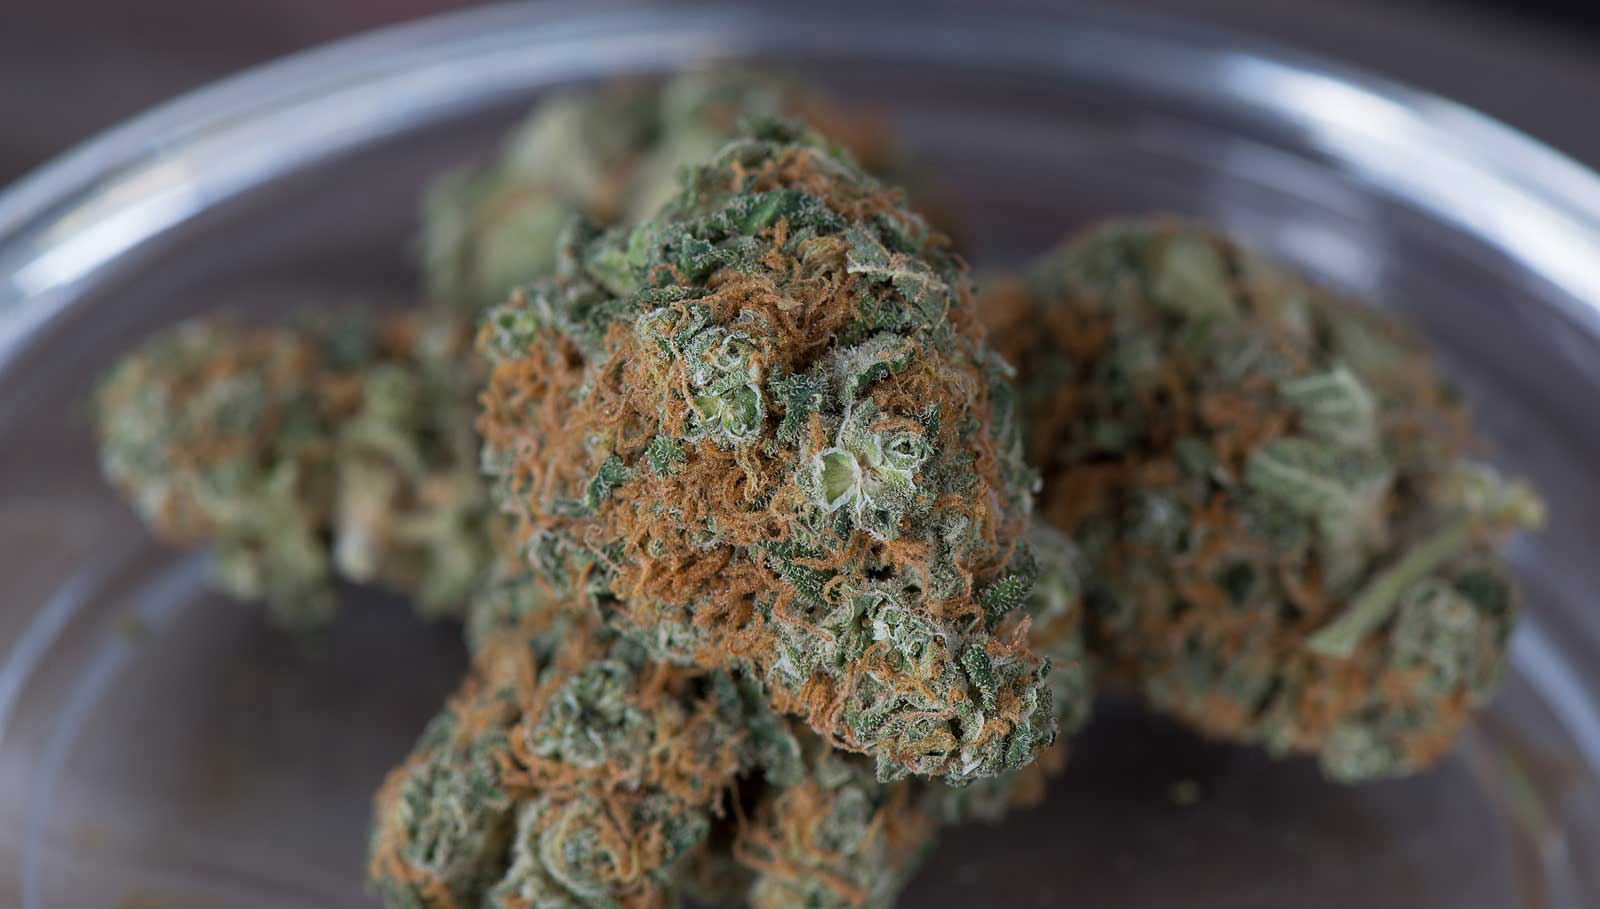
There is no stopping to how cannabis enthusiasts find ways on making every weed consumption a fun, amazing, and worthy experience. Aside from smoking, there are countless ways you can take weed and enjoy it. Cannabis has likewise improved. From different known strains, there are new and improved hybrid ones. Weed now comes in different forms and sizes. Truly, cannabis and cannabis utilization has come a long way. 

These days people use a lot of different tools to help them take a more amazing trip. One of these tools is a bong and cannabis enthusiast is learning how to make a gravity bong. But what is a gravity bong? To put it simply, it is a tool to help you smoke weed. Using gravity bong is a way of taking weed which employs the use of plastic bottles to channel smoke by using water. The smoke is then inhaled to go straight to the lungs. It is easy to make one, that is why a lot of cannabis enthusiasts recommend this technique. However, for beginners and those with low tolerance, this might not be the best option. Get to know how it works and the things you need to make your gravity bong!

Understanding How Gravity Bong Works

Does gravity play a role in how gravity bong works? Probably not much. It wouldn’t require you to do any gravity-related stunts. So, how does gravity bong work specifically? To give you an overview, gravity bong works by immersing a smaller bottle, which has cannabis on top usually situated in a bowl, to a larger bottle with water in it. When cannabis gets heated, the bottle gets pulled out slowly until it is filled with smoke. The lid is then unscrewed and smoke is inhaled from the opening of the small bottle while pushing the bottle down. It is like the process of creating a vacuum.

The sizes of the bottle don’t have to matter, as long as the other one is smaller and the second one is bigger. You don’t likewise need to buy any bottles. You can just use all the single-use bottles found in your home. However, it is safe?

There is no scientific research to determine the consequence of using these, however, the plastic has polyethylene terephthalate or PET which can be harmful when heated. 

These plastics may release a hazardous chemical that can be inhaled and go straight into your lungs. So, it is crucial to get informed of the potential risk. However, there are additional smoking devices that are made of silicone and other safe materials. You can use them too. But when learning how to make a gravity bong, this is usually a do it yourself process.

Make your Gravity Bong

To start learning how to make a gravity bong, you will need the following materials: two plastic bottles, knife, aluminum foil, scissors, and a toothpick. If you don’t want to use two plastic bottles, you can use a bucket or a plastic container. 

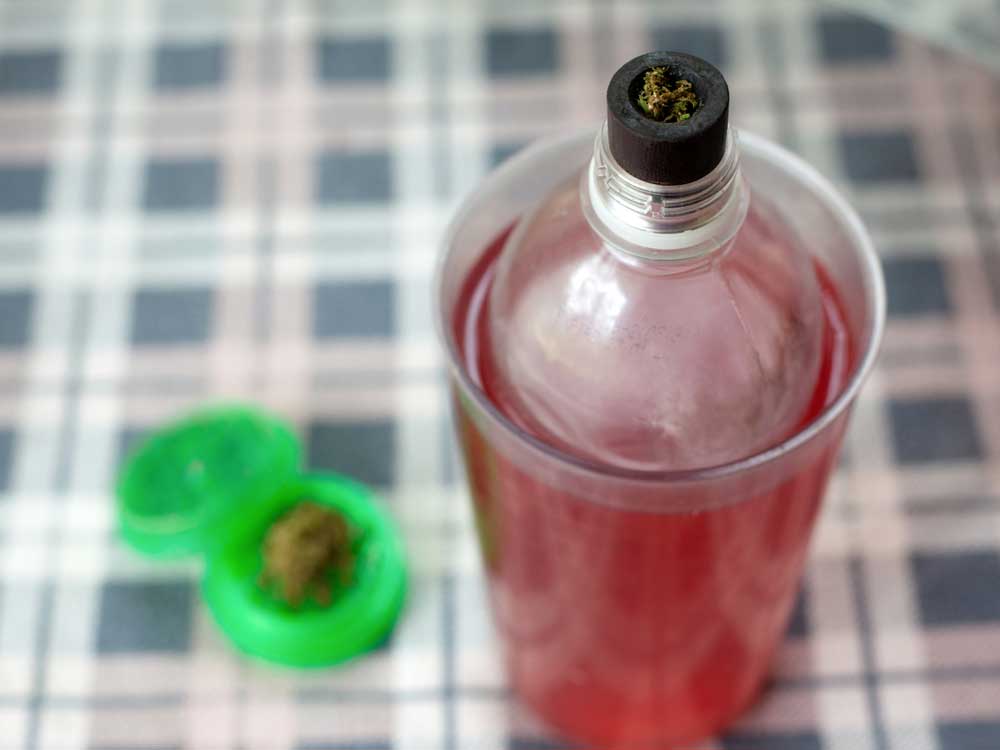
First, get your plastic bottle. It can be an empty water bottle or a soda bottle, whichever is available. The bigger the bottle, the bigger the hit as well. If this is your first try, you can begin with a small bottle. Make sure this bottle is smaller than the other one you will use.  Wash the bottle clean, then let it dry. 

Second, take the bottle’s cap. Get your aluminum foil and cover it around the mouthpiece. Wrap it well, but not too tightly. You need to efficiently take the aluminum off later when you start smoking. Make sure all is covered with aluminum well. 

Third, use your toothpick and punch little holes in the aluminum foil. Don’t make the holes too big. This is where you will place your cannabis. They may fall off smoothly if the holes are too wide. Don’t punch too many holes in the aluminum foil. A few around the mouthpiece is alright. 

Fourth, once the foil is secured and with holes, cut the bottom of the plastic bottle. From the bottom, measure an inch or two and cut the plastic bottle there. Make sure you cut it in a straight line. Now the first bottle is ready. 

Fifth, get your other bigger bottle, or any bucket or plastic container. If you will use another bottle, simply cut the neck of the bottle or where the size of the first bottle can fit loosely on the second one. However, if you use a bucket or a container, just simply wash them clean and they’re good to go. Fill your second bottle with water until it’s almost on the brim, but leave an inch or two so it won’t spill once you push your first bottle into the water. 

And that’s how simple it is how to make a gravity bong! It’s easy and straightforward.

How to Use It

Now, that’s everything is ready and you learn how to make a gravity bong, it’s time to know how to use your gravity bong. 

First, push your first smaller bottle into the other bottle or the container, but don’t push it too far so the cap with the aluminum foil isn’t soaked. 

Second, get your cannabis and put some on the aluminum foil. The cannabis should be ground to pieces, but not too fine or else they will fall through the holes. Make sure to hold the first bottle steady. You can ask for help if you have friends come over. 

Third, take a torch and aim it on the cannabis to light it up. When cannabis burned, the bottle will get stuffed with smoke. Slowly lift the bottle. This way, the bottle will easily get filled with smoke. Keep lifting it until the bottom part is almost out of water. However, don’t lift the bottle completely out of the water or the smoke will disappear. 

Fourth, once the first bottle is filled with smoke, take the aluminum foil off and put your mouth on the bottle and inhale the smoke. Push the bottle down while inhaling to the smoke is forced to come out. Keep doing until the smoke is out. 

Finally, exhale the smoke slowly. When you are ready for another whiff, put the foil back and burn more cannabis again. And that is how to make a gravity bong and how to use it to complete your gravity bong experience.

Conclusion 

Knowing how to make a gravity bong is uncomplicated to do and the bong is comfortable to use.  Plus, the materials required are already in your house. There’s no need to buy anything. Using the gravity bong, you will have a different experience getting the best hit you would want. As mentioned, gravity bong is not for beginners and faint-hearted. Primarily because gravity bong blast concentrated smoke right straight to your lungs. The amount is far higher than what you can get with a single joint. The gravity bong is like smoking the whole bowl of cannabis is one puff. This powerful hit full of THC is not best for a beginner and inexperienced cannabis user. 

But if you used cannabis for a long time, then gravity bongs are worth a try if you haven’t tried them. It is fun, it doesn’t take much work and it is effortless. If you don’t want to use the do-it-yourself gravity bong made of plastics, you can get yourself a bong in the market and have a lot of fun. Make sure to include the gravity bong in your list of must-try cannabis experience.

Early Signs of Male Plant of Cannabis

It is a must knowing the gender of cannabis. This is so since you are a certified grower. Know that just the female plant can develop a bud. As you nurture a male cannabis plant, it might only go into waste. This is not beneficial that much unless you’re aiming for producing seeds. If you are a novice to cannabis growing, below are the ways that you could identify its gender and know the early signs of the male plant of cannabis. 

Two Stages of Life

The cannabis plant can go through 2 stages of life. These are named as the flowering and vegetative stages. As per the beginning phase, it cannot be told as yet the gender of the cannabis plant. Upon reaching 6 weeks, the cannabis plant will begin to show flowering signs. Pre-flowers will also now form at the joints. In this stage, the marijuana will create buds or pollen sacs. The female will develop its pistils and the male will form pollen sacs in clusters. 

Identify Male Cannabis Plant

Since you will grow your cannabis plant, you want to produce a prime bud. This is when you need to identify and then remove the male plant. This is before them producing pollen. And, this is even before turning the smoking material into such a bumper seed.

The issue to face with male plant cannabis is avoided with the use of feminized cannabis seed. When you decide to grow out a regular seed, know first how the male cannabis plant is identified. The male cannabis plant does not make a perfect smoking material. It does not have any THC of CBD. It must never be kept hanging around.

In wanting to identify the male cannabis plant, know that there is no way you could tell its sex early on. Wait for the cannabis plant as it shows its sex. This will occur during the stage of pre-flowering. The plant will start to emit its energy while producing. 

The cannabis plant is a male if it starts to develop little pollen in sacks. This is through to its nodes. They also will appear like the little balls in their clusters or on their own. It depends much on how far the pre-flowering stage is. The plant is a female if its nodes start to produce for immature calyxes. Each of them has a single or two white wispy types of pistils.

Early Signs to Help Identify a Male Plant of Cannabis

Cannabis plants that are thick and tall are possibly believed as male plants. Fewer leaves and sporadic branching serve as an indication that the plant is a male. When the flowering cycle started, it is now easy to separate the male cannabis plants from the female cannabis plants. 

The flowering cycle will start when the amount of sunlight each day is shortened. This is to say around fourteen hours. This is true for outdoor gardening. For indoor gardening, the cycle will be triggered by the grower changing the photoperiod to about twelve-hour of light or twelve-hour of the dark cycle.

Regularly Monitor the Cannabis Plants

When the flowering cycle is started already, you as a grower should regularly monitor the cannabis plants. Monitor the unsexed plants daily. It should be done twice a day. Check for some possible signs of male reproductive organs. Once when the male cannabis plant shows its reproductive organ, it then appears as having a small bunch of bananas. Its color is green and not yellow. It is through the branches’ inner joints. 

When you spot the bananas, it’s when you need to remove the plant. The damage is brought about by pollination occurring when the male plant released its pollen. For as long as you positively identify the cannabis plant as a male, no seed will ever develop. Remove it from the garden before releasing the pollen.

Sexing the Cannabis Plant Early On

Follow a few techniques when weeding out the male cannabis plant. This is before properly entering the stage of pre-flowering. This enables you to remove the male cannabis plant early on. This thereby avoids you wasting resources and time on them.

As per the first technique, it places a black, light-tight, and breathable bag on the lower branch of the plant. This should take up about twelve hours a day. It works as it stimulates the pre-flowering stage in the plant. When you notice its sex, you may stop it placing the bag through it. Let it revert into vegetative growth.

Following the second technique, it is the same as the first one. Rather than covering the branch of the plant, just switch the lighting cycle for the crop twelve to twelve. This causes pre-flowering. When you are sure of the sex of the plant, change it back to its vegetative light cycle. The cannabis plant can now revert to vegetative growth in twenty-four hours. It will somehow take about two weeks before it works. This adds up a time to its overall growth.

If time will never be an issue, it is advised to follow the first technique. The cannabis plant will continue through vegetative growth. Only a small part of it will start to flower. This does not add two weeks to the growing time. This is perfect if you take the clone from the cannabis female plant. You could then be sure of the one-hundred percent feminized grow. 

Removal of the Male Plant Cannabis

If the male plant cannabis is found in the garden, just immediately have the fans turned off. Cannabis can be pollinated through the wind. This means to say that the air will move and will increase the pollen released from the male plant. This keeps the fans off when you remove the unwanted plants. This helps in the reduction of pollination. Just get the fans turned back on after the removal of the male. 

When you’re done with removing unwanted cannabis plants, get a spray bottle. Fill it up with water. Saturate the pollen sacs on the male plant. This reduces the pollen that will travel up by air. Cover an unwanted plant using a garbage bag. Do this to contain the released pollen. 

Conclusion

Follow the ways as to how to identify the gender and know the early signs of a male plant of cannabis. The one sign to pay attention to is the cannabis plants that are thick and tall are male plants. Sporadic branching and fewer leaves also prove that the plant is a male. So far, it is just easy to tell if cannabis is male. 

Cannabis Leaves Turning Yellow: Reasons and What to Do

Cannabis leaves turning yellow is possibly one of the most common problems when growing cannabis plants. It is equitably the same when growing other potted plants. There are ups and downs. Though in general, one green leaf turning yellow isn’t a worry. However, when a couple more gradually follows until nearly all leaves are yellow, then there must be something needed to be done. If cannabis leaves turning yellow is your problem, you are required to do a necessary check-up and tracing. 

To start with, there are different angles to look into why your cannabis leaves have turned yellow. As you have discerned, cannabis plants are highly sensitive plants. Whatever you gave them, they react immensely to it. When you see your leaves becoming yellow, there’s no need to panic. A clear head is needed to get to know the main source of this. It is fortunate that after years of cultivation, cannabis growers have accumulated information on how to suitably take care of your plant and save them when they turn to deteriorate. 

There’s no call to panic if it’s your first time growing your cannabis plant. There is no such point as perfect growth, but when problems arise, there are the most suitable solutions provided to keep you going. Cannabis leaves turning yellow isn’t something to get miserable about. Know the reasons and learn what you can do to respond to the problem well. 

Yellow Cannabis Leaves – How Science See it

You may have learned about the plant’s structure and growth when you were in middle school. Your Biology teacher must have explained it further. But to give you a little review, your cannabis leaving turning yellow has a scientific explanation behind it. 

You might remember that a leaf is made of different plant cells. These different plant cells are from organelles named chloroplast. The job of the chloroplast is for photosynthesis.  Inside the chloroplast is the chlorophyll which is mainly color green. Other nondominant colors will include yellow and orange carotenoids. The main job of the chlorophyll is to absorb light and heat from the sun. Through photosynthesis, the light is turned into sugar, which is then used for the plant’s growth. 

If the plants are healthy and strong, chlorophyll will increase making the leaves green and lush, however, when the plant is stressed out, the chlorophyll will decrease leaving the yellow and orange carotenoids behind. Thus, the yellow or orange color of the cannabis leaves. Therefore, it is concluded that a stress-free plant grows well compared to an unhealthy and stressed cannabis plant.

Accurate Investigation 

The best thing to do is give an accurate and thorough investigation of your cannabis leaves turning yellow. First, if there are only a couple, say two or three leaves turning yellow, there is no need to panic. Simply pluck the leaves off or get scissors. You wouldn’t want to let the yellow leaves stay on your plant.  But if you see most of the leaves turning yellow or starting to run yellow, put the scissors down and investigate. There can be several causes of why this happened. 

One point to consider is the life cycle of the cannabis plant. A few cannabis leaves turning yellow in the flowering stage is normal because this is when the plant continues to grow new leaves each day. Thus, the old leaves wither and may die. This usually happens during the final week of the flowering stage. This is likewise the same when the plant is nearing harvest time. Because there is no need to continue the nutrients, most cannabis leaves will turn yellow. 

However, if the following factors don’t meet the situation of your plant, then it’s time to know the causes of your cannabis leaves turning yellow and see how you can fix it.

Reasons and Solutions for Cannabis Leaves Turning Yellow

Most of the cannabis growers experienced noticing their cannabis leaves turning yellow, and the reasons depend entirely on different options. Know the possible reasons and how to solve them right away. 

Nitrogen Deficiency

Your cannabis plants will need nutrients, especially nitrogen to help it develop well and healthy. Get a close observation at the cannabis plant. If you detect yellow leaves mainly at the base on the plant and near the roots, then this may be the crisis. These yellow leaves are loose and soft to pluck. This is caused by the depletion of nutrients and not sufficient nitrogen absorbed from the soil. If you forgo spraying any cannabis nutrients, chances are, the leaves may turn yellow. 

The good message is, it is simple to fix. Transfer the plant to a new pot with wholesome and healthy soil, then go to the shop and acquire organic nitrogen and nutrients to get the required supplements for the plant. Observe it for a few days and see if the leaves stopped turning yellow.

When it likewise comes to nutrients, you will likewise need to constantly check the amount of pH level. Get a pH level test kit. The pH level of the soil must be around six to seven ph. Once they go over or beyond, the leaves will look burnt and discolored.

Overwatering or Underwatering

This mistake is mostly done by beginner growers who have no idea of the proper way to water cannabis plants. Since cannabis plants are special plants, they likewise need a special way of watering. Cannabis plants don’t need a lot of water. You will need the right amount of water to keep the soil moist and damp, and not dripping wet. Check the topsoil now and then, if it is still moist, consider watering a few hours later. Let the roots absorb all the moisture before watering again. 

You can use a container with holes on the base so water can drip into them. You don’t need bigger pots. Use the one that cannabis can fit perfectly. Additionally, if your plant is still smaller, they won’t need too much water. Use this to test your plant; when your plant bow while you water them, it means you are overwatering and when your plant perks up after watering, it means you are underwatering it.

Light Burn 

When the yellow leaves are in the top of the plant, or closer to the source of light, then the reason for your cannabis leaves turning yellow might be light burn. When your cannabis plants get too close to the light, it may burn the leaves causing it to turn yellow. 

Move your light farther away, maybe more than four inches or so away from the plants. You can put the plant in a clear glass to avoid too much light and harm the plant. This is better especially if you use LED.

Pests and Bugs

The deadliest enemies of the cannabis plant are the pests and bugs. They seem to appear out of nowhere and before you know it, your plants are already infected. Though some of them are easy to find and get because of the marks they leave behind, but some disappear and come back. The primary causes of these might be the bad airflow, uncleaned growing space, and overwatering.  

Since there are different kinds of cannabis pests and bugs, you need to identify them first to get rid of them. You can use organic insecticides or carefully removed the pests and bugs and throw them out. Check your growing spaces for any small holes. When you check them, make sure you are also clean and free of any dirt.

Conclusion 

It always comes to a point where cannabis leaves turning yellow isn’t something to be scared about. The different solutions will help you keep your plants safe and healthy again. It could be hard to prevent cannabis leaves from turning yellow, but doing the necessary things to cure them is possible. Cannabis leaves turning yellow is a way of your cannabis plant to tell you what’s wrong with your plant and the ways you grow it. It is giving you a chance to make necessary adjustments. 

As said, there is no perfect formula for growing the cannabis plant. It’s a constant trial and error. But with a few aides from the trusted tips and helpful tools, you will get a good yield in the end. Planting cannabis can be fun so enjoy the process and face the challenges head-on.  

How to Grow Purple Weed

Every cannabis plant has different characteristics. They have different sizes, effects strength, and even colors. If you have noticed, some of the marijuana plants have purplish color that hence is capable of turning as a purple weed. One that is very eye-catching and alluring, several cannabis cultivators seem to be enticed and are looking forward to growing their cannabis plants to weed with the same perspective, to make sure that they are purple. 

In this article, we will be talking about how to grow purple weed. But before we even go any further, let us talk about what a purple weed is, how does it even become possible, what are the factors that can make it purple, and other things you need to know about it. 

Everything you need to know about Purple Weed

Purple weed is seemingly attractive and has increased the demand of consumers as they are bright and charming. Every marijuana plant presents innately actual pigments. 

Pigments are naturally produced by plants and are by description the chemical compound generated, producing such color that can be physically described once seen. One of the examples of pigments that every plant produces is the chlorophyll. This substance helps in the plant’s photosynthesis. 

But aside from chlorophyll, anthocyanins are also another example of pigment. The difference between the two is their responsibility. While chlorophyll is responsible for green leaf pigmentation, anthocyanins, on the other hand, is responsible for producing red, blue, pink, and purple leaf colors. 

By knowing this, we can, therefore, conclude that purplish marijuana plants have a significant amount of anthocyanin produced instead of chlorophyll. 

What are the parts of cannabis plants affected?

Purple cannabis plants do not only include purple leaves, but some of them can entirely have a purple color. There are four major parts of marijuana plants that can uniformly have a purplish color. They are the pistils, calyxes, leaves, and the trichomes. 

  • Pistils are the hair-like part of the female marijuana plants that are the main detector of its sex. 
  • Calyxes are the buds themselves. 
  • Leaves are the thin sheet part of the marijuana plants that are normally fan blade-like in shape. They are the main responsible part in photosynthesis. 
  • Trichomes are the microscopic resin glands found on the buds. 

What are the factors that can make it purple?

If you are asking if all cannabis plants can turn to purple, the answer is no. Few factors can make a cannabis plant purple. The factors are: 

  • Genetics
  • Temperature
  • Nutrient effect
  • PH level
  • Overall growing method

Genetics

Genetics is the major player in having purple cannabis plants. These are the plants that have high anthocyanin content. Hence, they are the only marijuana plants capable of having a purple color. 

Temperature

There is no way for a cannabis plant to grow purplish without breaking down the chlorophyll. The colder temperature can break down chlorophyll and hence able to let your cannabis plant produce more anthocyanin to turn purple. 

Nutrient effect

Some purple-enabled marijuana plants can verily turn purple without doing anything once they are deprived of nutrients. What nutrients? Typically, they tend to get purple when they lack nitrogen or phosphorus. 

PH level

THE neutral PH level of soil typically produces purple color. It usually varies from genetics or growing means. If the PH level is acidic, the plant considerably turns red while if the PH level is alkaline, the plant considerably turns blue. 

Overall growing method

As discussed earlier, the way your cannabis plant can remarkably affect its color. This includes the proper timing of lowering down the temperature, the number of nutrients being given, and other factors. 

How to grow purple weed?

As you already have a clue on what a purple weed is, how it turns purple, and the factors that can affect its color, this section will help you in detail how you can grow your weed and turn it purplish. 

Step #1: Start with the seed

You can start choosing the right seed strain. As discussed earlier, you should make sure that the strain you will be growing is capable of growing purple. In the first step, there is nothing new. Place the seed in a pot. Wait for it to properly germinate. As long as you correctly germinate the seed, you are good to go on the next step.

Step #2: Wait until the flowering phase

As soon as your cannabis plant matures and starts to flower, that will be the time you can do the real thing. Ensure that your cannabis plants start flowering before even making any other actions. 

Step #3: Temperature control

This step will be critical and is only possible for indoor growing since you have no control over the temperature and growing environment when your cannabis plants are mounted outdoors. As soon as your marijuana plants matured and started flowering, that will be the time you can start managing and shifting the temperature. 

The only way you can achieve a perfect purple colored marijuana plant is by exposing it to a big temperature level difference. Start dropping the temperature level during the day to 27 to 30 degrees Celsius, while during the night, lower down the temperature to 10 to 13 degrees Celsius. 

As this step is very critical, drastically dropping down the temperature was much lower than the recommended one can cause your cannabis plants to die. So be very careful on this step. 

Step #4: Wait for the purple coloration

As soon as you perfectly manage the temperature, it is time for you to wait for the result. Purple coloration can remarkably be notable after 2 weeks. 

Useful tips

As you already know how to grow purple weed, this section will further give you tips on what to and what not to do when you want to start the growing process. 

  • As much as possible, do not deprive your cannabis plants of their daily nutrient intake. Although nitrogen and phosphorus deficiency can turn your marijuana plants to purple, doing this could affect their potency and terpene composition, and hence the effects and flavor. 
  • Grow them indoors. 
  • If your only option is to grow outdoors, choose auto-flowering strains. 
  • Choose the correct type of fertilizer or soil with a neutral PH level. 

Example of strain you can choose

Conclusion

One of the cannabis cultivator’s dreams is to achieve and grow a marijuana plant with purple color. Not only that it gives them a challenge, but it can also be very attractive and alluring. As you have seen a lot of weed that is purplish, growing it on your own is another thing. 

A lot of strains are different. But on your way to growing purple weed, choosing the right strain will be able to help you on your way to being successful. It may seem pretty easy for others to achieve purple weed but this process is very sensitive and it requires great attention as you started doing it. 

So long as you are not depriving the health of your plants and you follow the steps carefully, it is no doubt that your goal of having purple weed will be possible and realistic. 

Common Cannabis Seedling Problems and How to Fix Them

If you have a seedling, you must know that it is vulnerable and the most delicate part of your cultivating journey. With that being said, you must have enough knowledge of how you manage, fix and importantly, you should know what those cannabis seedling problems you might face on the process are. With this, you can ensure that you will have healthy and quality crops, not to mention an abundant yield. 

There are several common cannabis seedling problems that you may encounter, and you better be prepared on what to expect and how you can conquer them. In this article, we will tackle those issues. Remember that these circumstances are preventable, and we aim that we can impart these bits of information so you can be successful in your cultivation. 

Top Cannabis Seedling Problems 

As mentioned, there are many issues you might deal with on trying to produce a healthy and robust cannabis plant. We listed them for you:

  • Overwatering seedlings
  • Underwatering seedlings
  • Nutrient problems
  • High temperatures
  • Improper lighting

1. Overwatering seedlings 

We may pertain to the word overwatering as one of the cannabis seedling problems as the loss of oxygen supplies the pants instead of oversupply of water. Please know that the technique Hydroponic, which uses water as a base, is correctly working as long as enough oxygen is provided. However, is you are a cultivator that uses a normal container, this overwatering may be a real danger to your cannabis plants. One symptom you can notice if your plant is overwatered is if it is sagging but not shivering.

If your seedlings are in a big pot, there is a big chance that you will experience this overwatering issue for your crop. As seedlings do not absorb or consume a lot of water, a big container needs a lot of time to dry out completely. So rather than planting in a vast container, you might want to start using a small pot and wait for it to grow substantially. Then you may transfer it to a huge pot later. 

However, if you don’t have an option for the pots, you will use, or you already start cultivating it using an enormous container, the easiest way to prevent it is to manage or control how you water your plants. You can start in watering them in minimal amounts and sprinkle it all over in a circular pattern. Ensure that the top part of the soil, a measure of a knuckle, is already dried before you start the watering again. You do not have to worry about underwater with your tiny seedlings until its fully grown. These plants will grow faster if they are placed in a smaller container. The trick is to choose a pot that suits your plant’s size and then gradually increase it. 

2. Underwatering Seedlings

Another cannabis seedling problem is being underwatered. It is evident to the plant as she will look wilting and no moisture at all, and you may notice that it is not growing correctly. Even if it rarely happens to cannabis plants or seedlings, this may affect the quality and overall growth of your marijuana plant. This frequently occurs to those novices that are so conscious of overwatering their plants. 

Also, if you mix the issue of being underwatered plant with nutrient-dose, your crop mat turns to have a dark seedling, twisted, and discolored new growth. If your plant while on the transpiration process, and lack of water supply, moisture can be a big help for them to survive. So you might want to plan your growing techniques as well as your surroundings. 

If the plant can’t have enough moisture, this transpiration phase will not go through. That means that your crop’s growth will be messed up and may not grow at all and may result in crop death. 

3. Nutrient problems

The nutrient problems for a crop can be identified easily, especially if you can see yellow leaves that are crispy too. They can also have spotted and any discoloration on its leaves. Please note that marijuana seedlings leave needs to have green and healthy color all the time, for you to say that you are properly giving her nutrients to thrive. Having nutrient issues may arise from oversupplying of nutrients; it can be a lack of nutrients too. 

Per nutrients, overdose or toxicity may give you a burned like a tip or darker leaves. You may also notice a yellow line near the lower leaves, while a lack of nutrients or deficiency may result in pale-looking leaves or discoloration. The most common is nitrogen deficiency, wherein it makes the leaves to have a brownish state and will fold and soft. This kind of issue may only affect the old leaves, not those new growths, so do not confuse it with the yellow leaves on the top. 

With these, you should always remember that your seedlings do not need ample nutrients, so do not overwhelm them. And if you have a well and nice pot mix, they should be okay for their first week. Another thing is that you must know what type of nutrients are you giving to your seedlings. 

4. High temperatures

Your seedlings or plant may start to curl and fold if we don’t want that to happen if they receive a high temperature. They will begin to wilt and die eventually if this happens, so let’s know what we need to do. 

Always monitor the lightning in your grow area; you should also consider the climate you are in if you need to adjust and place tools and types of equipment that may help you balanced the lightning or temperature in your growing tent. 

These seedling are comfortable with 68 to 77 degrees F. A thermometer is a must if you are cultivating, and it is your buddy when maintaining the right heat and humidity for your crops. Please prevent placing your lights near your plants to prevent burning. 

5. Improper Lightning 

Did you notice crinkled leaves or burnt leaves? As well as falling or leaning tall seedlings and those ample amounts of stem internodal spaces? These symptoms are because of having improper grow lights in your indoor cultivation. Those leaning stems are the result of the dense leaves that burned and folded. Inadequate lighting may impose a threat to your precious marijuana crops, so you should know how to fix it. 

If you develop your plants outside, attempt to cover plants up on particularly summer weather, and ensure that every piece of your seedlings is accessible to sunlight. When they display symptoms of lighting issues, you can resolve the dilemmas by adjusting it early on, and it is enough to make them back on their feet. 

Common symptoms of having cannabis Seedling Problems

For leaves: 

  • Leaf Discoloration
  • Yellow leaves
  • Crispy 
  • Spotted colors
  • Burnt tips and edges
  • The pale color of the leaf
  • Death 
  • Slow growth

For plants: 

  • Leaves Wilting
  • Drooping
  • Algae growth on the leaf
  • Improper growth phase
  • Slow in growth
  • Dark green color

Conclusion 

Generally speaking, your seedlings will want a humid environment, high humidity, and also some light. Your seedlings will not want much more than the nutrients they need. They will become perfectly happy and satisfied as you have the right guide and fix them to avoid these cannabis seedling problems. 

Finally, seedlings or plants with significant genes have less sickness transition and become less prone to infection, malnutrition, insect, and environmental factor. That being said, you should also get the right strain that will suit your needs. 

Cannabis Light Burn Symptoms and Solutions

Our cannabis plant could only take much of light exposure. And there is a huge possibility that they will be damaged and wilt if sun exposure or improper lighting occurs. In this article, we would like to discuss what cannabis light burn symptoms and solutions may help you in getting quality and potent strains.  

There will be situations that they will show symptoms or evidence that a strain receives enough light and signs that they are being exposed to too much. There’s so much light that can harm the weed plant in different ways. Light burning means that your marijuana leaves nearest to the source of light becomes yellow and crumble in certain instances, and eventually die off. In some cases, it could also bleach the vine, lose color, and into a light white.

Cannabis Light Burn Symptoms and Solutions

Even though marijuana requires a considerable amount of light, this can be given far too much. Whenever this occurs, and your marijuana plants undergo stress, there can be all kinds of massive issues. We will provide information on how we can recognize and combat these maladies. 

How about they’re signs and symptoms of being light burned? Once your crops struggle from bright burning, they will typically be affected by those leaf on its tip that is directly beneath the lights. These are going to turn yellow. Though – and light burning doesn’t always manifest immediately in leaf buds. Also, often, before they transform in different hues, this same leaves might start pointing up first.

How to tell cannabis light burn symptoms due to lack of nitrogen? Any issues with growing marijuana, including a nitrogen shortage, can even have yellow buds, but there were forms of identifying one disease from another. The most important distinction in a nitrogen deficiency would be that light burning impacts the top leaf close to the light, whereas this nitrogen deficiency would then usually begin to showdown to the bottom of the crop of those old leaves.

Its yellow leaves are either a nitrogen deficiency and can also wane and collapse, usually falling off alone. Besides, the light burnt leaves will generally stay mostly on plants, that will not be easy to pick up. That yellowing mostly from a light burn would even hold the central veins of the green leaves, that is indeed the case for a deficit in nitrogen. But those yellow leaves weren’t the only sign of light burning at the edges. Often, its leaves, along with brown coloring and burned tips or tops, may transform a reddish or like purple as well.

If your marijuana plant will not get the right nutrients for optimum growth, or whether it continues to suffer from several other problems, it’ll also increase the likelihood that your crop will be decimated by light burning, which can be handled much better by safe plants.

How can you recognize a light burnt leaves?

Cannabis Light burn diseases don’t generally have to reveal up immediately. Sometimes the light could be just a little too near to the plant; that also means that its burning is slow, and you will not immediately recognize it. In this scenario, after many weeks, the foliage will gradually die off. If that occurs, then you will see the initial indications of light burning on older leaves and will make it difficult to locate the true source.

What is Light Bleaching in leaves?

The leaves of cannabis which are revealed too much from the light can often be bleached. However, instead of turning to yellow and starting to crumble, they will lose their color and transform into white. It can sometimes occur when using modern, LED, or an HPS light installed near to the plants. 

White or light-bleached leaves or buds were often claimed to be albino marijuana or white marijuana strain of yet another novelty. Sadly, such bleached crops, besides their fascinating appearance, are nothing wonderful. Yes, bleached buds are likely to have lost much of their taste or strength, or both, now.

These bleached leaves are not exceedingly common because of too much exposure to light. These conditions could make it totally burned, and then her small leaves will have a darker shade of brown. 

How can you prevent cannabis light burnt?

Once you observed or think your crop suffering with light burning, you should do the tips below:   

  • Make enough distance of your crops or seedlings from your florescent bulbs or lights.
  • Decrease the intensity of the lights

If you can’t make some adjustments with your grow light because it is higher and farther away, you might look at leaning it down so you can maximize the gap. It is also recommended to remove the tip of your crop, only while your cannabis is already in the veg process. Talking about the distance you can do to prevent burnt leaves, the next question is, how far can you adjust your marijuana plants? We will also present the optimal measurement of your plants from your installed grow lights. 

Growing lights could perhaps differ tremendously in their frequency and voltage, throughout the beam of wavelengths they give off, and that in the particular type of light in use, that is. LED / HPS. Many other reliable growing light makers will have relevant data about the suggested distances from the way to keep crops. This range would also rely on the state the crops are developing in. Generally, new growth requires a greater length as they’re more sensitive to temperature susceptibility.

Cannabis light burn outdoors

There is much less chance of light burning outdoors, under the most strenuous bright sunlight. The only other moment you have to be vigilant of so much sunshine is when you push plants from within onto the outdoors. Throughout this case, your erstwhile indoor plants also had to get used to the exterior. You should not push them straight into some kind of sun-drenched location with your enclosed shelter, but first position her in shaded, open place until they can gradually become used to a bright new world. You should then growing the crop in a warm and sunny location after about a week.

Cannabis light burn due to heat stress 

In addition to signs of heat discomfort, marijuana light burn occurs very frequently. The possible explanation seems to be that numerous types of growing lights would also consider giving off a significant amount of light except for some lights ( LED ).

Besides plants that are too near to a source of light would also face additional heat stress. It implies your crops will probably exhibit a mixture of symptoms on both circumstances-too much light and far too much high temperatures. Likewise, these signs can take the form with plants wilting, discolored, and dying.

Varieties of indoor marijuana that grow in electric lighting may use a basic trick to see if the temperature under a rising light would be too intense for the plants: merely put your hands under the light around the level of your crops. Then is it still comfortably, warm, and not even that hot, then your crops must be okay too.

Conclusion 

Understand that any adjustments to your crop’s growth conditions, such as reducing or raising the light output or heat, would entail specific needs for watering and nutrients. Too much light would then make your crops grow because they will need more nutrients and water as well. Daily irrigation with concentrated light and elevated temperatures will also help to limit cannabis light burn under these growing conditions.

Best Way to Store Weed

To get the most from your budget for marijuana by stockpiling your weed to preserve its power, flavor, and much more. Today we glance at stockpiling pot to help keep existing stash healthy. When this comes to packing your marijuana, the technique you prefer makes an enormous difference with how lengthy your buds retain quality and effectiveness. In this article, we are going to discuss some of the best ways to store weed.

As others have already mentioned, unless they’ve been successfully treated and maintained safely, marijuana can stay constant for up to 2 years. Sure, proper cannabis storing requires much more than tossing a tightly rolled plastic container into your undergarments drawer; you ought to achieve the ultimate environment for something like the best long-term cannabinoid storage.

What’s the best way to store weed?

Mildew, as well as other moldings on marijuana and some other organic material, grow at conditions between 77 ° to 86 ° F, so simple measures could go away to maintaining your weed in a dry, dark spot. High temperatures will dry off cannabinoids and terpenes, which have grown for months. If these natural oils become too dry together with the organic material, a warm, harsh smell can arise.

Cooler temperatures also delay the process of cannabis decarboxylation, this same process by which THCA transforms into the alluring cannabinoid THC. THC gradually deteriorates into CBN, a cannabinoid of different symptoms and properties. Warm air contains more humidity than cooler air, which takes us to another factor.

Do’s and Don’ts when storing your weed

DO’s

  • Keep it warm and dry storage to make sure that the cannabis will not become moist.
  • Make sure to store it using containers that were not used for any other chemicals.
  • Use types of equipment to check and take care of the weed’s RH grades.
  • Make sure to vacuum seal the container where the weed is placed.

DON’Ts

  • Do not store your marijuana in super cool places and almost at freezing level.
  • Do not just save the weeds in ordinary plastic bags or containers.
  • Avoid placing the weed container beside or on top of the appliance that gives out heat.
  • Avoid storing your marijuana with a pipe or any other equipment that is used for smoking.

There are other factors involved to make sure that you are doing the best way to store weed. Of course, additional food and edibles that have marijuana content or have cannabis ingredients do use a different approach to saving them. Make sure to follow the guidelines for this kind of example, like storing refrigerated or checking the expiration date to ensure that the quality and the cannabis content will not perish over time. 

On the other hand, liquors and other drinkable products that were infused with marijuana also degenerates with heat and other factors that affect the storage of cannabis. This does follow special instructions depending on what time of liquor has cannabis content and the amount of weed that the product contains. Usually, edible cannabis-infused products can be stored for several months, but it can be further than that when it comes to marijuana-infused drinks.

Things to consider when storing marijuana

Like what is stated before, considering the perfect place and situation for storing your marijuana is one crucial thing, but consider the elements that can still affect them while in storage is another. To ensure that your weed will be in top quality for a long time, it is wise also to know what can kill your product while in place for storage.

Proper curing is the first thing that we need to know and do for long-term cannabis storage. Here are the other common elements that a person needs to look out because it can degrade or, worse, kill the buzz out of your marijuana products.

Light

Several factors could lead to marijuana flower deterioration but the light seems to be the greatest factor that will destroy your cannabis. Likewise, intense UV rays will render your car’s color scheme appear dark or add streaks to the summer makeup, and it can also eat away the most important compounds in your hemp plant, terpenes, and the. To avoid premature degradation of these essential chemicals, secure the weed far from a clear trigger of light in transparent containers.

Air

Oxygen content is yet another major factor throughout the long-term storage of cannabinoids. Excessive oxygen can accelerate the process of decay and too little can change levels of humidity that can induce mold or fungus. Although vacuum sealing is an effective way to defend your marijuana from long-term oxygen toxicity, it isn’t always an ideal solution for all of us who wouldn’t keep finishes scattered on the floor.

Moisture

Mold prefers moisture so you must keep having a great bud safe to avoid it. But good value bud soon won’t get too warm without causing degradation of terpenes as well as cannabinoids. Thus the significance of ensuring appropriate amounts of humidity for both the long-term cultivation of cannabis, preferably around 59 as 63 RH air temperature or the volume of density in the soil compared to what it will bear. The easiest and affordable way this is by using moisture control measures, such as Evergreen Pods.

Whenever it comes to protecting our secret stash, almost all of us depend on the tested-but-untrue method of throwing everything in a pouch and stashing it away into a sofa. If you’d like to weaken your lovely buds into one that appears like a schwag. As it plays out, anything will affect the consistency of your weed, from air to sunlight.

Conclusion

To summarise, cannabis must be properly stored. Its flowers including buds may remain effective for years if preserved properly, while plants and leaves could maintain their viability for months. Whether you’re a rare smoker but want to hold on to these delicious weeds you’ve managed to pick up from either the pharmacy, proper pot preservation should ensure that your supply can last for several months. Now that you know the best way to store weed as well as how to better preserve your pot, you will have years of celebrating any major crop.

Marijuana Grow Room Humidity Guide

A big issue for cannabis farmers is humidity. So why is humidity essential for the marijuana plant, what are the optimum levels of a certain grow room humidity needed to sustain in your growing area?

When you desire to grow sticky, high-potential buds, your marijuana will take effort into many of its needs. Remember that– which is commonly neglected – for the developing a cannabis plant is humidity.

Whether you like it or not, this humidity is crucial for your cannabis. Humidity could help you understand your plant’s potency and resilience to battle with mildews and common molds as well as the amount of water they need to absorb. Getting the right balance can assist them to flourish and improve their growth, not to mention for you to be able to get bountiful yields. 

Fortunately, having the right to grow room humidity is a fun learning experience and not too much to learn. You can be a master of it with a little bit of effort and love for your crops. In this article, we will provide information that you can use to have enough knowledge about humidity and how you can give your cannabis a boost with their production. 

Understanding why grow room humidity matters

In all phases of growing cannabis cultivation, your crops needed constant consumption of water and the amount they will need to vacillate with the level of humidity in your growing area. Once the humid is high, your marijuana plants use leaves to receive moisture from the air that causes a less need for water from directly from its roots. Contrarily, they would also pull in an even more considerable amount of water whenever the grow room humid is low.

Because humidity shifts on how much water the plants drink, as well as the amount of water that you offer them, has nutrients in it, to be in supervision of humidity can provide you better control over their nutritional intake.

However, controlling the grow room humidity is not only about preventing issues, but having a balance and right grow room humid make your cannabis plants stronger, have leafy plants, and be healthy and quality buds on your harvest. 

What are the effects of not having the right humidity?

This is not to intimidate you, and we believed that you must know what’s wrong with bad humidity control in a grow space. We understand how great humidity is since we have experienced every one of these first-hand issues.

Powdery Mildew ( White ) 

It is a fungal condition that exhibits high humidity areas. It can be difficult since the new growth of cannabis grows in damp conditions. Fortunately, by ensuring that there has been a proper flow of air in your growing area, you help reduce WPM; a simple oscillatory fan – at such level surface – definitely works.

Rotting of Buds

Amongst the worst conditions that a cultivator can suffer as a consequence of inadequate humidity regulation. Foresee extracting a huge, thick key cola of your crop just to find the interior is white or gray with mold.

Nutrient Problems

Humidity in a growing area is a parameter that mainly influences how often your plants are going to drink. If your room’s air is dry, your crops will become more likely to consume from their roots. When they’re not consuming enough because of higher temperatures, low moisture may allow them to consume lots of water from their root and suck up very many nutrient rates.

Slow growth

Marijuana plants fond of higher moisture when young and lesser moisture if mature. If they do not have these factors, they do not develop as quickly or as they should.

Basics of Humidity

When cultivating weed, you know that you need to control humidity, but you’ll never realize the perfect humidity you ‘re looking for. We are here to guide you, please see below:

  • Clones – 70 %
  • Vegetative – 40-60 %
  • Flowering – 40- 50 %
  • Final Weeks – 40-45 % 

Humidity is, in essence, a calculation of just how much of the water vapor is ‘kept’ in air. There are various methods in which humidity can be calculated, like complete, specific, and relative humidity.

Most farmers talk about this Relative Humidity, also known as RH, in the growing area when they communicate regarding humidity. This relative humidity tests how much water is in the environment compared to the average volume of water at that altitude, which can be kept in the environment. This is a fast guide for the various phases of a life cycle of marijuana for relative humidity that you are looking for. We’ll go over all of these in more depth

Clones 

Optimum humidity is 70 percent RH for clones. It requires time to build a water-intaking root network. New clones rely entirely on having moisture from the atmosphere via their leaf, and that is only achievable with high temperatures. Requiring proper humidity levels would significantly improve the likelihood of effective rooting of these clones, and improve the growth of young clones.

However, the roots were not the only way to water your crop. Leaves will potentially draw water vapor straight out of the soil, so higher humidity in the soil enables the leaves to bring more water into the plant if appropriate. Low humidity rates in the air may cause development to be slower before your plant has completely formed roots.

Flowering plants 

Optimum flowering plant humidity is 40-50 percent RH. Preferably, in the early part of a flowering stage, growing room humidity must be reduced to about 40-50 percent. As crops approach production, some farmers lower the grow room humidity at below 40%, maybe even less so that they can force the buds to produce that much resin, although I have seen that certain plants can be highly stressed, so the technique must be used cautiously. Lower inflation rates the humidity only a little at a time and sees how plants respond before bringing the plants into intense surroundings.

Molds

This is particularly dangerous throughout the flowering period since without you realizing it can develop on or within your buds. When you discover that mold is continuing to grow in your buds, or have buds that are rotting from inside, you must discard all infected buds quickly. Bud rot will kill whole harvests, so check your growing room as it may infect others, and all become sick. When you can not reduce the humidity as well as having a raging mold epidemic, cutting your losses and harvesting instantly may be the best solution to prevent any more buds from being rotted.

Even though humidity is lesser, it is still essential to have air flowing around and through your crops. Tiny fans blasting over even under the canopy of the crop will help keep air moving because no wet places form through any crop portion.

Drying buds Humidity Cure

In the drying space, the optimum humidity is 55 percent RH. Maintaining the humidity or around the range of 50 percent will enable the buds to dry and keep the latter from drying fast. Also, this range is ideal for mold prevention, and if you are a beginner, it’s not any good for drying!

Few farmers prefer to maintain the humidity somewhat higher as an innovative drying and healing strategy such that buds dry slowly, which may potentially improve the consistency of your healed buds. High humidity extraction is known to be an innovative technique since the drying should be performed with special caution to avoid mold formation on your dried buds!

Air ventilation in the drying region is fine, so it is advised that no air is sprayed straight and over plants to keep them for drying very fast.

What if it gets too cold?

Cooler times tend to slow the growth. Temps below 60 ° F (15 ° C) may upset crop production, and cold weather will surprise a plant material, or perhaps even kill it.

Conclusion 

Many enclosed marijuana growers try to associate with far too much high temperatures, and high humidity levels-this is because growing lights can become very hot, and cannabis growth is often restricted to quite narrow areas due to stealth or privacy concerns.

Grow Room humidity depends on where you work, and whether you have decided to design your growing area. Most farmers are trying to reduce their humidity, as the number of leaves and foliage in a limited growing region continues to allow moisture to increase.

How to Flush Cannabis?

“Flushing” would be a word you may not be comfortable with once you begin out on a marijuana producer. Although frenzied thoughts of attempting to push a plant material down a drain can leap to view, flushing is basically if you avoid supplying nutrients to your plants and instead of giving them liquid. Generally speaking, the method looks as simple at it; after all, knowing exactly once to flush or how many seems to be a more sophisticated skill.

Flushing is a convenient and simple technique that can enhance your marijuana buds’ consistency and sweetness before growing season. Sounds sweet, doesn’t it? Naturally, it is! But farmers do need to be vigilant before harvesting with flushing. If you’re doing it very soon you will potentially damage your efficiency and decrease your outputs. In this article, we will provide information on how to flush cannabis and the proper execution with all the things that you need to know about this method.

The Basics On How to Flush Cannabis 

How would you like to remove all the nutrients off the ground? It doesn’t affect your crops? It helps a major manner of harvesting yourself. This allows the marijuana production to use whatever residual nutrients left available in the ground after the minerals are stripped from the surface. This is like our human bodies quite a lot. We ‘re taking plenty of meals and turning what we never use into fat. In acute conditions when food is limited, the body depends on nutrition on the accumulated fat.

The minerals should be diluted with water enough for roots can obtain nutrition. The roots do not have nutrients that are preceded, whether in a mixture or attached in a chemical system, even though they are abundant. Flushing through water will flush off the contaminants already within the formula.

Tools to use for Flushing Cannabis

The TDS and EC with pH meters are important tools needed to modify water liquid fertilizer appropriately. If the pH is outside the recommended range ( i.e., too low or too high) vitamins and minerals fall out from the formula and oxidize. That indicates heavy particles are forming solids and falling out of the product. Plants consume their vitamins instead of ingesting them, so they do not have nutrients that are instigated. With these tools, you can now start going further on how to flush cannabis.

Flushing Cannabis methods:

  • Active
  • Passive

The difference between Active and Passive Flushing

The distinction between active and passive flushing because at some level in the urge to the maturation of the crop, whether another person or nature decides to assist the plant mature by eliminating nutrition from the land. The main nutrient which is separated in this procedure is N so it removes several other water-soluble enzymes. Plants that grow in mixed soil are flooded with water. extracted salts will be drained away. Depending on how extensive the flush is removed, it removes more than, most or almost the whole of the essential nutrients. They were mostly replaced by a new fruiting formula which may include certain macro but rather micro pesticides and also estrogen, enzymes, or sucrose.

Crops react swiftly to these abrupt changes in the external environment whilst also concentrating their power on flowers maturing rather than continuing flower development.

Steps for Proper Flushing of Cannabis

  1. Overflow the soil of the same amount of fresh liquid it can retain.
  2. Allow it to be recovered for several minutes by flooding the soil to wipe everything aside from its plant.
  3. Let this process continue until the water color turns to brown and dirty.
  4. Once the watercolor changes, use a TDS meter (Total Dissolved Solids). The best measurement using this tool is around 1300 ppm.
  5. Keep the flushing process until the number on the TDS meter drop down to the level around 50 ppm or until it matches the water you are using to flush.
  6. By now, you will notice that water is starting to turn into a more refined and clean color and texture. This is what we are looking for since we want to remove as many solids as possible from the plant while we can.

Marijuana flushing is an easy process. It is easy. Any time you normally eat, instead, you wash. All you need to be used for flushing is raw plain water, just ensure that the pH for weed is healthy. Water very likely maintains a balanced pH, so if you still need to change the pH of your flushing liquid with the appropriate treatment, please be sure in doing so. Also, one thing you have to think about is pH changes.

When cannabis plants should not be flushed?

The only period that flushing isn’t allowed would be when developing in a modified soil profile. That is why all the minerals the crops need to survive are already in that soil. By overrunning the vegetation, you can wipe away as well as harm the diverse system you have tried incredibly hard throughout the land to also develop. Besides, these crops receive nearly always clean water all through washings. In this landscape, plant uptake of nutrients is normal, vibrant, and easy be for the flower to generate.

Even so, the absence of flushing really shouldn’t be a problem since there are no synthesized or additional nutrients introduced to this interface. Instead, your crops depend on microorganisms that split down and carry organic content to either the roots.

What is the outcome of Flushing?

Taking the additional time even after weed is picked to heal the bud towards its full potential. On the hardpoint, a good treatment will slash, even more, eliminating things such as unnecessary chlorophyll. You’ll be astonished at the distinction this little effort can make with your goods. During the first inhalation of such a perfectly soft haze which reaches the rear of your mouth as gentle as sugar, all of one‟s hard work would show. This is polished essence at its best. You can improve your marijuana output by adding extra water!

Conclusion

When it applies to flush cannabis, there are no conclusive responses. No one here has completed the form of intense scientific trials it would end up taking to be free to pronounce the accurate perfect place and moment to flush with legitimacy, what the actual composition will be, or whether it’s that much good enough to justify it first. From other observations, flushing tends to allow for the nicest buds against disadvantages for at minimum very few days, two to four weeks until harvesting.

How to Make Dabs of Cannabis

The new cannabis trend is a method for producing highly condensed marijuana products, also recognized as “dabs,” via simply just use a traditional blow dryer to apply controlled pressure and temperature to either a cannabis plant. This DIY process on how to make dabs of cannabis has mostly started to take off by many hashish enthusiasts a few years ago, but still, there is by now a market demand for what amateurs call Rosin Tech — such as manufacturing-sized production set-ups — and a genuine awareness among intelligent weedheads that such chemical-free, explosive decompression-free, the fast-and-easy concentrate will eventually conquer the marketplace.

Whether you’re trying to become a master of the dab, you need to perfect how to start making dabs! Marijuana dabs were the fury nowadays, owing to the mad scramble of impacts due to the higher concentrated cannabinoid potency. A few other THC wax specimens tested up to or higher than 90 percent THC. This article will give all the information you need to start perfecting the craft of Dabs.

What is “Dabs”?

Dabs are resinous marijuana concentrate produced by harvesting THC, CBD as well as other active cannabinoids, often using combustion byproducts or greenhouse gases solvents, to create solids commonly known as wax, break, budder, butane dried herb (BHO), or fresh resin. Assume with dabs as “bite-size,” single-serve hits which are generally no larger unlike your finger fingernail (although that’s a huge amount!). Using only a dabbing device, you squeeze a dab it onto finger but instead apply a torch to switch the solute into vapor. Eventually, breathing as many of the mist as you can. In a moment, this is dabbing.

8 Types of Dabs

1. Shatter

Alluding to an amount of glass-like blends, it is simple to see where it got its title shattered. Because all shattering styles are bendable, most are rough to the contact, and others may be soft. Shatter is quite popular because of its credibility for being pure and of quality.

2. Crumble

Crumble matches its identity with the roughest consistency of all the types solely on this whole shortlist. This centralized processing handling using a little faster as compared to many other dabs.

3. Budder

Since it possesses a comparable quality to peanut butter, This type of Dab is surprisingly easy to use, as well as a throwaway gag, too. It is made into either a seamless material by flinging resin or insulation shatter.

4. Wax

Wax dabs were not necessarily sticky, and can only be managed with a dry dab device. If you ever don’t follow this heads up but also try using your fingers only with wax, you’ll end up with such a greasy mess. While shatter is usually known to become the truest dab available, high amounts of THC nor CBD may be present in the sapper wax.

5. Oil

Some focuses are known as liquids with several different concentrations of extract, as compared to a stable state. Usually, such oils were used in a vial for easy and functional uses, although they usually taste distinct regardless of the manner the oil was collected.

6. Resin

In fact, the resin was its oily trichomes present mostly on leaves to flowers of adult pot plants. Resin too is classified as ‘sap’ by washing the stems out and treating them. It is a naturally occurring substance and using it as a protection against predators that could consume the crop before anything reproduces.

7. Live Resin

Live resin was not something users can generate in the house, demanding a research lab as well as trained technicians. A comparatively recent form of the compound, it requires a lengthy and complex method of cooling freshly grown marijuana plants cryogenically. Many that want the real medical effects of marijuana to choose live resin. But it’s usually more expensive than everyone else on the whole list, kudos to the scientific manufacturing process.

8. Rosin

Rosin is a simple and secure-to-produce concentrate that is created by draining and treating cannabis plants when using the amount of heat to discharge resin-filled of THC. You could manufacture rosin in the kitchen versus live resin because it doesn’t demand chemicals and is inexpensive to manufacture.

Equipment to Use on How to Make Dabs of Cannabis

Dabbing needs some sophisticated instruments, so users can’t attempt one morning to consider starting it out without running errands first. Odds are you also have some of the raw components lying across your living room. You’ll also need below to produce dabs:

  1. Dab rig – A customized bong that is utilized on dabs.
  2. Nail – This is not the kind of nail that you are buying at the home improvement store.
  3. Dome – Aligns each nail and allows it to generate the wax that is vaporized.
  4. Carb cap – Generates a small oven at reduced pressure that enables evaporate the wax.
  5. Your Dabs – The star of the show.

Steps on How to Make Dabs

Here is the step-by-step tutorial below on how to make dabs of cannabis in the comfort of your home not including any risk of property damage or even death:

Ingredients:

  • 2.5 to 3 grams of cannabis
  • 100% Alcohol
  • Metal screen
  • A container that is easy-to-pour and is heated and freezes friendly.
  • A pan
  • Clean coffee filters
  • Hot water

Directions:

  1. Just tear your ganja up a little bit.
  2. Place it in a heat-safe tray, and thaw the marijuana for 20 minutes at 93 degrees celsius. Please be aware that the above is not about decarboxylation. 
  3. Place it and all the containers of alcohol throughout the refrigerator for four or five hours, until the weed is dry enough.
  4. Wait for it.
  5. Place ample chilled alcohol throughout the weed to coat it by half-inch or more.
  6. Mix it softly for about 15 to 20 minutes.
  7. Using the metal screen, you can pour it all through so that the weed and the alcohol will be separated.
  8. Put the bud in-room temperature place for now.
  9. Get the filters and put the alcohol through using one of your containers.
  10. Make sure to gather all alcohol that you could from the filter by pressing it a bit.
  11. Let the alcohol boil away. Position a coffee filter above the container but mostly simply give it some time. 
  12. Squeeze the wax off the container when that alcohol is released, and place it in a plastic container or with some paper towels.

And, you’re done. You can now enjoy your dabs!

Dabbing: Pros and Cons

As for those other cannabis consumption forms, caution must be taken at dabbing. These are only a couple of both the benefits and drawbacks relevant to dabs:

Pros:

  • Casual marijuana users report a stiffer, longer-lasting high.
  • You don’t need large numbers. A little dab of extract, as opposed to other approaches, will theoretically relieve aches and pains for a longer time.
  • The intensity of the blends has created others to as an efficient painkiller quite popular among medical patients.

Cons:

  • The extraction of the solvents is very harmful. if users not a seasoned chemist, buying ready-made mixes or using the rosin technique is usually the best way to do so.
  • The peaks as from dabs could be quite intense due to its intensity. So, it’s smart to position yourself and just use minimal quantities at a moment.
  • The lungs and throat can be affected by the solvents used in a very harmful way.

Conclusion

Like with any unique marijuana effort, starting small is always a smart option, and taking it slowly. Recommend one-hit whether you’re dabbing for maybe the first point, and allow time several minutes to see just how the body’s reaction. When you like one, you can still hit the gear again because if you carry one too far, you won’t recover those impacts. The same goes for how to make dabs of cannabis, Work with a simple batch, have that process hanging but then raise your output when you have some experience. If anything, then in a botched effort to try new things, you will not bother wasting either of your valuable buds.

At the end of the day, it still depends on how you wanted to use this new technique. Always remember to have fun along the way and be comfortable. It’s still smart to play-safe with this kind of endeavor instead of blindly going forward. Make sure you equip yourself with proper knowledge.

Quick Guide to Growing Weed with CFL

As you might know, cannabis plants need light to grow big and healthy. Light is very important especially in the flowering and vegetative plant stage, where the plants need all the light and nutrients it can get to grow big and healthy.  These lights are very helpful especially when growing weed at a close and limited space. That is why most of the growers grow cannabis using these different electric lights. There are a few options available. One of the options includes growing weed with CFL. 

Growing weed with CFL may sound like a bad idea because fluorescent doesn’t give that much output even when it’s built big when introduced years ago. But as time passed by, fluorescent has gone through many improvements and it has become a staple choice for cannabis growers due to its convenience and price. True enough, CFL has come a long way.

CFL or compact fluorescent lamp is the best choices for growing the cannabis plant. Compared to other lights, CFL also offers good advantages with a few disadvantages. Get to know how growing weed with CFL can get successful.

Advantages and Disadvantages of Growing with CFL

To let you get a more definite viewpoint of what growing weed with CFL would do to your weeds, compare the following advantages and disadvantages that you will be receiving when growing weeds using CFL or compact fluorescent lamps. 

Advantages 

growing weed with CFL is affordable and cheap. You wouldn’t have to spend a lot of money to get started. When you want to save more, or it’s your first time growing and you don’t want to spend much on your first grow, then the compact fluorescent light is the best choice for you. 

It is likewise accessible to find the CFL lights. It is available in hardware stores or grocery stores. You wouldn’t have an arduous time finding it. This will be convenient if you don’t want to spend more time finding lights all over town. 

Another point that makes it a reliable option is it is suitable to use for your tiny growing space, be it a tent or a cupboard. Growing weed with CFL is the fittest choice if you would particularly grow one plant and get a harvest of one to three ounces. When using CFL, you might require to check your plant daily. 

It is the ideal light for you since they don’t heat much compared to traditional lights. So, even when you turn it on the whole time, there wouldn’t be any case of overheating. It is safer because of the low fire hazard. Because of this, you wouldn’t need an extra cooling system for your lights to let them start at a normal level. With these, you can be assured that growing weed with CFL will do its best to keep your plant growing and thriving.

Disadvantages

However, if you want to grow more plants and get bigger yields, then this wouldn’t be the best option. If you can’t also check your plant every day or has a bigger growing space, the light wouldn’t be enough for the plant. You might want to rethink getting this one once they won’t fit well with your goals.

Growing Weed with CFL

Before anything, you need to learn how to grow cannabis and the essential elements it demands to grow abundantly. If you don’t know anything about the process of growing cannabis, then you may face a lot of obstacles in the process that will cost you plenty of cash. It is not easy growing cannabis, but it is not impossible. It can be manageable once you get the hang of it. 

To start, you need to know the cannabis plant’s growing process. The first part is the seeding where you let the seed germinate. There are options for you on how you want to do it. Next is the vegetative state, where you will finally small leaves and stem sprouting out of the seed and you will see it grow bigger each day. Next will be the flowering stage where buds are starting to disappear and the level of growth slowly diminishes. This is also where you get to know the gender of your plant, whether it is a male or female. If you have feminized seeds, then you are good to go. If you got male, then it would be bad since male cannabis is not fit for smoking. Then, the last process includes harvesting, drying, and curing. 

Once you understand the different stages and know what to do with the plant during each stage, then you can start setting up your growing spaces and learning growing weed with CFL.

First, you need to have your equipment set. You will need CFL, and a few supplies to get you started. The supplies will depend on the kind of growing method you will use. If you want to use the traditional one which used the soil, then you can go ahead and prepare the essential things for the growing space. The primary supplies will include the Cannabis Seeds, soil, or your chosen growing medium, nutrients, CFLs, a pH test kit, and an electrical timer. Once you get these secured, you can start your set-up. 

You can start setting up in a closet, or a small cabinet. If you don’t mind spending money, you can buy a growing tent. Set your lights ready and safe. 

Make sure the lights are at the center or where the cannabis plant will get the direct light from it. Once you are putting the lights, you can do some necessary adjustments like covering the floor of the closet or installing exhaust fans for better ventilation.

Then, you can start the germination process of the cannabis plant. Now, the life cycle of your cannabis plant starts.

Now, when you reach the vegetative stage, growing weed with CFL would require you to start making use of your CFL to get a better yield. First, you must set up your CFL the way they can be adjusted around the plant. You will do the adjustment every day, to secure that all the parts of the plant get enough light. CFLs are positioned 4 inches away from the top of the plot and check if it isn’t too heated. If it is, then you must adjust again. All the parts of the plant should be inches away from the light. Remember, the higher light you give, the better is the growing result.

While the plants are in the flowering stage, you need to give them the most intense light CFL could give. Place the lights directly and closer to the plants, but with enough space to ensure no plants will get burned. See that the lights are close but not too close. 

Conclusion

Now that you got everything covered on growing weed with CFL, you will be confident to try cultivating your first cannabis plant. After all, CFL will encourage you to start small and learn big from it. You don’t need to push too far with your first attempt at cultivating weed. You can take it slow until you understand the process well and you are ready to invest in things you may need. Thus, this is when you put all your experiences to test. Still, growing weed with CFL has its advantages and when done right, you can get your first yield. So, stop putting it off and start growing weed with CFL.

Everything You Need to Know about Hybrid Weed

If you would like to know exactly the difference between the indica and sativa cannabis strains, then you should enjoy both worlds at the same time? That has been made possible with the advent of the so-called hybrid weed. 

Hybrid cannabis is a good addition to the variety making up the world of marijuana plants along with sativa and indica strains. No matter who you are, a consumer, grower, or dispensary owner, it is a must to be familiar with the different types of cannabis. It might be overwhelming because there could be hundreds or even thousands of cannabis strains. Nevertheless, they can be classified as indica, sativa, or hybrid. 

Hybrid Weed – What Is It?

Many people describe hybrid marijuana as something that takes a smoker in two different worlds. This strain is the offspring of sativa and indica strains. Meaning, it possesses both sides. It can be indica-dominant or sativa-dominant. Gone are the days when cannabis strains are either pure indica or sativa. Hybrid marijuana inherits more of the characteristics of the dominating parent strain with fewer attributes of the other parent. 

Hybrid Marijuana has 3 Basic Categories

Indica-dominant Hybrids

These hybrid strains have similar effects with pure indica cannabis strains. These strains are frequently used in dealing with insomnia and body pain with their head and body-high attributes. Examples of indica-dominant hybrid strains are Kosher Kush and Blackberry Kush.

Sativa-dominant Hybrids

Sativa-dominant hybrid strains have some features that are quite similar to that of sativa strains. Like pure sativa strains, these hybrids induce a cerebral buzz once consumed. Sativa hybrids give balance quickly to the mental and physical state. Sour Diesel is a good example of a sativa-dominant hybrid strain. 

Even Hybrid Strains

These cannabis strains are the ones with an equal ratio for indica and sativa. Meaning, they deliver the best of both worlds at the same time. Mostly, these strains induce first the sativa effects that will eventually fade away and give way to sedating body high. These strains are known to be perfect combinations that affect both the body and mind, customizing a user’s experience. Silver Haze and Purple Diesel are examples of even hybrid strains. 

Hybrid Marijuana Strains and Their Effects

The genetics of hybrid cannabis strains will determine those effects that people may experience when they consume this kind of marijuana. If you take sativa hybrid strains, you’re more likely to experience euphoric and uplifting effects. Indica hybrid strains, however, tend to induce a more relaxing sensation to people. 

Differentiating indica from sativa will just provide you an incomplete picture of the possible effects of a marijuana strain. It is why you should find out the ratio of CBD and THC contents of any cannabis product. The various cannabis attributes play a big role as to the way hybrid strains work within a person’s body. 

Gaining the correct information on those factors will help a marijuana consumer select the right strain to use. However, the best way to determine the possible effects of hybrid strains will be to use them starting with the minimal dose to be consumed slowly. 

Moreover, hybrid cannabis strains give users the chance to experience both cerebral buzz and body high. Choosing the right hybrid strain to use will accommodate a wide range of consumer’s preferences. Likewise, it will give the cannabis growers freedom to select crops that will work well based on their harvesting needs and growing space. 

The Origin of Hybrid Cannabis Strains

Hybrid strains originate from crossbreeding sativa and indica marijuana plants. For several years, the American farmers exerted efforts to enhance crop quality through hybridizing cannabis plants with different species originating in different parts of the world. The same is the case for modern cannabis breeding. 

As of now, what people know is that hybrids came into the market in the mid-1960s on the western coast of the US and Canada. Also, they believe these strains continuously develop until today. Growers combined subtropical indica strains and equatorial sativa strains for more viable commercially produced crops. 

Marijuana is a form of a dioecious plant that has both female and male sexes. Likewise, it is a yearly crop that will reproduce via the process of pollination that leads to the creation of seeds. Many of the wild hybrid strains are unstable mixtures of the parent strains. The same with what happens with humans, the succeeding generations of cannabis can produce madly varied combinations of parent plants’ genes. 

Breeders will also selectively inbreed the generations of similar hybrid. It is called back-crossing. The purpose behind this is to stabilize the newly created hybrid strain. Breeders will continuously do back-crossing until the next generation of that hybrid strain shows the genes in a more consistent manner. 

Identifying Hybrid Marijuana Strains

Identifying hybrid strains can be tough considering that they are a combination of various strains. However, you can tell whether a strain is sativa-dominant or indica-dominant based on the following factors:

  • Appearance and colors of the buds
  • Coloring of the buds
  • The smell and flavor of the strain
  • What you feel after consuming the strain

The Features of Hybrid Marijuana Buds

Hybrid cannabis strains share the same characteristics with both sativa and indica strains. However, being familiar with the common features seen in hybrids will help you identify them. Indica hybrids and indica-dominant strains will have:

  • Small and thick buds
  • Strong skunky smell
  • A purplish or bluish tint
  • Sativa-dominant hybrids might have:
  • Light and fruity smell
  • Thin and wispy buds
  • Spongy and fluffy feel

Aromas of Hybrid Marijuana Strains

Hybrid marijuana is more likely to have a more pleasing aroma. It is rich in terpenes that makes every hybrid strain as aromatic as it can be. Terpenes are molecules that give the plants, including cannabis, their enticing scent. Likewise, they can a major component in the essential oils of a plant.

Terpenes are responsible not just for the aroma as they can affect one’s reaction to cannabis. Moreover, they can affect the flavor of the plant. Recent studies revealed that terpenes like myrcene possess anti-inflammatory properties. Myrcene is considered the most predominant terpene that provides a fruity-like smell to cannabis. 

Cannabis has hundreds of terpenes. Every terpene gives an extraordinary effect when combined with other terpenes and cannabinoids. The more aromatic a hybrid strain is, the more therapeutic it can be. 

Breeders have been busy in creating hybrid cannabis strains with higher terpene levels. Terpenes make cannabis smell like pine, berries, and even gasoline. A lot of cannabis smokers believe that those strains with higher terpene levels are of the best quality and more effective compared to isolated cannabinoids. The kind of strain, be it sativa-dominant, indica-dominant, or balanced hybrid, doesn’t always determine the smell of the plant. When searching for a perfect hybrid marijuana strain, look for one with a pleasing smell and can provide the effect you like. A few hybrids are consistent in the aroma, although it can be so difficult to tell how the strains will smell. 

Famous Hybrid Cannabis Strains

There are plenty of hybrid marijuana strains. Some of them are extremely popular and the favorites of many. One of them is the White Widow. Growers like it much because it’s easy to grow and endure the unpleasant weather conditions. White Widow triggers a strong euphoric sensation and sudden energy bursts. It can also make the user more creative and talkative.

Another one is the Girl Scout Cookies. The buds of GSC contain around 17-20% THC and around 0.50% CBD. It’s a good cannabis strain to use when searching for an effective natural painkiller. GSC is potent and great to use in the daytime. Likewise, this strain creates a spicy and sweet oven-baked smell that makes it more tempting.

Blueberry Haze is also a hybrid strain. It was created after mixing and crossing the genetics of Haze with that of Blueberry. Increased cerebral stimulation is among the potential effects of this strain. The buds are tasty and induce a pleasing high. 

Growing Hybrid Marijuana Strains

Hybrids have been so popular among growers. Indica hybrids tend to flower faster than their sativa-dominant counterparts. They even offer a more decent yield, making them a perfect option for people who want the best return for their money. 

Sativa-dominant hybrid strains may take time to flower and offer lower yields. The best thing about them is they are naturally resistant to heat and mold that makes them a good choice for growers who live in areas with harsh climates. 

Breeding new hybrid strains of cannabis require effort and more time. It is not as easy as creating another plant because the results vary. You need to continue crossing the plants until you develop the stabilized version. It involves back-crossing the hybrid strains until the characteristics you want to become consistent in the recent strain generation.

Conclusion

Hybrid weed is simply irresistible and has something special to offer just like the pure indica and sativa strains. Balanced hybrid strains are extremely sought-after, especially for people who want to experience the best of both indica and sativa strains. Their characteristics and healing power helped them gain a good reputation in the market.